Table of Contents
Advertisement
Quick Links
Advertisement
Table of Contents

Related Manuals for Beko BDP710W


Summary of Contents for Beko BDP710W
- Page 1 Dryer User Manual BDP710W 2960312824_EN/041220.1351...
-
Page 2: Please Read This User Manual First
Please read this user manual first! Dear Customer, WARNING! Thank you for prefering a Beko product. We hope that your product which has been • Warning against scalding hazard. manufactured with high quality and technology will give you the best results. We advise you... -
Page 3: Important Instructions For Safety And Environment
1 Important instructions for safety and environment WARNING! NOTE • Always have the installation and • This section contains safety repairing procedures carried out by instructions that will help protect Authorised Service Agent. from risk of personal injury or The manufacturer shall not be held property damage. -
Page 4: Electrical Safety
1.1.1 Electrical safety DANGER! DANGER! • Do not use extension cords, multi- plugs or adaptors to connect the • Electrical safety instructions dryer to power supply in order to should be followed while decrease the risk of fire and electric electrical connection is made shock. - Page 5 WARNING! DANGER! • Ensure that the air inlet of the dryer Items such as lighter, match, is open and it is well-ventilated. coins, metal parts, needle etc. may • Product contains R290 refrigerant. damage the drum set or may lead •...
- Page 6 WARNING! WARNING! • Do not lean on the loading door • Underwear that contains metal of your dryer when it is open, reinforcements should not be dried otherwise it may fall over. in the dryer. Dryer may be damaged if metal reinforcements come loose •...
-
Page 7: Compliance With The Weee Regulation And Disposing Of The Waste Product
1.5 Compliance with the WEEE Installation Table for Washing Machine and Dryer regulation and disposing of the waste Washing Machine Depth product This product complies with EU Dryer Depth WEEE Directive (2012/19/EU). This product bears a classification symbol for waste electrical and Can be installed Cannot be electronic equipment (WEEE). -
Page 8: Technical Specifications
1.8 Technical Specifications Height (Min. / 84,6 cm / 86,6 cm* Max.) Width 59,7 cm Depth 56,8 cm Capacity (max.) 7 kg** Net weight 44 kg (± %10) Voltage Rated power input See type label*** Model code * Min. height: Height with adjustable feet are closed. -
Page 9: Your Dryer
2 Your Dryer 3 Installation 2.1 Overview Before the calling the nearest Authorized Service for the installation of the dryer, ensure that electrical installation and water drain is appropriate referring to the user’s manual. If they are not suitable, contact a qualified electrician and technician to make necessary arrangements. -
Page 10: Removing The Transportation Safety Assembly
• The rear surface of the tumble dryer shall 3.3 Connecting to the drain be placed against a wall. You can directly drain accumulated water through the water drain hose supplied with DANGER! the product instead of periodically draining the water collected in the water tank. -
Page 11: Transportation Of The Dryer
3.5 Transportation of the dryer Drain all water that has remained in the dryer. If direct water drain connection is made, then remove the hose connections. WARNING! • We recommend carrying the dryer in upright position. If it is not possible to carry the machine in the upright position, we recommend carrying it by tilting towards the right side when looked from... -
Page 12: Laundry Not Suitable For Drying In The Dryer
• For models with a condenser unit: clean 4 Preparation the condenser once in a month or after every 30 operations regularly. . 4.1 Laundry suitable for drying in the • Clean the filter periodically.Read the dryer Maintenance and cleaning of filters for Always obey the instructions given on the detalied information. -
Page 13: Operating The Product
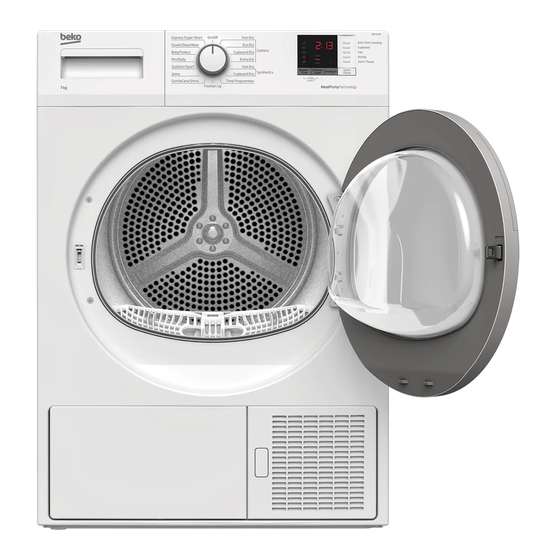
5 Operating the product 5.1 Control Panel On/Off/Program selection button Drying Level Button Start/Stand-by button Buzzer volume/Time programs selection End Time button button 5.2 Symbols Filter drawer / Child-proof Filter Mute Tank Volume up Delicates Express Shirts Sport Freshen Up Cottons Heat exchanger lock... -
Page 14: Program Selection And Consumption Chart
5.4 Program selection and consumption chart Programmes Programme Description You may dry your cotton laundry to be ironed in this program to have them Cottons Iron Dry 1000 slightly damp for ease of ironing. (Shirt, T-shirt, tablecloth, etc.) It dries single layer, casual cotton textiles Cottons Eco Dry 1000 in the most economical way. - Page 15 It dries the shirts in a more sensitive Gentle Care / Shirts manner, and causes less creasing and 1200 easier ironing. You may dry denim pants, skirts, shirts or Jeans 1200 jackets in this program. Use it to dry your clothes made of synthetics, cotton or mixed fabrics or Outdoor/Sports waterproof products such as functional...
-
Page 16: Warning Indicators
Allergy UK is the brand of the NOTE British Allergy Association. Seal of Approval is created to guide • You can add or remove laundry within people that require end time. Displayed time is the sum of recommendation about a normal drying time and end time. -
Page 17: Starting The Program
5.7 Starting the program 5.9 Changing the program after it is started Press the Start/Stand-by button to start the program. You can change the program you selected to Start/Stand-by and Drying indicators will dry your laundry with a different program after illuminate to indicate that program started. -
Page 18: Cancelling The Program
WARNING! • Do not touch the inner surface of the drum while adding or removing clothes during a continuing program. The drum surface is hot. 5.10 Cancelling the program If you want to cancel the program and terminate the drying operation for any reason after the drying machine starts running, turn the On/Off/Cancel knob, the program will be cancelled. -
Page 19: Maintenance And Cleaning
A layer can build up 6 Maintenance and cleaning on the filter pores that can cause clogging Service life of product extends and frequently of the filter after using experienced problems will be reduced if it is the dryer for a while. cleaned at regular intervals. -
Page 20: Draining The Water Tank
6.3 Draining the water tank 6.4 Cleaning the filter drawer Dampness of the laundry is removed and Lint and fiber that could not be captured by the condensed during drying process and the lint filter are blocked in the filter drawer behind water that arise accumulates in the water tank. -
Page 21: Cleaning The Evaporator
• If you observe a • Replace the filter drawer and tighten the layer over the filter cap turning the filter drawer lock turning it which can block in the arrow direction. the filter, remove the layer washing with a water and then cleaning it. -
Page 22: Troubleshooting
7 Troubleshooting Filter cleaning warning symbol/LED is on/flashing. Fibre filter might not be cleaned. >>> Clean the filter. The filter slot might be clogged with lints. >>> Clean the Drying operation takes too long. filter slot. A layer of fluff might have accumulated clogging up the lint Fibre filter pores might be clogged. - Page 24 www.beko.com.au...