
Related Manuals for Beko DH 10412 RX


Summary of Contents for Beko DH 10412 RX
- Page 1 Secador Manual do utilizador Dryer User Manual DH 10412 RX PT EN 2960311645_PT/250118.1014...
- Page 2 AVISO! “Caro Cliente, Agradecemos a sua preferÍncia pelo produto • Aviso contra superfícies quentes. Beko. Esperamos que o seu produto, o qual foi fabricado com a mais elevada qualidade e tecnologia, lhe proporcione os melhores resultados. Aconselhamos a leitura cuidadosa AVISO! deste manual e de toda a documentaÁ„o...
-
Page 3: Segurança Geral
1 Instruções importantes sobre segurança e meio- ambiente NOTA AVISO! • Esta secção contém • Os procedimentos de informações sobre segurança instalação e reparação que ajudarão na proteção de devem ser realizados sempre riscos de ferimentos pessoais pela Assistência Técnica ou danos materiais. -
Page 4: Segurança Eléctrica
AVISO! PERIGO! • Não usar quaisquer itens de • A voltagem especificada placa limpeza a seco ou materiais de características deve ser igual adicionais num programa de à voltagem eléctrica da sua vapor ou em qualquer outro casa. programa. • Desligue a máquina de secar da tomada quando não estiver em 1.1.1 Segurança eléctrica uso. -
Page 5: Segurança Do Produto
1.1.2 Segurança do produto PERIGO! PERIGO! • As roupas ou itens abaixo especificados não devem ser • Pontos a ser tomados em secos na máquina de secar consideração para perigo de considerando o perigo de incêndio: incêndio: • As roupas ou itens abaixo •... - Page 6 AVISO! AVISO! • A roupa interior que contenha • Instale a sua A máquina de reforços metálicos não deverá secar em locais adequados ser colocada na máquina de para o uso doméstico. (Casa secar. A máquina de secar de banho, varanda fechada, pode ficar danificada se os garagem, etc.) reforços metálicos se soltarem e...
- Page 7 Tabela de instalação para Máquina de NOTA Lavar e Máquina de Secar Profundidade da máquina de lavar O bloqueio para crianças encontra-se no Profundidade painel de controlo. (Ver Bloqueio para da máquina de secar crianças) Mantenha a porta de carregamento fechada mesmo quando a máquina de secar não está...
-
Page 8: Especificações Técnicas
1.8 Especificações técnicas Altura (ajustável) 84,6 cm / 86,6 cm* Largura 59,7 cm Profundidade 63,3 cm Capacidade (máx.) 10 kg** Peso bruto (± 4 kg) 52 kg Voltagem Entrada de potência Ver chapa de nominal características*** Código do modelo * Altura mínima: Altura com pés ajustáveis fechados. - Page 9 2 A sua máquina de secar 3 Instalação 2.1 Generalidades Antes do chamar o Serviço de assistência Autorizado mais próximo para a instalação da máquina de secar, certifique-se de que a instalação eléctrica e a descarga de água são apropriadas, consultando o manual do utilizador.
-
Page 10: Ajustar Os Pés
3.3 Ligar à drenagem • Uma vez que a máquina de secar esteja instalada, deve permanecer no mesmo Deve descarregar a água acumulada após local onde as instalações foram feitas. Ao cada ciclo de secagem. instalar a máquina de secar, certifique-se Pode descarregar directamente a água que a parede traseira não está... - Page 11 3.5 Transporte da máquina de secar Descarregue toda a água que ainda estiver dentro da máquina de secar. Se for feita uma ligação directa de descarga da água, então remova as ligações da mangueira. AVISO! • Recomendamos que transporte a sua máquina de secar na posição vertical.
- Page 12 4 Preparação máquina durante a secagem, a menos que seja necessário. Se tiver mesmo que abrir a porta, procure mantê-la aberta o 4.1 Roupa apropriada para secagem menos tempo possível. na máquina de secar • Não adicione roupa molhada com a Observe as instruções presentes nas etiquetas máquina de secar em funcionamento.
-
Page 13: Painel De Controlo
5 Operar com o produto 5.1 Painel de controlo Botão On/Off/Selecção do Botão Nível de Secagem programa Botão de seleção dos programas Volume Botão Iniciar/Pausa da Vibração/Hora Botão de hora de fim 5.2 Símbolos Bloquei Limpeza do Sem som Aumentar o Reserv Gaveta do ltro/ Expresso... - Page 14 5.4 Tabela de consumo e selecção do programa Programas Descrição dos programas Pode secar a sua roupa de algodão neste Secagem de algodão programa para que possa ser passada a ferro para passar a ferro 1000 com mais facilidade. (Camisa, T-shirt, toalha de mesa, etc.) Pode secar neste programa toda a roupa em Secagem de algodão...
- Page 15 Use este programa para secar junto peças Misturado de roupa de algodão e sintéticas não- 1000 pigmentadas. Este programa é especialmente adequado para BabyProtect 1200 secar a roupa infantil. Pode secar as calças, camisas, saias, ou Jeans 1200 blusões de ganga neste programa. Seca as camisas de uma forma mais delicada Delicados / Camisas e, dá...
-
Page 16: Indicadores De Aviso
5.5 Funções auxiliares NOTA Vibração/Tempo A máquina de secar emite avisos sonoros • Pode adicionar ou remover roupa quando o programa está concluído. Se não durante a hora de fim. O tempo no visor pretender ter um aviso sonoro, deve premir é... - Page 17 5.7 Iniciar o programa 5.9 Alterar o programa depois de ser Premir o botão Iniciar / Pausa para iniciar o iniciado programa. Pode alterar o programa que selecionou para Os indicadores de Iniciar/Pausa e Secagem secar a sua roupa com um programa diferente acendem para indicar que o programa já...
-
Page 18: Fim Do Programa
AVISO! • Não tocar na superfície interior do tambor quando estiver a adicionar ou a remover roupa durante um programa contínuo. A superfície do tambor está quente. 5.10 Cancelar o programa Se desejar cancelar o programa e terminar a operação de secagem por qualquer razão depois da máquina de secar iniciar o funcionamento, premir o botão Ligar/Desligar, o programa será... -
Page 19: Manutenção E Limpeza
6 Manutenção e limpeza • Abrir ambos os filtros (filtros interior e 6.1 Superfície interior da porta do exterior) remover o cabelo, as fibras, as tambor bolas de algodão, com a mão húmida ou um aspirador ou um pano. O cabelo e fibras que são separados da roupa durante o processo de secagem são recolhidos pelo filtro de fibra. -
Page 20: Limpar O Sensor
AVISO! • A água condensada não é apropriada para beber! • Nunca remover o depósito de água quando o programa está a decorrer! 6.2 Limpar o sensor Se se esquecer de esvaziar o depósito da Existem sensores água, a máquina parará durante os ciclos de humidade na subsequentes de secagem quando o depósito máquina de secar... - Page 21 6.4 Limpar o evaporador Os cabelos e as fibras que não são apanhados AVISO! pelo filtro de fibras vão para as aletas do evaporador atrás do resguardo e acumulam-se • Pode limpar manualmente, desde que aqui. Se o ícone do evaporador” ”...
-
Page 22: Resolução De Problemas
7 Resolução de problemas As fibras podem ter-se acumulado nos lados interiores da porta de carga e na junta da porta de carga. >>> Limpar as superfícies interiores da porta de carga e as superfícies da junta da porta de carga. A operação de secagem é... - Page 23 FICHA DE PRODUTO Em cumprimento com o Regulamento Delegado (UE) Nº 392/2012 da Comissão BEKO Marca DH 10412 RX Modelo Capacidade (kg) Air exalado Tipo de secador Condensador Classe de Eficiência Energética Consumo anual de energia (kWh/ano) Automático Tipo de controlo Não- Automático...
-
Page 24: Please Read This User Manual First
Please read this user manual first! Dear Customer, WARNING! Thank you for prefering a Beko product. We hope that your product which has been • Warning against hot surfaces. manufactured with high quality and technology will give you the best results. We advise you... -
Page 25: Important Instructions For Safety And Environment
1 Important instructions for safety and environment WARNING! NOTE Always have the installation and • This section contains safety repairing procedures carried out instructions that will help protect by the Authorized Service. from risk of personal injury or Manufacturer shall not be held property damage. -
Page 26: Electrical Safety
1.1.1 Electrical safety DANGER! DANGER! • Do not use extension cords, multi- • Electrical safety instructions plugs or adaptors to connect the dryer to power supply in order to should be followed while electrical connection is made decrease the risk of fire and electric shock. - Page 27 DANGER! DANGER! Points to be taken into • Clothes that are washed inadequately may ignite on their consideration for fire hazard: own and even may ignite after Below specified laundry or items drying ends. must not be dried in the dryer considering fire hazard.
-
Page 28: Mounting Over A Washing Machine
1.2 Mounting over a washing machine WARNING! • A fixing device should be used between the two machines when installing the • Never attempt to repair the dryer dryer above a washing machine. The by yourself. Do not perform any fitting device must be installed by the authorized service agent. -
Page 29: Compliance With The Weee Regulation And Disposing Of The Waste Product
1.8 Technical Specifications operate the dryer properly. 1.4 Child safety • Packaging materials are dangerous for the children. Keep packaging materials away Height (Min. / Max.) 84,6 cm / 86,6 cm* from children. Width 59,7 cm • Electrical products are dangerous for the children. -
Page 30: Your Dryer
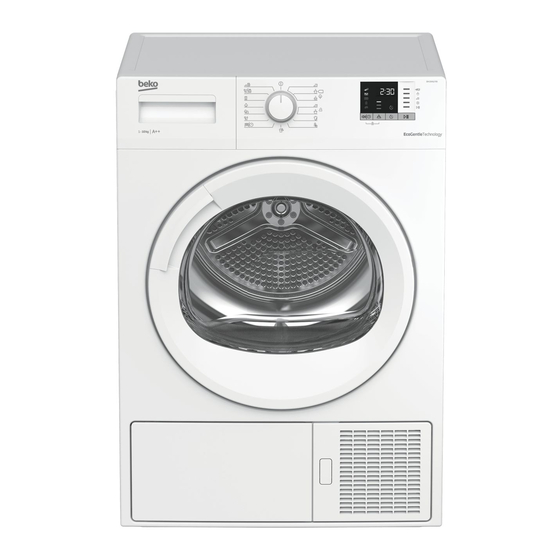
2 Your Dryer 3 Installation 2.1 Overview Before the calling the nearest Authorized Service for the installation of the dryer, ensure that electrical installation and water drain is appropriate referring to the user’s manual. If they are not suitable, contact a qualified electrician and technician to make necessary arrangements. -
Page 31: Removing The Transportation Safety Assembly
be adversely affected and it can get NOTE damaged. • The rear surface of the tumble dryer shall • Water drain hose should be attached to a be placed against a wall. height of maximum 80 cm. • Make sure that the water drain hose is not DANGER! stepped on and it is not folded between the drain and the machine. -
Page 32: Laundry Not Suitable For Drying In The Dryer
4 Preparation • Do not add wet laundry while the dryer is in operation • For models with a condenser unit: clean 4.1 Laundry suitable for drying in the the condenser once in a month or after dryer every 30 operations regularly. . Always obey the instructions given on the garment tags. -
Page 33: Operating The Product
5 Operating the product 5.1 Control Panel End Time button On/Off/Program selection button Drying Level Button Start/Stand-by button Buzzer volume/Time programs selection button 5.2 Symbols Child-proof Filter Filter drawer / Mute Tank Volume up Delicates Express Shirts Sport Daily Freshen Up Cottons Heat exchanger lock... -
Page 34: Program Selection And Consumption Chart
5.4 Program selection and consumption chart Programmes Programme Description You may dry your cotton laundry to be ironed in this Cotton Iron Dry programme to have them slightly damp for ease 1000 ofironing. (Shirt, T-shirt, tablecloth, etc.) You may dry all your cotton laundry in this programme. Cotton Cupboard (T-shirt, pants, pyjamas, baby clothes, underwear,linen, 10 /5... - Page 35 Use this programme to dry non-pigmenting 1000 synthetic and cotton laundry items together. Program used for baby clothing with can be dried Babyprotect 1200 approval on the label. You may dry denim pants, skirts, shirts or jackets in Jeans 1200 this programme.
- Page 36 5.5 Auxiliary functions Changing the end time If you want to change the duration during the Buzzer / time countdown: Drying machine makes an audible warning Cancel the program by turning the On/Off/ when the program is completed. If you don’t Program selection knob.
-
Page 37: Cancelling The Program
able to start a new program after the current program is finished or to be able to interfere NOTE with the program. To deactivate the child lock, keep the same buttons pressed for 3 seconds. • Adding laundry after the drying operation starts may cause the dried laundry inside the machine to mix with wet laundry and NOTE... -
Page 38: End Of Program
5.11 End of program When the program ends, the Fibre Filter Cleaning and Water Tank warning symbols on the program observation indicator turn on. Loading door may be opened and the dryer machine becomes ready for another run. Bring the On/Off/Program selection knob to On/Off position to turn the drying machine off. -
Page 39: Maintenance And Cleaning
6 Maintenance and cleaning • Open both fibre filters (inner and outer filters) remove the hair, fibre, cotton balls with your damp hand or a vacuum cleaner 6.1 Loading Door Inner Surface or a cloth. The hair and fibres that are separated from the laundry during drying process is collected by the Fibre Filter. -
Page 40: Cleaning The Sensor
6.2 Cleaning the sensor Remove the water tank in the drawer or container carefully. There are dampness sensors in the dryer that detect whether the laundry is dry or not. To clean the Drain the water in the tank. sensors: •... - Page 41 • After the cleaning process is completed, place the air router door to its place, move the latches to close it and close the toe board. WARNING! • You can clean by hand, provided you wear protective gloves. Do not try to clean with bare hands.
-
Page 42: Troubleshooting
7 Troubleshooting Loading door opens by itself. Loading door might be closed completely. >>> Push the loading door until the closing sound is heard. Drying operation takes too long. Water tank warning symbol is on/flashing. Fibre filter (interior and exterior filter) pores may be clogged. Water tank may be full. - Page 43 PRODUCT FICHE Complying Commission Delegated Regulation (EU) No 392/2012 BEKO Supplier name or trademark DH 10412 RX Model name Rated capacity (kg) Air Vented Type of Tumble Dryer Condenser Energy efficiency class Annual Energy Consumption (kWh) Automatic Type of Control...