Table of Contents
Advertisement
Available languages
Available languages
Quick Links
Advertisement
Chapters
Table of Contents

Related Manuals for Electrolux KGG95375K


Summary of Contents for Electrolux KGG95375K
- Page 1 KGG95375K User Manual Piano cottura Istruzioni per l’uso...
-
Page 2: Table Of Contents
10. ENERGY EFFICIENCY.................. 23 WE’RE THINKING OF YOU Thank you for purchasing an Electrolux appliance. You’ve chosen a product that brings with it decades of professional experience and innovation. Ingenious and stylish, it has been designed with you in mind. So whenever you use it, you can be safe in the knowledge that you’ll get great results every time. - Page 3 ENGLISH instructions in a safe and accessible location for future reference. 1.1 Children and vulnerable people safety This appliance can be used by children aged from 8 • years and above and persons with reduced physical, sensory or mental capabilities or lack of experience and knowledge if they have been given supervision or instruction concerning the use of the appliance in a safe way and understand the hazards involved.
- Page 4 CAUTION: The appliance must not be supplied • through an external switching device, such as a timer, or connected to a circuit that is regularly switched on and off by a utility. CAUTION: The cooking process has to be supervised.
-
Page 5: Safety Instructions
ENGLISH using insulating sleeving) with parts that can reach temperatures of more than 50°C above room temperature. WARNING: Use only hob guards designed by the • manufacturer of the cooking appliance or indicated by the manufacturer of the appliance in the instructions for use as suitable or hob guards incorporated in the appliance. - Page 6 2.4 Use • Do not use multi-plug adapters and extension cables. • Make sure not to cause damage to WARNING! the mains plug (if applicable) or to the Risk of injury, burns and mains cable. Contact our Authorised electric shock.
- Page 7 ENGLISH 2.5 Care and cleaning • Never leave a burner on with empty cookware or without cookware. • Do not put aluminium foil on the WARNING! appliance. Do not remove the buttons, • Cookware made of cast iron, knobs or gaskets from the aluminium or with a damaged bottom control panel.
-
Page 8: Installation
3. INSTALLATION threaded nut G 1/2". Screw the parts WARNING! without force, adjust the connection in Refer to Safety chapters. the necessary direction and tighten everything. 3.1 Before the installation Before you install the hob, write down the information below from the rating plate. - Page 9 ENGLISH 3.4 Adjustment of minimum level WARNING! Information for authorised installer only. To adjust the minimum level of the burners: 1. Light the burner. 2. Turn the knob on the minimum position. 3. Remove the knob and using thin screwdriver lift up and remove the plastic magnet holder.
- Page 10 3.7 Assembly A. Rigid copper pipe or flexible pipe of stainless steel If the pilot lights turn on after connecting the hob to the mains, turn on and off the control knob and wait until the residual heat indicator goes out.
- Page 11 ENGLISH 3.8 Installing hob under the hood If you install the hob under a hood, please see the installation instructions of the hood for the minimum distance between the appliances. 3.9 Possibilities for insertion The panel installed below the hob must be easy to remove and let an easy access in case a technical assistance intervention is necessary.
-
Page 12: Product Description
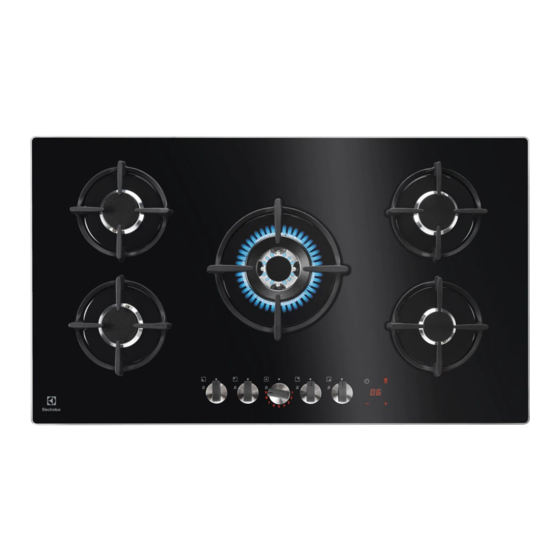
4. PRODUCT DESCRIPTION 4.1 Cooking surface layout Semi-rapid burner Multi Crown burner Auxiliary burner Control panel Control knobs Window for Hob²Hood infrared signal 4.2 Control panel layout Use the sensor fields to operate the Minute Minder and Hob²Hood. The displays, indicators and sounds tell which functions operate. - Page 13 ENGLISH Sensor Function Comment field To increase or decrease the time. To switch Hob²Hood Automatic Modes. Stand-by mode: Press the for at least 1 second to activate the display, 4.3 Control knob Symbol Description Symbol Description minimum gas supply no gas supply / off posi‐ 1 - 9 power levels tion...
-
Page 14: Daily Use
Semi-rapid 30 sec 3 min 10 min (rear right) Auxiliary 30 sec 3 min 5 min 5. DAILY USE 5.2 Ignition of the burner WARNING! Refer to Safety chapters. Always light the burner before you put on the 5.1 Burner overview cookware. - Page 15 ENGLISH CAUTION! WARNING! In the absence of electricity Always turn the flame down you can ignite the burner or switch it off before you without electrical device; in remove the pans from the this case approach the burner. burner with a flame, turn the control knob counter- 5.4 Minute Minder clockwise to maximum gas...
- Page 16 Setting default Hob²Hood procedure: Mode Manual Fan speed 1. When timer is off, touch Minute light Minder for 3 seconds. come on. Level 1 2. Touch together until An Level 2 comes on, n is a current automatic mode.
-
Page 17: Hints And Tips
ENGLISH 6. HINTS AND TIPS WARNING! Burner Diameter of Refer to Safety chapters. cookware (mm) 6.1 Cookware Multi Crown 180 - 260 CAUTION! Semi-rapid (rear left) 120 - 240 Do not use cast iron pans, clay or earthenware pots, Semi-rapid (rear right) 120 - 240 grilling accessories or toaster plates. - Page 18 To find the full range of cooker hoods Other remotely controlled which work with this function refer to our appliances may block the consumer website. The Electrolux cooker signal. Do not use any such hoods that work with this function must appliances near to the hob have the symbol while Hob²Hood is on.
-
Page 19: Care And Cleaning
ENGLISH Food categories Recipes Burner type Power level Caramel Auxiliary Desserts Custard Auxiliary Panna cotta Auxiliary All recipes for approximately For an optimal delicate 4 portions. cooking use the auxiliary burner. The settings suggested in the cooking table should only serve as guidelines and be adjusted depending on the rawness of food, its weight and quantity as well... -
Page 20: Troubleshooting
3. After you clean the pan supports, otherwise, the dirt can cause damage make sure that they are in correct to the hob. Take care to avoid burns. positions. • Remove when the hob is 4. For the burner to operate correctly,... - Page 21 ENGLISH Problem Possible cause Remedy Burner cap and crown are Place the burner cap and placed incorrectly. crown correctly. The flame extinguishes im‐ Thermocouple is not heat‐ After lightning the flame, mediately after ignition. ed up sufficiently. keep the knob pushed for equal or less than 10 sec‐...
-
Page 22: Technical Data
8.3 Labels supplied with the accessories bag Stick the adhesive labels as indicated below: MOD. MOD. MOD. TYPE PROD.NO. IP20 PROD.NO. PROD.NO. SER.NO. 0049 SER.NO SER.NO 03 IT DATA DATA MADE IN ITALY A. Stick it on Guarantee Card and send C. -
Page 23: Energy Efficiency
NOMINAL GAS FLOW g/h POWER POWER MARK G30 28-30 G31 37 mbar mbar Multi Crown 3,55 Semi-rapid Auxiliary 0,33 10. ENERGY EFFICIENCY 10.1 Product information according to EU 66/2014 Model identification KGG95375K Type of hob Built-in hob Number of gas burners... - Page 24 Put the packaging in relevant containers contact your municipal office. to recycle it. Help protect the environment and human health by Electrolux Appliances AB - Contact recycling waste of electrical and Address: Al. Powstańców Śląskich 26, electronic appliances. Do not dispose of 30-570 Kraków, Poland...
-
Page 25: Informazioni Di Sicurezza
10. EFFICIENZA ENERGETICA................48 PENSIAMO A TE Grazie per aver acquistato un elettrodomestico Electrolux. Hai scelto un prodotto che ha alle spalle decenni di esperienza professionale e innovazione. Ingegnoso ed elegante, è stato progettato pensando a te. Quindi, in qualsiasi momento lo utilizzi, avrai la certezza di ottenere sempre i migliori risultati. - Page 26 Conservare sempre le istruzioni in un luogo sicuro e accessibile per poterle consultare in futuro. 1.1 Sicurezza dei bambini e delle persone vulnerabili Questa apparecchiatura può essere usata da bambini • a partire dagli 8 anni e da adulti con limitate capacità...
- Page 27 ITALIANO AVVERTENZA: Non lasciare mai il piano di cottura • incustodito durante la preparazione di cibi in quanto olio e grassi potrebbero provocare un incendio. Non tentare MAI di spegnere un incendio con • dell'acqua; spegnere l'apparecchiatura e coprire le fiamme ad es.
-
Page 28: Istruzioni Di Sicurezza
Quando l'apparecchiatura è collegata direttamente • all'alimentazione elettrica, è necessario un interruttore isolante onnipolare. È necessario che l’apparecchiatura si scolleghi completamente dalla rete conformemente alle condizioni della categoria III relativa alla sovratensione. - Page 29 ITALIANO al di sotto dell'apparecchiatura per spina di alimentazione rimanga rendere inaccessibile la base. accessibile dopo l'installazione. • Nel caso in cui la spina di corrente sia 2.2 Collegamento elettrico allentata, non collegarla alla presa. • Non tirare il cavo di alimentazione per AVVERTENZA! scollegare l’apparecchiatura.
- Page 30 • Questa apparecchiatura è stata • Non lasciare mai un bruciatore prevista unicamente per un uso acceso con o senza tegami vuoti domestico. sopra. • Non modificare le specifiche tecniche • Non appoggiare la pellicola di dell'apparecchiatura. alluminio direttamente •...
-
Page 31: Installazione
ITALIANO 2.5 Pulizia e cura Autorizzato. Utilizzare solo ricambi originali. AVVERTENZA! • Per quanto riguarda la lampada o le Non togliere pulsanti, lampade all'interno di questo prodotto manopole o guarnizioni dal e le lampade di ricambio vendute pannello dei comandi. separatamente: Queste lampade L'acqua potrebbe penetrare sono destinate a resistere a... - Page 32 2. Rimuovere gli spartifiamma e le Ulteriore attenzione è richiesta qualora al corone del bruciatore. piano di cottura fosse abbinato il forno. 3. Con una chiave a bussola N. 7, togliere gli iniettori e sostituirli con...
- Page 33 ITALIANO • Utilizzare sempre una presa elettrica con contatto di protezione correttamente installata. • Verificare che la spina di alimentazione rimanga accessibile dopo l'installazione. • Non tirare il cavo di alimentazione per scollegare l’apparecchiatura. Tirare sempre dalla spina. • Collegando l'apparecchiatura a una 5.
- Page 34 100 mm min. 650 mm min. 55 mm 30 mm 830 mm 1. Collegare il filo di colore verde e giallo (terra) al morsetto contrassegnato dalla lettera "E" o dal simbolo di terra o colorato di verde e giallo.
-
Page 35: Descrizione Del Prodotto
ITALIANO e altrettanto facilmente deve consentire l'accesso in caso di interventi dell'assistenza tecnica. Unità da cucina con porta 30 mm min 20 mm (max 150 mm) ATTENZIONE! 60 mm Installare l'apparecchiatura esclusivamente su un piano di lavoro dalla superficie piatta. 3.8 Installazione del piano di cottura sotto la cappa da cucina A. - Page 36 4.2 Disposizione del pannello dei comandi Usare i campi sensore per azionare il Contaminuti e Hob²Hood. I display, le spie ed i segnali acustici mostrano quale funzione è attiva. Tasto Funzione Commento senso‐ Per impostare la funzione Timer. Per attivare le icone Hob²Hood icons.
-
Page 37: Utilizzo Quotidiano
ITALIANO 4.4 Calore residuo Spia piena LED La spia LED si riduce Spia LED spenta Manopola aperta lentamente Il calore residuo si conclude Il calore residuo inizia AVVERTENZA! La spia del calore residuo si Il calore residuo può essere accende quando si spegne il causa di ustioni. - Page 38 5.1 Panoramica bruciatore 1. Premere la manopola di regolazione e ruotarla in senso antiorario fino alla posizione massima ( ). 2. Tenere premuta la manopola di regolazione per circa 10 secondi. In questo modo la termocoppia si scalda. In caso contrario, l'alimentazione del gas viene interrotta.
- Page 39 ITALIANO Allo scadere del tempo stabilito, viene Quando si accende emesso un segnale acustico e 00 l'alimentazione dopo lampeggia. l'installazione o dopo un black-out, il generatore di Nell'ultimo minuto il tempo scintille si attiva in modo cala in secondi, e gli ultimi automatico.
- Page 40 An, n è una modalità Per la maggior parte della automatica. cappe, il sistema remoto è 3. Sfiorare per selezionare la disattivato all'origine. modalità automatica desiderata. Attivarlo prima di utilizzare la Dopo aver selezionato la Modalità funzione. Per maggiori...
-
Page 41: Consigli E Suggerimenti Utili
ITALIANO 6. CONSIGLI E SUGGERIMENTI UTILI 6.2 Diametro delle pentole AVVERTENZA! Fare riferimento ai capitoli ATTENZIONE! sulla sicurezza. Usare pentole con diametro adatto alle dimensioni dei 6.1 Pentole bruciatori. ATTENZIONE! Bruciatore Diametro del‐ Non usare pentole in ghisa, le pentole teglie in terracotta o coccio, (mm) accessori per il grill o piastre... - Page 42 Hob²Hood Per scoprire l'intera gamma di cappe da cucina compatibili con questa funzione fare riferimento al sito web del nostro cliente. Le cappe da cucina Electrolux compatibili con questa funzione devono riportare il simbolo Tenere pulita la finestrella del comunicatore del segnale a infrarossi Hob²Hood.
-
Page 43: Pulizia E Cura
ITALIANO Categorie cibo Ricette Tipo di bruciatore Livello di po‐ tenza Funghi con condimenti Semi rapido Caponata con verdure Multi corona 4 - 8 Verdure Spinaci surgelati con Rapido burro Patatine fritte Multi corona Piatti fritti Ciambelle Multi corona Noccioline arrostite Semi rapido 2 - 5 Snack cotti con padella... - Page 44 Verificare che i supporti si La presenza di acqua o altri adattino agli intagli sulla base del liquidi sul pannello dei bruciatore come indicato nell'immagine. comandi può In questo modo, il supporto pentole sarà accidentalmente attivare o fisso e stabile.
-
Page 45: Risoluzione Dei Problemi
ITALIANO 8. RISOLUZIONE DEI PROBLEMI AVVERTENZA! Fare riferimento ai capitoli sulla sicurezza. 8.1 Cosa fare se… Problema Causa possibile Soluzione Non scocca la scintilla Il piano cottura non è colle‐ Accertarsi che il piano cot‐ quando si tenta di attivare gato a una fonte di alimen‐... - Page 46 Problema Causa possibile Soluzione Non è possibile attivare o C'è acqua o macchie di Pulire il pannello dei co‐ mettere in funzione grasso sul pannello dei co‐ mandi. Hob²Hood e Timer. mandi. Il display mostra “E t”. Spegnere le manopole di...
-
Page 47: Dati Tecnici
ITALIANO 9. DATI TECNICI 9.1 Dimensioni del piano di cottura Larghezza 880 mm Profondità 510 mm 9.2 Diametri bypass BRUCIATORE Ø BYPASS 1/100 mm Multi corona Semi rapido Ausiliario 9.3 Altri dati tecnici Gas - Origi‐ G20 (2H) 20 mbar 10,45 kW nale: POTENZA TO‐... -
Page 48: Efficienza Energetica
Multi corona 3,55 Semi rapido 1,9 Ausiliario 0,33 10. EFFICIENZA ENERGETICA 10.1 Informazioni prodotto conformi alla norma UE 66/2014 Identificativo modello KGG95375K Tipo di piano di cottura Piano cottura a incasso Numero di bruciatori a gas Posteriore sinistro - Semirapi‐ 59,0% Posteriore destro - Semirapido 59,0% Efficienza energetica per brucia‐... - Page 49 Aiutare a residenza. proteggere l’ambiente e la salute umana e a riciclare rifiuti derivanti da Electrolux Appliances AB - Contact apparecchiature elettriche ed Address: Al. Powstańców Śląskich 26, elettroniche. Non smaltire le 30-570 Kraków, Poland...
- Page 52 www.electrolux.com/shop...