Table of Contents
Advertisement
Advertisement
Table of Contents

Related Manuals for Epson PictureMate PM 225


Summary of Contents for Epson PictureMate PM 225
- Page 1 User’s Guide...
-
Page 2: Table Of Contents
Contents Welcome! ............... . . 3 Prepare to Print . -
Page 3: Welcome
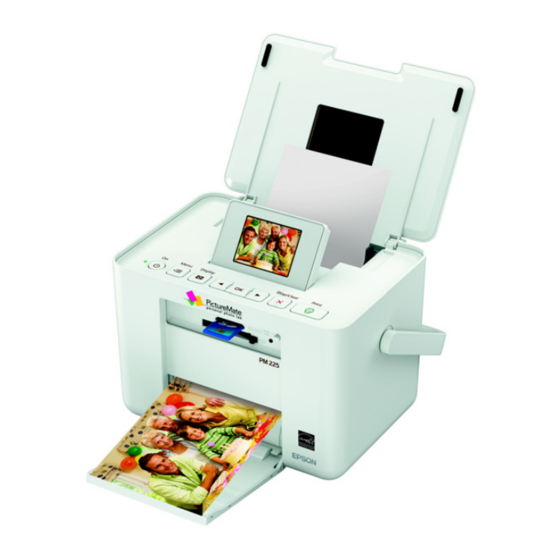
Welcome! PictureMate Charm is your easy-to-use, personal photo lab. Just insert a digital camera memory card and you’re ready to print brilliant, long-lasting photos. Because PictureMate ® is light and portable, you can print whenever and wherever you take pictures. Plus, your PictureMate prints will be as brilliant and vibrant generations from now as they are today. - Page 4 Special Features Printing with your PictureMate becomes even easier with these special features: From PictureMate’s photo viewer screen, you can view your photos and press Print to print the ones you want. Or you can select to print all photos. (See page 11.) If your camera supports DPOF (Digital Print Order Format), you can select which photos to print while...
-
Page 5: Supported Photo Formats
(100 sheets) and photo cartridge You can also buy a Print Pack and other PictureMate accessories from an Epson authorized reseller. To find the nearest reseller, call 800-GO-EPSON (800-463-7766). Or you can purchase online at www.epsonstore.com (U.S. sales) or www.epson.ca (Canadian sales). - Page 6 PictureMate Buttons Turn PictureMate on or off Change the number of photos displayed Move through Display optional photos and settings menu menu options Start printing Stop printing or cancel settings...
-
Page 7: Prepare To Print
Prepare to Print Before you print with PictureMate, you need to: ● Insert your memory card (below) ● Load paper (see page 7) When you finish printing, you can remove your memory card (see page 9). Inserting Your Memory Card Move the handle to the back. - Page 8 Press the On button to turn on PictureMate. Insert the memory card into the correct slot, as shown on the right. Insert just one card at a time. Note: PictureMate can’t read multiple cards at once. Push the card in carefully until it stops (it won’t go in all the way).
-
Page 9: Loading Paper
Removing Your Memory Card When you are ready to remove a memory card, first make sure the memory card light is not flashing. Caution: Do not remove a card while the memory card light is flashing; you may lose photos on your card. Top slot: Push in the card and release it, then pull it straight out of the slot. - Page 10 Slide the edge guides outward. Create a stack of up to 20 sheets of paper and separate the sheets slightly by fanning them. Place your paper into the slot between the edge guides with the glossy or whiter side up. Slide the edge guides inward slightly.
-
Page 11: Choose Photos And Print
Choose Photos and Print After you insert your camera’s memory card, PictureMate displays your photos on the photo viewer screen (shown at right). Note: You can adjust the angle of the photo viewer screen by raising or lowering the top of the screen. Be sure to lower the screen before closing the printer lid. - Page 12 Note: If your memory card has more than 1000 photos, PictureMate divides them into groups of 999. You can select the group you want to view and print. See page 10 for more information. Press the Display button to switch between one photo displayed with or without text, one photo with a “filmstrip”...
-
Page 13: Printing Groups Of Photos
The preview screen shows the layout, number of sheets, and other settings you have chosen, for example: Automatic fix icon Note: For more information about print settings, see page 17. Press l or r to review your selected photos. If you change your mind, press the Make sure you have enough paper loaded, then press... -
Page 14: Printing Photos By Date
Press l or r to choose Select Photos, then press Press l or r to highlight Select All Photos, then press OK. If you want more than one copy of each picture, press r to increase the number of copies or l to decrease it. - Page 15 After selecting all the dates you want, press OK. The photos taken on the selected date(s) appear on the screen. Press l or r to view the selected photos. Follow the steps on page 12 to select photos, set the number of copies for each, and print. Printing Camera-Selected DPOF Photos If your camera supports DPOF (Digital Print Order...
- Page 16 Storing and Displaying Your PictureMate Photos Photos printed on PictureMate photo paper are beautiful and long-lasting. Follow these guidelines to make sure they will look great for generations. Caring for Your Photos ● To avoid scratches or smudging, do not rub the printed side of the photo.
-
Page 17: Do More With Your Photos
Do More With Your Photos By pressing the Menu button, you can: ● Choose from a variety of layouts (see page 18) ● Print a proof sheet (see page 19) ● Remove red eyes from your photos (see page 19) ●... -
Page 18: Choosing A Layout
Choosing a Layout By default, your photos are printed at the full 4 × 6 size, without borders. If you want to print pictures with white borders or place several small photos on one sheet of paper, you can use the Layout menu to change the layout. -
Page 19: Printing A Proof Sheet
Printing a Proof Sheet You can print small thumbnail images of all the photos on your memory card, 20 images per page. After inserting a card, press Press l or r to highlight Utility, then press OK. Press l or r to highlight Print Proof Sheet, then press OK. - Page 20 Note: These settings affect only your printed pictures. They do not change your original image files. After inserting a card, press Press l or r to highlight Basic Print Settings, then press OK. Press l or r to highlight Enhance, then press OK. Press l or r to select one of the following options: ●...
- Page 21 Adjusting Borderless Expansion When you print borderless pictures, your images are automatically expanded and cropped. If your pictures are cut off around the edges, you can adjust the amount of expansion and cropping. Press Menu. Press l or r to highlight Setup, then press OK. Press l or r to highlight Advanced Settings, then press OK.
- Page 22 Press l or r to select B & W or Sepia, then press OK. You can see the effect on your photo. Adding Camera Text If your camera allows you to add text to your photos, you can print the pictures along with the text. This setting is available for borderless photos only.
-
Page 23: Print From An External Device
Print From an External Device PictureMate can print photos stored on a: ● PictBridge-enabled digital camera (this page) ● Bluetooth-enabled device (requires an optional Bluetooth Photo Print adapter; see page 24). Printing From a Digital Camera You can connect a digital camera that supports PictBridge printing to PictureMate and use the camera to control printing. - Page 24 Bluetooth Photo Print Adapter. The adapter (part# C12C824383) is available from your local reseller or Epson (see page 53). Note: Although PictureMate complies with the Bluetooth specification, it is not guaranteed to work with all devices that have Bluetooth wireless technology.
- Page 25 Select the photo you want to print from your Bluetooth device and send it to PictureMate: ● Windows ® : Send photos directly to PictureMate with your Bluetooth file sharing program. See the documentation included with your computer’s Bluetooth adapter for details.
-
Page 26: Print From A Computer
See “Inserting Your Memory Card and Copying Photos” on page 26 for instructions. Periodically, it’s a good idea to check Epson’s support website at epson.com/support for free updates to your PictureMate printer software. Download instructions are posted for your convenience. - Page 27 Note: If you have problems installing the software, see page 48. Installing Software for Windows Before you start, make sure PictureMate is NOT connected to your computer and does NOT have a memory card inserted in it. Press the On button to turn on PictureMate. Note: If you see a Found New Hardware screen, click Cancel and disconnect PictureMate from your computer.
- Page 28 After a moment, you see this screen: Connect the USB cable to any open USB port on your computer. Then connect the other end to the USB port on the back of PictureMate. Your PictureMate software is installed. Note: If you see a screen like this one, remove your memory card and click the X in the corner to close it.
- Page 29 Press the On button to turn on PictureMate. Insert the PictureMate CD. Double-click the Epson icon. When you see this screen, click Install. Read the license agreement and click Accept. Follow the on-screen instructions to install the...
- Page 30 After a few minutes, you see this screen: Connect the USB cable to any open USB port on your Macintosh. Then connect the other end to USB port on the back of PictureMate. If you’re using Mac OS X 10.5.x, skip to step 10. If you’re using Mac OS X 10.3.9 or 10.4.11, continue with the next step.
- Page 31 Print From a Computer Follow these basic printing instructions for your computer: ● Windows (below) ● Macintosh (see page 37) Printing From a Windows Computer You can print photos from an imaging application, the Windows Photo Gallery in Windows Vista (page 31), or the Picture and Fax Viewer in Windows XP (page 34).
- Page 32 Click the Print icon at the top of the screen, then select Print from the drop-down menu that appears. Make sure your printer is selected, then choose PictureMate Photo Paper as the Paper type setting. (4 × 6 in is automatically selected as the Paper size setting.) Click Options in the lower right corner of the screen and select Printer Properties.
- Page 33 ● You can change the Color Option and see the effects on the sample photo (the changes don’t affect your original). Auto Correction improves the quality of photos that are too dark or have a color cast. Scene Correction lets you choose the subject of your photo so that PictureMate can correct it appropriately.
- Page 34 Printing with the Windows XP Picture and Fax Viewer Locate the photo you want to print on your computer. Right-click the photo, highlight Open With, and select Windows Picture and Fax Viewer. Print icon Click the Print icon at the bottom of the screen. Click Next.
- Page 35 When you see this screen, select your EPSON PictureMate model and click Printing Preferences. Printing Preferences You see the printer settings screen: Choose from the following settings: ● Select Borderless to print a photo without borders. Select Borders to print with a white border all around.
- Page 36 ● You can change the Color Option and see the effects on the sample photo (the changes don’t affect your original). Auto Correction improves the quality of photos that are too dark or have a color cast. Scene Correction lets you choose the subject of your photo so that PictureMate can correct it appropriately.
- Page 37 Mac OS X 10.5 Start your print program and open the photo you want to print. Open the File menu and select Print. Select EPSON PictureMate PM225 as the Printer setting. Click d to expand the Print window, if necessary.
- Page 38 In Preview, you see the settings shown below: Open the Paper Size menu and place your cursor on the 4 × 6 in option. You see extended options: ● Select 4 × 6 in (Borderless) to print without any borders. ●...
- Page 39 To pause printing for all jobs, click Pause Printer. ● To check photo cartridge status, click Utility, then select EPSON Status Monitor. When you’re finished, close the window to exit. Mac OS X 10.3 and 10.4 Start your print program and open the photo you want to print.
- Page 40 ● Select 4 × 6 in (Borderless) to print without any borders. ● Select 4 × 6 in (Borders) to print with white borders all around. Note: iPhoto ® expands two sides of an image to the maximum print area, so you may see small borders in iPhoto prints.
- Page 41 If multiple print jobs are listed and you want one to print before the other(s), select the job and click the Status arrow to move it up. ● To check photo cartridge status, click Utility, then select EPSON Status Monitor. When you’re finished, close the window to exit.
-
Page 42: Copy Photos To And From Your Computer
Copy Photos to and From Your Computer You can insert a memory card into PictureMate and copy the photos from the card to your computer. You can also copy photos from your computer to the memory card. Make sure your PictureMate software is installed and PictureMate is connected to your computer as described in “Installing Software and Connecting PictureMate”... - Page 43 below for Windows Vista and XP. For Windows 2000 and Macintosh, see page 28. Windows Vista and XP You may see a screen like this: Note: If you don’t see this screen, remove your memory card from PictureMate and insert it again. You can choose any of the options to copy, view, or import your photos.
-
Page 44: Preparing To Remove A Memory Card
Windows 2000 Access your card just as you would access a drive on your computer. To copy photos to and from your computer and card, drag and drop the photos to the card or folder. Make sure the photo files meet the requirements described in “Supported Photo Formats”... -
Page 45: Replace Print Pack
(100 sheets) and photo cartridge You can also buy a Print Pack and other PictureMate accessories from an Epson authorized reseller. To find the nearest reseller, call 800-GO-EPSON (800-463-7766). Or you can purchase online at www.epsonstore.com (U.S. sales) or www.epson.ca (Canadian sales). -
Page 46: Replacing The Photo Cartridge
Replacing the Photo Cartridge Make sure you have a new PictureMate Print Pack before you remove the old photo cartridge. Once you remove the cartridge, you must install the new one right away. Caution: Before you replace the cartridge, read the “Photo Cartridge Safety Instructions”... - Page 47 Caution: Do not attempt to refill the photo cartridge. This could result in ink spills or other damage to PictureMate not covered by Epson’s warranty. Remove the new photo cartridge from its package. Don’t touch the green chip on the side Caution: Don’t touch the small green circuit board.
- Page 48 Caution: If the cartridge is not inserted correctly, PictureMate will not be able to print. Close the cartridge door all the way. Checking Photo Cartridge Status You can check the status of your Print Pack at any time. Press Menu. Press l or r to highlight Maintenance, then press Press l or r to highlight Cartridge Status, then press OK.
-
Page 49: Take Picturemate With You
Tip: You can order an optional PictureMate Carrying Case (part number PMBAG06) or rechargeable battery (part number C12C831082) from Epson. See page 53 for details. Packing Your PictureMate If PictureMate is going to travel a longer distance, pack it carefully to help protect it from getting damaged. -
Page 50: Using The Optional Battery
Using the Optional Battery To buy the optional battery, check with your PictureMate retailer or go to www.MyPictureMate.com. See page 53 for more information on purchasing PictureMate supplies and accessories. With a fully charged battery, you can print about 100 photos. - Page 51 The power light flashes during charging when PictureMate is off. It takes about 2 hours to fully charge the battery when PictureMate is off. It takes longer when you use PictureMate while it is charging. The power light turns off when the battery is fully charged (if PictureMate is turned off).
-
Page 52: Set Picturemate Preferences
Set PictureMate Preferences You can change the way PictureMate works by using the Setup menu. You can set the following preferences: ● Turn the print preview screen off or on (on the right) ● Turn on a screensaver that will appear after 3 minutes of inactivity (see page 37) ●... - Page 53 Make sure you select the right language. Making Bluetooth Settings If you have the optional Epson Bluetooth Photo Print Adapter, you can print wirelessly from your Bluetooth- enabled phone, PDA, or computer. If necessary, use the PictureMate buttons to choose settings for Bluetooth wireless communication.
- Page 54 on encryption, depending on the Bluetooth-enabled device from which you print. The Setup menu allows you to make communication and security settings for Bluetooth printing. Connect the Bluetooth adapter to PictureMate (see page 24). Press Menu. Press l or r to highlight Setup, then press OK. Press l or r to highlight Bluetooth, then press To display the device address for PictureMate (set at the factory), press l or r to select Device...
-
Page 55: Returning To Default Settings
Option Settings Encryption On/Off Select On to encrypt communication and require (default = Off) that a four-digit Passkey be entered into a device before it can print from PictureMate. Passkey Any four-digit This setting allows you to set number a four-digit Passkey that must be entered into a device (default = before printing if Pairing is... -
Page 56: Printer Care And Troubleshooting
Printer Care and Troubleshooting If you have problems or questions about how to use PictureMate, check the built-in help system: Press Menu. Press l or r to highlight Help, then press OK. Press l or r to select from the following:. Section Improve Print Quality Lines in printout... -
Page 57: Checking And Cleaning The Print Head
Checking and Cleaning the Print Head If your print quality is not as good as it used to be—if photos are too light, are missing colors, or have lines running through them—PictureMate’s print head nozzles may need cleaning. You can check the nozzles and clean the print head if necessary. -
Page 58: Aligning The Print Head
(in the lower right corner of your screen). Select Nozzle Check. Macintosh: Open the Applications folder and select EPSON Printer Utility3. Select PictureMate in the printer list, click OK, and select Nozzle Check. Follow the instructions on the screen to print a nozzle check pattern. - Page 59 Press Menu. Press l or r to highlight Maintenance, then press Press l or r to select Head Alignment, then press OK. You see a confirmation screen: Press Print. The alignment pattern is printed: You see the Head Alignment screen: Look at the printed squares to determine which one is the most even, with no streaks or white lines.
- Page 60 (in the lower right corner of your screen). Select Print Head Alignment. Macintosh: Open the Applications folder and select EPSON Printer Utility3. Select PictureMate in the printer list, click OK, and select Print Head Alignment. Follow the instructions on the screen to print the alignment pattern.
- Page 61 If you can’t find a square without lines or streaks, choose the one that looks the best. Then click Realignment to print another alignment pattern and repeat this step. Note: The square you select becomes the middle square (#5) the next time you align the print head. Cleaning Inside PictureMate To make sure your pictures look their best, you may need to use a “cleaning sheet”...
- Page 62 Caution: Never use a hard or abrasive brush, or alcohol or thinner for cleaning; they can damage the components and case. Don’t get water on the components and don’t spray lubricants or oils inside PictureMate. Printing and Operation Problems The On light and photo viewer screen don’t turn on. ●...
-
Page 63: Set Up Network Printing
● Make sure paper is not jammed and is loaded correctly, and make sure the handle is not resting on the paper. See page 9. PictureMate is on, but nothing prints. ● If you’re printing from your computer, make sure the USB cable is connected securely at both ends and the cable meets the requirements listed in “System Requirements”... -
Page 64: Print Quality Problems
can then use PictureMate to print from your computer or the memory card. See page 26. Printing is too slow. ● It takes a few moments for PictureMate to process your images before printing them. ● If PictureMate is in a hot or sunny location, move it to a cooler place and try printing again. - Page 65 Your print is blurry or smeared. ● Use PictureMate photo paper to ensure proper saturation, absorption of ink, and quality. ● Be sure to print with the glossy or whiter side of the paper face up. ● The print head may need cleaning. See page 41. ●...
-
Page 66: Problems With Paper Feeding
Make sure your paper is beneath the arrow on the edge guides. ● Don’t load plain paper; this may damage PictureMate. ● Use only PictureMate photo paper or Epson Premium Photo Paper Glossy or Semigloss. (See page 5.) ● Store paper flat to help prevent curling. Miscellaneous Printout Problems PictureMate prints blank pages. -
Page 67: Uninstalling Picturemate Software
Note: Do not turn off or disconnect PictureMate while you are uninstalling the software. Tip: Periodically, it’s a good idea to check Epson’s support website for free updates to your PictureMate printer software. Visit Epson’s driver download site ( U.S. downloads or Canadian downloads ). -
Page 68: Where To Get Help
You can download drivers and documentation, get FAQs and troubleshooting advice, or e-mail Epson with your questions. Speak to a Support Representative Before you call Epson for support, please have the following information ready: ● Product name (PictureMate Charm or PM 225) ●... - Page 69 You can purchase genuine PictureMate Print Packs and accessories at Epson Supplies Central at www.epson.com/ink3 (U.S. sales) or www.epson.ca (Canadian sales). You can also purchase supplies from an Epson authorized reseller. To find the nearest reseller, call 800-GO-EPSON (800-463-7766). , Pacific Time, to 6...
-
Page 70: Set Up Network Printing
, click Control Panel, and click Printer under Hardware and Sound. Windows XP: Click Start, click Control Panel, and click Printers and Other Hardware or Printers and Faxes. Windows 2000: Click Start, click Settings, and click Printers. Right-click your Epson PictureMate, then click Sharing. - Page 71 Printer icon. The Add Printer Wizard opens. Click Next. Select Network printer and click Next. On the next screen, click Next. Double-click the icon of the computer that is directly connected to PictureMate, then click your Epson PictureMate model. Click Next and follow the on-screen instructions.
- Page 72 Note: Depending on the operating system and the configuration of the computer to which PictureMate is connected, the Add Printer Wizard may prompt you to install the printer driver from the PictureMate software CD. In this case, click the Have Disk button and follow the on-screen instructions.
- Page 73 Click the checkbox next to Printer Sharing, then close System Preferences. Note: To share your printer with Windows, click the Windows File Sharing checkbox. See your Mac Help and Windows documentation for more information. Accessing a Shared Printer (Mac OS X 10.3 or 10.4) Follow the steps in this section to print to PictureMate from other Macintosh computers on your network.
-
Page 74: Specifications
Specifications System Requirements To use PictureMate with your computer, your system must meet the requirements below. Note: Visit Epson’s support website (U.S. or Canada) for more compatibility information and the latest drivers for PictureMate. Windows System Requirements ● Microsoft ®... -
Page 75: Technical Specifications
Paper Note: Since the quality of any particular brand or type of paper may be changed by the manufacturer at any time, Epson cannot guarantee the quality of any non-Epson brand or type of paper. Size 4 × 6 inches... - Page 76 Mechanical Paper path Sheet feeder, top entry Sheet feeder capacity 20 sheets Dimensions Storage: Width: 9.1 inches (231 mm) Depth: 6.7 inches (169 mm) Height: 5.9 inches (149 mm) Printing: Width: 9.1 inches (231 mm) Depth: 13.5 inches (344 mm) Height: 10.4 inches (265 mm) Weight Approx.
- Page 77 Environmental Temperature Operation: 50 to 95 °F (10 to 35 °C) Storage: –4 to 140 °F (–20 to 40 °C) 1 month at 104 °F (40 °C) Humidity Operation: 20 to 80% RH (without condensation) Memory Card Slots Card type Voltage requirements CompactFlash 3.3 V...
- Page 78 Interface 2.0 Hi-Speed (for PictBridge compliant devices/Mass storage class for external storage) Recommended cable length: less than 6.5 feet (2 meters) Bluetooth Ver. 2.0 + EDR compliant (optional) Standards and Approvals Safety UL 60950-1 CAN/CSA-C22.2 No. 60950-1 FCC part 15 Subpart B class B CAN/CSA-CIE/IEC CISPR22 Class B...
-
Page 79: Notices
Notices Important Safety Instructions Before using your PictureMate, read the following safety instructions to make sure you use it safely and effectively. ● Be sure to follow all warnings and instructions marked on the printer. ● If you use the printer in places where the use of electronic devices is limited, such as in airplanes or hospitals, follow all instructions in those places. - Page 80 ● Avoid places subject to dust, shock, or vibration. ● Leave enough room around the printer to allow for sufficient ventilation. ● Place the AC adapter near a wall outlet where the plug can be easily unplugged. ● Do not place or store the printer, the AC adapter, or the optional battery outdoors.
- Page 81 WARNING: The cords included with this product contain chemicals, including lead, known to the State of California to cause birth defects or other reproductive harm. Wash hands after handling. (This notice is provided in accordance with Proposition 65 in Cal. Health & Safety Code §25249.5 and following.) Photo Cartridge Safety Instructions ●...
- Page 82 If a battery is swallowed, seek medical treatment immediately. ● Use only an Epson Li-ion battery model D121A for this printer according to the directions in the user documentation. Replacing the battery with an incorrect model may cause an explosion.
- Page 83 Shipments to other locations will be made freight collect. You are responsible for securely packaging the defective unit and returning it to Epson within five (5) working days of receipt of the replacement. Epson requires a debit or a credit card number to secure the cost of the replacement printer in the event that you fail to return the defective one.
- Page 84 Epson, e.g., dealer or user-added boards or components. Epson is not responsible for warranty service should the Epson label or logo or the rating label or serial number be removed or should the product fail to be properly...
- Page 85 You can continue printing with paper from another PictureMate Print Pack or Epson Premium Photo Paper Glossy in the 4 × 6 borderless size which is available from many resellers or Epsonstore.com. There are other photo papers available but most are not formulated to be fully compatible with the PictureMate Photo Cartridge.
- Page 86 Declaration of Conformity According to 47CFR, Part 2 and 15 for Class B Personal Computers and Peripherals; and/or CPU Boards and Power Supplies used with Class B Personal Computers: Epson America, Inc. Located at: MS: 3-13 3840 Kilroy Airport Way...
- Page 87 Seiko Epson Corporation. The information contained herein is designed only for use with this Epson product. Epson is not responsible for any use of this information as applied to other printers.
- Page 88 (excluding the U.S.) failure to strictly comply with Seiko Epson Corporation’s operating and maintenance instructions. Seiko Epson Corporation shall not be liable for any damages or problems arising from the use of any options or any consumable products other than those designated as Original Epson Products or Epson Approved Products by Seiko Epson Corporation.
-
Page 89: Index
Index Accessories, 5, 24, 45, 49, 69 Adapter Bluetooth, 24 to 25 memory card, 8 Aligning print head, 58, 59, 60 to 61 Auto Cleaning, 57 to 58, 64 Auto Correction, 33, 36 Auto shutoff, 12, 51, 62 Banding, fixing, 57 to 58, 64 Basic printing Macintosh, 37, 39, 41 Windows, 31, 37... - Page 90 Button location, 6 Menu, 17 On, 27, 29, 49, 62, 79 Cable power, 49, 50 USB, 23, 26, 28, 30 Camera printing from, 23 printing text from, 22 selected photos (DPOF), 15 Cancelling printing Macintosh, 39, 41 Windows, 33, 37 Care of photos, 16 Care of PictureMate, 56, 59 Case, optional, 49...
- Page 91 File formats, 42 Fixing photos, 33, 36 Gaps in image, 57 to 58, 65 Grainy prints, 64 Half-page photos, 18 Help control panel, 17 Epson, 68 Icons on screen, 51 Image formats, 42 quality problems, 64 Incorrect colors, 65 margins, 21, 66...
- Page 92 Landscape orientation, 38, 40 Layout Macintosh, 38, 39 problems, 66 settings, 18 Windows, 35 Lever, cartridge, 46, 47 License agreement, 27 Lights memory card, 8 to 9, 42 On, 62, 79 Lines in photos, fixing, 57 to 58, 64 Loading paper, 9, 66 Macintosh basic printing, 37, 39, 41 Bluetooth printing, 25...
- Page 93 On light, 62, 79 Orientation setting, Macintosh, 40 Output tray, 49 Page Setup window, 39 Paper buying, 5, 45 feeding problems, 66 jam, 66 loading, 9, 66 orientation, 40 output tray, 49 size, 40 storing, 16 support, 9, 49 PDA, printing from, 24 to 25 Photo choosing, 11, 15 copying to/from computer, 42...
- Page 94 Photo viewer screen adjusting angle, 11 blank, 12, 51, 62 display options, 11 icons, 51 instructions on, 17 problems, 62 safety instructions, 82 using, 11, 59 PictBridge camera, 23 Picture and Fax Viewer, Windows, 31 to 37 PIM (PRINT Image Matching), 20 Portrait orientation, 38, 40 Power battery, 50 to 51, 82 to 83...
- Page 95 Printing all photos, 13 black-and-white, 21, 33, 36, 38, 41 Bluetooth, 24 to 25 cancelling, 37, 39, 41 from camera, 23 from computer, 31, 39, 41 from external device, 23 individual photos, 13 Macintosh, 37, 39, 41 photos by date, 14 to 15 preview, 12 to 15, 36 problems, 62 to 64 Windows, 31, 37...
- Page 96 Resolution, 42 Safety instructions, 79 to 83 Saving power, 12, 51 Screen adjusting angle, 11 blank, 12, 51, 62 display options, 11 icons, 51 instructions on, 17 problems, 62 safety instructions, 82 using, 11, 59 Sepia, 21, 33, 36, 38, 41 Service, 68 Settings, default, 55 Several photos, selecting, 13...
- Page 97 Windows basic printing, 31, 37 Bluetooth printing, 25 cancelling printing, 37 installing software for, 27 to 29 network printing, 70 system requirements, 74 uninstalling software for, 67 Wireless printing, 24 to 25...