Table of Contents
Advertisement
Quick Links
Panasonic Corporation
Web Site: http://www.panasonic.com
© Panasonic Corporation 2018
A copy of the Installation Instructions is attached.
Thank you for purchasing this Panasonic product.
Before using this appliance, please read these instructions and Safety Precautions (Pages EN1 - EN2)
carefully and keep this manual for future reference.
隨附安裝說明
衷心感謝您購買 Panasonic 產品。
使用產品前請仔細閱讀並妥善保管本使用說明書。
使用前必須仔細閱讀「安全注意事項」(第 HK1 - HK2 頁)。
P9901-13T00
S1218-0
Printed in China
Operating Instructions
Dishwasher (Household Use)
使用說明書
洗碗碟機
(家用型)
NP-TH1HK
Model No.
P990 1 - 13T00
Advertisement
Table of Contents

Related Manuals for Panasonic NP-TH1HK


Summary of Contents for Panasonic NP-TH1HK
- Page 1 Model No. A copy of the Installation Instructions is attached. Thank you for purchasing this Panasonic product. Before using this appliance, please read these instructions and Safety Precautions (Pages EN1 - EN2) carefully and keep this manual for future reference.
-
Page 2: Table Of Contents
Table of Contents Table of Contents Safety Precautions ………………… EN1 Safety Precautions ………………… EN1 Quick Start Guide ……………………… EN6 Quick Start Guide ……………………… EN6 Maintenance …………………………… EN13 Maintenance …………………………… EN13 Notes on Use ………………………… EN2 Notes on Use ………………………… EN2 Instructions for Use ……………………... -
Page 3: Safety Precautions
Safety Precautions Safety Precautions Notes on Use Notes on Use must observe must observe To prevent personal injuries and property damages, be sure to observe the following instructions. To prevent personal injuries and property damages, be sure to observe the following instructions. WARNING WARNING ■... -
Page 4: Parts Identification/Accessories
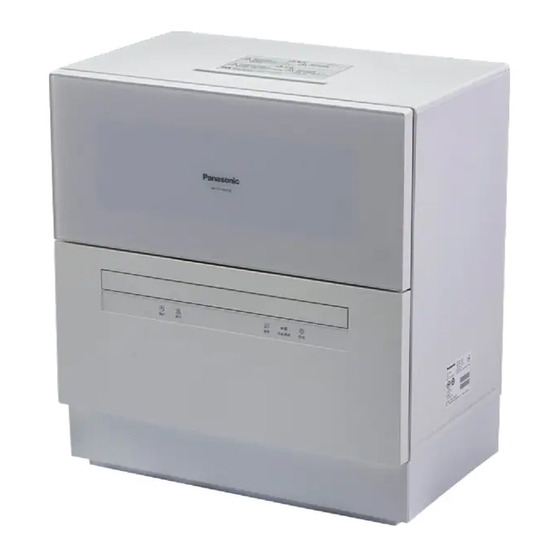
Parts Identification/Accessories Parts Identification/Accessories Control panel Control panel Display Display Door Door Power button Power button Open Door Open Door Nozzle (back) Nozzle (back) button button ● After the power is turned on, by default it is automatically set to the program of ●... -
Page 5: Confirmation And Preparation Before Use
Confirmation and Preparation before Use Confirmation and Preparation before Use Quick Start Guide Quick Start Guide Preparation Preparation • Confirm the installation (pages EN19 - EN24) and the placement of the filter • Confirm the installation (pages EN19 - EN24) and the placement of the filters CAUTION CAUTION Avoid tempered glasses... -
Page 6: Instructions For Use
Instructions for Use Instructions for Use Loading the Dishwasher Loading the Dishwasher ● Items should be loaded with the soiled surfaces facing the nozzles (see ● Items should be loaded with the soiled surfaces facing the nozzles (see ) for effective ) for effective ■... -
Page 7: Adding Detergent And Washing
Instructions for Use Instructions for Use Adding Detergent and Washing Adding Detergent and Washing Display Display Water Softening System Water Softening System For Hong Kong, set the option code "0". For Hong Kong, set the option code "0". If using the dishwasher in an area of high water hardness level, whitish staining may leave on the utensils and If using the dishwasher in an area of high water hardness level, whitish staining may leave on the utensils and baskets.The dishwasher can be programed according to the level of water hardness. -
Page 8: Drying Delay Start Changing The Settings
Instructions on Use Instructions on Use Drying · Delay Start · Changing the settings Drying · Delay Start · Changing the settings ■ Changing the settings ■ Changing the settings Press Press and select drying and select drying Various settings can be changed according to your preference or actual situation. Various settings can be changed according to your preference or actual situation. -
Page 9: Maintenance
Maintenance Maintenance ● Do not fill in water by hand when performing maintenance (to avoid water leakage, damage or error alarm). ● Do not fill in water by hand when performing maintenance (to avoid water leakage, damage or error alarm). ●... -
Page 10: Frequently Asked Questions
Frequently Asked Questions Frequently Asked Questions Error Indication Error Indication ■ If the following situations occur while using the dishwasher, please check and handle as follows. ■ If the following situations occur while using the dishwasher, please check and handle as follows. ■... -
Page 11: Freezing Prevention Not In Use For A Long Time
(Kitchen detergent may generate excessive foam. Supplying and draining drained repeatedly drained repeatedly Panasonic staff handling the draining should note the following: Panasonic staff handling the draining should note the following: water repeatedly is necessary to eliminate the foam. The operation time will water repeatedly is necessary to eliminate the foam. -
Page 12: Installation Instructions
Install the water supply hose connector ● Panasonic Corporation shall not be held responsible for any accidents, damage or injuries that may occur as ● Panasonic Corporation shall not be held responsible for any accidents, damage or injuries that may occur as a result of failure to follow the Installation Instructions in the setup, trial operation or inspection of this appliance. - Page 13 Installation Instructions Installation Instructions (cont.) (cont.) ● Another installation ● Another installation ❷ connect to the supply valve ❷ connect to the supply valve (under the kitchen counter connection) (under the kitchen counter connection) direct installation direct installation three - way connector installation three - way connector installation The following optional accessories are required, which can be purchased at the dealer.
- Page 14 Installation Instructions Installation Instructions (cont.) (cont.) Secure the drain hose with a sucker Secure the drain hose with a sucker Checkup Checkup ● Please check the following before use. ● Please check the following before use. Drain hose Drain hose →...
-
Page 15: Specifications
Specifications Specifications MEMO MEMO ■ Specifications ■ Specifications Model No. Model No. NP-TH1HK NP-TH1HK Item Item Power supply Power supply 220 V 220 V 50 Hz 50 Hz Power consumption Power consumption 1170 W 1170 W Dimension (Width × Depth × Height) Dimension (Width ×... - Page 16 安全注意事項 安全注意事項 使用要求 使用要求 必須遵守 必須遵守 為防止人身傷害及財產損失,必須遵守以下說明。 為防止人身傷害及財產損失,必須遵守以下說明。 ■ 為防止火災、 ■ 為防止火災、 ■ 必須正確使用洗碗碟機 ■ 必須正確使用洗碗碟機 警告 警告 ■ 按照錯誤操作而產生的危害及損害程度分別說明如下。 ■ 按照錯誤操作而產生的危害及損害程度分別說明如下。 燙傷、觸電等… 燙傷、觸電等… • 請勿靠近電視機、收音機等電器產品 • 請勿靠近電視機、收音機等電器產品 警告 警告 (可能導致影像錯亂或出現雜音) (可能導致影像錯亂或出現雜音) 表示如不避免,則可能造成死亡或嚴重人身傷害的某種潛在危害情況 表示如不避免,則可能造成死亡或嚴重人身傷害的某種潛在危害情況 擺放刀具及其他尖銳餐具時, 擺放刀具及其他尖銳餐具時, • 請勿用手注水洗滌 •...
- Page 17 部件名稱 / 附件 部件名稱 / 附件 控制板 控制板 顯示屏 顯示屏 機門 機門 開門掣 開門掣 電源開關鍵 電源開關鍵 噴嘴(背面) 噴嘴(背面) 開啟電源後,自動設定為上一次的操作程序(若上一次為「Dry Only(只乾碗)」程序則除外)。 開啟電源後,自動設定為上一次的操作程序(若上一次為「Dry Only(只乾碗)」程序則除外)。 ● ● 噴嘴(上方) 噴嘴(上方) 程序鍵 程序鍵 選擇清洗程序,每按一次,可以切換清洗模式,顯示屏的指示燈會循環亮燈顯示相關模式 選擇清洗程序,每按一次,可以切換清洗模式,顯示屏的指示燈會循環亮燈顯示相關模式 ● ● (第 HK10 頁)。 (第 HK10 頁)。 噴嘴(底部) 噴嘴(底部) 乾碗鍵...
- Page 18 使用前的確認與準備 使用前的確認與準備 快速使用指南 快速使用指南 準備 準備 • 確認是否正確安裝(第 HK19 - HK24 頁),確認過濾網的安放狀況(第 HK13 頁) • 確認是否正確安裝(第 HK19 - HK24 頁),確認過濾網的安放狀況(第 HK13 頁) 禁止洗滌強化玻璃製品 注意 注意 禁止洗滌強化玻璃製品 • 確認餐具是否均適合由洗碗碟機清洗(第 HK5 頁) • 確認餐具是否均適合由洗碗碟機清洗(第 HK5 頁) (可能因粉碎並飛濺而導致受傷) (可能因粉碎並飛濺而導致受傷) 擺放餐具 擺放餐具 (第 HK6 - HK8 頁) (第...
- Page 19 使用方法 使用方法 擺放餐具 擺放餐具 ● 擺放餐具時,請將餐具污漬面沿著 方向朝向各噴嘴,以便噴到水,達到良好洗潔效果。 ● 擺放餐具時,請將餐具污漬面沿著 箭咀方向朝向各噴嘴,以便噴到水,達到良好洗潔效果。 ■ 調校碗籃 ■ 調校碗籃 洗碗碟機上下層碗籃的支架均可調校(共有 4 處可調校部分),以方便擺放較大、較高的餐具。 洗碗碟機上下層碗籃的支架均可調校(共有 4 處可調校部分),以方便擺放較大、較高的餐具。 ■ 碗籃擺放餐具分區 ■ 碗籃擺放餐具分區 茶杯 茶杯 上層碗籃 上層碗籃 上層碗籃 上層碗籃 可調校部分(❶) 可調校部分(❶) 當下層碗籃擺放較長的餐具例如筷子而碰到上層碗籃時,可將上層碗籃的樹脂架調高一層。 當下層碗籃擺放較長的餐具例如筷子而碰到上層碗籃時,可將上層碗籃的樹脂架調高一層。 卡口架到上面 卡口架到上面 飯碗 飯碗 ❶ ❶ 玻璃杯 玻璃杯 湯羹...
- Page 20 使用方法 使用方法 添加洗滌劑·清洗 添加洗滌劑·清洗 顯示屏 顯示屏 軟水系統 軟水系統 香港地區使用時請設置代碼為0。 香港地區使用時請設置代碼為0。 如果所處地區的水硬度較高,餐具及碗籃容易留下白色水垢。洗碗碟機可根據水質硬度進行設定,加入專用鹽後, 如果所處地區的水硬度較高,餐具及碗籃容易留下白色水垢。洗碗碟機可根據水質硬度進行設定,加入專用鹽後, 自動將水的硬度降低軟化,以達到更佳的清潔效果。 自動將水的硬度降低軟化,以達到更佳的清潔效果。 選擇功能 選擇功能 進行以下設定,否則可能會多消耗專用鹽、自來水或令清潔效果欠佳。 進行以下設定,否則可能會多消耗專用鹽、自來水或令清潔效果欠佳。 ● ● 按下 按下 ,開啟電源 ,開啟電源 ■ 地區設定 ■ 地區設定 (在關閉電源狀態下設定) (在關閉電源狀態下設定) 功能代碼 功能代碼 選項代碼(水質硬度) 選項代碼(水質硬度) 顯示屏指示燈 顯示屏指示燈 確定關閉電源 確定關閉電源 • • 顯示屏所有程序的指示燈閃爍一下後,最後只顯示上一次操作的指示燈(其他指示燈會熄滅)。...
- Page 21 使用方法 使用方法 乾碗·延遲啟動·更改設定 乾碗·延遲啟動·更改設定 ■ 更改設定 ■ 更改設定 按下 按下 , 選擇乾碗 , 選擇乾碗 按照喜好或實際情況,可更改各種設定。 按照喜好或實際情況,可更改各種設定。 • 想調整上一個程序中所包含的乾碗功能時,可按乾碗鍵來進行,每一次可按照下述圖表進行切換乾碗模式, • 想調整上一個程序中所包含的乾碗功能時,可按乾碗鍵來進行,每一次可按照下述圖表進行切換乾碗模式, 顯示屏的指示燈亦隨之如下循環亮燈。 顯示屏的指示燈亦隨之如下循環亮燈。 增強清潔設定 增強清洗設定 若想加強清潔效果,延長清洗時間,請如下更改設定。 若想加強清洗效果,延長清洗時間,請如下更改設定。 Basic(標準)、 Basic(標準)、 Speedy(超快速)、 Speedy(超快速)、 Dry Only(只乾碗) Dry Only(只乾碗) Eco(節能)程序時 Eco(節能)程序時 Intense(高效清洗)程序時 Intense(高效清洗)程序時 Care(清潔機身)程序時 Care(清潔機身)程序時 程序時...
- Page 22 保養 保養 進行保養時,請勿用手注入水。(以免造成漏水、破損或異常警報) 進行保養時,請勿用手注入水。(以免造成漏水、破損或異常警報) ● ● 操作結束 30 分鐘後,方可取出餐具、清洗過濾網、進行保養(以免燙傷) 操作結束 30 分鐘後,方可取出餐具、清洗過濾網、進行保養(以免燙傷) (若因手動注水導致需要修理等售後服務時,即使在保修期間也不屬於免費保修範圍。) (若因手動注水導致需要修理等售後服務時,即使在保修期間也不屬於免費保修範圍。) ● ● 必須關閉電源才可進行保養。 必須關閉電源才可進行保養。 請勿使用漂白劑、洗滌劑、稀釋劑、揮發油、清潔劑、蠟或殺蟲劑(可能導致損壞、變色) 請勿使用漂白劑、洗滌劑、稀釋劑、揮發油、清潔劑、蠟或殺蟲劑(可能導致損壞、變色) ● ● ● ● 使用化學抹布時,請遵守其說明書的要求 使用化學抹布時,請遵守其說明書的要求 ● ● 清洗過濾網 清洗過濾網 清潔機門、排氣口、密封圈、機身內部 清潔機門、排氣口、密封圈、機身內部 請先取出碗籃,然後取出過濾網 請先取出碗籃,然後取出過濾網 用擰乾的軟布擦拭機門、排氣口、密封圈等各部件 用擰乾的軟布擦拭機門、排氣口、密封圈等各部件 如圖示,從機內取出過濾網,再拆開過濾網,用水沖洗乾淨 如圖示,從機內取出過濾網,再拆開過濾網,用水沖洗乾淨 ● 洗碗碟機邊緣密封圈、排氣口等位置容易聚積污漬,請仔細清潔保養。 ●...
-
Page 23: 常見問題
常見問題 常見問題 異常提示 異常提示 ■ 使用洗碗碟機時若出現以下情況,請按照下表確認並處理。 ■ 使用洗碗碟機時若出現以下情況,請按照下表確認並處理。 ■ 洗碗碟機顯示屏出現以下提示(同時主機發出警報聲)時,請按照下表確認情況並處理,如無法處理, ■ 洗碗碟機顯示屏出現以下提示(同時主機發出警報聲)時,請按照下表確認情況並處理,如無法處理, 請聯絡服務中心。 請聯絡服務中心。 (長按程序鍵 5 秒以上,顯示屏會重新顯示上一次發生的異常情況) (長按 Program(程序)鍵 5 秒以上,顯示屏會重新顯示上一次發生的異常情況) 現象 現象 確認情況及處理方法 確認情況及處理方法 是否未添加洗滌劑,或是否使用了非洗碗碟機專用洗滌劑? 是否未添加洗滌劑,或是否使用了非洗碗碟機專用洗滌劑? ● ● → 請添加適量洗碗碟機專用洗滌劑(第 HK9 頁) → 請添加適量洗碗碟機專用洗滌劑(第 HK9 頁) 餐具是否碰到噴嘴,導致噴嘴無法旋轉而影響清潔效果? 餐具是否碰到噴嘴,導致噴嘴無法旋轉而影響清潔效果? ● ●... -
Page 24: 預防凍結·長時間不使用
● 萬一凍結後對其置之不理,可能造成進水閥及管道破損。如需進行排水防凍處理,請聯絡服務中心。 萬一凍結後對其置之不理,可能造成進水閥及管道破損。如需進行排水防凍處理,請聯絡服務中心。 是否使用了洗潔精或餐具上附著了洗潔精等非洗碗碟機專用洗滌劑? 是否使用了洗潔精或餐具上附著了洗潔精等非洗碗碟機專用洗滌劑? ● ● → 必須使用洗碗碟機專用洗滌劑。 → 必須使用洗碗碟機專用洗滌劑。 反覆不停供水、 反覆不停供水、 (洗潔精容易產生大量泡沫,需要增加供水及排水次數以消除泡沫,運作時間會延長, (洗潔精容易產生大量泡沫,需要增加供水及排水次數以消除泡沫,運作時間會延長, Panasonic 排水處理工作人員請注意: Panasonic 排水處理工作人員請注意: 排水 排水 過程中切勿打開機門,以免洩漏。) 過程中切勿打開機門,以免洩漏。) ■ 若已經凍結,請進行以下操作 ■ 若已經凍結,請進行以下操作 機門周圍結露 機門周圍結露 室內與機內有溫差時,可能結露,並非異常。 室內與機內有溫差時,可能結露,並非異常。 ❶ 選擇「Speedy(超快速)」程序運作 1 - 2 次進行解凍。(若凍結較嚴重,可重複運作多次) ❶ 選擇「Speedy(超快速)」程序運作 1 - 2 次進行解凍。(若凍結較嚴重,可重複運作多次)... -
Page 25: 安裝方法
安裝方法 安裝方法 安裝進水管接頭 安裝進水管接頭 如果沒有按照本安裝方法進行裝置、試機、檢查而出現事故、損害,則本公司概不負任何責任。 如果沒有按照本安裝方法進行裝置、試機、檢查而出現事故、損害,則本公司概不負任何責任。 ● ● 安裝完成後,必須試機,檢查無問題後才可使用。 安裝完成後,必須試機,檢查無問題後才可使用。 ● ● ■ 請增加用於連接洗碗碟機的新水龍頭。必須將進水管接頭配件安裝於橫向水龍頭的端口。 ■ 請增加用於連接洗碗碟機的新水龍頭。必須將進水管接頭配件安裝於橫向水龍頭的端口。 請勿使用舊的進水管、排水管,以免漏水。 請勿使用舊的進水管、排水管,以免漏水。 ● ● 請按照進水管接頭安裝說明書安裝進水管接頭到水龍頭上。 請按照進水管接頭安裝說明書安裝進水管接頭到水龍頭上。 ● ● 洗碗碟機在出廠前會進行注水測試,若從包裝取出時發現殘留水滴,並非異常。 洗碗碟機在出廠前會進行注水測試,若從包裝取出時發現殘留水滴,並非異常。 ● ● 請諮詢當地供水部門或水管施工專業人員,瞭解自來水水壓、流量等情況以便安裝。 請諮詢當地供水部門或水管施工專業人員,瞭解自來水水壓、流量等情況以便安裝。 ● ● ·本產品適用的進水壓力為 0.05 MPa - 1 MPa (當水壓較低時,操作時間可能會延長) ·本產品適用的進水壓力為 0.05 MPa - 1 MPa (當水壓較低時,操作時間可能會延長) 増加水龍頭+進水管接頭... - Page 26 安裝方法 安裝方法 (續) (續) ❷ 連接到進水閥 ❷ 連接到進水閥 ●其他安裝方法(連接在廚柜下面) ●其他安裝方法(連接在廚柜下面) 需要以下另購配件。請向經銷商購買。 需要以下另購配件。請向經銷商購買。 直接安裝 直接安裝 連接管(三通)安裝 連接管(三通)安裝 另購配件 另購配件 進水管 進水管 保護套(螺栓組合)(1 個) 保護套(螺栓組合)(1 個) 進水管 進水管 進水管(1 根) 進水管(1 根) 分拆方法 分拆方法 ● ● 連接管(三通) 連接管(三通) 墊片(3 個) 墊片(3 個) (1 個)...
- Page 27 異常提示:洗碗碟機是否會發出報警聲,顯示屏是否會顯示異常提示(第 HK16 頁) 漏水:進水管、排水管連接處以及其他連接部位應無漏水 漏水:進水管、排水管連接處以及其他連接部位應無漏水 結束時 結束時 發出 6 聲「嗶」响,電源自動關閉 發出 6 聲「嗶」响,電源自動關閉 排水狀況:打開機門,確認機內的水均已排出 排水狀況:打開機門,確認機內的水均已排出 停水狀況:在電源關閉的情況下,確認排水口無水排出 停水狀況:在電源關閉的情況下,確認排水口無水排出 提示 提示 ● 試機操作結束後,請保持進水閥在打開的狀態。 ● 試機操作結束後,請保持進水閥在打開的狀態。 ● 若長時間不使用,請關閉自來水管總掣,以防發生漏水。 ● 若長時間不使用,請關閉自來水管總掣,以防發生漏水。 ● 若可能發生凍結,請進行排水處理。(可能造成進水閥破損而導致漏水) ● 若可能發生凍結,請進行排水處理。(可能造成進水閥破損而導致漏水) → 若出現凍結,請聯絡服務中心 → 若出現凍結,請聯絡 Panasonic 服務中心 HK23 HK23 HK24 HK24...
- Page 28 規格 規格 備忘錄 備忘錄 ■ 規格 ■ 規格 型號 型號 NP-TH1HK NP-TH1HK 項目 項目 電源 電源 220 V ~ 50 Hz 220 V ~ 50 Hz 額定功率 額定功率 1170 W 1170 W 體積(長 × 寬 × 高) 體積(長 × 寬 × 高)...