Table of Contents
Advertisement
Quick Links
Advertisement
Table of Contents

Related Manuals for Pioneer MVH-A219BT


Summary of Contents for Pioneer MVH-A219BT
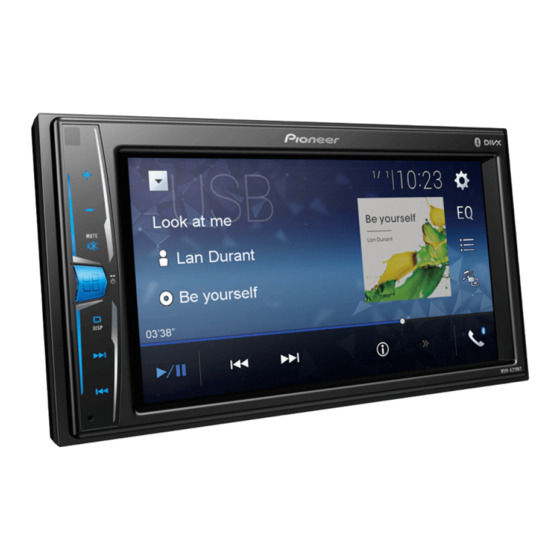
- Page 1 MVH-A219BT MONITOR RDS AV RECEIVER Operation Manual...
-
Page 2: Table Of Contents
Contents ■ Other functions ....36 Thank you for buying this Pioneer ■ product. Connection ...... 38 Please read through these instructions ■ Installation....... 44 so you will know how to operate your ■ model properly. After you have finished Appendix ...... -
Page 3: Precaution
• If you notice smoke, a strange noise or odour from this product, or any other abnormal signs on the LCD screen, turn off the power immediately and consult your dealer or the nearest authorised Pioneer Service Station. Using this product in this condition may result in permanent damage to the system. - Page 4 • Do not install this product where it may (i) obstruct the driver’s vision, (ii) impair the performance of any of the vehicle’s operating systems or safety features, including air bags or hazard lamp buttons or (iii) impair the driver’s ability to safely operate the vehicle.
- Page 5 • To prevent data loss and damage to the storage device, never remove it from this product while data is being transferred. • Pioneer cannot guarantee compatibility with all USB mass storage devices and assumes no responsibility for any loss of data on media players, smartphone, or other devices while using this product.
-
Page 6: Parts And Controls
• To protect the LCD screen from damage, be sure to touch the touch panel keys only with your finger and do so gently. Notes on internal memory • The information will be erased by disconnecting the yellow lead from the battery (or removing the battery itself ). - Page 7 MUTE Press to display the top menu screen. Press and hold to power off. To power back on, press any button. NOTE icon appears when the power is on. DISP Press to turn the display on or off. Performs manual seek tuning, fast forwards, reverse and track search controls. RESET Press to reset the microprocessor (page 8).
-
Page 8: Basic Operation
Press to pause or resume playback. For audio: Press and hold to perform fast reverse or fast forwards. For video: Press to perform fast reverse or fast forwards. Press to return to the previous track (chapter) or go to the next track (chapter). Press to answer or end a call. - Page 9 How to replace the battery Insert the CR2025 (3 V) battery with the plus (+) and minus (-) poles orientated properly. WARNING • Do not ingest the battery, Chemical Burn Hazard. (The remote control supplied with) This product contains a coin/button cell battery. If the coin/ button cell battery is swallowed, it can cause severe internal burns in just 2 hours and can lead to death.
- Page 10 Starting up the unit Start the engine to boot up the system. The top menu screen appears. NOTE From the second time on, the screen shown will differ depending on the previous conditions. Using the touch panel You can operate this product by touching the keys on the screen directly with your fingers.
- Page 11 Operating list screens Starts playback the item. Appears when all characters are not displayed on the display area. If you touch the key, the rests are scrolled for display. NOTE This function is available only when you stop your vehicle in a safe place and apply the handbrake.
-
Page 12: Bluetooth
Hands-free phoning (page 14) AV source off If you select , you can turn off almost all functions. The unit turns on by operating following functions: • An incoming call is received (only for hands-free phoning via Bluetooth). • A rear view camera image is input when the vehicle is in reverse. •... - Page 13 details on Bluetooth device operations, refer to the operating instructions supplied with the Bluetooth device. Bluetooth settings Press Touch then CAUTION Never turn this product off and disconnect the device while the Bluetooth setting operation is being processed. Menu Item Description [Connection] Connect, disconnect, or delete registered Bluetooth device...
- Page 14 Switching the connected Bluetooth device You can switch among the connected Bluetooth devices using the switch devices key in the Bluetooth menu. • You can register up to three Bluetooth devices on this product (page 12). • The Bluetooth audio player can be switched to other Bluetooth devices on the Bluetooth audio playback screen.
- Page 15 Direct phone number input Enter the number keys to enter the phone number then touch to make a call. ▶To end the call Touch Using the preset dial lists ▶Registering a phone number You can easily store up to six phone numbers per device as presets. Press , then touch Touch...
- Page 16 Menu Item Description [Auto Answer] Select [On] to answer an incoming call automatically. [On] [Off] [Ring Tone] Select [On] if the ring tone does not come out from the car [On] [Off] speakers. [Invert Name] Select [Yes] to change the order of the first and last names in the phone book.
- Page 17 • With some mobile phones, even after you press the accept button on the mobile phone when a call comes in, hands-free phoning may not be performed. • The registered name will appear if the phone number is already registered in the phone book.
-
Page 18: Av Source
Press Touch [Bluetooth Audio]. The Bluetooth audio playback screen appears. Basic operation Description of Bluetooth audio playback screen Track number indicator Sets a repeat play range. Plays files in random order. Selects a file or folder from the list to playback. NOTE This function is available only when the AVRCP version of the Bluetooth device is 1.4 or higher. -
Page 19: Smartphone Connection For Av Source
Selecting a source Source on the AV source selection screen Press Touch the source icon. When you select , the AV source is turned off. Source on the source list Touch on the AV Source screen. Touch the source key. When you select [Source OFF], the AV source is turned off. -
Page 20: Radio
Connecting via Bluetooth The following sources are available when a smartphone is connected to the unit via Bluetooth. • Bluetooth audio Connect a smartphone with this product via Bluetooth (page 12). Press Touch compatible desired source. Radio Starting procedure Press Touch [Radio]. - Page 21 Manual tuning Seek tuning or non stop seek tuning Releasing the key in a few seconds skips to the nearest station from the current frequency. Keep holding the key for long seconds to perform, performs non stop seek tuning. Searches for a broadcast by PTY information (page 21). Searching by PTY information You can tune into a station using PTY (Programme Type Identification) information.
- Page 22 Radio settings Press Touch then The system setting screen appears. Touch [AV Source Settings]. Touch [Radio settings]. The menu items vary according to the source. Menu Item Description [Local] Local seek tuning allows you to only tune into [Off] radio stations with sufficiently strong signals. FM: [Level1] [Level2] [Level3] [Level4] NOTE AM: [Level1] [Level2]...
-
Page 23: Compressed Files
Menu Item Description [News Interrupt]* Interrupt the currently selected source with [On] [Off] news programmes. * This function is available only when you receive the FM band. Compressed files Plugging/unplugging a USB storage device You can play compressed audio, compressed video, or still image files stored in an external storage device. - Page 24 Basic operation You can set the screen size for the video and image files (page 37). Audio source Description of Audio source screen When you touch text information, all information is displayed by scrolling only when the handbrake is applied. Sets a repeat play range for all files/the current folder/the current file.
- Page 25 Video source CAUTION For safety reasons, video images cannot be viewed while your vehicle is in motion. To view video images, stop in a safe place and apply the handbrake. Description of Video source screen Touch anywhere on the screen, the touch panel keys appear. Performs frame-by-frame playback.
-
Page 26: Aux
Rotates the displayed picture 90° clockwise. Sets a repeat play range for all files/the current folder. Plays all files in the current repeat play range or does not play them in random order. Switches the following media file types. [Music]: Compressed audio files [Video]: Compressed video files [Photo]: Image files Selects a file from the list. -
Page 27: Settings
Basic operation Description of AUX screen TIPS • Touch anywhere on the screen, the touch panel keys appear. • You can set the screen size for the video image (page 37). Switches between the video input and audio input. Settings You can adjust various settings in the main menu. - Page 28 To set the rear view camera as the camera for Camera View mode, set [Back Camera Input] to [On] (page 28). CAUTION Pioneer recommends the use of a camera which outputs mirror reversed images, otherwise the screen image may appear reversed. • Immediately verify whether the display changes to the rear view camera image when the gearstick is moved to REVERSE (R) from another position.
- Page 29 • Depending on your vehicle, this function may not work properly. In this case, contact your dealer or an authorised PIONEER Service Station. • Please use a PIONEER wiring harness for each car model when [With Adapter] mode is engaged, otherwise select [No Adapter]. [Restore Settings]...
- Page 30 Menu Item Description [Touch panel calibration] Touch [Yes]. Touch four corners of the screen along the arrows. Press The adjustment results are saved. Press once again. Proceed to 16-point adjustment. Gently touch the centre of the [+] mark displayed on the screen.
- Page 31 Menu Item Description [Dimmer Duration] Adjust the time that the dimmer is turned on or off by dragging the cursors or touching You can use this function when [Dimmer Trigger] is set to [Time]. TIPS • Each touch of moves the cursor backwards or forwards in the 15 minute width.
-
Page 32: Theme Settings
* With some pictures, you cannot adjust [Hue] and [Colour]. NOTES • The adjustments of [Brightness], [Contrast], and [Dimmer] are stored separately when your vehicle's headlights are off (daytime) and on (nighttime). • [Brightness] and [Contrast] are switched automatically depending on the setting of [Dimmer Settings]. -
Page 33: Audio Settings
Audio settings The menu items vary according to the source. Some of the menu items become unavailable when the volume is set to mute. Menu Item Description [Graphic EQ] Select or customise the equaliser curve. [S.Bass] [Powerful] Select a curve that you want to use as the basis of customising [Todoroki] [Vocal] [Flat] then touch the frequency that you want to adjust. - Page 34 Menu Item Description [Speaker Level] Adjust the speaker output level of the listening position. [Front Left] [Front Right] Touch to select the listening position then [Rear Left] [Rear Right] select the output speaker. [Subwoofer] [Listening Touch to adjust the selected speaker output Position] level.
-
Page 35: Video Settings
The following speakers can be adjusted: Front, Rear, Subwoofer. NOTE [Subwoofer Settings] is available only when [Subwoofer] is [On]. Press Touch then Touch [Crossover] or [Subwoofer Settings]. Touch to switch the speaker. Touch to set the cutoff position. Touch to set the cutoff slope. The following items can also be set. -
Page 36: Thank You For Buying This Pioneer Other Functions
Favourite menu Registering your favourite menu items in shortcuts allows you to quickly jump to the registered menu screen by a simple touch on the [Favourites] screen. NOTE Up to 12 menu items can be registered in the favourite menu. Creating a shortcut Press then touch... - Page 37 • You can change the order of date display format: Day-month, Month-day. Changing the wide screen mode You can set the screen mode for AV screen and image files. Touch the screen display mode key. Screen display mode key Touch the desired mode. [Full] Displays 16:9 images on the full screen without changing the ratio.
-
Page 38: Connection
WARNING resulting in considerable danger. • It is extremely dangerous to allow cables Pioneer does not recommend that you to become wound around the steering install this product yourself. This product is column or gearstick. Be sure to install this designed for professional installation only. - Page 39 • Make sure that the cables and wires will *Please refer to connection for a not interfere with or become caught in connection method. any of the vehicle’s moving parts, • The black cable is earth. When installing especially the steering wheel, gearstick, this unit or power amp (sold separately), handbrake, sliding seat tracks, doors, or make sure to connect the earth wire first.
- Page 40 unused speaker leads, which if left Front output uncovered may cause a short circuit. Rear output • For connecting a power amp or other Subwoofer output devices to this product, refer to the manual for the product to be connected. Power cord •...
- Page 41 Connect to system control terminal of Front speaker the power amp (max. 300 mA 12 V DC). Rear speaker Light green White Used to detect the ON/OFF status of the White/black handbrake. This lead must be Grey connected to the power supply side of Grey/black the handbrake switch.
- Page 42 Smartphone (Android device) NOTE For details on how to connect an external device using a separately sold cable, refer to the manual for the cable. Connecting via the USB port With internal amp Important Front speaker and Rear speaker are output from the speaker leads when this connection is in use.
- Page 43 allows you to check what is behind you NOTES while driving. • For mounting the camera, follow the instructions for mounting the camera. WARNING Use a camera whose power lead is USE INPUT ONLY FOR REVERSE OR MIRROR connected to the ACC switch. IMAGE REAR VIEW CAMERA.
-
Page 44: Installation
AUX input • Could injure the driver or passengers if Mini-jack AV cable (sold separately) the vehicle stops suddenly. Yellow • May interfere with the driver’s operation Red, white of the vehicle, such as on the floor in front To Yellow of the driver’s seat, or close to the To Red, white steering wheel or gearstick. - Page 45 Installation notes Installation using the screw holes on the side of this • Do not install this product in places product subject to high temperatures or humidity, such as: – Places close to a heater, vent or air Fastening this product to the factory conditioner.
-
Page 46: Reading The Instructions, Keep This Appendix
→ The handbrake interlock is activated. lead where necessary inside the vehicle. – Park your vehicle in a safe place and For installation, contact your dealer or an apply the handbrake. authorised Pioneer Service Station for The icon is displayed, and operation is assistance. impossible. - Page 47 If the error persists, If the error message is still displayed after record the error message and contact your performing the above action, please dealer or your nearest Pioneer service contact your dealer or an authorised centre. Pioneer Service Station.
- Page 48 • Depending on the kind of the USB Handling guidelines and supplemental storage device you use, this product may information not recognise the storage device or files • This product is not compatible with the may not be played back properly. Multi Media Card (MMC).
- Page 49 used for the file name, the subtitle file ID3 tag: ID3 tag Ver. 1.0, 1.1, 2.2, 2.3, 2.4 may not be recognised. WMA compatibility • The character code for the subtitle file • This product is not compatible with the should comply with ISO-8859-1.
- Page 50 Bluetooth the file. SIG, Inc. and any use of such marks by PIONEER • This product is not compatible with CORPORATION is under license. Other packet write data transfer.
- Page 51 • The LCD screen should be used within Notice regarding video the temperature ranges shown in viewing Specifications on page 52. • Do not use the LCD screen at temperatures higher or lower than the Remember that use of this system for operating temperature range, because commercial or public viewing purposes the LCD screen may not operate normally...
- Page 52 Preout output level (max): 2.0 V visible. In that case, please consult your Equaliser (13-Band Graphic Equaliser): dealer or the nearest authorised Pioneer Frequency: Service Station. 50 Hz/80 Hz/125 Hz/200 Hz/315 Hz/ 500 Hz/800 Hz/1.25 kHz/2 kHz/3.15...
- Page 53 Slope: <USB video> -6 dB/oct, -12 dB/oct, -18 dB/oct, -24 DivX decoding format: dB/oct, -30 dB/oct, -36 dB/oct, OFF Home Theater (Except ultra and HD) : avi, Phase: Normal/Reverse divx Time alignment: MPEG video decoding format: 0 to 140 step (2.5 cm/step) MPEG1 (Low Level), MPEG2 (Main Level), Bass boost: MPEG4 (part2) (Main Level)
- Page 54 © 2018 PIONEER CORPORATION. All rights reserved. <OPM_MVHA219BTID_engb_A> ID...