
Related Manuals for Brother HAK 100


Summary of Contents for Brother HAK 100
- Page 1 User’s Guide HAK 100 Before using this machine, be sure to read the Product Safety Guide. We suggest that you read this User's Guide and keep it in a handy place for future reference.
- Page 2 Brother reserves the right to make changes without notice in the specifications and materials contained herein and shall not be responsible for any damages (including consequential) caused by reliance on the materials presented, including but not limited to typographical and other errors relating to the publications.
-
Page 3: Table Of Contents
Table of Contents General Information Definitions of Notes ..........................1 Product Introduction .........................1 Part Names and Functions Machine ............................2 2.1.1 Front ............................2 2.1.2 Rear............................3 Control Panel and LED Indicators ....................4 Prepare the Machine Unpack the Machine and Check the Components ................6 Remove the Packing Materials......................7 Initial Setup............................9 3.3.1... - Page 4 11.1.1 FAQs (Frequently Asked Questions)..................54 11.1.2 Customer Service........................54 11.2 Regulation ............................55 11.2.1 Chemical Substances (EU REACH)..................55 11.2.2 Open Source Licensing Remarks..................55 11.2.3 Copyright Infringement of Customer-Created Designs ............55 11.2.4 No Guarantee of Profit from Commercial Use of the HAK 100 ..........55...
-
Page 5: General Information
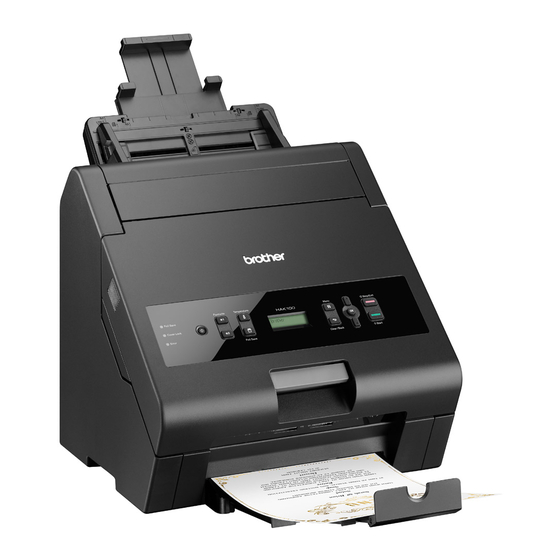
General Information Thank you for buying the Brother HAK 100! Reading the documentation will help you make the most of your machine. 1.1 Definitions of Notes We use the following symbols and conventions throughout this User's Guide: WARNING indicates a potentially hazardous situation which, if not avoided, could WARNING result in death or serious injuries. -
Page 6: Part Names And Functions
Part Names and Functions 2.1 Machine 2.1.1 Front 1 Feed Tray Load your media into the Feed Tray. 2 Extendable Feed Tray Flap Adjust the length to fit the media size. 3 Paper Guides Adjust the width to fit the media size. 4 Paper Feed Adjuster Compartment Cover Access the Paper Feed Adjuster. -
Page 7: Rear
Part Names and Functions 8 Paper Output Tray Collect your completed designs from this tray. 9 Extendable Paper Support Flap Adjust the length to fit the media size. 10 Paper Output Slot The machine ejects completed designs from this slot. 11 Foil Holder and Cartridge Assembly 12 Foil Holder 13 Foil Cartridge... -
Page 8: Control Panel And Led Indicators
Part Names and Functions 2.2 Control Panel and LED Indicators (Power On/Off) (Favourite1)/ (Favourite2) Register a Favourite, or recall a registered Favourite (for more information, see Favourites on page 36). (Temperature) Change the transfer temperature (for more information, see Adjust the Transfer Temperature on page 29). (Menu) Display the main menu. - Page 9 Part Names and Functions 12 LED Indicators Check the LED indicators for the machine status. 1 Foil Save Lit: Transferring the foil in Foil Save Mode. Off: Transferring the foil in Standard Mode. Note For more information on how to enable or disable Foil Save Mode, see Foil Save Mode on page 31. 2 Cover Lock Lit: The Front Cover is locked during the foil transfer or when the temperature inside the machine is high.
-
Page 10: Prepare The Machine
Prepare the Machine 3.1 Unpack the Machine and Check the Components The components included in the box: 1 Foil Printer 2 Feed Tray 3 Foil Holder 4 Product Safety Guide 5 Power Cable Note Before using this machine, be sure to read the Product Safety Guide. -
Page 11: Remove The Packing Materials
Prepare the Machine 3.2 Remove the Packing Materials Remove the machine from the box. Remove the tape attached to the Paper Output Tray. Remove the packing material from the Feed Tray Slot as illustrated. Open the Front Cover. - Page 12 Prepare the Machine Remove the packing tape 1 and the packing material 2 from the machine.
-
Page 13: Initial Setup
Prepare the Machine 3.3 Initial Setup 3.3.1 Connect the Machine and Install the Feed Tray and the Foil Cartridge Connect the included Power Cable to the Power Cable Connector 1 and then connect the Power Cable plug to a 220 V - 240 V electrical socket 2. Make sure the Power Cable plug is fully inserted into the electrical socket. - Page 14 Prepare the Machine Open the Front Cover. Lift the lower part of the Foil Holder 1, and then lift the entire Foil Holder upwards 2 to remove it from the machine. Load the Foil Cartridge in the Foil Holder. For more information see: ...
-
Page 15: Select The Lcd Language (Initial Power On Only)
Prepare the Machine 3.3.2 Select the LCD Language (Initial Power On Only) When you turn the machine on for the first time, you must select the LCD language. Press (Power On/Off) to turn the machine on. [Please Wait] briefly appears on the LCD. When [Select Language] appears on the LCD, press (OK). -
Page 16: Install The Foil Cartridge
Prepare the Machine 3.4 Install the Foil Cartridge To install the Foil Cartridge (either "Full-Width" or "Half-Width"), load it into the Foil Holder, and then insert the complete Foil Holder and Cartridge Assembly into the machine. 3.4.1 Load the Full-Width Foil Cartridge Open the Foil Holder Cover. - Page 17 Prepare the Machine Insert the frame-side of the Foil Cartridge into the Foil Holder. Make sure that: The blue mark on the frame-side of the Foil Cartridge 1 is aligned with the blue mark on the Foil Holder 2. ...
-
Page 18: Load The Half-Width Foil Cartridge
Prepare the Machine If the foil is sagging, turn the spindle 1 clockwise to remove the slack. 3.4.2 Load the Half-Width Foil Cartridge Note • For the Half-Width Foil Cartridge you can either centre or left-align the foil. • Right-alignment is not supported. •... - Page 19 Prepare the Machine If necessary, position the foil in the centre: a) Move the lever on the frame-side of the Foil Cartridge 1 to the right until it locks into place. b) Move the foil-winding-side of the Foil Cartridge 2 to the centre until it locks into place. Load the Foil Cartridge into the Foil Holder as described in section Load the Full-Width Foil Cartridge on page 12.
-
Page 20: Remove The Foil Holder And Cartridge Assembly
Prepare the Machine 3.4.3 Remove the Foil Holder and Cartridge Assembly WARNING The machine's internal parts will be extremely hot. Wait for the machine to cool down before touching them. Make sure the Cover Lock LED is off. Open the Front Cover. Lift the lower part of the Foil Holder and Cartridge Assembly 1, and then lift the entire Foil Holder and Cartridge Assembly upwards 2 to remove it from the machine. - Page 21 Prepare the Machine Unlock the Foil Holder as illustrated. Lift both ends of the Foil Cartridge upwards to remove it from the Foil Holder. Wind the foil to remove the slack.
- Page 22 Prepare the Machine Note When not using the Foil Cartridge, store it: • In the original box. Otherwise dust will adhere to the cartridge, which may result in poor transfer results. 1 Foil-winding-side of the Foil Cartridge 2 Frame-side of the Foil Cartridge •...
-
Page 23: Media Specifications
Media Specifications 4.1 Acceptable Media Length 90 mm to 500 mm Width 55 mm to 225 mm Weight 90 g/m to 350 g/m Maximum Total Thickness of Sheets Less than 5 mm When using banner paper (of a length between 297 mm and 500 mm), make sure its width does not exceed 210 mm. -
Page 24: Unacceptable Media
Media Specifications 4.2 Unacceptable Media The machine may not be able to feed the following media and transfer the foil onto them successfully. Media with a carbon sheet attached Media with ink-based print Media that is not completely dry ... -
Page 25: Other Specifications
Media Specifications 4.3 Other Specifications 4.3.1 Feed Tray Capacity The maximum number of sheets that can be loaded in the Feed Tray is determined by the paper size and weight. Paper Weight (g/m Paper Size A4, LTR Maximum Sheets 4.3.2 Top Margin Requirements to Avoid Paper Jams To avoid paper jams, make sure the media's top margin: Is at least 5 mm long. -
Page 26: Use The Machine
Important • Make sure the media you want to use is acceptable. For more information, see Media Specifications on page 19. • We recommend using only the media printed using Brother monochrome laser printers. 5.1 Transfer Important • Create a margin of 5 mm at the top of the sheet. To avoid paper jams, make sure there is no toner-based print in the top margin. -
Page 27: To Transfer The Foil Onto A Two-Sided Sheet
Use the Machine Load the sheet into the Feed Tray (for more information, see Load the Media on page 23). When the sheet is loaded correctly, the LCD message changes to [Media Set?]. Press (Start). [Processing] appears on the LCD. Note When the foil transfer finishes, the LCD message changes to [Ready]. -
Page 28: Load Standard-Size Media
Use the Machine 5.3.1 Load Standard-size Media The machine is compatible with the following standard-sized media: JISB5 LTR/LGL Pull the Extendable Feed Tray Flap 1 and the Extendable Paper Support Flap 2 out of the machine. Carefully position the Extendable Paper Support Flap. - Page 29 Use the Machine Fan the sheets several times along both the long edge and the short edge. Align the edges of the sheets. Place the sheets, face down, top edge first in the Feed Tray between the Paper Guides until you feel the top edge touch the inside of the machine.
-
Page 30: Load Non-Standard-Size Media
Use the Machine 5.3.2 Load Non-Standard-Size Media Adjust the Paper Guides 1 to fit the media width. Place the sheet, face down, top edge first in the Feed Tray between the Paper Guides until you feel the top edge touch the inside of the machine. Note •... -
Page 31: Change Settings
Change Settings Use the main menu to change the machine's settings and to reset the machine's settings and operation history. 6.1 Access the Main Menu Note For more information about the main menu items, see Menu Items on page 28. Press (Menu). -
Page 32: Menu Items
Change Settings 6.2 Menu Items Menu/Sub-Menu Overview Setting Values See Select the LCD Language Change the LCD language. (Initial Power On Only) Local Language on page 11. 1hours Set the amount of time to automatically turn the machine ... -
Page 33: Improve The Transfer Quality
Change Settings 6.3 Improve the Transfer Quality 6.3.1 Adjust the Transfer Temperature If the foil peels off easily or there is missing print, increase the machine's transfer temperature. Press (Temperature). The transfer temperature change screen appears on the LCD. Note You can also press (Menu), press ▼... -
Page 34: Change The Feed Speed
Change Settings 6.3.2 Change the Feed Speed If the foil peels off easily or there is missing print, decrease the machine's feed speed. Press (Menu). Press ▼ or ▲ to select [Print Speed], and then press (OK). Press ▼ or ▲ to change the feed speed, and then press (OK). -
Page 35: Foil Save Mode
Change Settings 6.4 Foil Save Mode Use Foil Save Mode to transfer the foil only onto specific areas of the sheet. You can select one of three Foil Save Mode settings. Skip 1 2 3 1 1 2 2 3 3 1 1 2 2 3 3 4 4 5 5 6 6 Specify the length of foil you want... -
Page 36: Transfer The Foil Only Onto The Upper Part Of The Sheet (Top)
Change Settings 6.4.1 Transfer the Foil Only onto the Upper Part of the Sheet (Top) Specify the length of foil you want to transfer onto the sheet, leaving the remaining areas blank. 1 2 3 1 Feed direction 2 Margin of 5 mm without any toner-based print 3 Transfer area (The foil will be transfered only onto this area) 4 Blank area... -
Page 37: Transfer The Foil Only Onto The Lower Part Of The Sheet (Skip)
Change Settings 6.4.2 Transfer the Foil Only onto the Lower Part of the Sheet (Skip) Specify the area from the top edge of the sheet that you want to leave blank and transfer the foil only outside this area. 1 2 3 4 5 6 1 Feed direction 2 Blank area (Skipped) -
Page 38: Transfer The Foil Only Onto The Centre Part Of The Sheet (Mid)
Change Settings 6.4.3 Transfer the Foil Only onto the Centre Part of the Sheet (Mid) Specify the area from the top edge of the sheet that you want to leave blank and then specify the length of foil you want to transfer. 1 2 3 1 Feed direction 2 Blank area (Skipped) -
Page 39: Turn Off Foil Save Mode
Change Settings 6.4.4 Turn Off Foil Save Mode Press (Foil Save). The Foil Save Mode settings screen appears on the LCD. Note You can also press (Menu), press ▼ or ▲ to select [Foil Save Mode], and then press (OK). Press ▼... -
Page 40: Favourites
Change Settings 6.5 Favourites Save your frequently used transfer settings for quick access. You can specify the following settings: Transfer temperature Feed Speed Foil Save Mode settings 6.5.1 Assign your Favourite Settings to the Control Panel Buttons Press either (Favourite1) or (Favourite2). -
Page 41: Overwrite Or Delete Favourites
Change Settings 6.5.3 Overwrite or Delete Favourites When [Ready] or [Media Set ?] appears on the LCD, press ▲. [Select Favourite] appears on the LCD. Press either (Favourite1) or (Favourite2) to overwrite or delete the settings assigned to this button. The number of the Favourite button you pressed and [▲... -
Page 42: Reset The Settings
Change Settings 6.6 Reset the Settings You can use your machine's control panel to reset the main menu settings and the machine settings to their default settings. Press (Menu). Press ▼ or ▲ to select [Reset], and then press (OK). Press ▼... -
Page 43: Change The Media Feed Pressure
Change Settings 6.7 Change the Media Feed Pressure When you use rough paper, the machine may feed multiple sheets at the same time, resulting in an error. If this happens, reduce the media feed pressure using the Paper Feed Adjuster. Note •... -
Page 44: Routine Maintenance
Routine Maintenance 7.1 Clean the Outside of the Machine Wipe the Control Panel with a dry, soft, lint-free cloth to remove dust. Pull the Extendable Paper Support Flap out of the machine. Wipe the inside of the Paper Output Tray and Extendable Paper Support Flap with a dry, soft, lint-free cloth to remove any dust. -
Page 45: Clean The Separation Roller
Routine Maintenance 7.2 Clean the Separation Roller Turn the machine off and disconnect the Power Cable. Remove the Feed Tray as illustrated. Open the Separation Roller Compartment Cover 1 on the back of the machine, and clean the Separation Roller 2 with a soft, lint-free cloth slightly moistened with water. Close the Separation Roller Compartment Cover. -
Page 46: Troubleshooting
Troubleshooting 8.1 Overview This chapter explains how to resolve typical problems you may encounter when using your Brother machine. 8.2 Identify the Problem Make sure you have checked the following: The Power Cable is connected correctly and the machine is turned on. -
Page 47: Print Quality Problems
Use a sheet with toner-based print. non-toner-based method. The sheet is dirty. Use a clean sheet. The Heat Roller inside the machine Contact your local Brother dealer. is dirty. The fuser unit may be near the end Contact your local Brother dealer. of its life. -
Page 48: Media Feed Problems
Troubleshooting 8.2.3 Media Feed Problems Problem Cause Action Do not use media of the weight of more The sheet is too thick. than 350 g/m Reposition the top edge of the sheet and The sheet is not loaded correctly. try again. The sheet is curled. -
Page 49: Paper Jam
Troubleshooting 8.3 Paper Jam 8.3.1 If a Paper Jam Results in the "No Paper Fed" Error If a paper jam occurs before feeding the media into the machine, [No Paper Fed] appears on the LCD. Follow the steps below to clear the paper jam: If multiple sheets are loaded, remove them. -
Page 50: If A Paper Jam Occurs Inside The Machine
Troubleshooting 8.3.2 If a Paper Jam Occurs Inside the Machine If a paper jam occurs inside the machine, [Jam Inside] appears on the LCD. Follow the steps below to clear the paper jam: WARNING The machine's internal parts will be extremely hot. Wait for the machine to cool down before touching them. Make sure that the Cover Lock LED is off. - Page 51 Troubleshooting Note • Pulling the jammed paper downwards using both hands allows you to remove it more easily. • If the edge of the sheet is jammed and you cannot pull the sheet downwards, pull the edge of the sheet in the direction of the arrow and then gently pull the sheet out using both hands.
-
Page 52: If A Paper Jam And A Foil Jam Occur Simultaneously
Troubleshooting 8.3.3 If a Paper Jam and a Foil Jam Occur Simultaneously If the sheet has no margins of 5 mm, it may be wound around the foil side, or the foil may loosen. If this happens, remove the sheet and remove the slack in the foil using the following procedure: WARNING The machine's internal parts will be extremely hot. - Page 53 Troubleshooting Open the Foil Holder Cover. Remove the jammed sheet. Turn the spindle 1 clockwise to remove the slack.
-
Page 54: Specifications
Specifications 9.1 General Specifications Transfer Technology Fuser LCD (Liquid Crystal Display) 20 characters x 2 lines 220 V - 240 V Power Source AC 50 Hz / 60 Hz Foil Transfer Approx. 340 W Power Consumption Ready Approx. 7 W Power Off Approx. - Page 55 Specifications 384.2 mm 330 mm 415 mm Dimensions 384.2 mm 313 mm 509 mm 822 mm 16.3 kg (including the Full-Width Foil Cartridge) Weight (with supplies) 16.1 kg (including the Half-Width Foil Cartridge) Operating 10°C to 32°C Temperature Storage 0°C to 40°C Operating 20% to 80% (without condensation) Humidity...
-
Page 56: Print Media Specifications
* Replacement frequency depends on the type of media used. If you cannot complete a transfer job, it may mean that the fuser unit has reached the end of its life. To replace the fuser unit, contact your local Brother dealer. -
Page 57: Error Messages
The most common error messages are shown in the table. You can correct most errors and clear routine maintenance messages yourself. If you need more help, the Brother support website at support.brother.com offers the latest FAQs and troubleshooting tips. Error Message... -
Page 58: Appendix
11.1.1 FAQs (Frequently Asked Questions) The Brother support website is our one-stop resource for all your machine needs. Visit support.brother.com to read FAQs and Troubleshooting tips to learn how to get the most from your Brother product. 11.1.2 Customer Service Visit www.brother.com for contact information for your local Brother office. -
Page 59: Regulation
When using this product, the customer shall take sufficient precautions not to infringe upon the copyrights and other rights of Brother and third parties. Brother takes no responsibility, even if a claim is made by a third party that a design created by the customer using this product infringes upon copyrights or other rights. - Page 60 Version A...