Table of Contents
Advertisement
USER MANUAL
Electric Rice Cooker
TRCS02
User Manual
Version A - 12 - 2020
Safety Precautions
Product Features
Installation Instructions
Operating Instructions
Care and Cleaning
Troubleshooting Tips
Warning notices: Before using this product,
please read this manual carefully and keep
it for future reference.
The design and specifications are subject
to change without prior notice for product
improvement. Consult with your dealer or
the manufacturer for details.
https://www.toshiba-lifestyle.com/us/
Page 1
Advertisement
Table of Contents

Related Manuals for Toshiba TRCS02


Summary of Contents for Toshiba TRCS02
- Page 1 Operating Instructions Care and Cleaning Troubleshooting Tips USER MANUAL Electric Rice Cooker TRCS02 Warning notices: Before using this product, please read this manual carefully and keep it for future reference. The design and specifications are subject to change without prior notice for product improvement.
-
Page 3: Table Of Contents
0 Safety Precautions ......................4 1 Product Features ......................5 2 Installation Instructions ....................6 Unpacking ........................6 Electrical Requirements ..................6 Location Requirements ..................7 3 Operating Instructions....................8 Controls ........................8 Using the Rice Cooker .................... 9 4 Care And Cleaning .....................18 5 Troubleshooting Tips ....................23 6 Warranty .........................25 Read This Manual... -
Page 4: Safety Precautions
Authorized Service Center for examination, repair, or adjustment. • Do not disassemble, repair or modify the rice cooker. For any repair, consult a Toshiba authorized Service Center. • Do not operate the rice cooker if any part of the unit is damaged. - Page 5 • To disconnect, set all controls to “Off,” then remove plug from wall outlet. • The use of accessory attachments not recommended by Toshiba may cause injuries. • Handles are not used to carry heavy objects. Items in the cooker can not be moved by the handle.
-
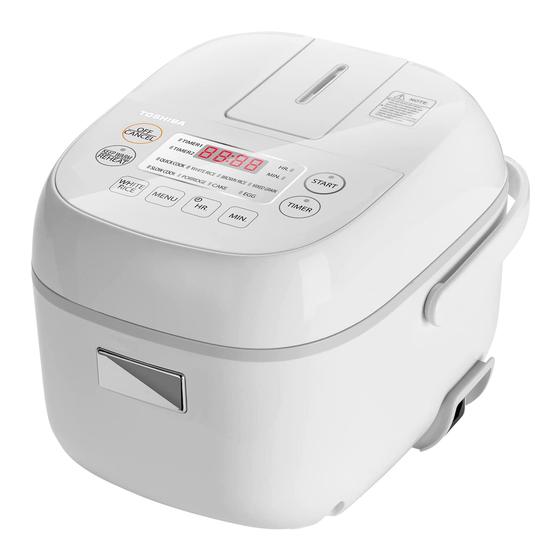
Page 7: Product Features
PRODUCT FEATURES Removable movable cover Upper Housing Inner Pot Handle Outer body Power Accessories Power cord Page 5... -
Page 8: Installation Instructions
INSTALLATION INSTRUCTIONS Unpacking Remove all packing materials. Wash the cooking pot, inner lid, steam port and other accessories, and then dry thoroughly before using. Electrical Requirements WARNING Electrical Shock Hazard • Plug into a grounded 3 prong outlet. • Do not remove the ground prong. •... -
Page 9: Location Requirements
Location Requirements This rice cooker is designed for household use only; the cooker should not be used for commercial use. Use indoors on a stable, level, non-heat sensitive surface such as a countertop in a location where the lid can be fully opened; do NOT use outdoors. Do not place the rice cooker on an area of the countertop that is exposed to direct sunlight, or where it might be splashed with cooking oil. -
Page 10: Controls
Controls IMPORTANT To select a cooking program, the rice cooker must first be plugged into a grounded 3 prong electrical outlet (ON). OFF/ CANCEL Press the OFF/CANCLE button to stop cooking and return to ON (standby mode). White Rice Press the WHITE RICE button to set the program to cook white rice. Cooking Programs and Time Display Hour and Minute Buttons Press the HR. -
Page 11: Using The Rice Cooker
Using the Rice Cooker INTRODUCTION The Toshiba® Rice and Grain Cooker benefits from the use of Fuzzy Logic, a technology that senses moisture levels to accurately cook food. Cooking time and temperature are defined by the appliance. Our highly intelligent Rice and Grain Multicooker automatically adjusts the heat and timing for perfect results every time. - Page 12 MEASURING RICE IMPORTANT The total amount of rice and water should NOT exceed the 3 cup MAX level marked inside the cooking pot. NOTE The Rice Measure is significantly smaller than the standard U.S. cup measure. • To achieve the correct ratio of rice to water, use ONLY the Rice Measure (cup provided). •...
- Page 13 COOKING RICE WARNING Electrical Shock Hazard • Plug into a grounded 3 prong outlet. • Do not remove the ground prong. • Do not use an adapter. • Do not use an extension cord. Failure to do so can result in death, fire or electrical shock. NOTE Cooking time will vary depending on the type of rice or grain being cooked.
- Page 14 7. Rotate the pot two to three times to ensure a solid contact between the bottom of the cooking pot and the heating plate. Cooking Pot 8. Close the lid, and then press downward until it clicks into place. 9. Plug the power supply cord into a grounded 3 prong electrical outlet. NOTE The rice cooker is powered ON, but in standby mode (no heat).
- Page 15 Application of function buttons START button Plug in power supply, LED displays current time, multi-cooker is on Standby mode. Under the standby state, select the desired function and press "START" to start the program. If there is not any operation for more than two minutes, it will return to the standby state automatically. OFF/CANCEL button 1.
- Page 16 TIMER After selecting the function need to pre-set the cooking time, press "TIMER" button, “TIMER1” light on,and the corresponding function light flashs on, press the “TIMER” button again, "TIMER1" light off and “TIMER2” light on.set the time and press "START" button. The preset time is the cooking completion time.
- Page 17 Brown Rice 1.Under the standby mode, press the "MENU" button, select "Brown Rice" function,"Brown Rice" light flashs. 2.Press the "Start" button to start the "Brown Rice" program, "Start" and "Brown Rice"lights stay on, and digital screen display countdown timer. 3.The Brown Rice function automatically enters the stew stage after cooking automatically enters the temperature preservation function when program completes.
- Page 18 1. Under the standby mode, press the "MENU" button, select "EGG" function, "EGG" light flashs. 2. Press the "Start" button to start the "EGG" function, "START" and "EGG" lights stay on, and digital screen display countdown timer. 3. The "EGG" function automatically enters the standby state when program completes. Recipes: Appropriate amount of eggs and water 1.
- Page 19 Timer per-set method (QUICK COOK/WHITE RICE/BROWN RICE/MIXED RICE/SLOW COOK/PORRIDGE) 1. Select the function requires pre-set timer, press the "TIMER" button, "TIMER1" light on and enter the setting state. Press the “TIMER” button again, "TIMER1" light off and “TIMER2” light on. Press "HR."...
-
Page 20: Care And Cleaning
CARE AND CLEANING WARNING Burn Hazard • Wait until the rice cooker has cooled before cleaning. Failure to do so may result in burns Unplug the rice cooker from the electrical outlet, allow it to cool, and then clean and dry the cooker and all its parts after each use to avoid odors and poor performance. - Page 21 1. Remove the steam valve from the body. Pull up • Please press to install. 2. Open Hold the steam valve and open the small buckle. Small buckle 3. Cut-out Insert the buckle on the steam valve base into the pinhole of the steam valve cover, and fasten the small buckle.
- Page 22 Remove the removable cover plate. Push the inner cover slider to the right according to the arrow (the removable c leans forward). Grab the handle and pull up the removable cover plate. Inner cover slider Handle When the removable cover plate is removed, the upper housing cannot be c prevent you from cooking without the removable cover plate.
-
Page 23: Troubleshooting Tips
TROUBLESHOOTING TIPS Before calling for service, review the following tips. It may save you time and money. This list includes common occurrences that are not the result of poor workmanship or defective materials. WARNING Electrical Shock Hazard • Plug into a grounded 3 prong outlet. •... - Page 24 Rice is scorched Dirt or a foreign substance is Remove foreign substance and stuck to the temperature sensor. clean well. NOTE: Rice turning a light brown color Other ingredients and/or Cook only rice with the proper is not a result of rice seasonings were added to the ratio of water.
- Page 25 Steam escaping The inner lid is not attached Check the condition of the inner from the rice properly. lid and gasket. Confirm that the cooker inner lid is correctly seated in The inner lid and/or cooking pot the cooker cover. is deformed.
-
Page 26: Warranty
U.S. AND CANADA ONLY Warranty Period: This warranty is available to consumers only. You are a consumer if you own a Toshiba® Rice and Grain Multicooker that was purchased at retail for personal, family or household use. Except as otherwise required under applicable law, this warranty is not available to retailers or other commercial purchasers or owners. - Page 27 BEFORE RETURNING YOUR TOSHIBA PRODUCT If you are experiencing problems with your Toshiba product, we suggest that you call our 1-855-204-5313 before returning the product for service. If Toshiba Service Center at servicing is needed, a Representative can confirm whether the product is under warranty and direct you to the nearest service location.