
Related Manuals for LG LSXS26336V


Summary of Contents for LG LSXS26336V
- Page 1 REFRIGERATOR SERVICE MANUAL CAUTION PLEASE READ CAREFULLY THE SAFETY PRECAUTIONS OF THIS MANUAL BEFORE CHECKING OR OPERATING THE REFRIGERATOR. MODELS: LSXS26336V LSXS26336D...
- Page 2 CONTENTS CONTENTS SAFETY PRECAUTIONS ........................... 1. SPECIFICATIONS ............................ 2. PARTS IDENTIFICATION ........................3. DISASSEMBLY ............................1. Door Alignment............................2. Install Water Filter............................3. Refrigerator Shelves..........................4. Icemaker..............................4. HOW TO DISASSEMBLY AND ASSEMBLY................
- Page 3 Safety Warning and Cautions Chapter 1 Safety Warning and Cautions ► Observing cautions for safety can prevent accidents and dangers. ► Cautions are classified into Warning and Caution and the meanings are as follows WARNING WARNING indicates the possibility of serious injury or death if the instructions are not followed.
- Page 4 Safety Warning and Cautions WARNING If grounding is required, be sure to Do not store poisonous, consult an electrician. flammable, or explosive chemicals in the refrigerator. The refrigerator must be plugged in There is danger of to a properly rated explosion and fire.
- Page 5 Safety Warning and Cautions WARNING Do not alter the power cord. Do not place heavy objects on the Replace it only with an exact factory refrigerator. replacement part. Falling objects when opening or closing doors Electric shock or fire may occur may cause injury.
- Page 6 Safety Warning and Cautions WARNING Do put the vessel that flower base, Do not accumulate objects on a cup, cosmetics or drugs, etc refrigerator or do not keep are contained on the foods in random method. refrigerator. Dropping of objects when opening or closing the door may cause Fire or electric shock may occur, or physical injury.
- Page 7 Safety Warning and Cautions WARNING power plugs catching with the end Do not use power cords or power of plugs without catching cords. plugs when they are damaged or holes of power plugs are loose. Fire may occur due to electric Fire may occur due to shock or short-circuit.
- Page 8 Product Standards Model LSXS26336V / LSXS26336D Total inner capacity(L) 742.49L (26.22 Cu.ft) Effective inner F-Room 260.59L (9.20 Cu.ft) capacity R-Room 481.90L (17.02 Cu.ft) Outer dimension ( W X D X H ) 35 7/8" x 35 7/8" x 70 3/8"...
- Page 9 Circuit Diagram...
- Page 10 Speci cations 1. Speci cations Unit : inch (mm) Model LSXS26336V / LSXS26336D ltem Width (A) 35.9 (912) Width When opening door by 90° (including handle) (B) 39.6 (1005) Case (including back handle) (C) 28 7 730 After disassembling door (including hinge, L) (D)
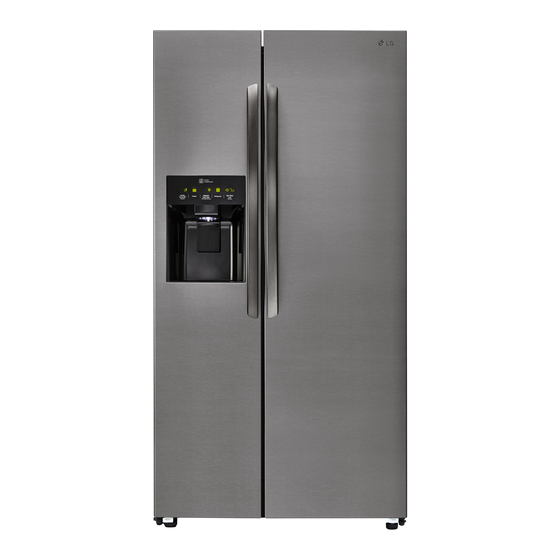
- Page 11 Appearance Size of Refrigerator and Name of Every Part 2. Main Name MODEL : LSXS26336* Freezer Refrigerator Compartment Compartment Dairy Corner LED Lamp Filter LED Lamp Automatic Icemaker Door Bin Shelf Shelf Door Bin Freezing Zone Fresh zone Door Bin Door Bin...
- Page 12 Micom Function 1. Operating Panel c) MODEL : LSXS26336* Freezer Refrigerator Temperature Temperature Ice Plus adjustment adjustment button button for for refrigerator Ice Plus Button(1sec) freezer compartment compartment Ice On/Off Ice Making Door Alarm Dispenser On/Off Door Alarm Dispenser Button(3sec) Button(1sec) Selection Button(1sec)
- Page 13 Micom Function Models: LSXS26336* 1-1. Display Function When the Appliance is plugged in, it is set to step 4 for refrigerator and freezer. You can adjust the Refrigerator and the Freezer control temperature by pressing the Freezer and Refrigerator Button. When the power initially applied or restored after a power failure, it is set to the previously controlled temperature.
- Page 14 Micom Function 1-5. ICE PLUS selection Please select this function for quick freezing. 1) Function is repeat Ice Plus icon whenever pressing Ice Plus button. Ice Plus function automatically turns off after a fixed time passes. 1-6. Ice Maker On/Off Button 1) When the Refrigerator is first turned on, the Ice Maker also turned On.
- Page 15 Micom Function Models: LSXS26336* 2. Function description 2-1. Funnction of Temperature Selection Power Notch 1st press 2nd press 3rd press 4th press 5th press 6th press 7th press Initiallly On Freezer Refrigeration 1. The actual inner temperature varies depending on the food status, as the indicated setting temperature is a target temperature, not actual temperature within refrigerator.
- Page 16 Micom Function 10. The freezing room fan motor operates at the high speed of RPM during operation of Ice Plus. 11. During 21 hours after Pill Down Operation, F-Room is controlled at Maximum F-Notch normally and F-Fan operates normal RPM. 12.
- Page 17 Micom Function 2-10. Failure Diagnosis Function ERROR CODE on display control panel To display the error message, press and hold Ice Plus button and Freezer button. If no errors are displayed, all LEDs will be illuminated. If a primary or secondary error is present, certain LEDs will be illuminated indicating failure mode. Error Display Error Detection Error Generation Factors...
- Page 18 Micom Function 2-11. Test Function 1) The purpose of test function is to check function of the PCB and product and to search for the failure part at the failure status. 2) T est button is placed on the main PCB of refrigerator (test switch), and the test mode will be finished after maximum 2 hour for Test mode 1, 80minutes for Test mode 2.
- Page 19 Micom Function 2-13. Sequential operation of built-in product Built-in components such as the compressor, defrost removal heater, freezer compartment fan, Cooling Fan and step motor damper are sequentially operated as follows to prevent noise and part damage from occurring during testing procedure. Function Load Operation Sequence Remark...
- Page 20 Micom Function 2-14 Ice On / Off function Press ice on/off button 3secs to select ice making on or off. Ice on Mode in factory default setting. Ice on Ice on / off BUTTON Ice off Ice on / off BUTTON 2-15.
- Page 21 Icemaker and dispenser working principles and repair 1. OPERATION PRINCIPLE 1-1. Operation Principle of Icemaker Power On • Adjusts EJECTOR to Start Position with power on. Start Position Icemaking • Waits until water becomes cold after starting the Mode icemaking operation. Checking full •...
- Page 22 Icemaker and dispenser working principles and repair 2. Function TEST CAUTION! Before you carry out the test mode, check whether the water is frozen in the icemaker completely. If the test is performed while the water is not frozen in the icemaker, The water may overflow after test and it will cause other serious problem.
- Page 23 Micom Circuit description 1. Refrigerator undercool/overcool compensation circuit Temperature compensation from cut JCR1 JCR2 JCR3 JCR4 Undercool compensation Overcool compensation Refrigerator temperature Remarks compensation JCR3 JCR4 JCR1 JCR2 (Factory default) Above option circuit compensates the refrigerator temperature by simply cutting the circuit during the service.
- Page 24 Micom Circuit description 2. Freezer undercool compensation circuit Temperature compensation from cut JCF3 JCF4 Undercool compensation Freezer temperature Remarks compensation JCF3 JCF4 (Factory default) ►Above option circuit compensates the freezer temperature by simply cutting the circuit during the service. 2-1. Communication circuit and connecting L/wire between main PCB and display PCB As the communication circuit, the following circuit exchanges information required between main MICOM of main PCB and MICOM exclusively for LED for LED control of display PCB.
- Page 25 Micom Circuit description 3. Table of sensor resistance characteristics Refrigerator sensor 1, 2, defrost Measured temperature Freezer sensor sensor, external sensor 22.3kΩ 77kΩ 16.9kΩ 60kΩ 13kΩ 47.3kΩ 10.1kΩ 38.4kΩ 7.8kΩ 30kΩ 6.2kΩ 24.1kΩ 4.9kΩ 19.5kΩ 3.9kΩ 15.9kΩ 3.1kΩ 13kΩ 2.5kΩ 11kΩ...
- Page 26 Micom Circuit description...
- Page 27 Compressor 12-1 INFORMATION OF LINEAR COMPRESSOR The information tag provides compressor model, refrigerant, serial number and safety approval Compressor Label 1. Compressor Model F L B 0 7 5 L A N A Operating Type Series name A : A-Inverter DLF/FA/FB E : E-Inverter Displacement...
- Page 28 Compressor To reduce noise level, the piston stroke is slowly increased to full power during start up. Step 1) Start up - Half stroke interval for first 30 seconds. Step 2) Ramp up - Stroke increases every 0.8sec until maximum stroke length is reached (about 3 min, 15 sec) Step 3) CVCF interval - 180V / 60Hz Step 1) Start up - Half stroke interval for first 20...
- Page 29 Compressor CON201 Time>30sec Power off Power ON PCB OK Disconnect ≒ Y& V 200 Replace drver Comp FLB075(A-Inverter) Ref. Display & sound Refer TEST1 Forced Starting TDC (Full Stroke) Display ON, Buzz 1 time...
- Page 30 Compressor 12-1 Check A Dear is PC board located in the PCB case. The control driver is PC board for the compressor. This step shows the source voltage of the driver PC board. Step 1. Open PCB Cover Step 2. Check Driver PCB * Driver PCB located in machine room.
- Page 31 Compressor 12-1 Check B B1. LED blinks once, then repeats (FCT0 Fault: A-Inverter) Blink OFF Blink OFF - Purpose: Detecting motor current and voltage error - Check voltage at point A (Motor Voltage), point B (Motor Current) and Point C (Capacitor Voltage) when compressor is off.
- Page 32 Compressor...
- Page 33 Compressor Protection Compressor blink 6 times logic Intermittently (Current Trip)check B5 Check B Works Replace IPM Check Driver PCB Compressor Replace Damage Compressor Check Reset Repeat Current trip Power Check Procedure occur? Replace Compressor Cycle blockage? Compressor Doesn’t works Sealed system Cycle check Repair...
- Page 34 Compressor...
- Page 35 Compressor...
- Page 36 Compressor...
- Page 37 Troubleshooting Chapter 9 Troubleshooting 1. PCB Picture - Main PCB ( P/N : EBR819699**) CON5 CON4 CON6 CON8 CON3 CON7 CON201 CON1...
- Page 38 Troubleshooting 1. Display PCB ( P/N : EBR819699**) CON101...
- Page 39 Troubleshooting 2. Troubleshooting With Error Display 1) Freezer Sensor Error Symptom Check Point 1.F2 Turn on 1. Check for a loose connection 2. Check Sensor Resistance ( P/N : EBR819699**) CON7 CON8 CON201 CON6 CON5 CON4 CON1 CON3 CON8 Resistance [Ω] Short CON8 Open...
- Page 40 Freezer Sensor Error ( Er FS) Reconnect or Is the Connector disconnected Check the Sensor resistance. repair the or loose between Main PCB and Is resistance normal? connector sensor? Check the Temperature and resistance refer to the table. No problem? CON8 CON8 Resistance [Ω]...
- Page 41 Troubleshooting 2) Refrigerator Sensor Error Symptom Check Point 1. F3 turn on 1. Check for a loose connection 2. Check Sensor Resistance ( P/N : EBR819699**) CON7 CON8 CON201 CON6 CON5 CON4 CON7 CON1 CON3 Resistance [Ω] Short CON7 Open pin ~ 20 Other Normal...
- Page 42 Troubleshooting Refrigerator Sensor Error ( Er rS) Reconnect or Is the Connector disconnected Check the Sensor resistance. repair the or loose between Main PCB and Is resistance normal? connector sensor? Check the Temperature and resistance refer to the table. No problem? CON7 CON7 Resistance [Ω]...
- Page 43 Troubleshooting 3) Refrigerator Sensor Error (Er r2) Symptom Check Point 1. “ICE PLUS” Indicator 1. Check for a loose connection wont be turn on. 2. Check Sensor Resistance **Secondary errors only can be displayed by performing “DISPLAY LED CHECK” pressing ICE PLUS & FREEZER buttons simultaneously for more than 5 seconds, **Secondary error.
- Page 44 Troubleshooting Refrigerator Sensor Error ( Er r2) Reconnect or Is the Connector disconnected Check the Sensor resistance. repair the or loose between Main PCB and Is resistance normal? connector sensor? Check the Temperature and resistance refer to the table. No problem? CON7 CON7 Resistance [Ω]...
- Page 45 Troubleshooting 4) Room Temperature Sensor Error Symptom Check Point 1. Only Freezer notch bottom 1. Check for a loose connection F1 indicator turn off 2. Check Sensor Resistance **Secondary errors only can be displayed by performing “DISPLAY LED CHECK” pressing ICE PLUS & FREEZER buttons simultaneously for more than 5 seconds, If all LED are turned ON, errors are not present.
- Page 46 Troubleshooting Room Temperature Sensor Error Reconnect or Is the Connector disconnected Check the Sensor resistance. repair the or loose between Main PCB and Is resistance normal? connector sensor? Check the Temperature and resistance refer to the table. No problem? CON5 CON5 Resistance [Ω] pin ~ 14...
- Page 47 Troubleshooting 5) Icing Sensor Error Symptom Check Point 1. Only Cubed 1. Check for a loose connection icon turn off. 2. Check Sensor Resistance **Secondary errors only can be displayed by performing “DISPLAY LED CHECK” pressing ICE PLUS & FREEZER buttons simultaneously for more than 5 seconds, **Secondary error If all LED are turned ON, errors are not present.
- Page 48 Troubleshooting Icing Sensor Error Reconnect or Is the Connector disconnected Check the Sensor resistance. repair the or loose between Main PCB and Is resistance normal? connector sensor? Check the Temperature and resistance refer to the table. No problem? CON6 Ice Maker Connector CON6 Resistance [Ω] pin ~ 12...
- Page 49 Troubleshooting 6) Defrost Sensor Error Symptom Check Point 1.F4 Turn on 1. Check for a loose connection 2. Check Sensor Resistance ( P/N : EBR819699**) CON7 CON8 CON201 CON6 CON5 CON4 CON1 CON8 CON3 Resistance [Ω] Short CON8 Open pin ~ 22 Other Normal CON8...
- Page 50 Icing Sensor Error (F dS) Reconnect or Is the Connector disconnected Check the Sensor resistance. repair the or loose between Main PCB and Is resistance normal? connector sensor? Check the Temperature and resistance refer to the table. No problem? CON8 CON8 Resistance [Ω] pin ~ 22...
- Page 51 Troubleshooting 7) Defrost Heater Error Symptom Check Point F2,F3,F4 & 1. Check the heater disconnect F5 LED 2. Check the Fuse hire Turn on. 3. Check Drain stuck 4. Check the PCB output voltage ( P/N : EBR819699**) CON7 CON8 CON201 CON6 CON5...
- Page 52 Troubleshooting Defrost Heater Error Input Test 2 Mode (Push the button 2 times) Replace the Replace Check the Door gasket . Check the Heater Voltage. Door gasket Main PCB Is door gasket damaged? Is voltage 112~116V? CON3 Change TEST MODE 2 Voltage [V] Fuse-M Check the Defrost control part.
- Page 53 Troubleshooting 8) Freezer Fan Error Symptom Check Point 1.-F2, F5 1. Check the air flow Turn on 2. Check the Fan Motor 2. Check the PCB Fan motor voltage ( P/N : EBR819699**) CON7 CON8 CON201 CON6 Fan Motor CON5 CON4 CON1 CON3...
- Page 54 Troubleshooting Freezer Fan Error (Er FF) Check the Fan Motor voltage Replace Is Fan Motor voltage 10~12V? Main PCB Reset the unit and Input Test1 Mode. CON8 (Push the button 1 time) TEST MODE 1 Voltage [V] CON8 10~12 VDC pin ~ 12 5 Check the Fan Motor voltage Go to 3...
- Page 55 Troubleshooting 9) Condenser Fan Error (Er CF) Symptom Check Point 1.- F2, F3 1. Check the air flow Turn On. 2. Check the fan motor and connector 2. Check the PCB Fan motor voltage Fan Motor ( P/N : EBR819699**) CON7 CON8 CON201...
- Page 56 Troubleshooting Condenser Fan Error ( Er CF) Check the Fan Motor voltage Replace Is Fan Motor voltage 10~12V? Main PCB Reset the unit and Input Test1 Mode. CON8 (Push the button 1 time) TEST MODE 1 Voltage [V] CON8 10~12 VDC pin ~ 16 5 Check the Fan Motor voltage Go to 3...
- Page 57 Troubleshooting 10) Icemaker Motor Error (Er It) Symptom Check Point 1. Er It 1. Check for a loose connection 2. Check Sensor Resistance ( P/N : EBR819699**) CON7 CON8 CON201 CON6 CON5 CON4 CON1 CON3 CON6 Housing Resistance [Ω] CON6 374~456 pin ~ 8 CON6...
- Page 58 Ice Maker Motor Error (Er It) 3 Disconnect housing of Main PCB Change the Explain to And check resistance between ICE Maker Input Ice Maker test mode(Push customer Pink and blue wires. Is Motor Unit The ice maker test button),check resistance 374~456Ω? The Ice Tray,Ice maker motor Rotate? Wait until 1 minute...
- Page 59 3. Troubleshooting Without Error Display 1) Cube mode doesn’t work Symptom Check Point 1. Cube mode 1. Check the loose connection doesn’t work 2. Check the resistance ( P/N : EBR819699**) CON7 CON8 CON201 CON6 CON5 CON4 CON1 CON3 Duct Motor Ice Maker Auger Motor Dispenser SW...
- Page 60 1) Cube mode doesn’t work Result ICE / Water INSPECTION POINT LEVER S/W ICE/Water Lever SW Pushing 0~2V CON6 Not Pushing 3.5~5V pin ~ 20 Duct Motor Pushing 9~12V CON6 Not Pushing 0~2V pin ~ 24 Motor Type Resistance [Ω] Auger Motor Pushing 112~115V...
- Page 61 1) Cube mode doesn’t work Check the resistance value. Replace Is Dispenser Motor resistance Geared Motor 9.9 ~ 12.1Ω? Cube mode doesn't work Check the loose connection Dispenser Motor Change the Resistance [Ω] Check the voltage. (while pushing the lever S/W) Dispenser Motor 9.9 ~ 12.1 Is voltage correct compared with...
- Page 62 2) Crush mode doesn’t work Symptom Check Point 1. Crush mode 1. Check the loose connection doesn’t work 2. Check the resistance ( P/N : EBR819699**) CON7 CON8 CON201 CON6 CON5 CON4 CON1 CON3 Duct Motor Ice Maker Auger Motor Dispenser SW...
- Page 63 2) Crush mode doesn’t work INSPECTION Result POINT LEVER S/W Pushing 0~2V ICE Lever SW CON7 3.5~5V pin ~ 20 Pushing Pushing 9~12V Duct Motor CON7 0~2V pin ~ 24 Motor Type Resistance [Ω] Pushing Pushing 112~115V Auger Motor 23~27 Auger Motor CON3 Duct Motor...
- Page 64 Check the resistance value. Replace Is Dispenser Motor resistance Geared Motor 9.9 ~ 12.1Ω? Crush mode doesn't work Check the loose connection Dispenser Motor Change the Resistance [Ω] Check the voltage. (while pushing the lever S/W) Dispenser Motor 9.9 ~ 12.1 Is voltage correct compared with table? Check the voltage.
- Page 65 3) Water mode doesn’t work Symptom Check Point 1. Water mode 1. Check the loose connection doesn’t work 2. Check the resistance valve Ground (BL) (1) (2) (3) (4) Water Valve(RD) Pilot Valve (GY) CON3 Pilot Valve Water Valve Machine Room Result Water INSPECTION...
- Page 66 Water mode doesn’t work Replace Water Valve Check the resistance value. Check the loose connection Is Pilot Valve resistance 390~450 Ω? Change the Check the voltage. (while pushing the lever S/W) Is voltage correct compared with table? Pilot Valve Valve Resistance [Ω] Pilot Valve 390~450...
- Page 67 4) Refrigerator room led doesn’t work Symptom Check Point 1. Refrigerator room led 1. Check the refrigerator door switch sticky doesn’t work 2. Check the door S/W resistance 3. Check the LED Lamp Door S/W R Led Lamp CON5 (R-Door S/W) CON7 (R-LED Supply) Resistance [Ω] Open...
- Page 68 Refrigerator room lamp doesn’t work Change the Change the Check the Freezer door switch. Door S/W Door S/W Check the LED Lamp voltage. Does it feel sticky? Is it 0~2V? (While door closed) Change the Check the door S/W resistance. Door S/W Is it correct compared with table? Change the...
- Page 69 5) Freezer room lamp doesn’t work Symptom Check Point 1. Freezer room led 1. Check the freezer door switch sticky doesn’t work 2. Check the door S/W resistance 3. Check the LED Lamp Door S/W F Led Lamp CON5 (F-Door S/W) CON8 (F-LED Supply) Resistance [Ω] Open...
- Page 70 Freezer room lamp doesn’t work Change the Change the Check the Refrigerator door switch. Door S/W Door S/W Check the LED Lamp voltage. Does it feel sticky? Is it 0~2V? (While door closed) Change the Check the door S/W resistance. Door S/W Is it correct compared with table? Change the...
- Page 71 6) Poor/Over cooling in Fresh food section Symptom Check Point 1. Poor cooling in Fresh 1. Check the sensor resistance food section 2. Check the air flow 3. Check the air Temperature 4. Check the R-Damper motor voltage Duct Fan Motor CON7 CON8 CON6 R1SNR...
- Page 72 Check the Compressor 4 Check the air temperature. and sealed Is it cold? system Poor cooling in Fresh food section Go to 8 Check the sensor resistance. Check the Fan Motor voltage Replace Is Fan Motor voltage 10~12V? Main PCB CON7 CON8 CON6 R1SNR...
- Page 73 7) Poor cooling in Freezer compartment Symptom Check Point 1. Poor cooling in 1. Check the sensor resistance Freezer compartment 2. Check the air flow 3. Check the air Temperature 4.Check the Fan motor sticky 4. Check the Fan motor voltage Duct CON8 Fan Motor...
- Page 74 Poor cooling in Freezer compartment Check the F Check the sensor resistance. Fan Motor Open the fresh food door and Go to 5 Check the air flow. Windy? CON8 CON8 Resistance [Ω] pin ~ 24 -22ºF / -30ºC -13ºF / -25ºC -4ºF / -20ºC 5ºF / -15ºC 14ºF / -10ºC...
- Page 75 Check the Fan Motor voltage Replace Is Fan Motor voltage 10~12V? Main PCB CON8 TEST MODE 1 Voltage [V] CON8 10~12 VDC pin ~ 12 7 Check the Fan Motor voltage Is Fan PWM voltage 2~4.5V ? Replace Main PCB CON8 TEST MODE 1 Voltage [V]...
- Page 76 Troubleshooting 3. COMP operation error 1.Open the PWB COVER When the COMP is normal, it will 2.Check the number of LED blinks not blink (Refer to the next page for resolution by number of LED blinks 1.Open the BACK COVER 3.Check the COMP connector voltage (Measure without...
- Page 77 Troubleshooting 4. Resolution by number of LED blinks LED operating condition Cause Service guide 1. After resetting the power check LED blinking 1 time repeatedly PCB part normal operation defect . When the same symptom occurs again after taking action for 1, (MICOM) Blink -Off-Blink-Off-Blink-Off-Blink-Off-Blink-Off Repeat...
- Page 78 Troubleshooting 5. Reference 1) TEST MODE and Removing TPA 1.How to make TEST MODE If you push the test button on the Main PCB, the refrigerator will be enter the TEST MODE * 2 times :Forced defrost mode * 1 time :Comp / Damper / All FAN on (All things displayed) (22 22 displayed) Main PWB...
- Page 79 Troubleshooting 2) TEMPERATRUE CHART - FRZ AND ICING SENSOR TEMP RESISTANCE VOLTAGE -39°F( -40°C) 73.29Ω 4.09 V -30°F(-35°C) 53.63Ω 3.84 V -21°F(-30°C) 39.66Ω 3.55 V -13°F( -25°C) 29.62Ω 3.23 V -4°F(-20°C) 22.33Ω 2.89 V 5°F(-15°C) 16.99Ω 2.56 V 14°F( -10°C) 13.05Ω...
- Page 80 Troubleshooting 3) TEMPERATRUE CHART - REF AND DEF SENSOR TEMP RESISTANCE VOLTAGE -39°F( -40°C) 225.1Ω 4.48 V -30°F(-35°C) 169.8Ω 4.33 V -21°F(-30°C) 129.3Ω 4.16 V -13°F( -25°C) 99.3Ω 3.95 V -4°F(-20°C) 76.96Ω 3.734 V 5°F(-15°C) 60.13Ω 3.487 V 14°F( -10°C) 47.34Ω...
- Page 81 Troubleshooting 4) TEMPERATRUE CHART - AMBIENT SENSOR TEMP RESISTANCE VOLTAGE -39°F( -40°C) 225.1Ω 4.79 V -30°F(-35°C) 169.8Ω 4.72 V -21°F(-30°C) 129.3Ω 4.64 V -13°F( -25°C) 99.3Ω 4.54 V -4°F(-20°C) 76.96Ω 4.43 V 5°F(-15°C) 60.13Ω 4.29 V 14°F( -10°C) 47.34Ω 4.13 V 23°F( -5°C) 37.55Ω...
- Page 82 How to disassemble and assemble (4) Lift up the freezer door 1 in arrow direction and disconnect 1. DOOR the door from the lower hinge 2 . Don’t pull the door forward. 1) Disconnect water supply tube 2 in the lower part of freezer door.
- Page 83 How to disassemble and assemble 4. To install the duct cap assembly, insert one end of the spring 3-10 DISPENSER into the right hole of the dispenser lever and insert the other end into the right hole in the top part of the dispenser. Then 1.
- Page 84 How to disassemble and assemble 4.WATER VALVE DISASSEMBLY METHOD 1)Turn off the power of the refrigerator (pull out the plug). 4)Separate the Mechanical Cover and Valve Screw. Open the FREEZER and REFRIGERATOR Door and Mechanical Cover disassemble the Lower Cover. 5)Separate the housing and pull out the valve.
- Page 85 How to disassemble and assemble 4.WATER VALVE DISASSEMBLY METHOD 1)Turn off the power of the refrigerator (pull out the plug). 4)Separate the Mechanical Cover and Valve Screw. Open the FREEZER and REFRIGERATOR Door and Mechanical Cover disassemble the Lower Cover. 5)Separate the housing and pull out the valve.
- Page 86 How to disassemble and assemble 6. ICEMAKER DISASSEMBLY METHOD 2) Hold the front of the Cover,TV and Pull it out completely. Note :to disassemble the icemaker, separate Motor, AC from the door first. disassemble Ice bin and cover. Cover 3) Loosen 1 Screw on the Water Tank. Ice bin Separate the Motor,AC from the door.
- Page 87 How to adjust the refrigerator door level difference How to adjust the refrigerator door level How to adjust the door level difference difference * It may be unleveled concerning installed condition of the floor. 1. When the refrigerator door is low 1.
- Page 88 Heavy Repair Method of Refrigerator by Application of Refrigerant Heavy Repair Method of Refrigerator by Application of Refrigerant 1. Heavy Repair SVC Method For the heaver repair of R134a type of refrigerator, perform work according to following SVC method. 1-1. Return of Refrigerator Refrigerant Required equipment: Pinch pliers, refrigerant discharging hose, refrigerant returnbag •...
- Page 89 Heavy Repair Method of Refrigerator by Application of Refrigerant 1-2. Return of Remained Refrigerant Required equipment: Pinch pliers, hose for refrigerant recovery, vacuum pump If refrigerant returntime of 7 minutes has passed, connect a vacuum pump at the ends of a refrigerant returnhose outdoor.
- Page 90 Heavy Repair Method of Refrigerator by Application of Refrigerant 1-4. Charging Tube Connection Step Required equipment: Charging tube, simple welding machine Remove a charging pipe to recharge R134a refrigerant after completing work, and then connect a charging tube with welding Suction Pipe Charging Tube Discharge Pipe...
- Page 91 Heavy Repair Method of Refrigerator by Application of Refrigerant 1-6. Refrigerant Charging Required equipment: Bombe, R134 a refrigerant (Energy Star Al spiral condenser model 165g DOE Fe wire condenser model 175g • Firstly remove fire appliances and heating source for performing work when charging scaled refrigerant. (Do not spray refrigerant indoor.) •...
- Page 92 #EV# EXPLODED VIEW FREEZER DOOR 131C 600A 200A 201A 203A 131D 405H 282G 612A 280A 113F 113E 606A 241G 244A...
- Page 93 #EV# FREEZER COMPARTMENT 230A 231A 241A 233A 212K 212G 244A 212J 241D 212K 241H...
- Page 94 #EV# FREEZER COMPARTMENT 120E 625A 158C 312C 281A 903E 271B 271A 404A 619A 330B 405A 329A 405D 332A 903G 405G 135J 301A 316B 149A 332B 149C 128C 128D 128E 161C 128F 281G 136A 135D 319B 136B...
- Page 95 #EV# REFRIGERATOR COMPARTMENT 625A 281B 271B 611E 271C 903D 120B 158A 140A 903F 120A 120D 154B 136C 128G 128H 611B 621B 616K 281H 154A 610E 615A 623A 627B 627C 151A...
- Page 96 #EV# MACHINE COMPARTMENT 103B 411A 501F 103A 410G 410H 308A 501A 304A 316A 307A 105A 314A 314A 317A 318A 319C 404B 405C 405F 329C 319E 312A 319A 315A 323B...
- Page 97 November, 2015 MFL62215931...