
Related Manuals for LG HW300A


Summary of Contents for LG HW300A
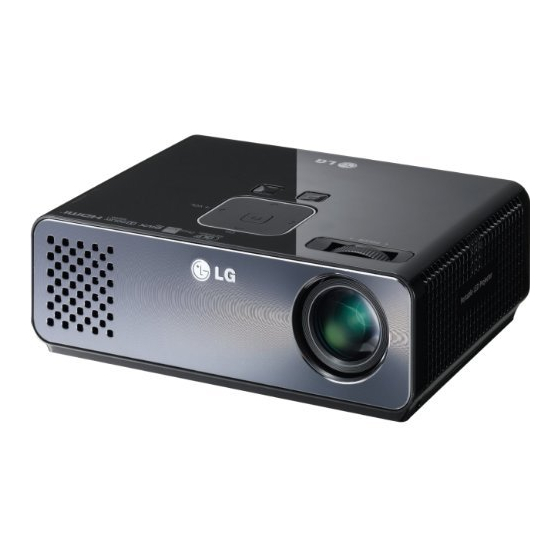
- Page 1 OWNER’S MANUAL DLP PROJECTOR Please read this manual carefully before operating your set and retain it for future reference. HW300A...
-
Page 2: Safety Instructions
SAFETY INSTRUCTIONS SAFETY INSTRUCTIONS Please take note of the safety instructions to prevent any potential accident or misuse of the projector. Read these instructions. Keep these instructions. Heed all warnings. Follow all instructions. The lightning flash with Indoor Installation arrowhead symbol, within an equilateral triangle, WARNING is intended to alert the user to... - Page 3 SAFETY INSTRUCTIONS Power Do not place the projector directly on a carpet, rug or place where ventilation is restricted. WARNING - This would cause its internal This Projector has a three- temperature to increase and might prong grounded AC plug.It create a fire hazard or damage the must be connected to a three- unit.
- Page 4 SAFETY INSTRUCTIONS Using NOTES Hold the plug firmly when unplugging. WARNING If you pull the cord, it may be damaged. Do not place anything containing - This may cause a fire hazard. liquid on top of the projector such as Do not use if the power cord or the flowerpot, cup, cosmetics or candle.
- Page 5 SAFETY INSTRUCTIONS NOTES CAUTION concerning the Power Cord It is recommend that most appliances Do not place heavy objects on top of be placed on a dedicated circuit; projector. that is, a single outlet circuit which - This may cause mechanical failure or powers only that appliance and has no personal injury.
- Page 6 SAFETY INSTRUCTIONS Cleaning Others WARNING WARNING Do not use water while cleaning the Do not attempt to service the projector. projector yourself. Contact your dealer - This may cause damage to the or service center. projector or an electric shock hazard. - This may cause damage to the In the unlikely event of smoke or a projector and could give an electric...
-
Page 7: Table Of Contents
TABLE OF CONTENTS TABLE OF CONTENTS SAFETY INSTRUCTIONS ENTERTAINMENT MY MEDIA ASSEMBLING AND PREPAR- - Connecting USB Storage Devices - MOVIE LIST Unpacking - PHOTO LIST Optional Extras - MUSIC LIST Parts and Buttons - FILE VIEWER Installation PLAY GAME - Installation Precautions - Basic Operation of the Projector 13 CUSTOMIZING SETTINGS 36... - Page 8 TABLE OF CONTENTS MAINTENANCE Cleaning the Projector - Cleaning the lens - Cleaning the Projector Case How to Fix the Lens Cap SPECIFICATIONS NOTE Image shown may differ from your projector. Your projector’s OSD (On Screen Display) may differ slightly from that shown in this manual.
-
Page 9: Assembling And Preparing
ASSEMBLING AND PREPARING ASSEMBLING AND PREPARING Unpacking Check your product box for the following items. If there are any missing accessories, contact the local dealer where you purchased your product. The illustrations in this manual may differ from the actual product and item. Remote Control CD Owner's Polishing Cloth... -
Page 10: Optional Extras
ASSEMBLING AND PREPARING Optional Extras Optional extras can be changed or modified for quality improvement without any notification. Contact your dealer for buying these items. Projection Screen Tripod HDMI Cable Video Cable Audio Cable Component Cable AJ-CB2 AJ-CB2+AJ-CS60 Ceiling Mounting Bracket 1 Use screw size: M4x6-M4x8... -
Page 11: Parts And Buttons
ASSEMBLING AND PREPARING Parts and Buttons * This projector is manufactured using high-precision technology. You may, however, see on the Projector screen tiny black points and/or bright points (red, blue, or green). This can be a normal result of the manufacturing process and does not always indicate a malfunction. -
Page 12: Installation
ASSEMBLING AND PREPARING Installation Installation Precautions Always provide proper ventilation for Place this projector in adequate this projector. temperature and humidity - The projector is equipped with conditions. ventilation holes. Do not block or - Install this projector only in place anything near these holes. -
Page 13: Basic Operation Of The Projector
ASSEMBLING AND PREPARING Basic Operation of the Projector Place the projector on a sturdy and horizontal surface. Place the projector with the desired distance from the screen. The distance between the projector and the screen determines the actual size of the image. Position the projector so that the lens is set at a right angle to the screen. -
Page 14: How To Install The Projector Using A Tripod
ASSEMBLING AND PREPARING How to Install the Projector Using a Tripod * You can install this projector using a camera tripod. * When stabilizing the tripod, we recommend using the locking bolt of standard size 4.5 mm or less.The maximum size allowed for the locking bolt is 5.5 mm.(If it is longer than the maximum allowed size, it may damage the projector.) Projector is Bottom side of Projector... -
Page 15: Remote Control
REMOTE CONTROL REMOTE CONTROL The descriptions in this manual are based on the buttons on the remote control. Please read this manual carefully and use the projector correctly. To replace batteries, open the battery cover, replace batteries (1.5 V AAA) matching the ends to the label inside the compartment, and close the battery cover. - Page 16 REMOTE CONTROL MENU Accesses the menu. AUTO Automatically adjusts the input from a computer.. Q.MENU Accesses the quick menu. Navigation buttons (up/down/left/right) Scrolls through menus or options. Selects menus or options and confirms your input. MARK Selects a menu or option. STILL Freeze the moving image.
-
Page 17: Watching Projector
WATCHING PROJECTOR WATCHING PROJECTOR Watching Projector Operating the Projector In Standby mode, press the POWER to turn the projector on. Turning on for the First Time Press INPUT and select desired input. Make sure the power cord is Control the projector using the connected correctly. -
Page 18: Using Additional Options
WATCHING PROJECTOR Using Additional Options Adjusting Aspect Ratio Resize an image to view at its optimal Set By Program: Displays images size by pressing RATIO while you are in the same aspect ratio as the watching projector. original image. NOTE y Some options may not be available depending on input 4:3: Resizes images to the previous... -
Page 19: Adjusting Keystone
WATCHING PROJECTOR Adjusting Keystone Adding an Input Label Use this function when the screen is Add a label to an input source so not at a right angle to the projector that you can easily identify a device and the image is a trapezoid shape. connected to each input source. -
Page 20: Blank Function
WATCHING PROJECTOR Using the Quick Blank Function Menu Using Blank Function Customize frequently used menus. This function may be effective if Press Q.MENU to access the quick you need to get the attention of menus. the audience during presentations, meetings or briefings. Press the Navigation buttons to scroll through the following menus Press the BLANK to turn off the... -
Page 21: Entertainment My Media
ENTERTAINMENT ENTERTAINMENT MY MEDIA To disconnect a USB storage device, make sure to end the connection properly to prevent damages to the Connecting USB Storage projector or files. Devices Press Q.MENU to access the quick Connect USB storage devices such menus. - Page 22 ENTERTAINMENT Tips for Using USB Storage Devices Only a USB storage device is Please connect a USB storage recognizable. device with cable is offered by USB USB hubs are not supported. maker. If connected with cable is A USB storage device which uses its not offered by USB maker or an own driver may not be recognized.
-
Page 23: Movie List
ENTERTAINMENT MOVIE LIST * The movie list is activated once USB is detected. It is used when playing movie files on projector. Tips for playing video files (Global Motion Compensation) and Some user-created subtitles may Qpel (Quarterpel Motion Estimation) not work properly. is not supported. - Page 24 ENTERTAINMENT DivX Supported Video Formats File Audio/ Codec Profile/Level Support Explanation Extensions Video VC-1 Advanced Advanced Profile @ Level 3 (e.g. 720p 60, 1080i 60, Only streams Profile 1080p 30) compliant to SMPTE Video 421M VC-1 standard VC-1 Simple Simple Profile @ Medium Level (e.g. CIF, QVGA) .asf are supported.
- Page 25 ENTERTAINMENT Browsing Movie List ❶ ❷ ❸ ❹ ❺ Play video files on the screen. Your screen can display video files from a Page 1/1 Movie List USB storage device. Drive1 USB 1 XTICK Page 1/1 Connect a USB storage device. Butterfly_... d 01:34:33 Press USB to access the Home menu.
- Page 26 ENTERTAINMENT Play a movie by using the following Description menus/buttons. ❽ Allows you to mark certain files. Select files you want and press Color buttons. Play Marked Press Red. Play the first selected file. �� Mark All Press Green. � 01:02:30 / 02:30:25 �...
- Page 27 ENTERTAINMENT Options for Movie List Option Description Subtitle The subtitles can be Press Q.MENU. A pop-up window will appears. Language turned on or off. Language: Activated Press the Navigation buttons to for SMI subtitles and scroll to the option and press OK. can select the language Press the Navigation buttons within the subtitle.
- Page 28 ENTERTAINMENT Registering the DivX code Language Subtitle - The DivX registration code allows you to rent or purchase the latest Language Supported Language movies at www.divx.com/vod. To Group play a rented or purchased DivX file, Latin1 French, Spanish, Catalan the file’s registration code should Basque, Portuguese, be same as your projector’s DivX Italian, Albanian, Rhaeto-...
-
Page 29: Photo List
ENTERTAINMENT PHOTO LIST Deactivating the DivX feature - You can deactivate all of the devices * The projector can display JPEG files. through the web server and block Supported Photo File Formats devices from activating. Delete the existing authentication PHOTO(*.JPEG) supporting file information to receive a new DivX Baseline: 64 pixel (width) x 64 pixel user authentication for the projector. - Page 30 ENTERTAINMENT Description ❽ Allows you to mark certain files. Select files you want and press ❶ ❷ ❸ ❹ ❺ Color buttons. Page 1/1 View Marked Press Red. Photo List Display the USB 1 XTICK Drive1 Page 1/1 selected photo. Mark All Press Green. Mark all files in the folder.
- Page 31 ENTERTAINMENT Options for Photo List Option Description BGM � Listen to music while Press Q.MENU. viewing photos in full size. A pop-up window will appears. y Set the BGM device Press the Navigation buttons to and album in Option- scroll to the option and press OK. Set Photo View.
-
Page 32: Music List
ENTERTAINMENT MUSIC LIST Description ❶ Thumbnail * You can use the Music List menu to play MP3 files from a USB storage Abnormal files device. Music Supported File Formats Non-supported files MUSIC (*.MP3) supporting file Bit rate range 32 Kbps - 320 Kbps ❷... -
Page 33: File Viewer
ENTERTAINMENT FILE VIEWER Page 1/1 Music List Drive1 USB 1 XTICK Page 1/1 � Supported File Formats 001. - B01.mp3 002. - B02.mp3 003. - B03.mp3 004. - B04.mp3 00:00 00:00 00:00 00:00 005. - B05.mp3 00:00 Supported File : XLS, DOC, PPT, TXT, XLSX, PPTX, DOCX, PDF �� 002. - B02.mp3 � 02:30 / 03:25 Microsoft Office Version 97 / 2000 / �... - Page 34 ENTERTAINMENT Control playback by using the following buttons. ❶ ❷ ❸ ❹ y Press Page to move the previous Page 1/1 or next page. File Viewer Drive1 USB 1 XTICK Page 1/1 y Press VOL to Zoom in or zoom out. test1.doc test2.hwp test3.pdf test4.ppt y 1.
-
Page 35: Play Game
ENTERTAINMENT PLAY GAME Allows you to enjoy the games installed on the projector. Press Menu to access the menu. Press the Navigation buttons to scroll to GAME and press OK. GAME JUMP HOLE IN ONE SUDOKU SAVING CRYSTAL INVADER Exit � When you are finished, press BACK. -
Page 36: Customizing Settings
CUSTOMIZING SETTINGS CUSTOMIZING SETTINGS The SETUP Menu Press Menu to access the menu. Press the Navigation buttons to scroll to one of the following menus and press Press the Navigation buttons to scroll to the setting or option you want and press OK. -
Page 37: Picture Settings
CUSTOMIZING SETTINGS PICTURE Settings Press Menu to access the menu. PICTURE ꔂ Move ꔉ OK Press the Navigation buttons to scroll to • Picture Mode : Standard PICTURE and press OK. • Contrast • Brightness Press the Navigation buttons to scroll to the • Sharpness setting or option you want and press OK. - Page 38 CUSTOMIZING SETTINGS Setting Description Color Adjusts intensity of all colors. Tint Adjusts the balance between red and green levels. Advanced Customizes the advanced options. Control or Expert Control Picture Reset Restores the options of each mode to the factory default.
- Page 39 CUSTOMIZING SETTINGS Advanced / Expert Control Options Setting Description Dynamic Adjusts the contrast to keep it at the best level according Contrast to the brightness of the screen. The picture is improved by making bright parts brighter and dark parts darker. Dynamic Color Adjusts screen colors so that they look livelier, richer and clearer.
- Page 40 CUSTOMIZING SETTINGS Setting Description Color Filter This function filters specific colors in the video. You can use the RGB filter to set color saturation and hue accurately. Color This is the function to adjust the overall color of the screen to Temperature the feeling you want.
-
Page 41: Screen Settings
CUSTOMIZING SETTINGS SCREEN Settings Press Menu to access the menu. SCREEN ꔂ Move ꔉ OK Press the Navigation buttons to scroll to • PJT Mode : Front SCREEN and press OK. • Aspect Ratio : 16:9 • Keystone Press the Navigation buttons to scroll to the • RGB Config. setting or option you want and press OK. -
Page 42: Audio Settings
CUSTOMIZING SETTINGS AUDIO Settings Press Menu to access the menu. AUDIO ꔂ Move ꔉ OK Press the Navigation buttons to scroll to • Volume AUDIO and press OK. • Balance • Treble Press the Navigation buttons to scroll to the setting or option you want and press OK. When you are finished, press BACK. -
Page 43: Option Settings
CUSTOMIZING SETTINGS OPTION Settings Press Menu to access the menu. OPTION ꔂ Move ꔉ OK Press the Navigation buttons to scroll to • Language : English OPTION and press OK. • Blank Image : Blue • LED Mode : Normal Press the Navigation buttons to scroll to the • Auto Power : Off setting or option you want and press OK. -
Page 44: Making Connections
MAKING CONNECTIONS MAKING CONNECTIONS Connect various external devices to the ports on the projector. Computer/Notebook Digital Device HDMI – See p.45 Gaming Device Component – See p.45 Headphone Composite – See p.46 RGB – See p.46 Memory storage – See p.21 Audio - See p.47... -
Page 45: Connecting To A Hd Receiver, Dvd, Or Vcr Player
MAKING CONNECTIONS Connecting to a HD Component Connection receiver, DVD, or Transmits the analog video and audio VCR player signals from an external device to the projector. Connect the external device and the projector with the component Connect a HD receiver, DVD, or VCR cable as shown in the following player to the projector and select an illustration. -
Page 46: Connecting To A Pc
MAKING CONNECTIONS Connecting to a PC Composite Connection Transmits the analog video and audio This projector supports the Plug & signals from an external device to the Play. A PC will automatically recognize projector. Connect the external device the projector and requires no driver to and the projector with the composite be installed. -
Page 47: Connecting To A Headphone
MAKING CONNECTIONS Connecting to a Headphone Listen to the sound through a headphone. RGB OUT (PC) AUDIO OUT... - Page 48 MAINTENANCE MAINTENANCE How to Fix the Lens Update and clean your projector regularly to keep the best performance and to extend the product lifespan. Prepare the lens cap and the strap supplied as accessories. Cleaning the Insert the end of the strap into the hole at the bottom of the lens Projector section of the projector.
- Page 49 SPECIFICATIONS SPECIFICATIONS MODEL HW300A (HW300A-JE) Resolution (Pixel) 1280 (Horizontal) × 800 (Vertical) Ratio 16:10 (Horizontal:Vertical) Panel size (mm) 11.623 Projection distance 0.59 m - 3.00 m (Screen size) (50.8 cm - 254.0 cm) Projection Offset 100 % Remote control distance...
- Page 50 SPECIFICATIONS RGB-PC supported mode OPEN SOURCE LICENSE To obtain the source code under GPL, Vertical Freq. Horizontal Format LGPL, MPL and other open source (Hz) Freq.(kHz) licenses, that is contained in this 640X350 70.090 31.468 product, please visit 720X400 70.080 31.469 www.artograph.com 59.940...
- Page 51 The model and serial number of the projector is located on the back or one side of the projector. Record it below should you ever need service. MODEL SERIAL...