Table of Contents
Advertisement
Quick Links
Advertisement
Table of Contents

Related Manuals for Philips Audio SA235/17X


Summary of Contents for Philips Audio SA235/17X
- Page 1 Digital Audio Player Audio Audio...
-
Page 2: Table Of Contents
Contents Controls and Connections –––––––––––––––––––––––––––––––– General information Safety & Maintenance –––––––––––––––––––––––––––––––––––– Copyright information ––––––––––––––––––––––––––––––––––– About RUSH –––––––––––––––––––––––––––––––––––––––––– Supplied accessories ––––––––––––––––––––––––––––––––––––– First time installation ––––––––––––––––––––––––––––––––––––– Minimum computer system requirements ––––––––––––––––––––– Software installation ––––––––––––––––––––––––––––––––––––– 11-13 Power supply Battery–––––––––––––––––––––––––––––––––––––––––––––––– Connecting , disconnecting RUSH ––––––––––––––––––––––––– Transferring MP3,WMA files –––––––––––––––––––––––––––––... - Page 3 Contents Playing your tracks ( MUSIC & VOICE only Play and pause –––––––––––––––––––––––––––––––––––––––––– Selecting a different track ––––––––––––––––––––––––––––––––– Fast searching within a track ––––––––––––––––––––––––––––––– Delete tracks, Playmode ( MUSIC & VOICE only Deleting tracks ––––––––––––––––––––––––––––––––––––––––– Playmode: Different playback modes ––––––––––––––––––––––– Memory ( MUSIC &...
-
Page 4: Controls And Connections
Controls and Connections Armband Neck strap If you would like help or more information on your RUSH product, visit the Philips website: http://www.audio.philips.com/rush... - Page 5 Controls and Connections CARD INSERT...
- Page 6 Controls and Connections neck strap ring - attach the neck strap here Display - shows status of the device and file details multi-function joy pad - enables 5 different functions 2; OK – press and hold for ~2 seconds to switch the device on/ off –...
- Page 7 Controls and Connections 3, 4 – navigates up/ down to view the submenu options MUSIC & VOICE modes only: – skips to the beginning of a current/ previous/ next track – fast cue/ review within a track TUNER: tunes to a FM radio station - 3.5 mm stereo headphone jack MODE - press ~1 second and release to select sound source in MP3 and WMA...
-
Page 8: Safety & Maintenance
Safety & Maintenance To avoid damage or malfunction: – Do not expose to excessive heat caused by heating equipment or direct sunlight. – Do not drop the device or allow objects to fall on the device. – Do not allow the device to be submersed in water. Do not expose earphone jack or battery compartment to water as water entering the set may cause major damage. -
Page 9: About Rush
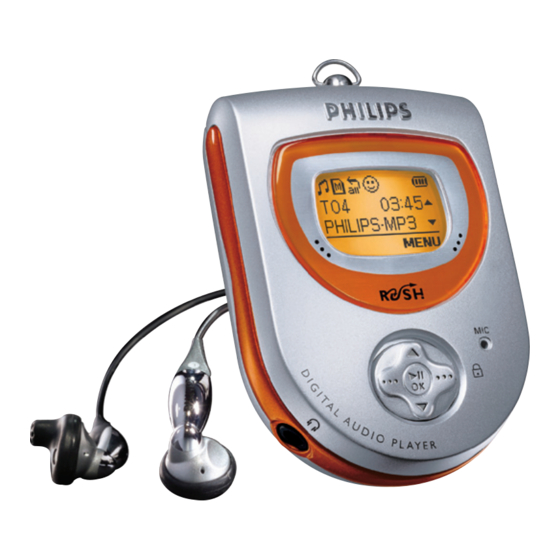
General information About RUSH RUSH is a solid state, portable digital audio player – plays MP3, WMA (Windows Media Audio) and future digital audio formats files e.g. digitized and compressed CD tracks, tape tracks, audio books, newspapers, sound effects, etc., that are encoded into format MP3 or WMA. –... -
Page 10: First Time Installation
System requirements IMPORTANT! First time installation Before connecting RUSH to your computer for the 1st time: please insert the supplied CD- ROM and run the CD-ROM. The installation process is automatically launched for first-time application users. During downloading/ uploading/ formatting: •... -
Page 11: Software Installation
Software installation TIP: IMPORTANT! Windows2000 users: Please make sure you have Windows2000 Service Pack 3 (or later) from Microsoft installed, before you start installation and connect RUSH to your PC. You can download this service pack from: http://www.microsoft.com/windows2000/downloads/servicepacks/default.asp Insert the RUSH CD-ROM into your CD-ROM drive. An introduction screen appears. - Page 12 Software installation Select and install the MUSICMATCH Jukebox or plug-in which most suits you. Follow all the screen instructions to complete installation.
- Page 13 Software installation For further details and instructions on using MUSICMATCH Jukebox, click View MUSICMATCH tutorial or, you can also visit www.musicmatch.com – MUSICMATCH Jukebox software allows you to manage your music collection on your personal computer. For example: • convert CD music tracks to MP3 and WMA files •...
-
Page 14: Power Supply
Power supply Battery • Insert one battery (preferably alkaline) type AAA, LR03 or UM4 as indicated by the + and – symbols inside the battery compartment. Indication of empty battery CARD INSERT The number of blocks inside the battery symbol indicates the power level. -
Page 15: Connecting, Disconnecting Rush
Connecting, disconnecting RUSH Connecting RUSH to your PC Always turn on your computer before connecting RUSH. Connect the supplied USB cable to the computer’s USB port. Remove the protective rubber seal from the USB jack on RUSH and insert the other end of the cable here. -
Page 16: Transferring Mp3,Wma Files
Transferring MP3, WMA files TIP: – In Window Explorer, you can simply drag-and-drop your selected music files to your player (Removable Disk). Or you can follow steps 1-4 below and use MUSICMATCH Jukebox to transfer your files. – During downloading/ uploading/ formatting, DO NOT disconnect RUSH until the device shows the READY display. -
Page 17: Transferring Rush Voice Files
Transferring RUSH VOICE files TIP: – Only voice recordings created by RUSH in .WAV format will be recognized by the device for playback. – You should also only use Windows Explorer for uploading and downloading to manage your VOICE files. y To make voice recordings , please read VOICE pages 32-33. -
Page 18: Downloading
Transferring RUSH VOICE files Drag and drop from the RUSH folder window (right) to your computer’s folder named VOICE (left-hand side window). y RUSH device display: READING during transfer. Downloading In Windows Explorer, select the RUSH VOICE files you want to transfer from your computer. -
Page 19: Deleting Files, Upgrading
(see page 25, Deleting tracks). • To clear all tracks from the device memory, click from your PC task bar: Start yPrograms y Philips RUSH Audio player y Format. Upgrading your device Visit hhtp://www.audio.philips.com/rush for more information and software upgrades. -
Page 20: Switching On/Off
Switching ON / OFF Switching On This device plays from the last function selected before you switched off. Press and hold 2; OK for ~2 seconds. • y Display: RUSH splash screen. y Plays from the last function selected before you switched the device off. The device starts to play according to the device’s status: y No files! is shown if no files on RUSH or in the memory card. -
Page 21: Power-Saving Standby Mode
Selecting function / menus Power-saving standby mode The device automatically switches off if no keys are pressed within 60 seconds after pause is activated. Selecting function During playback, press and hold MODE for ~1 second. y Display: changes color and briefly shows the function screen. -
Page 22: Adjusting Volume
Volume, display icons Adjusting volume • During playback, press – VOLUME + left/ right to decrease/ increase the volume. y Display: briefly shows the volume bar and the volume level. Some display icons More titles/ menu options stored. Scroll through to view the rest. Music mode Voice mode Tuner mode... -
Page 23: Interactive Backlight
Backlight, , accessories Interactive backlight The device has 3 different backlight colors for each function. The backlight lights up briefly when you press a control. If you like, switch the backlight On/ Off: green (FM tuner), orange (Music), (Voice) During playback, use the ••• (right-hand side, MENU soft key), 3/4 and 2;... -
Page 24: Music & Voice Only
Play, Pause, Search (MUSIC & VOICE only) Playing and Pausing Music/ Voice Files During playback, use the MODE button to select your function. Press 2; OK to pause playback. y Display: shows the elapsed playtime flashing and filename stops scrolling. Press 2;... -
Page 25: Delete Tracks, Playmode (Music & Voice Only)
Delete tracks, playmode (MUSIC & VOICE only) Delete tracks The Delete option allows you to delete tracks individually. Use 3/4 to scroll through and find the track for deletion. Use the ••• (right-hand side), 3/4 and 2; OK controls to scroll and select MENU y SETTING y Delete y Track. -
Page 26: Memory ( Music & Voice Only )
Insert your card in the RUSH CARD INSERT slot. Connect RUSH to your PC using the supplied USB cable. Click Start y Program y Philips RUSH Audio Player y Format. Choose the correct drive and click Start. Selecting memory options To select the Memory menu, use the •••... -
Page 27: Equalizer Sound Options
Equalizer (MUSIC & VOICE only) Equalizer sound options During playback, press ••• (right-hand side, MENU soft key). y Display: shows SETTING menu and the submenu options. Press 3/4 to scroll to EQ. Press 2; OK to confirm and enter the EQ menu. y Display: shows the current sound icon and setting highlighted. -
Page 28: Custom: Adjustable, Personal Sound Options
Custom, Favorite (MUSIC mode only) Custom: adjustable, personal sound options If you have selected Custom, the display shows a set of 4 frequency bars which can be adjusted to provide a personal setting. Use the ••• (right-hand side, NEXT soft key) and 2;... -
Page 29: Favorite
Favorite (MUSIC mode only) Selecting Off and saving tracks Favorite switched on: In the Favorite Off mode, you can save and add further track saved as a Favorite favorite tracks. During playback, use the ••• (right-hand side), 3/4 and 2; OK controls to scroll and select Favorite y On/Off y Off. -
Page 30: Tuner
Tuner RUSH stores up to 10 FM preset stations. There are 3 menu settings available: • Preset Stn (see Preset stations chapter, page 31) • Auto tune (see Auto tuning chapter) • Backlight (see Interactive Backlight chapter, page 23) Auto tuning This setting automatically tunes and stores up to 10 FM tuner stations, depending on the strength of radio signals in your area. -
Page 31: Manual Tuning And Station Storing
Tuner Manually tuning and storing presets Press and hold 3/4 for more than 1 second to auto search from 87.5MHz or 108MHz respectively. y Display shows: Searching... until a station signal is detected. If necessary, press 3/4 repeatedly and briefly to •... -
Page 32: Preparation For Voice Recording Quality
VOICE Recording – Useful for recording lectures and important discussions. – Maximum Voice recording time: approximately 4 hours if using all the built-in memory on Low sound quality recording setting. Preparation for VOICE recording quality In the VOICE mode, use the •••/••• and 2; OK controls to scroll and select MENU y SETTING y QUALITY. -
Page 33: Deleting Voice Files
Deleting VOICE files Elapsed recording time Voice track number scrolls during N flashes during recording, recording and playback of .WAV file next to the remaining total STOP soft key available recording time left To stop recording, press ••• (left-hand side) STOP soft key. y RUSH changes to the VOICE function in the pause position. -
Page 34: Troubleshooting
• Clear all tracks from the device memory. Click from your PC task bar: Start y Programs y Philips RUSH Audio player y Format. – If there is still no response from the above tips, the Flash memory may have been corrupted. - Page 35 Troubleshooting Once the recovery process is complete, click on the Unplug or Eject Hardware removal icon on your PC task tray. When you reach the message: The 'USB Mass Storage device' can now be safely removed from the system, click •...
- Page 36 Troubleshooting Unable to download MP3 file – Battery low and/ or connection between the set and computer is loose. • Check battery status and USB cable connection. – Electrostatic discharge. • Remove battery and replace after several seconds. Set skips/ repeats files –...
-
Page 37: Technical Data
Technical data Amplifier system Audio out 2 x 5mW S/N ratio >80dB Frequency response 20Hz - 20KHz Connections I/O Interface 5 pin mini USB connector. Memory capacity built-in (SA220) 64 MB * built-in (SA230) 128 MB * * full memory capacity may not be available as some memory will be reserved for the device. Supported format 8kbps-320kbps 5kbps-160kbps... - Page 38 Technical data MUSIC mode Equalizer Adjustable: Custom 6 presets: N Normal, Rock, Pop, Jazz, Classical, Bass1, Bass2 Power supply Battery 1 x AAA, LR03 or UM4 General Dimensions 55mm x 76mm x 21mm Weight 50g (without battery) Battery playtime 9 hours using AAA alkaline Windows and Windows Media Audio are registered trademarks of Microsoft Corporation Pentium is a registered trademark of Intel Corporation.
- Page 39 Meet Philips at the Internet http://www.audio.philips.com SA220 SA230 SA235 SA238 lkw0326/hk...