
Related Manuals for JVC NX-F55


Summary of Contents for JVC NX-F55
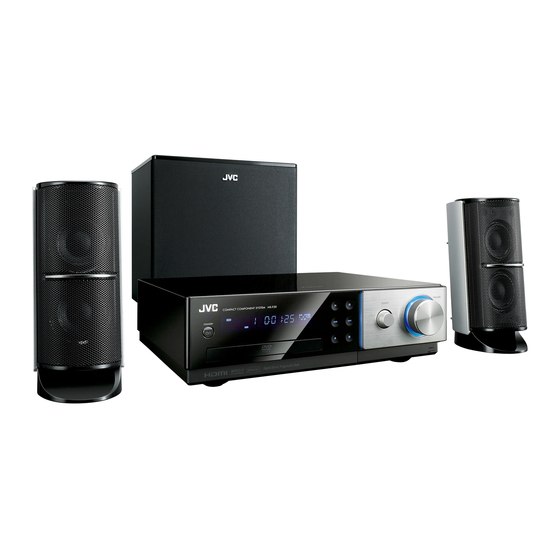
- Page 1 COMPACT COMPONENT SYSTEM NX-F55 Consists of CA-NXF55, SP-THFT3F and SP-NXF30W NX-F40 Consists of CA-NXF40, SP-NXF40F and SP-NXF30W NX-F30 Consists of CA-NXF30, SP-NXF30F and SP-NXF30W INSTRUCTIONS GVT0267-001C...
- Page 2 Warnings, cautions and others CAUTION To reduce the risk of electrical shocks, fire, etc.: 1. Do not remove screws, covers or cabinet. 2. Do not expose this appliance to rain or moisture. CAUTION The F button in any position does not disconnect the mains line. Disconnect the mains plug to shut the power off completely (the STANDBY lamp goes off).
- Page 3 — CAUTION Proper Ventilation To avoid risk of electric shock and fire and to protect from damage, locate the apparatus as follows: Top/Front/Back/Sides: No obstructions should be placed in the areas shown by the dimensions below. Bottom: Place on the level surface. Maintain adequate air path for ventilation by placing on a stand with a height of 10 cm or more.
- Page 4 Penalties may be applicable for incorrect disposal of this waste, in accordance with national legislation. (Business users) If you wish to dispose of this product, please visit our web page http://www.jvc.eu/ to obtain information about the take-back of the product. Battery [Other Countries outside the European Union] Notice: These symbols are only valid in the European Union.
- Page 5 IMPORTANT for the U.K. DO NOT cut off the mains plug from this equipment. If the plug fitted is not suitable for the power points in your home or the cable is too short to reach a power point, then obtain an appropriate safety approved extension lead or consult your dealer.
-
Page 6: Table Of Contents
Table of contents Thank you for purchasing a JVC product. Please read all instructions carefully before operation, to ensure your complete understanding and to obtain the best possible performance from the unit. Introduction Playing back sources from external devices Part description ......3 Using the remote control ....4... - Page 7 Troubleshooting......60 Specifications ......64 Recording from a CD to a Main unit (CA-NXF55/ CA-NXF40/CA-NXF30) USB device ..............64 Speakers (SP-THFT3F) (For NX-F55) ..64 Recording from a CD to a USB Speakers (SP-NXF40F/ SP-NXF30F) (For NX- device..........44 F40/NX-F30) ..........64 Subwoofer (SP-NXF30W) (For NX-F55/NX-F40/ Recording all tracks from a CD to a USB device NX-F30) ............64...
-
Page 8: Part Description
Part description The numbers refer to the pages in which the parts are explained. Front view Refer to “Display 29, 30 window” below. 16, 24, 25, STANDBY 22, 23 29–31, 45 lamp Remote control sensor 11, 12 15, 22, 23 15, 22 11, 15, 23, 12, 16, PHONES... -
Page 9: Using The Remote Control
Using the remote control 12, 22 12, 29 11, 12, 22–25, 29, 30, 33, 34, 44 11, 12, 23, 24, 29, 46, 47 12, 16 50–52 12, 21 12, 21 49, 50 12, 17, 22, 24, 25, 30 31, 33, 38, 39, 48–52 50–52 11, 12, 16, 21, 22, 24, 30, 32, 35, 36, 40, 44, 49–52... -
Page 10: Preparation
Preparation Do not connect the power cable until all other connections have been made. Connecting the FM antenna FM antenna (supplied) Main unit (rear view) Stretch out the FM antenna to the best position for radio reception. When radio reception with the supplied FM antenna is poor, or when using a communal antenna Main unit (rear view) Antenna cable Communal... -
Page 11: Connecting The Speakers And Subwoofer
Connecting the speakers and subwoofer Connect the speakers to the main unit by connecting the colored connectors to the same color terminals on the rear of the main unit. For NX-F55 SP-THFT3F/SP-NXF30W White Main unit (rear view) Black Blue Speaker cable... -
Page 12: When Installing The Speakers On The Floor (For Sp-Thft3F)
(not supplied) • DO NOT connect more than one speaker cable to one speaker terminal. CAUTION For NX-F55 only: • The each speaker weighs approximately 0.85 kg. Sufficient care must be taken when installing • The speaker has a groove on... -
Page 13: Connecting A Tv
• To obtain the best possible sound from the Dimensions of 124 mm System, install all speakers at the same the wall-mount distance from the listening position. attachment for Main unit the speakers Subwoofer (SP-THFT3F) Left speaker Right speaker Speaker layout Install the speakers on a flat and level surface to ensure the best sound quality. - Page 14 Preparation (continued) Do not connect the power cable until all other connections have been made. Connecting a TV with the Connecting a TV with the [HDMI MONITOR OUT] terminal [COMPONENT] terminals This system can output uncompressed digital video signals to a TV compatible with HDMI (High Definition Multimedia Interface).
-
Page 15: Connecting External Digital Audio Devices
Connecting external digital Connecting external analog audio devices audio devices Output Analog audio Output MD player or device satellite receiver To an optical digital output terminal Audio cable Optical digital cable (not supplied) (not supplied) Main unit (rear view) Input Input Output Main unit... -
Page 16: Selecting The Video Signal Type
Preparation (continued) Press (cursor) to select the video signal type suitable for the • When the TV is connected to the [VIDEO] terminal, select “576I”. • When the TV is connected to the [COMPONENT] terminals, select “576P”. • When the TV is connected to the [HDMI Remote control MONITOR OUT] terminal, the video signal mode selector... -
Page 17: Basic Operations
Basic operations Turning on/off the main unit Press [AUDIO ] (or [STANDBY on the main unit). • The power of the main unit turns on and the [STANDBY] lamp (button) on the main unit turns Number off. buttons • Press [AUDIO ] (or [STANDBY ] on the Remote control... -
Page 18: Turning Off The Sound Temporarily
Basic operations (continued) Turning off the sound Adjusting the volume level temporarily for surround/subwoofer sound Press [MUTING]. • Press [MUTING] again or [VOL +] or [VOL –], or You can adjust the volume level for the left and turn the [VOLUME] control on the main unit to right surround sound and the subwoofer sound restore the sound. -
Page 19: Selecting The Headphone Surround Mode
For the locations of the remote control buttons, refer to page 12. Selecting the headphone Selecting the surround surround mode volume level You can listen to surround sound via headphones You can increase the surround volume level. connected to the [PHONES] terminal. This function is effective for the following conditions: ■When headphones are connected to the... -
Page 20: Using The Sleep Timer
For the locations of the remote control buttons, refer to page 12. Basic operations (continued) Using the sleep timer Changing the brightness of the display window When the time you specify elapses, the main unit automatically turns off. ■When the main unit is turned on Press [SLEEP]. -
Page 21: Listening To Fm Radio
Listening to FM radio Press [TUNING ] or [TUNING repeatedly to select a radio station (frequency). • When the main unit has received an FM radio, the “ST” (stereo) indicator lights up in the display window. Number ■ Automatic tuning: buttons You can also select a radio station using automatic tuning. -
Page 22: Tuning In To A Preset Fm Radio Station
Listening to FM radio (continued) Tuning in to a preset FM Radio Data System radio station Receiving FM radio with Radio Data Presetting radio stations in the main unit allows System you to easily tune in to a radio station. Radio Data System allows FM radio stations to Presetting FM stations send an additional signal along with their regular... - Page 23 For the locations of the remote control buttons, refer to page 16. Press [PTY SEARCH]. Changing the Radio Data System Display on the main unit information You can refer to Radio Data System information in the display window while listening to an FM radio broadcast.
- Page 24 Listening to FM radio (continued) PTY codes NONE: Undefined. FINANCE: Stock market reports, commerce and trading. NEWS: News. CHILDREN: Programs targeted at a young audience. AFFAIRS: Topical program expanding or SOCIAL: Programs about sociology, history, enlarging upon news-debate or geography, psychology and society. analysis.
- Page 25 For the locations of the remote control buttons, refer to page 16. • While listening to a program tuned in with the Switching to a program type of your Enhanced Other Networks function, you can choice temporarily only use [TA/News/Info] and [DISPLAY] as the tuner operation buttons.
-
Page 26: Playing Back Sources From External Devices Playing Back Sources From External Devices
Playing back sources from external devices Playing back sources from external devices Press [AUDIO IN] or [DIGITAL IN]. • [AUDIO IN] is for selecting the device connected to the [AUDIO IN] terminals. • [DIGITAL IN] is for selecting the device connected to the [DIGITAL IN] terminal. -
Page 27: Basic Operations Of Disc/File Playback
Basic operations of disc/file playback Playing back a disc This part explains how to play back the types of discs shown above. Number Press on the remote control or buttons on the main unit. Remote control • The disc tray ejects. mode selector Place a disc on the disc tray. -
Page 28: Playing Back A File
Basic operations of disc/file playback (continued) NOTE Playing back a file • When a file on a USB device is played back, the “USB” indicator lights up in the display window. • You can also use the main unit. When you turn This part explains how to play back 1) files [SOURCE] to select “DVD”... -
Page 29: Display Window On The Main Unit For Disc/File Types
For the locations of the remote control buttons, refer to page 22. Press (cursor) to Display window on the main select a group and track. unit for disc/file types NOTE • You can also use the number buttons and to select a track. •... - Page 30 Basic operations of disc/file playback (continued) DVD VR VCD/SVCD ■When a disc is played back ■When a disc is played back Chapter number Elapsed playback time Track number Playback control • You can use the menu screen to control [DISPLAY] is pressed. playback of a PBC compatible disc.
- Page 31 For the locations of the remote control buttons, refer to page 22. MP3/WMA/WAV/ASF/DivX/MPEG1/ MPEG2 file ■When a disc is played back ■When a file is played back Track number Elapsed playback time Track number Elapsed playback time ■When a disc is stopped [DISPLAY] is pressed.
- Page 32 Basic operations of disc/file playback (continued) JPEG file Messages on the TV screen ■When a file is played back When a DVD VIDEO or a USB device is selected as the source, the messages shown below are displayed on the TV screen to indicate the status of the DVD VIDEO or USB device.
- Page 33 For the locations of the remote control buttons, refer to page 22. Guide icons on the TV screen Indicators in the display window (on-screen guide) The indicators corresponding to the status below light up in the display window. : Play ■Digital signal format indicators : Pause Lights up when Dolby Digital signal comes...
-
Page 34: Stopping Playback
Basic operations of disc/file playback (continued) Stopping playback Pausing playback ■ When a disc/file is played back ■ When a disc/file is played back Press Press • To return to normal playback, press [DVD Resuming playback [USB ] or (playback). Advancing the picture frame by frame When playback is stopped in the middle, playback... -
Page 35: Playing Back From A Position 10 Seconds Before
For the locations of the remote control buttons, refer to page 22. Playing back from a position Selecting a chapter/track 10 seconds before using the number buttons ■When a disc is played back (PBC off) ■When a disc/file is played back Press Use the number buttons to select the NOTE... -
Page 36: Selecting A Chapter/Track From The Menu Screen
For the locations of the remote control buttons, refer to page 22. Basic operations of disc/file playback (continued) Selecting a chapter/track ■When a disc is stopped or played back from the menu screen Press [TOP MENU/PG] to display the original program or press ■When a disc is stopped or played back [MENU/PL] to display the play list. -
Page 37: Convenient Functions Of Disc/File Playback
Convenient functions of disc/file playback Playing back a disc/file in the desired order (Program playback) Number buttons (only on a loaded disc) Remote control You can program a maximum of 99 chapters or mode selector tracks. The same chapter or track can be programmed more than once. - Page 38 Convenient functions of disc/file playback (continued) Example: TV screen for a DVD VIDEO Press the number buttons to (Program screen) program tracks/chapters. • You can refer to the program number in the display window by pressing [DISPLAY]. Display for a DVD VIDEO •...
-
Page 39: Playing Back A Disc/File In A Random Order (Random Playback)
For the locations of the remote control buttons, refer to page 32. Playing back a disc/file in a Playing back a disc/file random order repeatedly (Repeat playback) (Random playback) (PBC off) ■When a disc/file is played back (only on a loaded disc) Press [REPEAT]. -
Page 40: Selecting The Audio Language And Subtitle Language
Convenient functions of disc/file playback (continued) Selecting the audio language Magnifying the picture and subtitle language ■When a disc/file is played back ■When a disc/file is played back or paused ■ IMPORTANT ■ IMPORTANT • Slide the remote control mode •... -
Page 41: Adjusting The Picture Quality (Vfp)
For the locations of the remote control buttons, refer to page 32. Press (cursor) to select the Adjusting the picture quality item you want to adjust. (VFP) • Each time you press (cursor), the item changes on the TV screen as follows. - “GAMMA”... -
Page 42: Using The Status Bar And The Menu Bar
Using the status bar and the menu bar ■When a disc/file is played back Information displayed on the status Press [ON SCREEN] twice. Example: TV screen for a DVD VIDEO DVD VIDEO/DVD VR Status bar Example: Status bar for a DVD VIDEO (DVD VIDEO) Current title number Menu bar... - Page 43 For the locations of the remote control buttons, refer to page 32. Function list Refer to page 34. Changes the time information in the TIME (For A-B repeat playback, refer to display window and the status bar. page 39.) Repeat mode Time display Instead of steps 3 and 4 on page 37, press [ENTER] repeatedly.
-
Page 44: Playing Back A Specified Part Repeatedly (A-B Repeat Playback)
For the locations of the remote Using the status bar and the menu bar (continued) control buttons, refer to page 32. Playing back a specified part Designating the time (Time repeatedly (A-B repeat search) playback) (PBC off) (PBC off) ■When a disc is played back You can play back a desired part repeatedly by Press [ON SCREEN] twice. -
Page 45: Changing The Initial Settings With The Preference Screen
Changing the initial settings with the preference screen Basic operations ■When a disc/file is stopped or no disc is You can use the preference screen to change the loaded (“NO DISC” is displayed in the initial settings of the main unit according to the display window) environment where the main unit is used. -
Page 46: Picture
Changing the initial settings with the preference screen (continued) PICTURE Items Items Contents ( : initial setting) Contents ( : initial setting) MONITOR Select the display method suitable for PICTURE Select the item suitable to the video TYPE your TV. SOURCE source. -
Page 47: Audio
AUDIO OTHERS Items Items Contents ( : initial setting) Contents ( : initial setting) DIGITAL Select the output signal type suitable to RESUME Select or OFF. (Refer to page 29.) AUDIO the device connected to the [DIGITAL Select or OFF. (Refer to page 28.) OUTPUT OUT] terminal. -
Page 48: Language Codes
Changing the initial settings with the preference screen (continued) List of relationships of DIGITAL AUDIO OUTPUT preference items and output signals DIGITAL AUDIO OUTPUT preference Playback disc/file STREAM/PCM DOLBY DIGITAL/PCM PCM ONLY 48 kHz, 16/20/24-bit linear PCM DVD VIDEO 48 kHz, 16-bit stereo linear PCM 96 kHz linear PCM DVD VIDEO DTS DVD VIDEO DTS bit stream... -
Page 49: Usb Device
Recording from a CD to a USB device You can record sound from a CD to a USB device. Recording all tracks from a CAUTION CD to a USB device • It should be noted that it may be unlawful to re-record pre-recorded tapes, records, or Place a CD on the disc tray and discs without the consent of the owner of... - Page 50 Recording from a CD to a USB device (continued) Press [ENTER] to start recording. CAUTION • Do not bump or move the main unit while • The “REC” indicator starts flashing in the recording sound. Such movement may interfere display window. with recording.
-
Page 51: Deleting A Track/Group From A Usb Device
For the locations of the remote control buttons, refer to page 44. NOTE Deleting a track/group from a • When “WAIT” is displayed in the display window, USB device you cannot start deletion. Wait until the main unit reads signals from the USB device. Connect the USB device. -
Page 52: Adding (Editing) A Title To A Track/Group On A Usb Device
Recording from a CD to a USB device (continued) Enter a title. Adding (Editing) a title to a • Refer to “Entering a title” on page 48. track/group on a USB device • To cancel editing a title, press Connect the USB device. Press [ENTER]. - Page 53 For the locations of the remote control buttons, refer to page 44. Available characters Entering a title You can use the characters shown below by repeatedly pressing the number buttons ([1] to [9] The operation is explained with the time when to and [0]).
-
Page 54: Operating Other Equipment
20, 39, 40 21, 22, 23, Magnavox 10 Sony 24, 25 13, 14, 18, Mitsubishi 11, 33 Telefunken 26, 27, 28 13, 14, 18, Miver Thomson 26, 27, 28, Nokia 12, 34 Toshiba The initial code setting is “01 (JVC)”. -
Page 55: Operating An Stb Using The Remote Control
• It is recommended that you slide the remote Luxor control mode selector to [AUDIO] after using this The initial code setting is “01 (JVC)”. function. Most of the other functions can be used when the remote control mode selector is at [AUDIO]. -
Page 56: Operating A Vcr Using The Remote Control
Hitachi 08, 09 Siemens [AUDIO]. 28, 29, 30, Loewe 05, 10, 11 Sony 17, 18, 19, Magnavox 04, 05 Telefunken 31, 32 12, 13, 14, Mitsubishi Toshiba The initial code setting is “01 (JVC)”. - Page 57 For the locations of the remote control buttons, refer to page 49. Release [STB/VCR Using the remote control for the VCR operation NOTE • It is recommended that you slide the remote Before the VCR operation, select the remote control mode selector to [AUDIO] after using this control mode for the VCR.
-
Page 58: Basic Operations Of Hdmi Cec
• Not all HDMI devices are compatible with CEC. If the main unit is connected to non-CEC compatible devices, these devices cannot be controlled using the CEC function. • The CEC function may not work with some CEC devices. (When the main unit is connected to a non-JVC product, the CEC function may not work.) •... -
Page 59: Notes On Operations
Notes on operations Suitable locations for the Notes on handling main unit Important cautions To minimize the need for servicing and maintain the high quality of this system, do not place the Power cable main unit in the following locations: •... -
Page 60: License And Trademark
Notes on operations (continued) • USE OF THIS PRODUCT IN ANY MANNER Safety Precautions THAT COMPLIES WITH THE MPEG-4 VISUAL STANDARD IS PROHIBITED, EXCEPT FOR Avoid moisture, water and dust USE BY A CONSUMER ENGAGING IN Do not place the system in moist or dusty places. PERSONAL AND NON-COMMERCIAL Avoid high temperatures ACTIVITIES. -
Page 61: Notes On Discs/Files
Notes on discs/files Playable disc/file types Playable discs * DVD VIDEO, DVD VR * , VCD, SVCD, CD, CD-R * CD-RW * , DVD-R * , DVD-RW * , +R, +RW Playable files recorded on a disc * MP3, WMA, WAV, JPEG, ASF, DivX, MPEG1, MPEG2 Playable files recorded on a USB device * •... - Page 62 • If characters other than single-byte cannot be played back. alphanumeric characters are used in the file • JVC does not guarantee the operation and name of an MP3/WMA/WAV/JPEG/ASF file, the sound quality of discs not authorized by CD-DA, track/file name is not displayed correctly.
- Page 63 • The profile and level should be MP@ML (Main USB device. Profile at Main Level)/SP@ML (Simple Profile at • JVC bears no responsibility for any loss of data Main Level)/MP@LL (Main Profile at Low Level). on the USB device while using this system.
-
Page 64: Data Hierarchy
Notes on discs/files (continued) Data hierarchy Handling discs DVD VIDEO/DVD VR • Do not use a commercially-available non- A DVD VIDEO consists of “titles” and each title standard shape disc (like a heart, flower or credit may be divided into “chapters”. card, etc.), because it may damage the system. -
Page 65: Troubleshooting
Troubleshooting ■General Reference Problem Possible cause Possible solution page Power does not come The power cable is not Connect the power cable correctly. connected to an AC outlet. You cannot operate any Some specific operations are This is not a malfunction. –... - Page 66 Troubleshooting (continued) ■General (continued) Reference Problem Possible cause Possible solution page No sound is produced. The speakers are not Connect the speakers correctly. connected correctly. Headphones are connected. Disconnect the headphone plug. The sound is turned off. Restore the sound. If “NO AUDIO”...
- Page 67 ■For a loaded disc Reference Problem Possible cause Possible solution page A disc cannot be played If “REGION CODE ERROR!” Confirm the region code number back. appears on the TV screen, the compatible with this system. region code number of a disc is not compatible with this system.
- Page 68 Troubleshooting (continued) ■For a connected USB device Reference Problem Possible cause Possible solution page Files on a USB device If “CANNOT PLAY THIS Check that the file types recorded cannot be played back. DEVICE” appears on the TV on the USB device are compatible screen, the files on a USB with this system.
-
Page 69: Specifications
• Optical digital output terminal x 1 Subwoofer (SP-NXF30W) –23 dBm to –15 dBm • Component video output terminals x 1 (For NX-F55/NX-F40/NX-F30) Y: 1.0 Vp-p, 75 Ω terminated : 0.7 Vp-p, 75 Ω terminated : 0.7 Vp-p, 75 Ω terminated... - Page 70 2008 Victor Company of Japan, Limited 1209WMKMDWJMM...