Table of Contents
Advertisement
Quick Links
Contents
1 Read Before Proceeding .......................................................1
1.1 Safety Precautions....................................................................... 1
1.2 Personal Information and Data Security ...................................... 2
1.3 Legal Notice................................................................................. 3
2 Getting Started.......................................................................6
2.1 Key Functions at Your Fingertips................................................. 6
2.2 Important Information About the Battery...................................... 7
2.3 Power Saving Tips ...................................................................... 7
2.4 Power On or Off Your Mobile Phone ........................................... 8
2.5 Using the Touchscreen................................................................ 9
2.6 Locking and Unlocking the Screen .............................................. 9
2.7 Home Screen............................................................................. 10
2.8 Application Screen..................................................................... 15
2.9 Using a microSD Card ............................................................... 15
3 Calling..................................................................................16
3.1 Making a Call ............................................................................. 16
3.2 Answering or Rejecting a Call.................................................... 17
3.3 Other Operations During a Call ................................................. 19
3.4 Using the Call log....................................................................... 19
3.5 Direct Connect Call.................................................................... 20
3.6 Alerts.......................................................................................... 21
3.7 DC Group Calls.......................................................................... 22
3.8 Direct Connect Settings ............................................................. 25
3.9 Interrupt Request ....................................................................... 26
3.10 Missed DC Event ..................................................................... 26
3.11 Concurrency ............................................................................ 26
3.12 Using Airplane Mode ............................................................... 28
4 Contacts...............................................................................28
i
Advertisement
Table of Contents

Related Manuals for Huawei U8867Z


Summary of Contents for Huawei U8867Z
-
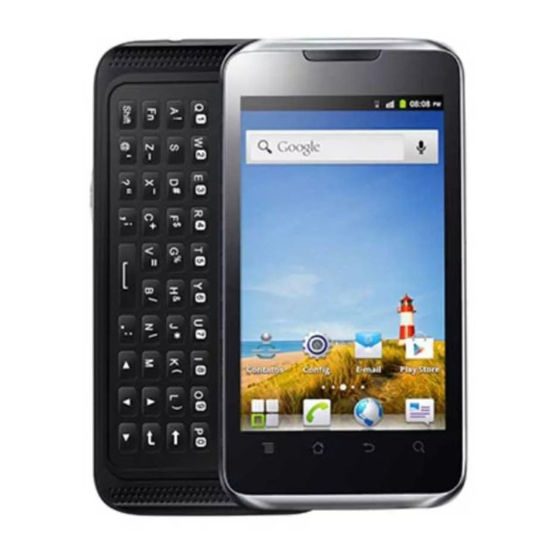
Page 1: Table Of Contents
Contents 1 Read Before Proceeding ............1 1.1 Safety Precautions............... 1 1.2 Personal Information and Data Security ........2 1.3 Legal Notice................. 3 2 Getting Started...............6 2.1 Key Functions at Your Fingertips..........6 2.2 Important Information About the Battery........7 2.3 Power Saving Tips ..............7 2.4 Power On or Off Your Mobile Phone ........... - Page 2 4.1 Opening the Contacts Application ..........28 4.2 Importing Contacts from a USIM Card........28 4.3 Adding a Contact ............... 29 4.4 Adding a Contact to Your Favorites........... 29 4.5 Searching for a Contact ............. 29 4.6 Editing a Contact ............... 29 4.7 Communicating with Your Contacts...........
- Page 3 9.1 Creating a Google Account............51 9.2 Gmail ..................52 9.3 Talk .................... 53 9.4 Maps ..................55 9.5 YouTube ..................56 9.6 Play Store .................. 56 10 Synchronizing Information ..........58 10.1 Managing Your Accounts............58 10.2 Customizing Your Account Synchronization......60 11 Using Other Applications ...........61 11.1 AppInstaller................
-
Page 4: Read Before Proceeding
1 Read Before Proceeding 1.1 Safety Precautions Please read the safety precautions carefully to ensure the correct use of your mobile phone. Do not crash, throw, or puncture your mobile phone. Avoid the falling, squeezing, and bending of your mobile phone. Do not use your mobile phone in a moist environment, such as the bathroom. -
Page 5: Personal Information And Data Security
Do not place your mobile phone or its accessories in containers with a strong electromagnetic field. Do not place magnetic storage media near your mobile phone. Radiation from the phone may erase the information stored on them. Do not put your mobile phone in a high-temperature place or use it in a place with flammable gas such as a gas station. -
Page 6: Legal Notice
• Be sure to obtain third-party applications from a legitimate source. Downloaded third-party applications should be scanned for viruses. • Install security software or patches released by Huawei or third-party application providers. • Some applications require and transmit location information. As a result, a third- party may be able to share your location information. - Page 7 Third-party service providers provide content and services through network or transmission tools outside of the control of Huawei Technologies Co., Ltd. To the greatest extent permitted by applicable law, it is explicitly stated that Huawei Technologies Co., Ltd. shall not...
- Page 8 Huawei Technologies Co., Ltd. shall not be responsible for the legality, quality, or any other aspects of any software installed on this product, or for any uploaded or downloaded third-party works, such as texts, images, videos, or software.
-
Page 9: Getting Started
export, re-export or import the product mentioned in this manual including the software and technical data therein. 2 Getting Started All the pictures in this guide are for your reference only. Your phone’s actual display features may be different to those described here, depending on its software version. -
Page 10: Important Information About The Battery
• Press to adjust the voice or speaker volume during a call • Press to adjust the speaker volume while using the music Volume keys player or other applications. • Press to adjust the incoming notification volume, such as ringtone volume and Alert volume. Direct Push to use Direct Connect. -
Page 11: Power On Or Off Your Mobile Phone
• When your mobile phone is not in use, turn off the screen backlight. • Reduce the time it takes for your screen backlight to turn off when your phone is idle. • Lower the screen brightness. • Turn off Bluetooth when you are not using it. Only make your phone visible to other Bluetooth devices when you need to establish a Bluetooth connection. -
Page 12: Using The Touchscreen
2.5 Using the Touchscreen 2.5.1 Touchscreen Actions • Touch: Tap the screen with your finger to select an item, confirm a selection, or start an application. • Touch and hold: Touch an item with your finger and do not release it until the mobile phone responds. -
Page 13: Home Screen
10:23 If you have set up a screen unlock pattern, you will be prompted to draw the pattern on the screen to unlock it. 2.7 Home Screen Notification bar: Displays reminders and phone status icons. Flick down to open the notification panel. Display area: Main display area of the phone. - Page 14 2.7.1 Notification and Status Icons Signal strength No signal Connected to GPRS GPRS in use mobile network Connected to EDGE EDGE in use mobile network Connected to 3G mobile 3G in use network Roaming Airplane mode Receiving location data Bluetooth on from GPS Vibration mode Alarm enabled...
- Page 15 New voicemail Connected to a PC Open Wi-Fi network Upcoming event available Uploading Downloading Phone storage space is Connected to a VPN getting low Preparing the mircoSD More undisplayed card notifications Synchronizing data Synchronization failed Portable Wi-Fi hotspot on USB tethering on DC call in progress DC group call in progress DC Speaker off...
- Page 16 Opening the Notification Panel 1. When a new notification icon appears on the notification bar, place your finger on the notification bar and flick down to open the notification panel. You can also open the notification panel from the Home screen: Touch >...
- Page 17 2.7.4 Customizing the Home Screen Adding a New Home Screen Item 1. Touch and hold a blank area on the Home screen until the Add to home screen menu is displayed. You can also touch > Add on the Home screen to display the Add to home screen menu.
-
Page 18: Application Screen
2.7.7 Changing the Wallpaper 1. On the Home screen, touch > Wallpaper. 2. Touch the following menu items to select a picture and set it as the wallpaper: • Gallery • Live wallpapers • Wallpapers 2.7.8 Changing the Theme 1. On the Home screen, touch >... -
Page 19: Calling
1. Connect your mobile phone to your PC with the USB cable provided. Your PC will detect the microSD card as a removable storage device. 2. Open the notification bar, and then touch USB connected. 3. Touch Turn on USB storage in the dialog box that opens to confirm that you want to transfer files. -
Page 20: Answering Or Rejecting A Call
3.1.1 Making a Call with the Phone Application Your mobile phone supports the SmartDial function, that is, when you touch numbers on the dialer, the phone automatically searches among your contacts and lists the matching results ordered according to the accuracy of the match. If no contacts match the information entered, the phone will not display any result. - Page 21 Drag to the right to answer the call. 3.2.2 Ending a Call During a call, touch End to hang up. 3.2.3 Rejecting an Incoming Call Drag to the left to reject the call.
-
Page 22: Other Operations During A Call
3.3 Other Operations During a Call 3.3.1 Making a Conference Call If you receive a new call while you are already in a call, you can add the second call to the call you are in. This feature is known as conference calling. You can also set up a conference call with multiple callers. -
Page 23: Direct Connect Call
3. Touch Add to contacts in the options menu. 4. Touch Create new contact or scroll through the contact list and touch an existing contact name. 3.5 Direct Connect Call With Direct Connect (DC), you can instantly talk to another Direct Connect user or group of users with the push of a button. -
Page 24: Alerts
3.5.3 Answering Direct Connect Calls 1. When you receive a Direct Connect call, your phone will play an incoming Direct Connect call notification. Then the caller may begin speaking, or simply wait for you to respond to the notification. 2. After the caller finishes speaking, or releases the Direct Connect button, you will hear a tone to indicate that the floor is now open and you may speak. -
Page 25: Dc Group Calls
Storing an Alert in Notifications If you do not respond to an Alert, the Alert will be removed from your screen and will be placed as a missed Alert icon in the Notification bar. 3.6.3 Using the Alert Notification 1. Open the Notification panel. 2. - Page 26 5. Select members to add, and then touch Add. You can push the Direct Connect button to start the DC Group call immediately without saving the group. 6. Touch Done to save the group. Adding a Member to DC Groups Stored in Contacts 1.
- Page 27 4. Touch Delete to confirm. 3.7.6 Making DC Group Calls 1. From DC Groups or Call log tabs, touch the DC Group call icon. 2. Push the Direct Connect button to start the DC Group call. 3.7.7 Answering DC Group Calls Proceed as if answering a Direct Connect call from one user.
-
Page 28: Direct Connect Settings
3.8 Direct Connect Settings Touch > Settings > DC settings and then you can control how your phone handles Direct Connect calls, DC Group calls, and so on. • One touch DC: Set the Direct Connect button behavior. • Exiting DC Group call I initiated: Select the check box to allow the call to continue when you exit a DC Group call you initiated. -
Page 29: Interrupt Request
3.9 Interrupt Request 3.9.1 Sending an Interrupt Request 1. During a Direct Connect call or a DC Group call, when another party is speaking and you want to speak, then you can touch Interrupt to send a message to the speaker that you want to talk. - Page 30 • Push and hold the Direct Connect button to make a Direct Connect call. • Touch Send Alert, a message displays, and then you can push the Direct Connect button to send an Alert. • Touch Resume voice call to return to the voice call. If you do not respond to the missed Direct Connect call screen, then the notification will disappear after several seconds.
-
Page 31: Using Airplane Mode
3.11.6 Converting a Direct Connect Call to a Voice Call When a quick Direct Connect call turns into a longer conversation, the phone supports the switch between a Direct Connect call and a voice call. During a Direct Connect call, if you have saved the voice call number of the other party on the phone, touch >... -
Page 32: Adding A Contact
4. Touch Copy. 5. If you have more than one account on your phone, touch the account into which you want to import the contacts. 4.3 Adding a Contact 1. In the contact list, touch > New contact. 2. If you have more than one account with contacts, touch the account to which you want to add the contact. -
Page 33: Communicating With Your Contacts
2. Touch the category of contact information you wish to change: name, phone number, email address, or any other information you recorded earlier. 3. Make the desired changes to the contact information, and then touch Done. To cancel all of your changes, touch Cancel. 4.7 Communicating with Your Contacts From the Contacts or Favorites tab, you can quickly call or send a text (SMS) or multimedia (MMS) message to a contact’s default phone number. -
Page 34: Backing Up And Synchronizing Contacts
4.9 Backing Up and Synchronizing Contacts You can back up contacts from your phone to a microSD card, or synchronize phone contacts with a server using your Google account. 4.9.1 Using a microSD Card to Back Up Contacts Backing Up Contacts 1. -
Page 35: Sending Contacts
carrier. Please use them according to local laws and regulations. 4.10.1 Joining Contacts 1. On the Home screen, touch > Contacts. 2. Touch a duplicated contact, and then touch > Edit contact. 3. Touch > Join. 4. Select the contact to be joined to combine two duplicate contacts. Two contacts will be joined together and displayed as one contact. -
Page 36: Using The Onscreen Keyboard
5 Using the Onscreen Keyboard 5.1 Displaying the Keyboard To enter text, use the onscreen keyboard. Some applications open the keyboard automatically. In others, touch a text field to open the keyboard. Touch to hide the keyboard. Touch and hold a text field to open the Edit text menu. 5.1.1 Choosing an Input Method 1. - Page 37 q w e r t y u i o p & ” a s d f g h j k To enter a word, just drag your z x c v b n m finger over the letters in the word. I’ll q w e r t y u i o p...
- Page 38 On the Home screen, touch > Settings > Language & keyboard > Android keyboard > Voice input to turn on or turn off voice input. 5.1.4 Using the Landscape Keyboard If you find the keyboard inconvenient or difficult to use, turn your mobile phone sideways.
-
Page 39: Customizing Keyboard Settings
5.2 Customizing Keyboard Settings 1. On the Home screen, touch > Settings > Language & keyboard. 2. In Keyboard settings, select an input method to customize the keyboard settings. 6 Messaging The Messaging application allows you to exchange text messages (SMS) and multimedia messages (MMS) with anyone using an SMS-or-MMS-capable phone. - Page 40 6.1.3 Creating and Sending a Multimedia Message You can use multimedia messages to make everyday communications very special. You can record a message and send it as an audio file, sing 'Happy Birthday' and send it to friend, or send a slideshow of photographs of a special event. The possibilities are endless.
-
Page 41: Email
6.1.4 Opening and Viewing a Multimedia Message 1. In the message list, touch the message thread you wish to view. 2. Touch the multimedia message to view the message. 6.1.5 Replying to a Message 1. In the message list, touch a text or multimedia message thread to open it. 2. - Page 42 1. On the Home screen, touch > Email. 2. In the email system list, select a system, or select Others. 3. To customize your email settings, follow the onscreen instructions, and then touch Next. 4. Enter the account name and the name you want other people to see when they receive an email from you.
- Page 43 4. Enter the subject of your message and compose the message. To send an attachment with the message, touch , and then touch Add attachment. 5. When you are finished, touch Send. If you are not ready to send the message, touch Save as draft or touch save the message as a draft.
-
Page 44: Getting Connected
7 Getting Connected 7.1 Mobile Networks Your mobile phone will be automatically configured to use your network operator’s 2G/3G service (if available) when you turn on the phone for the first time. Note that the USIM card must be inserted (some CDMA mobile phones have an integrated UIM card and do not need a separate UIM card) 7.1.1 Checking the Network Connection 1. -
Page 45: Sharing Your Phone's Data Connection
7.2.2 Connecting to a Wireless Network 1. After turning on Wi-Fi, touch > Settings. 2. Touch Wireless & networks > Wi-Fi settings. You will see a list of detected Wi-Fi networks in the Wi-Fi networks section. 3. Touch a Wi-Fi network to connect to it. •... -
Page 46: Browser
3. Open the drivers folder and then open the usbnet_driver_win2k_xp folder. Double-click the link DownloadActiveSync.url. 4. Download and install ActiveSync 4.5 or a later version. 5. After the installation, you are able to use USB tethering. 7.3.2 Sharing Your Phone’s Data Connection via USB To use USB tethering in different operating systems, you may need to prepare your computer to establish a network connection via USB. - Page 47 Touch to open the browser options menu and perform one of the following operations: • New window: Touch to open a new window. • Bookmarks: Touch to display bookmarks. • Windows: Touch to view thumbnails of open browser windows. You can switch to another browser window or open a new one on this screen.
-
Page 48: Bluetooth
7.4.4 Customizing Browser Settings Customize the browser to suit your browsing style. Use Browser to set page content, privacy, and security preferences. In a browser window, touch , and then touch More > Settings. 7.5 Bluetooth Your mobile phone has Bluetooth, which allows you to create a wireless connection with other Bluetooth devices so you can share files with your friends, talk hands-free with a Bluetooth headset, or even transfer photos from your phone to your PC. -
Page 49: Entertainment
1. Ensure that the Bluetooth function on your mobile phone is enabled. 2. On the Home screen, touch > Settings > Wireless & networks > Bluetooth settings. Your mobile phone will then scan for Bluetooth devices in range. 3. Touch the device you want to pair your mobile phone with. 4. - Page 50 • Touch to close the camera. Capture Screen Thumbnail of the last photo. Touch to preview the photos or videos. Slide up to record videos; slide down to take photos. Touch to take a photo. Touch to customize the camera settings. On the capture screen, touch to show the capture panel.
-
Page 51: Using The Gallery
8.1.4 Recording a Video 1. Open the camera application, and then switch it to camcorder mode. 2. If necessary, change the camcorder settings. 3. Frame the scene with which you want to start your video. 4. Touch to start recording a video. 5. -
Page 52: Enjoying Music
3. Touch the screen. Then the zoom panel appears. You can zoom in or zoom out on the picture. The picture viewer supports the automatic rotation function. When you rotate your mobile phone, the picture adjusts itself to the rotation. 8.2.3 Rotating a Picture 1. -
Page 53: Listening To The Fm Radio
5. After copying music, unmount or eject the drive as required by your PC’s operating system to safely remove the mobile phone. 6. Disconnect the mobile phone from the PC. 8.3.2 Opening the Media Library Touch > Music to display the media library. The Music application organizes your music files by storage location. -
Page 54: Google Services
8.4.1 Opening the FM Radio 1. On the Home screen, touch > FM Radio to open the application. 2. The first time you open FM radio, touch Auto tuning, which automatically scans for available FM channels, saves them as presets, and plays the first FM channel found. -
Page 55: Gmail
3. Enter the first name, last name, and user name for your Google account, and then touch Next. The mobile phone will connect to a Google server to check whether the username is available. If the username you entered is already in use, you will be prompted to choose another one or select one from a list. -
Page 56: Talk
2. Enter the message recipient’s email address in the To field. If you are sending the email to several recipients, separate the email addresses with commas. You can add as many message recipients as you want. If you want to send a copy (Cc) or a blind copy (Bcc) of the email to other recipients, touch , and then touch Add Cc/Bcc. - Page 57 9.3.1 Opening Talk On the Home screen, touch > Talk to open the application. Your Talk account is based on the Google account you set up with your mobile phone. 9.3.2 Adding a Friend 1. In the friends list, touch , and then touch Add friend.
-
Page 58: Maps
Select the check box to make your mobile phone vibrate Vibrate when you receive a new instant message. 9.3.6 Signing out of Talk On the friends list screen, touch , and then touch Sign out to quit Talk. 9.4 Maps Maps lets you find your current location, view real-time traffic conditions (depending on availability in your locale), and get detailed directions to various destinations. -
Page 59: Youtube
9.4.4 Getting Directions 1. While viewing a map, touch , and then touch Directions. 2. Enter the starting point in the first text box, and then enter your destination in the second text box. 3. Touch the icon for car, public transit, or walking directions. 4. - Page 60 9.6.1 Opening Play Store 1. On the Home screen, touch > Play Store. 2. When you open Play Store for the first time, the Google Play Terms of Service window will appear. Touch Accept to continue. 9.6.2 Searching for Applications There are a few different ways to find applications on the Play Store home screen, including: •...
-
Page 61: Synchronizing Information
9.6.4 Uninstalling an Application 1. On the Play Store screen, touch > My Apps. 2. Touch the application you want to uninstall, and then touch Uninstall. 3. When prompted, touch OK to remove the application from your mobile phone. 10 Synchronizing Information Some applications on your mobile phone give you access to the same personal information that you can add, view, and edit on your computer. - Page 62 example, you may need to know the account’s domain or server address. 2. Touch Add account. 3. Touch the kind of account to add. 4. Follow the onscreen steps to enter the required and optional information about the account. Most accounts require a username and password, but the details depend on the kind of account and the configuration of the service to which you are connecting.
-
Page 63: Customizing Your Account Synchronization
10.2 Customizing Your Account Synchronization You can configure background data use and synchronization options for all the applications on your phone. You can also configure what kind of data you synchronize for each account. For some accounts, synchronization is bi-directional; changes that you make to the information on your mobile phone are made to the copy of that information on the web. -
Page 64: Using Other Applications
11 Using Other Applications 11.1 AppInstaller You can use this installer to install more than one applications at a time. 11.1.1 Install Applications 1. On the Home screen, touch > AppInstaller. Then the installer will scan and display all the applications (.apk files) in the microSD card. 2. - Page 65 the event. 2. Enter the event name. • If there is a time frame for the event, touch From and To to set the beginning and end times of the event. • If the event is a special occasion such as a birthday or a day-long activity, set the date for From and To, and then select the All day check box.
-
Page 66: File Manager
3. Touch OK. 11.2.5 Customizing Calendar Settings In any calendar view, touch . Then touch More > Settings and choose from the following: • Hide declined events: Select to hide events for which you have declined invitations. • Set alerts & notifications: Touch to set event reminders to alert you, to send you a notification, or to turn off event notifications on your mobile phone. - Page 67 2. Touch the file or folder you want to move or copy. When a file or a folder is selected, a check mark will appear. To select or unselect all files, touch Select all or Unselect all. 3. Touch Cut or Copy. 4.
-
Page 68: Clock
Extracting a File 1. Touch and hold a compressed file. 2. Touch Extract. 3. Edit the save path for the extracted files. 4. Touch OK to start extracting. 11.3.6 Viewing Your Memory Status On the File Manager screen, touch to open the options panel, and then touch Memory Status. -
Page 69: Calculator
4. Touch Ringtone to select a ringtone for the alarm. 5. Select the Vibrate check box to enable the phone to vibrate, in addition to playing the ringtone. 6. Touch Label to enter a name for the alarm. 7. Touch Done. The alarm clock still works when the phone is powered off. -
Page 70: Managing Your Mobile Phone
12 Managing Your Mobile Phone To configure your mobile phone, touch > Settings. 12.1 Setting the Date and Time When your mobile phone is using the date and time settings provided automatically by the network, you cannot manually set the date, time, and time zone. -
Page 71: Setting Ringers
12.2.2 Adjusting the Time Before the Screen Turns Off If your mobile phone is idle for several minutes, it will turn off the screen to save battery power. To set a longer or shorter idle time: 1. On the Settings screen, touch Display >... -
Page 72: Setting Phone Services
2. In the message list, touch > Settings > Select ringtone. 3. In the displayed list, select an option: • Ringtone: Select a preinstalled ringtone. The ringtone plays when selected. • Music: Select the music stored in the phone or on the microSD card. The music plays when selected. -
Page 73: Protecting Your Mobile Phone
2. If your mobile phone does not have speech synthesizer data installed, connect to Android Play Store and let it guide you through the process of downloading and installing the data. 3. Follow the instructions to install the voice data. 12.5.2 Adjusting the Speech Rate 1. -
Page 74: Managing Applications
12.6.3 Protecting Your Mobile Phone with a Numeric PIN You can set up a numeric PIN to lock your phone. 1. On the Settings screen, touch Location & security > Set up screen lock > PIN. 2. Enter at least four characters. 3. -
Page 75: Resetting Your Mobile Phone
2. Touch an application, and then touch Uninstall. 12.7.3 Moving an Application to the microSD Card Some applications are designed to be stored on your phone’s USB storage or microSD card (depending on the model of your phone), rather than in its internal storage. -
Page 76: Appendix
12.8.2 Restoring Factory Data If you reset your phone to its factory settings, all of your personal data stored on the phone, including information about your Google account, any other accounts that you have configured, your system and application settings, and any applications you have installed will be erased. - Page 77 atmospheres include the areas where you would normally be advised to turn off your vehicle engine. Triggering of sparks in such areas could cause an explosion or a fire, resulting in bodily injuries or even deaths. Do not power on your device at refueling points such as service stations.
- Page 78 such as a device case and a device holster are not composed of metal components. Keep your device 1.5 cm away from your body to meet the requirement earlier mentioned. • On a stormy day with thunder, do not use your device when it is being charged, to prevent any danger caused by lightning.
- Page 79 • Use the AC power supply defined in the specifications of the charger. An improper power voltage may cause a fire or a malfunction of the charger. • Do not connect two poles of the battery with conductors, such as metal materials, keys, or jewelries.
- Page 80 • Do not place your device, battery, and charger in places where they can get damaged because of collision. Otherwise, it may lead to battery leakage, device malfunction, overheating, fire, or explosion. • Do not place magnetic storage media such as magnetic cards and floppy disks near the device.
- Page 81 (1) this device may not cause harmful interference, and (2) this device must accept any interference received, including interference that may cause undesired operation. Caution Changes or modifications made to this device not expressly approved by Huawei Device USA. may void the FCC authorization to operate this device.
-
Page 82: Faqs
13.2 FAQs More FAQs are available at the following website: http://www.huaweidevice.com/worldwide/faq.do?method=index. How Can I Use a microSD Card to Import Contacts to My Phone from a Different Mobile Phone? Your mobile phone only supports contact files in the .vcf format. Save the contacts you want to import to your mobile phone to a microSD card as a .vcf file. - Page 83 How Do I Set a Song As a Phone Ringtone? In Music, touch and hold the song to be set as ringtone, and then touch Use as phone ringtone. How Do I Prevent Automatic Change of Screen Orientation When Rotating My Phone? On the Home screen, touch >...