Table of Contents
Advertisement
Quick Links
Advertisement
Table of Contents

Related Manuals for Huawei U8500


Summary of Contents for Huawei U8500
- Page 1 Welcome to Huawei HUAWEI U8500 User Guide...
-
Page 2: Reading Before Proceeding
1 Reading Before Proceeding 1.1 Safety Precautions Please read the safety precautions carefully to ensure the correct use of your mobile phone. Do not crash, throw, or puncture your mobile phone. Avoid the falling, squeezing, and bending of your mobile phone. Do not use your mobile phone in a moist environment, such as the bathroom. -
Page 3: Legal Notice
No part of this document may be reproduced or transmitted in any form or by any means without prior written consent of Huawei Technologies Co., Ltd. The product described in this manual may include copyrighted software of Huawei Technologies Co., Ltd. and possible licensors. Customers shall not in any manner... - Page 4 Huawei Technologies Co., Ltd. reserves the right to change or modify any information or specifications contained in this manual without prior notice or obligation. Huawei Technologies Co., Ltd. is not responsible for the legitimacy and quality of any products that you upload or download through this mobile phone, including but not limited to the text, pictures, music, movies, and non-built-in software with copyright protection.
-
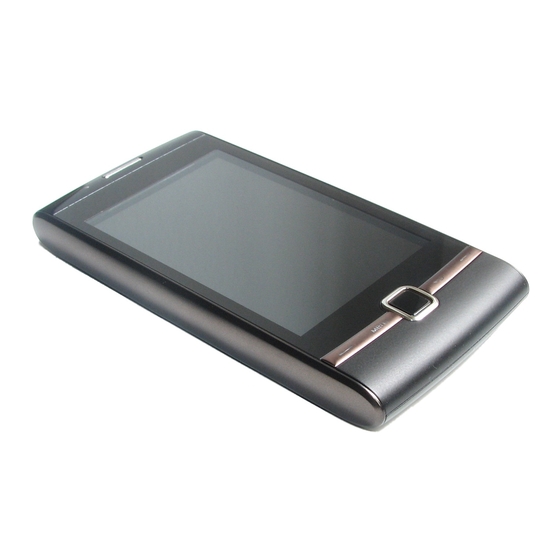
Page 5: Mobile Phone View
export or import the product mentioned in this manual including the software and technical data therein. 2 Getting to Know Your Mobile Phone 2.1 Mobile Phone View 2.1.1 Phone at a Glance All the pictures in this guide are for your reference only. The actual appearance and display features depend on the mobile phone you purchase. -
Page 6: Key Functions At Your Fingertips
Send key Menu key Microphone Power key Charging/Data Headset jack interface Camera Speaker 2.1.2 Key Functions at Your Fingertips • Press to power on your mobile phone. • Press and hold to open the Phone options menu. • Press to lock the screen when your mobile phone is active. •... -
Page 7: Before Getting Started
2.2 Before getting started Installing SIM card Removing battery cover Installing *micro SD card Installing battery Installing battery cover *micro SD is optional 2.2.1 Charging the Battery Before charging the battery, ensure that it has been properly inserted into your phone. -
Page 8: Battery Saving Tips
1. Connect the USB cable that came with your mobile phone to the charger. 2. Connect the USB cable to your mobile phone. Then, plug in the connector of the charger to an electrical outlet. The phone begins charging. If your mobile phone is charged when it is powered on, the battery icon on the Notification bar shows the charging status. -
Page 9: Power On Or Off Your Mobile Phone
• Turn off the data service. 2.2.3 Important Information About the Battery • If the battery has not been used for a long period of time, you may not be able to power on your mobile phone immediately after you begin charging the battery. Allow the battery to charge for a few minutes with the phone powered off before attempting to power on the phone. -
Page 10: Using The Touch Screen
2.3.3 Powering Off Your Mobile Phone 1. Press and hold to open the Phone options menu. 2. Touch Power off. 3. Touch OK. 2.4 Using the Touchscreen 2.4.1 Touchscreen Actions • Touch: Use the touch of your finger to select an item, confirm a selection, or start an application. -
Page 11: Home Screen
If you have set up a screen unlock pattern, you will be prompted to draw the pattern on the screen to unlock it. 2.6 Home Screen 10:23 Notifications bar: Displays the reminders and status icons of your phone. Flick down to open the notifications panel. -
Page 12: Notification And Status Icons
2.6.1 Notification and Status Icons Call in progress using a Call in progress Bluetooth device Call forwarding on Call on hold Missed call Connected to a PC GPS connected Music playing New voicemail New message GPRS connected GPRS in use EDGE connected EDGE in use 2.6.2 Notification Panel... -
Page 13: Viewing Other Parts Of The Home Screen
2.6.3 Viewing Other Parts of the Home Screen 10:23 Flick your finger left or right across the Home screen. Touch a thumbnail to open the Home screen or its extensions. Touch and hold the small dots to view thumbnails of the Home screen and its extensions. 2.6.4 Customizing the Home Screen Adding a New Screen Item 1. -
Page 14: Using A Microsd Card
2.6.5 Changing the Wallpaper 1. On the Home screen, press > Wallpaper. 2. Do any of the following: • Touch Live wallpapers to select a picture and set it as the wallpaper. • Touch Pictures to select a picture and set it as the wallpaper. •... -
Page 15: Making A Call With The Phone Application
3 Calling To make a phone call, you can dial a number or touch a number from your contact list, on a Web page, or in a document. When you are on a call, you can answer other incoming calls or send them to your voicemail box. You can also set up conference calls with several participants. -
Page 16: Answering Or Rejecting A Call
2. Touch to the right of the log entry to dial. If you touch and hold a log entry, the options menu will open. 3.2 Answering or Rejecting a Call 3.2.1 Answering an Incoming Call When you receive a phone call, the incoming call screen opens with the caller's name and number that you have entered in Contacts. -
Page 17: Other Operations During A Call
3.3 Other Operations During a Call 3.3.1 Making a Conference Call If you receive a new call while you are already on a call, you can connect the second call to the call you are on. This feature is known as conference calling. You can also set up a conference call with multiple callers. -
Page 18: Switching Between Calls
3.3.2 Switching Between Calls If you receive a new call while you are already on a call, you can switch between the two calls. 1. While you are on the first call and the second call comes in, answer the incoming call, and then touch >... -
Page 19: Opening The Contacts Application
4.1 Opening the Contacts Application If you have a new mobile phone and have not yet added any contacts, Contacts displays a message with hints on how to start adding contacts to your mobile phone. Touch > Contacts to open the Contacts application. All of your contacts are displayed alphabetically in a list that you can scroll through. -
Page 20: Editing A Contact
2. Enter the name of the contact you wish to search for. As you type, contacts with matching names appear below the search box. 4.5 Editing a Contact You can make changes to the information you have stored for a contact at any time. 1. -
Page 21: Deleting A Contact
4.7 Deleting a Contact 1. In the contacts list, touch and hold the contact that you want to delete, and then touch Delete contact in the options menu. 2. Touch OK to confirm that you want to delete the contact. 5 Using the Onscreen Keyboard 5.1 Displaying the Keyboard Panel To enter text, use the onscreen keyboard. -
Page 22: Using The Android Keyboard
5.1.2 Using the Android Keyboard q w e r t y u i o p a s d f g h j k Touch to delete a character z x c v b n m to the left of the cursor. Touch and hold to delete all ?123 Next... -
Page 23: Using The Swype Keyboard
5.1.3 Using the Swype Keyboard r t y u i o p & ” a s d f g h j k Touch to delete a character z x c v b n m to the left of the cursor. Touch and hold to delete all . -
Page 24: Customizing Keyboard Settings
5.1.4 Using the Landscape Keyboard If you find the keyboard inconvenient or difficult to use, turn your mobile phone sideways. The screen will display the keyboard in landscape orientation, providing you with a wider keyboard layout. 5.2 Customizing Keyboard Settings 1. -
Page 25: Creating And Sending A Multimedia Message
6.1.3 Creating and Sending a Multimedia Message You can use multimedia messages to make everyday communications very special. You can record a message and send it as an audio file, sing 'Happy Birthday' and send it to friend, or send a slideshow of photographs of a special event. The possibilities are endless. -
Page 26: Customizing The Message Settings
2. Touch the text box to compose your message, and then touch Send. 6.1.6 Customizing the Message Settings In the message list, touch , and then touch Settings to customize the message settings. 6.2 Email Your mobile phone also puts email at your fingertips. With your phone’s Email application, you can use your email account with Yahoo!, AOL, or other popular email services on your phone. - Page 27 Adding Other Email Accounts 1. After creating your initial email account, touch on the Inbox screen, and then touch Accounts to access the accounts screen. 2. Touch on the accounts screen, and then touch Add account to create another email account. When adding an additional email account, you have the option to use the new account to send all outgoing messages.
-
Page 28: Changing Email Account Settings
3. Touch OK. 6.2.6 Changing Email Account Settings You can change a number of settings for an account, including how often you check for emails, how you are notified of a new mail, and details about the servers the account uses to send and receive mails. Your account’s incoming and outgoing settings depend on the kind of email service you are using. -
Page 29: Turning On The Data Service
7.1.2 Turning on the Data Service 1. Touch > Settings. 2. Touch Wireless & networks > Mobile networks. 3. Select the Data enabled check box to turn on the data connection. 7.2 Wi-Fi Wi-Fi gives you wireless access to broadband Internet access. To use Wi-Fi on your mobile phone, you need to have an access to wireless access points (hotspots). -
Page 30: Sharing Your Phone's Data Connection Via Usb
7.3 Sharing Your Phone’s Data Connection You can share your mobile phone's data connection with a single computer via a USB cable: USB tethering. You can share your mobile phone's data connection with devices at the same time, by turning your phone into a portable Wi-Fi hotspot. 7.3.1 Sharing Your Phone’s Data Connection via USB To use USB tethering in different operating systems, you may need to prepare your computer to establish a network connection via USB. -
Page 31: Opening A Web Page
When the known or open Wi-Fi networks and the mobile networks are present at the same time, your phone will preferably select a Wi-Fi network for internet access. Open the browser options menu and perform one of the following operations, touch •... -
Page 32: Customizing The Browser Settings
2. Touch , and then touch Bookmarks > Add. The add bookmark screen opens. 3. Edit the bookmark name as needed and then touch OK. Opening a Bookmark 1. In a browser window, touch , and then touch Bookmarks. On the Bookmarks screen, touch the History tab to view the pages you have visited. -
Page 33: Pairing And Connecting A Bluetooth Device
7.5.2 Pairing and Connecting a Bluetooth Device Your mobile Bluetooth lets you do the following: • Hands Free Profile (HFP): allows you to use a hands-free Bluetooth device. • Headset Profile (HSP): allows you to use a mono Bluetooth headset. •... -
Page 34: Taking Photos And Recording Videos
8 Entertainment In addition to being a communication device and personal assistant, your mobile phone also provides you with a multitude of entertainment possibilities. You can take photos, create videos and audio clips, and download and listen to music. 8.1 Taking Photos and Recording Videos The camera is a combination of camera and camcorder that you can use to shoot and share pictures and videos. -
Page 35: Viewing Your Photos
3. Compose your photo within the photo capture screen. 4. Touch and hold . When the frame turns green, the image is in focus. 5. Release to take your photo. The photo you just took is displayed for a moment. You can take another photo or preview your photos. -
Page 36: Using The Gallery
8.2 Using the Gallery Your Gallery application can automatically search for pictures and videos on your microSD card. Use Gallery to sort photos and videos into folders, view and edit pictures, watch videos, and set a picture as wallpaper or as a photo for a contact. 8.2.1 Opening the Gallery Touch >... -
Page 37: Enjoying Music
8.2.4 Cropping a Picture 1. When viewing a picture, touch to display the more operations panel, and then touch Crop. 2. Use the cropping tool to select the portion of the picture to crop. • Drag from the inside of the cropping tool to move it. •... -
Page 38: Listening To Fm Radio
8.3.3 Playing Music 1. Touch a category on the music library screen. 2. Touch the song you want to play. When you are listening to music, press , to use another application. Your music continues to play. To return to the music controls, open the notification panel and then touch the song. -
Page 39: Tuning The Fm Radio
8.4.2 Tuning the FM Radio Open the FM Radio application, and then touch to do the following: • Touch Inching tuning, then touch to fine tune the frequency at -0.05 MHz or +0.05 MHz intervals. Touch OK when you are satisfied. After tuning, touch , and then touch Save channel. -
Page 40: Using Gmail
7. When the Google Terms of Service screen appears, touch I agree, Next. 8. Enter the characters that appear on the screen, and then touch Next. To use another Google account, go to the Accounts & sync settings screen, and touch Add account to select which type of accounts you want to add. 9.2 Using Gmail Gmail is Google’s web-based email service. -
Page 41: Using Talk
9.2.4 Replying To or Forwarding an Email 1. In the mail list, touch the email that you want to reply to or forward. 2. Touch Reply, Reply to all, or Forward. 3. Do one of the following: • If you selected Reply or Reply to all, enter your message. •... - Page 42 3. Touch Send invitation. 9.3.3 Accepting an Invitation 1. If you have invited anyone to chat or if someone else has invited you to chat, this information will appear in the friends list. 2. Touch a pending invitation, and then touch Accept. 9.3.4 Starting a Chat 1.
-
Page 43: Using Maps
9.4 Using Maps Maps lets you find your current location, view real-time traffic conditions (depending on availability in your locale), and get detailed directions to various destinations on a satellite, traffic, or other kind of map. 9.4.1 Enabling Location Source Before you open Maps to find your location or search for places of interest, you must enable "location source". -
Page 44: Using Youtube
6. When you finish viewing or following the directions, touch and touch More > Clear map to reset the map. 9.5 Using YouTube YouTube is Google’s free online video streaming service for viewing, searching for, and uploading videos. 9.5.1 Opening YouTube Touch >... -
Page 45: Searching For Applications
2. When you open Market for the first time, the Android Market Terms of Service window will appear. Touch Accept to continue. 9.6.2 Searching for Applications There are a few different ways to find applications on the Market home screen, including: •... -
Page 46: Synchronizing Information
2. Touch the application you want to uninstall, and then touch Uninstall. 3. When prompted, touch OK to remove the application from your mobile phone. 4. Choose the reason for removing the application, and then touch OK. 10 Synchronizing Information Some applications on your mobile phone give you access to the same personal information that you can add, view, and edit on your computer. -
Page 47: Removing An Account
2. Touch Add account. 3. Touch the kind of account to add. 4. Follow the onscreen steps to enter the required and optional information about the account. Most accounts require a username and password, but the details depend on the kind of account and the configuration of the service to which you are connecting. -
Page 48: Using Other Applications
• Select or clear the Background data check box to control whether applications and services can transmit data when you are not working with them directly (that is, when they are running in the background). If you clear this option, Gmail stops receiving new mail, Calendar stops synchronizing events, and so on, until you touch the Refresh menu item or send an email. -
Page 49: Creating An Event
11.1.2 Creating an Event 1. On any calendar view, touch . Then touch More > New event to open the Event details screen. 2. Enter the event name. • If there is a time frame for the event, touch From and To to set the beginning and end times of the event. -
Page 50: Using The Clock
• Set alerts & notifications: Touch to set event reminders to alert you, send you a notification, or to turn off event notifications on your mobile phone. • Select ringtone: Touch to select the ringtone to sound when you receive an event reminder. -
Page 51: Using The Calculator
6. Touch Label to enter a name for the alarm. 7. Touch Done. Customizing Alarm Settings On the alarm list screen, touch , and then touch Settings. 11.3 Using the Calculator Use the calculator to solve simple arithmetic problems or use its advanced operators to solve more complex equations. -
Page 52: Setting The Display
When your mobile phone is using date and time settings provided automatically by the network, you cannot manually set the date, time, and time zone. 1. On the Settings screen, touch Date & time. 2. Clear the Automatic check box. 3. -
Page 53: Setting Ringers
12.3 Setting Ringers 12.3.1 Turning On Silent Mode 1. On the Settings screen, touch Sound. 2. Select the Silent mode check box to silence all sounds except alarms, and music and video media sound. 12.3.2 Adjusting the Volume You can adjust the volume from the Home screen or any application screen (except during a call or when playing music or videos). -
Page 54: Setting Phone Services
12.4 Setting Phone Services 12.4.1 Customizing Call Settings You mobile phone service provider offers different services such as call forwarding, call waiting, fixed dialing numbers, and voicemail. You can customize many of these services if they are part of your calling plan. On the Settings screen, touch Call settings to customize your call functions. -
Page 55: Adjusting The Speech Rate
12.5.2 Adjusting the Speech Rate 1. On the Settings screen, touch Voice input & output > Text-to-speech settings > Speech rate. 2. Select a speed at which the text is to be spoken. 12.6 Protecting Your Mobile Phone 12.6.1 Turning on Your SIM Card PIN 1. -
Page 56: Managing Applications
12.7 Managing Applications 12.7.1 Viewing an Installed Application 1. On the Settings screen, touch Applications > Manage applications. 2. In the applications list, do any of the following: • Touch , and then touch Sort by size. Then touch an application to view its details. -
Page 57: Restoring Factory Data
12.8.2 Restoring Factory Data If you reset your phone to the settings that were configured at the factory, all of your personal data stored on the phone, including information about your Google Account, any other accounts, your system and application settings, and any applications you have downloaded will be erased. - Page 58 vehicle engine. Triggering of sparks in such areas could cause an explosion or a fire, resulting in bodily injuries or even deaths. Do not power on your device at refueling points such as service stations. Comply with restrictions on the use of radio equipment in fuel depots, storage, and distribution areas, and chemical plants.
- Page 59 components. Keep your device 1.5 cm away from your body to meet the requirement earlier mentioned. • On a stormy day with thunder, do not use your device when it is being charged, to prevent any danger caused by lightning. •...
- Page 60 • Do not connect two poles of the battery with conductors, such as metal materials, keys, or jewelries. Otherwise, the battery may be short-circuited and may cause injuries and burns on your body. • If battery electrolyte leaks out, ensure that the electrolyte does not touch your skin and eyes.
- Page 61 • Do not place magnetic storage media such as magnetic cards and floppy disks near the device. Radiation from the device may erase the information stored on them. • Do not leave your device, battery, and charger in a place with an extreme high or low temperature.
- Page 62 (2) this device must accept any interference received, including interference that may cause undesired operation. Caution Caution Changes or modifications made to this device not expressly approved by Huawei Technologies Co., Ltd. may void the FCC authorization to operate this device.
- Page 63 Industry Canada Compliance This phone complies with Industry Canada RSS Gen/RSS 133/RSS 132/RSS 102/RSS 139/RSS 210/ICE 003.This phone complies with the Class B limits for radionoise emissions as set out in the interference causing standard entitled "Digital Apparatus" (ICES-003) of Industry Canada.