
Related Manuals for Electrolux EBL4


Summary of Contents for Electrolux EBL4
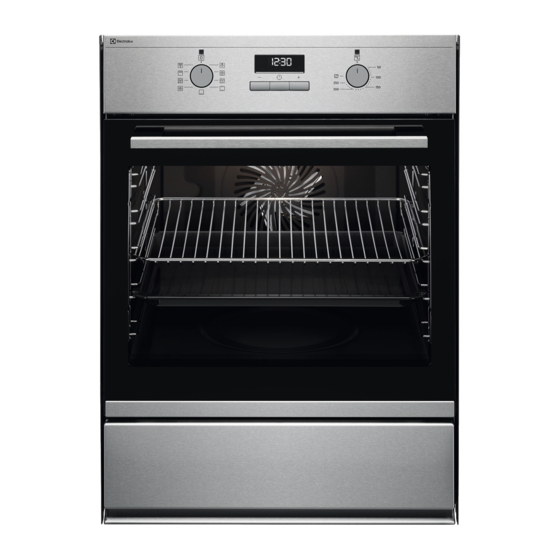
- Page 1 ..................... EBL4 EN OVEN USER MANUAL...
-
Page 2: Table Of Contents
13. GARANTIE, GARANZIA, GUARANTEE ........27 WE’RE THINKING OF YOU Thank you for purchasing an Electrolux appliance. You’ve chosen a product that brings with it decades of professional experience and innovation. Ingenious and stylish, it has been designed with you in mind. -
Page 3: Safety Information
ENGLISH 1. SAFETY INFORMATION Before the installation and use of the appliance, carefully read the supplied instructions. The manufacturer is not responsible if an incorrect installation and use causes in- juries and damages. Always keep the instructions with the appliance for future reference. 1.1 Children and vulnerable people safety WARNING! Risk of suffocation, injury or permanent disability. -
Page 4: Safety Instructions
• Before maintenance cut the power supply. • Do not use harsh abrasive cleaners or sharp metal scrapers to clean the glass door since they can scratch the surface, which may result in shattering of the glass. • Be careful, when you touch the storage drawer. It can get hot. - Page 5 ENGLISH • Do not let mains cables to come in • Always keep the appliance door closed touch with the appliance door, specially when the appliance is in operation. when the door is hot. • Open the appliance door carefully. The •...
-
Page 6: Product Description
• Clean regularly the appliance to prevent WARNING! the deterioration of the surface material. Risk of electrical shock. • Remaining fat or food in the appliance • Before replacing the lamp, disconnect can cause fire. the appliance from the power supply. -
Page 7: Before First Use
ENGLISH Baking tray For cakes and biscuits. Storage drawer Below the oven cavity is the storage drawer. WARNING! The storage drawer can become hot when the appliance operates. Do not store any flammable mate- rials in the drawer. 4. BEFORE FIRST USE WARNING! After approximately five seconds, the Refer to the Safety chapters. - Page 8 To deactivate the appliance turn the • The indicator comes on when the oven control knobs for the oven functions heats up. and temperature to off position. • The lamp comes on when the appli- ance operates. Knob symbol, indicator or •...
-
Page 9: Clock Functions
ENGLISH 5.3 Electronic programmer Function indicators Time display Function indicator Button + hr min Selection button Button - If you do not use the appliance for 3 minutes, the brightness of the display decreases to lower the power consumption. When you press a button, the display goes back to the active mode. -
Page 10: Using The Accessories
10 www.electrolux.com Press and hold the button -. 6.2 Cancelling the clock functions The clock function goes out after some seconds. Press the Selection button again and again until the necessary function in- dicator flashes. 7. USING THE ACCESSORIES WARNING! Refer to the Safety chapters. -
Page 11: Additional Functions
ENGLISH 8. ADDITIONAL FUNCTIONS surfaces of the appliance cool. If you de- 8.1 Cooling fan activate the appliance, the cooling fan can When the appliance operates, the cooling continue to operate until the appliance fan activates automatically to keep the cools down. - Page 12 12 www.electrolux.com Baking results Possible cause Remedy The baking time is too The next time you bake, The cake is too dry. long. set a shorter baking time. The oven temperature is Set a lower oven temper- The cake browns uneven-...
- Page 13 ENGLISH Cakes / pastries / breads on baking trays Shelf Temperature Time Type of baking Oven function position (°C) (min) Plaited bread / Conventional 170 - 190 30 - 40 bread crown Cooking Christmas stollen Conventional 50 - 70 160 - 180 Cooking Bread (rye bread): 1.
- Page 14 14 www.electrolux.com Shelf Temperature Time Type of baking Oven function position (°C) (min) Short bread / Short Conventional bread / Pastry 20 - 30 Cooking Stripes Biscuits made with True Fan Cook- 150 - 160 15 - 20 sponge mixture...
- Page 15 ENGLISH 1) Preheat the oven 9.4 Multileveled Baking Cakes / pastries / breads on baking trays True Fan Cooking Temperature Type of baking Shelf position Time (min) (°C) 2 levels 3 levels Cream puffs / 1 / 4 25 - 45 160 - 180 Eclairs Dry streusel cake...
- Page 16 16 www.electrolux.com Shelf posi- Temperature Time Type of baking tion (°C) (min) Pizza (with a lot of topping) 180 - 200 20 - 30 Tarts 180 - 200 40 - 55 Spinach flan 160 - 180 45 - 60 Quiche Lorraine...
- Page 17 ENGLISH Type of Oven Shelf po- Tempera- Time Quantity meat function sition ture (°C) (min) Roast beef per cm of Turbo Grill- or fillet: me- 6 - 8 180 - 190 thickness dium Roast beef per cm of Turbo Grill- or fillet: well 8 - 10 170 - 180...
- Page 18 18 www.electrolux.com Game Type of Quantity Oven Shelf po- Tempera- Time meat function sition ture (°C) (min) Saddle of up to 1 kg Conven- 30 - 40 hare, leg of tional hare Cooking Saddle of 1.5 - 2 kg Conven-...
- Page 19 ENGLISH Grilling Time (min) Food to be Shelf posi- Temperature grilled tion (°C) 1st side 2nd side Roast beef 210 - 230 30 - 40 30 - 40 Filet of beef 20 - 30 20 - 30 Back of pork 210 - 230 30 - 40 30 - 40...
- Page 20 20 www.electrolux.com Convenience food Shelf position Temperature (°C) Time (min) Lasagne / Cannello- 160 - 180 40 - 60 ni, frozen Oven baked cheese 170 - 190 20 - 30 Chicken Wings 190 - 210 20 - 30 Frozen Ready Meals...
- Page 21 ENGLISH • Fill the jars up to the same level and 9.11 Preserving - Bottom Heat close with a clamp. Things to note: • The jars cannot touch each other. • Use only preserve jars of the same di- • Put approximately 1 / 2 litre of water in- mensions available on the market.
-
Page 22: Care And Cleaning
22 www.electrolux.com Shelf position Food to be Temperature Time dried (°C) 1 level 2 levels Peppers 1 / 4 60 - 70 5 - 6 Vegetables for 1 / 4 60 - 70 5 - 6 sour Mushrooms 1 / 4... - Page 23 ENGLISH 10.1 Shelf supports Removing the shelf supports You can remove the shelf supports to clean the side walls. Pull the front of the shelf support away from the side wall. Pull the rear end of the shelf support away from the side wall and remove Installing the shelf supports Install the shelf supports in the opposite sequence.
-
Page 24: What To Do If
24 www.electrolux.com Install the shelf supports. 10.3 Removing / inserting the door To clean the door remove it. CAUTION! Be careful when you remove the door from the appliance. The door is heavy. There is a risk of injury or damage to the appliance. -
Page 25: Installation
ENGLISH Problem Possible cause Remedy The appliance does not The appliance is deacti- Activate the appliance. heat up. vated. Refer to the chapter "Dai- ly use". The appliance does not The clock is not set. Set the clock. Refer to heat up. - Page 26 26 www.electrolux.com 12.1 Installing the oven WARNING! Installation into flammable material must agree with NIN SEV 1000 ca.50 (Swiss Association of the Cantonal Fire Insurance Companies) fire protection guidelines and regula- tions. A = appliance N = recess Pull the appliance drawer out as far as it goes and remove it.
-
Page 27: Garantie, Garanzia, Guarantee
ENGLISH Pull the appliance drawer out as far min. 20 as it goes and remove it. Use the side handles to hold the oven and slide it flush into the recess. CAUTION! Make sure the cable is free when you move the appliance. Use a minimum of 2 screws to attach the oven on the 2 sides (Detail A). - Page 28 28 www.electrolux.com 13.1 Kundendienst, service-clientèle, Servizio clienti, Customer Service Centres Servicestellen Points de Serv- Servizio dopo Point of vendita Service 5506 Mägenwil/Zürich In- 3018 Bern Mor- 1028 Préver- 6928 Manno dustriestrasse 10 genstrasse 131 enges Le Trési 6 Via Violino 11 9000 St.
- Page 29 ENGLISH 14. ENVIRONMENT CONCERNS Recycle the materials with the symbol and electronic appliances. Do not dispose . Put the packaging in applicable appliances marked with the symbol containers to recycle it. with the household waste. Return the Help protect the environment and human product to your local recycling facility or health and to recycle waste of electrical contact your municipal office.
- Page 30 30 www.electrolux.com...
- Page 31 ENGLISH...
- Page 32 www.electrolux.com/shop...