Table of Contents
Advertisement
POWER
Í
/I
INPUT
SELECTOR
Dear customer
Thank you for purchasing this product. For optimum performance
and safety, please read these instructions carefully.
Before connecting, operating or adjusting this product, please read
these instructions completely. Please keep this manual for future
reference.
P
PC
DVD
DISC 1
1
DISC 4
4
PICTURE MODE
7
SETUP
100
OPEN/CLOSE/EJECT
TOP MENU
NAVI
DIRECT
NAVIGATOR
OSD/
DISPLAY
TV VOL
RESET
TV/VIDEO
MULTI RE-MASTER
SUBWOOFER LEVEL
POSITION
MEMORY
PROG
SHIFT
1
2
3
4
5
DISC
DISC CHANGE
OPEN/CLOSE
DISC CHECK
VOLUME
DISC
/REW
FF/
5
4
3
STOP
PLAY
STOP
PLAY
2
1
-
DEMO
PHONES
DOWN
TV
INPUT SELECTOR
DVD/VHS
FM/AM
VHS
TV
TUNER
DISC 2
DISC 3
2
3
DISC 5
CH
5
6
VOLUME
8
9
Operating Instructions
ENTER
S10
0
SKIP
SLOW/SEARCH
JET REW
CD MODE
MENU
PLAY
LIST
ENTER
RETURN
TV VOL
PAGE
MIX 2CH
REPEAT
GROUP
SUBTITLE
PLAY MODE
C.S.M
C.FOCUS
PROGRESSIVE
SFC
SUPER SRND
MUTING
ZOOM
QUICK REPLAY
REC
SPEED
SLEEP
TEST
PL
AUDIO
CH SELECT
CANCEL
DVD/VHS Home Theater
EJECT
CH
REC
UP
Model No.
Region number
The player plays DVD-Video marked with labels containing the
region number "1" or "ALL".
Example:
1
ALL
\For\U.S.A.]
As an
determined that this product meets the
E
NERGY
efficiency.
[For\U.S.A.\only]
The warranty can be found on page 54.
[For\Canada\only]
The warranty can be found on page 55.
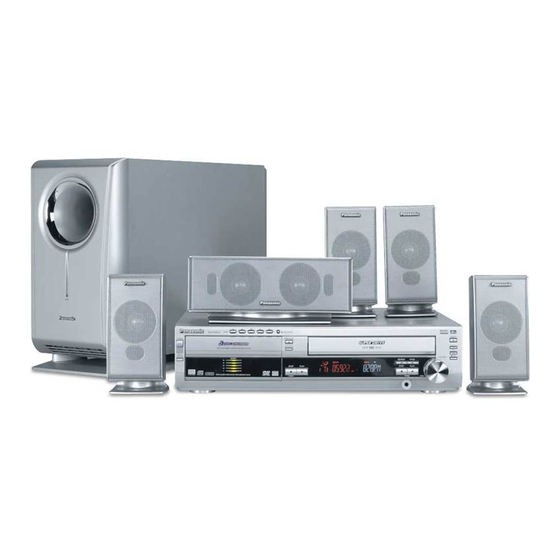
Sound System
SC-HT820V
1
2
4
E
S
NERGY
TAR
®
Partner, Panasonic has
S
®
TAR
guidelines for energy
RQT7388-P
Advertisement
Table of Contents

Related Manuals for Panasonic SC-HT820V


Summary of Contents for Panasonic SC-HT820V
-
Page 1: Operating Instructions
The warranty can be found on page 54. [For\Canada\only] The warranty can be found on page 55. DVD/VHS Home Theater Sound System SC-HT820V Model No. As an NERGY ® Partner, Panasonic has determined that this product meets the ® NERGY guidelines for energy efficiency. RQT7388-P... -
Page 2: Note To Catv System Installer
Stacking Place the unit in a horizontal position, and do not place anything RQT7388 heavy on it. SC-HT820V Operations in these instructions are described mainly with the remote control, but you can do the operations on the SA-HT820V main unit if the controls are the same. -
Page 3: Table Of Contents
Table of contents Accessories ....... . .4 The remote control ....... 4 IMPORTANT SAFETY INSTRUCTIONS . -
Page 4: Accessories
The model number and serial number of this product can be found on either the back or the bottom of the unit. Please note them in the space provided below and keep for future reference. SC-HT820V MODEL NUMBER SERIAL NUMBER... -
Page 5: Important Safety Instructions
IMPORTANT SAFETY INSTRUCTIONS Read these operating instructions carefully before using the unit. Follow the safety instructions on the unit and the applicable safety instructions listed below. Keep these operating instructions handy for future reference. Read these instructions. Keep these instructions. Heed all warnings. -
Page 6: Discs That Can Be Played
≥Recorded with Panasonic DVD-Video recorders ≥To play JPEG files, select “Play as Data Disc” in Other Menu (➜ page 27) § on a Panasonic DVD-Video recorders or § the disc after recording. HighMAT™ and the HighMAT logo are either trademarks or registered trademarks of Microsoft Corporation in the United States and/or other countries. -
Page 7: Control Reference Guide
Control reference guide ≥If [SHIFT] appears after the button name the function will not work unless you use with [SHIFT] button. Make sure to press [SHIFT] and the button. Remote control—common buttons INPUT SELECTOR DVD/VHS FM/AM TUNER DISC 1 DISC 2 DISC 3 DISC 4 DISC 5... -
Page 8: Remote Control-Vhs Operation
Control reference guide ≥If [SHIFT] appears after the button name the function will not work unless you use with [SHIFT] button. Make sure to press [SHIFT] and the button. Remote control—VHS operation DVD/VHS DISC 1 DISC 2 DISC 3 DISC 4 DISC 5 PICTURE MODE ENTER... -
Page 9: Main Unit And Subwoofer
Main unit and subwoofer DISC CHANGE DISC OPEN/CLOSE POWER Í DISC CHECK INPUT SELECTOR D I S C STOP DEMO ∫ Common buttons [1] Power button [Í/I POWER]......15 Press to switch the unit from on to standby mode or vice versa. -
Page 10: Simple Setup
Simple setup STEP Locating How you set up your speakers can affect the bass and the sound field. Note the following points. ≥Place speakers on flat secure bases. ≥Placing speakers too close to floors, walls, and corners can result in excessive bass. Cover walls and windows with thick curtains. ≥The front left, right and surround speakers are all the same. -
Page 11: Step2 Connecting Speakers With The Subwoofer
STEP Connecting speakers with the subwoofer Attach the speaker-cable stickers to make connection easier. Speaker cables ≥3a4-m (13-foot) cables (For Front and Center speakers) ≥2a10-m (33-foot) cables (For Surround speakers) Front (R) Copper Silver Subwoofer [Note] ≥Never short-circuit positive (i) and negative (j) speaker wires. ≥Be sure to connect only positive (copper) wires to positive (i) terminals and negative (silver) wires to negative (j) terminals. -
Page 12: Step3 Television
STEP Television Basic connection 75 ≠ coaxial cable VHF/UHF RF IN If the connector doesn’t match ➜ page 49 RF IN RF OUT Outdoor antenna To enjoy cable and satellite television Connection ➜ page 48 Subscribe to a cable or satellite company. RQT7388 VIDEO 75 ≠... -
Page 13: For Better Video From Dvd
≥Connect to the component video input terminals on a 480P compatible television. (Video will not be displayed correctly if connected to an incompatible television.) ≥All televisions manufactured by Panasonic and that have 480P input connectors are compatible. Consult the manufacturer if you have another brand of television. -
Page 14: Step4 Radio And System Connection
STEP Radio and system connection System cable Connect the AC power supply cords after all other connections are complete. AM loop antenna Click! Stand the antenna up on its base. Place the antenna where the reception is best. Keep loose antenna cord away from other wires and cords. -
Page 15: Step5 Plug-In Auto Tuning
STEP Plug-in Auto Tuning INPUT SELECTOR DVD/VHS FM/AM TUNER DISC 1 DISC 2 DISC 3 DISC 4 DISC 5 PICTURE MODE VOLUME ENTER SETUP SKIP SLOW/SEARCH JET REW CD MODE OPEN/CLOSE/EJECT TOP MENU MENU NAVI DIRECT PLAY NAVIGATOR LIST ENTER OSD/ DISPLAY RETURN... -
Page 16: Step6 Operating The Television
ZOOM QUICK REPLAY PROG SPEED SLEEP TEST SHIFT AUDIO CH SELECT CANCEL Manufacturer Panasonic 01, 02 FISHER G.E. 02, 03, 07, 09 GOLD STAR 07, 15 HITACHI 05, 07 03, 06, 07, 10, 14, 15 MAGNAVOX 06, 07, 11, 15, 22... -
Page 17: Step7 Dvd Quick Setup
STEP DVD QUICK SETUP INPUT SELECTOR DVD/VHS FM/AM TUNER DISC 1 DISC 2 DISC 3 DISC 4 DISC 5 PICTURE MODE VOLUME ENTER SETUP SKIP SLOW/SEARCH JET REW CD MODE OPEN/CLOSE/EJECT MENU TOP MENU NAVI DIRECT PLAY NAVIGATOR LIST ENTER OSD/ DISPLAY RETURN... -
Page 18: Basic Play
Basic play Turn on the television and select the appropriate video input for the DVD. 1 Put the remote control in DVD mode. INPUT SELECTOR DVD/VHS FM/AM TUNER DISC 1 DISC 2 DISC 3 DISC 4 DISC 5 Remote control signal sensor PICTURE MODE VOLUME ENTER... - Page 19 INPUT SELECTOR DVD/VHS FM/AM TUNER DISC 1 DISC 2 DISC 3 DISC 4 DISC 5 PICTURE MODE VOLUME ENTER SETUP SKIP SLOW/SEARCH JET REW CD MODE OPEN/CLOSE/EJECT MENU TOP MENU NAVI DIRECT PLAY NAVIGATOR LIST ENTER OSD/ DISPLAY RETURN TV VOL TV VOL RESET PAGE...
-
Page 20: Convenient Functions
Convenient functions INPUT SELECTOR DVD/VHS FM/AM TUNER DISC 1 DISC 2 DISC 3 DISC 4 DISC 5 PICTURE MODE VOLUME ENTER SETUP SKIP SLOW/SEARCH JET REW CD MODE OPEN/CLOSE/EJECT TOP MENU MENU NAVI DIRECT PLAY NAVIGATOR LIST ENTER OSD/ DISPLAY RETURN TV VOL TV VOL... -
Page 21: Multi Re-Master
INPUT SELECTOR DVD/VHS FM/AM TUNER DISC 1 DISC 2 DISC 3 DISC 4 DISC 5 PICTURE MODE VOLUME ENTER SETUP SKIP SLOW/SEARCH JET REW CD MODE OPEN/CLOSE/EJECT TOP MENU MENU NAVI DIRECT PLAY NAVIGATOR LIST ENTER OSD/ DISPLAY RETURN TV VOL TV VOL RESET PAGE... -
Page 22: All Group/Program/Random Play
Convenient functions INPUT SELECTOR DVD/VHS FM/AM TUNER DISC 1 DISC 2 DISC 3 DISC 4 DISC 5 PICTURE MODE VOLUME ENTER SETUP SKIP SLOW/SEARCH JET REW CD MODE OPEN/CLOSE/EJECT TOP MENU MENU NAVI DIRECT PLAY NAVIGATOR LIST ENTER OSD/ DISPLAY RETURN TV VOL TV VOL... -
Page 23: Repeat Play
INPUT SELECTOR DVD/VHS FM/AM TUNER DISC 1 DISC 2 DISC 3 DISC 4 DISC 5 PICTURE MODE VOLUME ENTER SETUP SKIP SLOW/SEARCH JET REW CD MODE OPEN/CLOSE/EJECT TOP MENU MENU NAVI DIRECT PLAY NAVIGATOR LIST ENTER OSD/ DISPLAY RETURN TV VOL TV VOL RESET PAGE... -
Page 24: Using Navigation Menus
Using navigation menus INPUT SELECTOR DVD/VHS FM/AM TUNER DISC 1 DISC 2 DISC 3 DISC 4 DISC 5 PICTURE MODE VOLUME ENTER SETUP SKIP SLOW/SEARCH JET REW CD MODE OPEN/CLOSE/EJECT TOP MENU MENU NAVI DIRECT PLAY NAVIGATOR LIST ENTER OSD/ DISPLAY RETURN TV VOL... -
Page 25: Playing Highmat Discs
Playing HighMAT discs [WMA] [MP3] [JPEG] Press [TOP MENU]. While the menu is displayed Select the item following the on- screen instructions. Menu: Takes you to the next menu New Playlist Item Long Name Display Te PAG E 1 / 3 which shows play lists or another menu M e n u 2... -
Page 26: Using On-Screen Menus
Using On-Screen Menus OSD/ DISPLAY Return to the previous menu Press once. Select the menu. (When pressed twice, the elapsed play time indicator appears. ➜ below) Items shown differ depending on the type of software. Main menus Program To start from a specific item Group Title Chapter... -
Page 27: Other Settings
Other settings [RAM] [DVD-V] To change play speed – from k0.6 to k1.4 (in 0.1 units) Play Speed ≥After you change the speed –Sampling frequency of 96 kHz is converted to 48 kHz. ∫ Play Menu (Only when the elapsed play time can be displayed [JPEG]: Works with all JPEG content.) Repeat (➜... -
Page 28: Changing The Player Settings
Changing the player settings SETUP SHIFT ENTER Shows Setup Select the tab. menu. ≥The settings remain intact even if you switch the unit to standby. ≥Underlined items are the factory preset. ∫ “Disc” tab Audio Choose the audio language. Subtitle Choose the subtitle language. -
Page 29: Changing The Delay Time (Speaker Setting)
∫ “Display” tab ≥English Menu Language ≥On On-Screen Messages ∫ “Others” tab ≥Enable HighMAT ≥Disable (Unable to use the HighMAT function.) ≥Yes QUICK SETUP ≥Yes: The password screen is shown if “Ratings” (➜ page 28) are set. Please enter the same Re-initialize Setting This returns all values in the Setup ≥No... -
Page 30: Playback
Playback Turn on the television and select the appropriate video input for the VHS. 1 Put the remote control in VHS mode. INPUT SELECTOR DVD/VHS FM/AM TUNER DISC 1 DISC 2 DISC 3 DISC 4 DISC 5 PICTURE MODE VOLUME ENTER SETUP SKIP... -
Page 31: Picture Mode
INPUT SELECTOR DVD/VHS FM/AM TUNER DISC 1 DISC 2 DISC 3 DISC 4 DISC 5 PICTURE MODE VOLUME ENTER SETUP SKIP SLOW/SEARCH JET REW CD MODE OPEN/CLOSE/EJECT TOP MENU MENU NAVI DIRECT PLAY NAVIGATOR LIST ENTER OSD/ DISPLAY RETURN TV VOL TV VOL RESET PAGE... -
Page 32: Manual Recording
Manual recording INPUT SELECTOR DVD/VHS FM/AM TUNER DISC 1 DISC 2 DISC 3 DISC 4 DISC 5 PICTURE MODE VOLUME ENTER SETUP SKIP SLOW/SEARCH JET REW CD MODE OPEN/CLOSE/EJECT TOP MENU MENU NAVI DIRECT PLAY NAVIGATOR LIST ENTER OSD/ DISPLAY RETURN TV VOL TV VOL... -
Page 33: Using Another Source While Recording
Using another source while recording You can watch and listen to other content when the unit is in timer recording standby or during VHS recording. ∫ Television (➜ page 16) 1 During recording Press [TV] to put the remote control in TV mode. 2 Press [TV/VIDEO] then select the channel with the numbered buttons, [W CH] or [X CH]. -
Page 34: Timer Recording
Timer recording INPUT SELECTOR DVD/VHS FM/AM TUNER DISC 1 DISC 2 DISC 3 DISC 4 DISC 5 PICTURE MODE VOLUME ENTER SETUP SKIP SLOW/SEARCH JET REW CD MODE OPEN/CLOSE/EJECT TOP MENU MENU NAVI DIRECT PLAY NAVIGATOR LIST ENTER OSD/ DISPLAY RETURN TV VOL TV VOL... -
Page 35: Auto Sp/Ep Change
To check, correct, and cancel timer programs ∫ To check a program 1 Press [PROG]. The timer-programming screen appears. ∫ To correct a program While the timer programming screen is on the television, 1 Press [PROG] to highlight the program you want to correct and press [ENTER]. -
Page 36: Finding Programs With The Jet Navigator And Vhs Index Search System (Viss)
Finding programs with the Jet Navigator and VHS Index Search System (VISS) INPUT SELECTOR DVD/VHS FM/AM TUNER DISC 1 DISC 2 DISC 3 DISC 4 DISC 5 PICTURE MODE VOLUME ENTER SETUP SLOW/SEARCH SKIP JET REW CD MODE OPEN/CLOSE/EJECT MENU TOP MENU NAVI DIRECT... -
Page 37: Finding Programs-Vhs Index Search System (Viss)
Setting categories Set categories to make it easier to see what kind of programs are in the list. Press [1] while the program you want to categorize is highlighted. Press [3 4 2 1] to select a category and press [MENU] to confirm and return to the previous screen. -
Page 38: Changing Settings
Changing settings INPUT SELECTOR DVD/VHS FM/AM TUNER DISC 1 DISC 2 DISC 3 DISC 4 DISC 5 PICTURE MODE VOLUME ENTER SETUP SKIP SLOW/SEARCH JET REW CD MODE OPEN/CLOSE/EJECT TOP MENU MENU NAVI DIRECT PLAY NAVIGATOR LIST ENTER OSD/ DISPLAY RETURN TV VOL TV VOL... -
Page 39: Channel Set
CHANNEL SET The unit tunes automatically after you plug it in and turn it on for the first time (➜ page 15, Plug-in Auto Tuning), but you can start the process again if necessary. ≥Make sure you have tuned to a television channel. This does not work if you have selected “AU” channel. Press [3 4] to select “CHANNEL SET”... -
Page 40: Option
Change the code on this unit and its remote control (the two must match) if you place another Panasonic video cassette recorder close together. ≥Use “1”, the factory preset, under normal circumstances. -
Page 41: On-Screen Display
On-screen display To see these displays, set the OSD item in the OPTION menu to ON. Press [OSD/DISPLAY]. The time and operation details appear on the screen for about 5 seconds. CH 1 0:00.22 1 SP 1 STEREO STANDARD Channel display Displays the cable television channel or television channel currently being received. -
Page 42: The Radio
The radio Press [TUNER] to put the remote control in TUNER mode. INPUT SELECTOR DVD/VHS FM/AM TUNER DISC 1 DISC 2 DISC 3 DISC 4 DISC 5 PICTURE MODE VOLUME ENTER SETUP SKIP SLOW/SEARCH JET REW CD MODE OPEN/CLOSE/EJECT MENU TOP MENU NAVI DIRECT... -
Page 43: Optional Fm Antenna Connection
Optional FM antenna connection Use FM outdoor antenna if radio reception is poor. ≥Disconnect the outdoor antenna when the unit is not in use. ≥Do not use the outdoor antenna during an electrical storm. RF IN LOOP RF OUT 1 Remove a piece of the 2 Carefully pull the tabs apart to outer vinyl insulator. -
Page 44: Sound Field And Sound Quality
Sound field and sound quality INPUT SELECTOR DVD/VHS FM/AM TUNER DISC 1 DISC 2 DISC 3 DISC 4 DISC 5 PICTURE MODE VOLUME ENTER SETUP SLOW/SEARCH SKIP JET REW CD MODE OPEN/CLOSE/EJECT MENU TOP MENU NAVI DIRECT PLAY NAVIGATOR LIST ENTER OSD/ DISPLAY... -
Page 45: Custom Sound Memory
INPUT SELECTOR DVD/VHS FM/AM TUNER DISC 1 DISC 2 DISC 3 DISC 4 DISC 5 PICTURE MODE VOLUME ENTER SETUP SKIP SLOW/SEARCH JET REW CD MODE OPEN/CLOSE/EJECT TOP MENU MENU NAVI DIRECT PLAY NAVIGATOR LIST ENTER OSD/ DISPLAY RETURN TV VOL TV VOL RESET PAGE... -
Page 46: Other Convenient Features
Other convenient features INPUT SELECTOR DVD/VHS FM/AM TUNER DISC 1 DISC 2 DISC 3 DISC 4 DISC 5 PICTURE MODE VOLUME ENTER SETUP SKIP SLOW/SEARCH JET REW CD MODE OPEN/CLOSE/EJECT TOP MENU MENU NAVI DIRECT PLAY NAVIGATOR LIST ENTER OSD/ DISPLAY RETURN TV VOL... -
Page 47: Other Speaker Setup Options
Other speaker setup options Attaching to a wall [Note] ≥The wall or pillar on which the speakers are to be attached should be capable of supporting 10 kg (22 Ib.) per screw. Consult a qualified building contractor when attaching the speakers to wall. -
Page 48: Connecting A Cable Tv Box/Satellite Receiver
Optional connections ≥The equipment connections described are examples. ≥Peripheral equipment and optional cables sold separately unless otherwise indicated. ≥Before connection, turn off all equipment and read the appropriate operating instructions. Connecting a cable TV box/satellite receiver ≥You need to subscribe to a cable TV or satellite TV service, to enjoy viewing their programming. ≥Consult your service provider regarding appropriate cable TV box or satellite receiver. -
Page 49: If The Antenna Connector Doesn't Match
If the antenna connector doesn’t match Other antenna connections to the unit Use one of the following connections to suit the antenna lead. ∫ A single twin lead ≥If your television has both lead and coaxial VHF terminals, use the lead connection to minimize signal loss. -
Page 50: Troubleshooting Guide
Troubleshooting guide Before requesting service, make the following checks. If you are in doubt about some of the check points, or if the remedies indicated in the chart do not solve the problem, refer to the “Customer Services Directory” on page 54 if you reside in the U.S.A., or refer to the “Product information” on page 55 if you reside in Canada. - Page 51 Picture incorrect ≥Ensure that the unit is connected directly to the television, and is not connected through an Picture distorted. A/V selector or other equipment. ≥The unit and television are using different video systems. Use a multi-system or NTSC television. The television may display ≥The system used on the disc doesn’t match your television.
-
Page 52: Maintenance
Troubleshooting guide Recording “ ” flashes when I try to start recording. Cannot record. Timer recording doesn’t record a program correctly. Cannot record from other equipment. Black bands appear in the recording. The copy of a videotape or DVD is very poor. -
Page 53: Specifications
Specifications Undecided ∫ AMPLIFIER SECTION RMS output power, 10 % total harmonic distortion 1 kHz FL/FR 1 kHz Center 1 kHz SL/SR 100 Hz Subwoofer Total RMS Dolby Digital mode power FTC output power, 1 % total harmonic distortion 120 Hz–20 kHz FL/FR 120 Hz–20 kHz Center 120 Hz–20 kHz SL/SR 45 Hz–120 Hz Subwoofer... -
Page 54: Limited Warranty (Only For U.s.a.)
Monday-Friday 9 am-9 pm; Saturday-Sunday 10 am-7 pm, EST. For hearing or speech impaired TTY users, TTY : 1-877-833-8855 Accessory Purchases Purchase Parts, Accessories and Instruction Books online for all Panasonic Products by visiting our Web Site at: http://www.pasc.panasonic.com or, send your request by E-mail to: npcparts@panasonic.com... -
Page 55: Limited Warranty (Only For Canada)
5770 Ambler Drive, Mississauga, Ontario L4W 2T3 PANASONIC PRODUCT—LIMITED WARRANTY Panasonic Canada Inc. warrants this product to be free from defects in material and workmanship and agrees to remedy any such defect for a period as stated below from the date of original purchase. -
Page 56: Index
Panasonic Sales Company, Company, Division of Matsushita Division of Matsushita Electric of Electric Corporation of America Puerto Rico, Inc. (“PSC”) One Panasonic Way Secaucus, Ave. 65 de Infantería, Km. 9.5 New Jersey 07094 San Gabriel Industrial Park, Carolina, http://www.panasonic.com Puerto Rico 00985 C 2003 Matsushita Electric Industrial Co., Ltd.