Table of Contents
Advertisement
For U.S.A.
As an ENERGY STAR
determined that this product meets the ENERGY
STAR
®
guidelines for energy effi ciency.
Before connecting, operating or adjusting this product, please read
these instructions completely. Please keep this manual for future
reference.
Operations in these instructions are described mainly using
remote control, but you can do the operations on the main unit if
the controls are the same.
P PC
®
Partner, Panasonic has
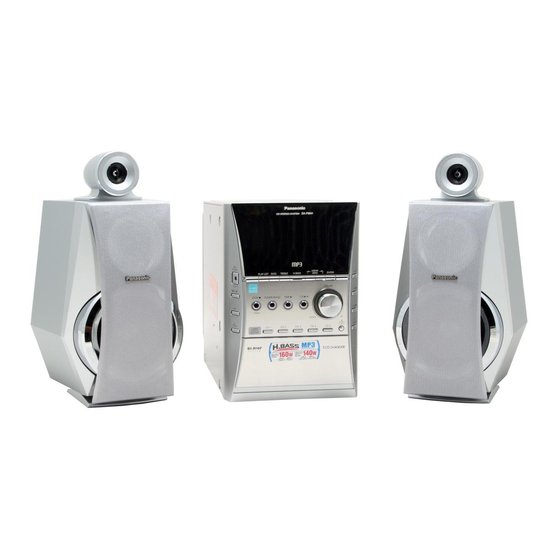
Operating Instructions
CD Stereo System
Model No.
Table of contents
Supplied accessories ....................... 2
INSTRUCTIONS ............................ 3
Getting started .................................. 4
Overview of controls ........................ 6
CDs and MP3 - Play ......................... 7
Cassette tape - Play and record ..... 12
Radio - Tune ..................................... 13
Timer .................................................. 14
Sound adjustment ............................ 16
External unit ...................................... 16
Troubleshooting guide ..................... 17
Warranty (ONLY FOR U.S.A.) ........... 18
FOR U.S.A.) ................................... 18
Product Service ................................ 19
Listening caution .............................. 19
Specifi cations ................................... 20
RQT8038-3P
Advertisement
Table of Contents

Related Manuals for Panasonic SC-PM41


Summary of Contents for Panasonic SC-PM41
-
Page 1: Table Of Contents
P PC CD Stereo System Table of contents ® Partner, Panasonic has Supplied accessories ... 2 IMPORTANT SAFETY INSTRUCTIONS ... 3 Getting started ... 4 Step 1 - Making the connections... -
Page 2: Sc-Pm41
Please check and identify the supplied accessories. Use numbers indicated in parentheses when asking for replacement parts. (As of January 2005) In U.S.A. to order accessories, refer to “Accessory Purchases” on page 18. SC-PM41 1 x Remote control SA-PM41 SB-PM41 1 x AC power supply... -
Page 3: Important Safety Instructions
IMPORTANT SAFETY INSTRUCTIONS Read these operating instructions carefully before using the unit. Follow the safety instructions on the unit and the applicable safety instructions listed below. Keep these operating instructions handy for future reference. 1) Read these instructions. 2) Keep these instructions. 3) Heed all warnings. -
Page 4: Getting Started
Getting started Step 1 1 Step - Making the connections - Making the connections Connect the AC power supply cord only after all other connections have been made. Preparation Twist and pull off the vinyl tip of the speaker cords. If the speaker cords do not have vinyl tips, directly connect them to the terminals. -
Page 5: Step 2 - Inserting Batteries Into The Remote Control
Step 2 Step 2 - Inserting batteries into the remote control - Inserting batteries into the remote control S S tep tep 3 3 - - DEMO function DEMO function Placement of speakers Placement of speakers Speakers are designed identically so that no left or right channel orientation is necessary. •... -
Page 6: Overview Of Controls
Overview of controls Main unit Main unit Refer numbers in parentheses for page reference. Cassette lid (12) 1 Standby/on switch (y/l POWER) (7, 14) Press to switch the unit from on to standby mode or vice versa. In standby mode, the unit is still consuming a small amount of power. -
Page 7: Cds And Mp3 - Play
CDs and MP3 – Play Playing a disc Playing a disc Press [y] to turn the unit on. Press [CD 1 ~ CD 5] to select your desired tray. Press [0 OPEN/CLOSE] to open the disc tray and then load the disc. Press [0 OPEN/CLOSE] again to close the tray. -
Page 8: Advanced Cds And Mp3 Functions
CDs and MP3 – Play (Continued) C C hecking which CDs are in the trays hecking which CDs are in the trays (CD CHECK) (CD CHECK) Press [CD CHECK]. Press the button again to close the trays. • The tray with a CD being played will not open. •... - Page 9 Entering characters Entering characters Press the numeric buttons repeatedly to select your desired character then press [3/FF/¢] to key in the next character. • You can enter up to 32 characters. • To edit, press [4/REW/4] or [3/FF/¢] to revised any characters.
- Page 10 CDs and MP3 – Play (Continued) Finding your CD titles Finding your CD titles This function allows you to display disc, album and track titles, then select to start play. Press [CD 6] and then [CLEAR 7]. Press [PLAY LIST]. The CD selection screen appears.
- Page 11 Album/Track title search Album/Track title search Enable you to search your desired album or track. Press [CD 6] and then [CLEAR 7]. For album title search, press [TITLE SEARCH] once. For track title search, press [TITLE SEARCH] twice. Press the numeric buttons repeatedly to select your desired character then press [3/FF/¢] to key in the next character.
-
Page 12: Cassette Tape - Play And Record
Cassette tape – Play and record Basic play Basic play Press [OPEN 0] on top of the unit. Insert a cassette. Forward side Close the lid by hand. Press TAPE to start play. To play the other side of the cassette, turn the cassette over. -
Page 13: Radio - Tune
Radio – Tune Manual tuning Manual tuning Press [TUNER/BAND] to select “FM” or “AM”. Press [PLAY MODE] to select “MANUAL”. Press [4/REW/ 4] or [3/FF/¢] to select the frequency of the required station. • “ ” is displayed when a stereo FM broadcast is being received. -
Page 14: Timer
Timer Setting the clock Setting the clock This is a 12-hour clock. Press [CLOCK/TIMER] to select “CLOCK”. Each time you press the button: CLOCK ˚ PLAY Original display Within 7 seconds, press [4/REW/ 4] or [3/FF/¢] to set the time. Press [CLOCK/TIMER] again to confirm. -
Page 15: Using The Play Or Record Timer
Using the play or record timer Using the play or record timer You can set the timer to come on at a certain time to wake you up (play timer) or to record from the radio or an aux source (record timer). Turn the unit on and set the clock. -
Page 16: Sound Adjustment
Sound adjustment Selecting sound effects Selecting sound effects You can change the sound effect by selecting Preset EQ or adjusting the bass or treble effect. Preset EQ Preset EQ Press [PRESET EQ] repeatedly to select your desired setting. HEAVY → CLEAR → SOFT → VOCAL → OFF Setting Effect HEAVY... -
Page 17: Troubleshooting Guide
Troubleshooting guide Before requesting service, make the following checks. If you are in doubt about some of the check points, or if the remedies indicated in the chart do not solve the problem, refer to the “Customer Services Directory” on page 18 if you reside in the U.S.A., or refer to the “Product information”... -
Page 18: Warranty (Only For U.s.a.)
Monday-Friday 9 am-9 pm; Saturday-Sunday 10 am-7 pm, EST. For hearing or speech impaired TTY users, TTY: 1-877-833-8855 Accessory Purchases Accessory Purchases Purchase Parts, Accessories and Instruction Books online for all Panasonic Products by visiting our Web Site at: http://www.pasc.panasonic.com or, send your request by E-mail to: npcparts@us.panasonic.com You may also contact us directly at: 1-800-332-5368 (Phone) 1-800-237-9080 (Fax Only) (Monday-Friday 9 am to 8 pm, EST.) -
Page 19: Product Service
For product information or assistance with product operation: In the U.S.A., refer to “Customer Services Directory” on page 18. In Canada, contact the Panasonic Canada Inc. Customer Care Centre at 905-624-5505, or visit the website (www.panasonic.ca), or an authorized Servicentre closest to you. -
Page 20: Specifi Cations
42.64 dB (A weighted) Wow and fl utter Fast forward and rewind time Approx. 120 seconds with C-60 cassette tape Panasonic Consumer Electronics Company, Division of Panasonic Corporation of North America One Panasonic Way Secaucus, New Jersey 07094 http://www.panasonic.com © 2005 Matsushita Electric Industrial Co., Ltd.