LG WCES6428F Owner's Manual
Hide thumbs
Also See for WCES6428F:
- Owner's manual (81 pages) ,
- Installation manual (32 pages) ,
- Installation manual (32 pages)
Table of Contents
Advertisement
Available languages
Available languages
Quick Links
us_main.book.book Page 1 Friday, December 3, 2021 2:25 PM
OWNER'S MANUAL
COMBINATION
WALL OVEN
Read this owner's manual thoroughly before operating the
appliance and keep it handy for reference at all times.
ENGLISH
WCES6428F
www.lg.com
MFL70581904
Copyright © 2021 LG Electronics Inc. All Rights Reserved.
Rev.00_120321
Advertisement
Table of Contents

Related Manuals for LG WCES6428F


Summary of Contents for LG WCES6428F
- Page 1 Page 1 Friday, December 3, 2021 2:25 PM OWNER'S MANUAL COMBINATION WALL OVEN Read this owner's manual thoroughly before operating the appliance and keep it handy for reference at all times. ENGLISH WCES6428F www.lg.com MFL70581904 Copyright © 2021 LG Electronics Inc. All Rights Reserved. Rev.00_120321...
-
Page 2: Table Of Contents
us_main.book.book Page 2 Friday, December 3, 2021 2:25 PM TABLE OF CONTENTS IMPORTANT SAFETY 16 Language Selection INSTRUCTIONS 16 Volume 16 Preheat Alarm Light READ ALL INSTRUCTIONS BEFORE USE 17 Temperature Adjustment 4 Precautions to Avoid Possible Exposure to 17 Temperature Units Excessive Microwave Energy 17 Smart Diagnosis™... - Page 3 57 Connecting to Wi-Fi 57 Wireless LAN Module Specifications 57 FCC Notice 58 Open Source Software Notice Information Smart Diagnosis Feature 58 Using LG ThinQ to Diagnose Issues 58 Using Audible Diagnosis to Diagnose Issues 59 MAINTENANCE Cleaning 59 General Cleaning Tips...
-
Page 4: Important Safety Instructions
us_main.book.book Page 4 Friday, December 3, 2021 2:25 PM IMPORTANT SAFETY INSTRUCTIONS IMPORTANT SAFETY INSTRUCTIONS READ ALL INSTRUCTIONS BEFORE USE Precautions to Avoid Possible Exposure to Excessive Microwave Energy (a) Do not attempt to operate this oven with the door open since open-door operation can result in harmful exposure to microwave energy. - Page 5 us_main.book.book Page 5 Friday, December 3, 2021 2:25 PM IMPORTANT SAFETY INSTRUCTIONS • Children must not be allowed to play with accessories or hang down from the door or any part of the oven. Doing so can cause serious injury and damage. As with any appliance, close supervision is necessary when used by children.
-
Page 6: Installation
us_main.book.book Page 6 Friday, December 3, 2021 2:25 PM IMPORTANT SAFETY INSTRUCTIONS Installation • Never allow anyone to climb, sit, stand or hang on the oven door. Injury might result from contact with hot food or the oven itself. • Do not line the oven walls, racks, bottom, or any other part of the oven with aluminum foil or any other material. -
Page 7: Maintenance
us_main.book.book Page 7 Friday, December 3, 2021 2:25 PM IMPORTANT SAFETY INSTRUCTIONS • Do not put large, heavy items such as whole turkeys on the open oven door. • Take care when the door is open to avoid injury. • If the door or door seals are damaged, the oven must not be operated until it has been repaired by a competent person. -
Page 8: Microwave Oven
us_main.book.book Page 8 Friday, December 3, 2021 2:25 PM IMPORTANT SAFETY INSTRUCTIONS Microwave Oven • The oven must be installed following the provided installation instructions. • Secure the cord in the cabinet above the oven. • Preserve the oven floor: - Do not heat the oven floor excessively. -
Page 9: Caution
us_main.book.book Page 9 Friday, December 3, 2021 2:25 PM IMPORTANT SAFETY INSTRUCTIONS CAUTION CAUTION • To reduce the risk of minor injury to persons, malfunction, or damage to the product or property when using this product, follow basic precautions, including the following: Operation •... -
Page 10: Product Overview
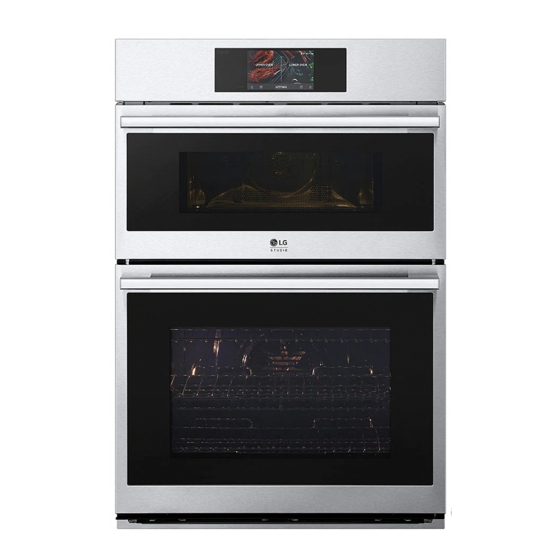
us_main.book.book Page 10 Friday, December 3, 2021 2:25 PM 10 PRODUCT OVERVIEW PRODUCT OVERVIEW Product Features The appearance and specifications listed in this manual may vary due to constant product improvements. Exterior / Interior Oven controller Broiler pan and grid Upper oven door Standard racks Spacer (2ea) - Page 11 Accessories for Lower Oven Accessories for Cooking Owner’s manual Installation manual NOTE • Contact LG Customer Service at 1-800-243-0000 (1-888-542-2623 in Canada) if any accessories Grid are missing. • For your safety and for extended product life, Heavy duty standard rack only use authorized components.
-
Page 12: Operation
us_main.book.book Page 12 Friday, December 3, 2021 2:25 PM 12 OPERATION OPERATION Operating Control Panel Control Panel Features LCD Display On/Off LCD Touchscreen for Oven Display Icons Icons appear in display when activated. Lamp Icon (Upper Oven) Touch to turn light on/off Timer Icon (Upper Oven) Touch to set a timer Microwave Quick Start... -
Page 13: Energy Saving Tips
us_main.book.book Page 13 Friday, December 3, 2021 2:25 PM OPERATION Auto Conversion Icon Appears when Convection Auto Conversion is turned on Wi-Fi Icon • Appears when oven is connected to Wi-Fi • Appears when oven is disconnected from Wi-Fi or is not registered Remote Start Icon Appears when Remote Start is active Lock Icon... -
Page 14: Microwave Quick Start
us_main.book.book Page 14 Friday, December 3, 2021 2:25 PM 14 OPERATION Location of Settings A popup screen appears. Touch Unlock for 3 seconds. • Page 1: Microwave Quick Start, Lockout, Date & Time, Clock Themes, Sabbath Mode, Wi-Fi Setup The lock icon disappears from the top of the •... -
Page 15: Sabbath Mode
us_main.book.book Page 15 Friday, December 3, 2021 2:25 PM OPERATION Sabbath Mode Wi-Fi Sabbath mode is used on the Jewish Sabbath and Connect the appliance to a home Wi-Fi network to Holidays. use Remote Start and other smart functions. See the Smart Functions section for more details. -
Page 16: Display
us_main.book.book Page 16 Friday, December 3, 2021 2:25 PM 16 OPERATION Adjust the display brightness by touching and Select ON or OFF. dragging the dot across the bar, by tapping anywhere on the bar, or by touching When Convection Auto Conversion is ON, the icon appears at the top of the display. -
Page 17: Temperature Adjustment
us_main.book.book Page 17 Friday, December 3, 2021 2:25 PM OPERATION Temperature Units Setting the Preheat Alarm Set the oven temperature display to show either Touch Settings at the center bottom of the Fahrenheit or Celsius units. Main screen, swipe to the third Settings The oven defaults to Fahrenheit unless changed by screen, and touch Preheat Alarm Light. -
Page 18: Factory Data Reset
us_main.book.book Page 18 Friday, December 3, 2021 2:25 PM 18 OPERATION Oven Cooling Touch Settings at the center bottom of the Main screen, swipe to the third Settings The oven cooling icon appears in the display if the screen, and touch Demo Mode. temperature inside the oven is high during or after operation. - Page 19 us_main.book.book Page 19 Friday, December 3, 2021 2:25 PM OPERATION Adjusting or Cancelling the Timer Touch the remaining time next to the clock icon in the display. To cancel the timer, touch the Reset icon in the popup. Then touch OK. Reset icon To adjust the time, scroll the numbers in the popup until the desired time appears.
-
Page 20: Operating The Upper Microwave Oven
us_main.book.book Page 20 Friday, December 3, 2021 2:25 PM 20 OPERATION Operating the Upper - Use utility dishes, loaf dishes, pie plates, cake plates, liquid measuring cups, casseroles and Microwave Oven bowls without metal rims. - Do not use delicate glassware, such as Before Using tumblers or wine glasses, as these might shatter when heated. -
Page 21: Cooking Tips
us_main.book.book Page 21 Friday, December 3, 2021 2:25 PM OPERATION Cooking Tips • Tableware - Do not put plates with painted decoration in Carefully monitor the food in the microwave oven the oven, as the paint may contain metal and while it is cooking. -
Page 22: Microwave Power Levels
us_main.book.book Page 22 Friday, December 3, 2021 2:25 PM 22 OPERATION • Foods with Skin, Shell or Membrane - Always underestimate defrosting time. Food should still be somewhat icy in the center - Skin or Membrane: Pierce the outsides of when removed from the oven. -
Page 23: Microwave Mode
us_main.book.book Page 23 Friday, December 3, 2021 2:25 PM OPERATION Convection Bake Mode Power Level During Convection Bake, a heating element is used to raise the temperature of the air inside the oven. • Thawing meat, poultry and seafood The convection cooking temperature ranges from (40%) 100 ℉... -
Page 24: Broil Mode
us_main.book.book Page 24 Friday, December 3, 2021 2:25 PM 24 OPERATION NOTE NOTE • When the oven reaches the set preheat • For best results, use the rack when broiling in temperature, a melody will sound. The oven the upper oven. automatically holds that temperature for 30 minutes. -
Page 25: Defrost Mode
us_main.book.book Page 25 Friday, December 3, 2021 2:25 PM OPERATION To Stop Cooking NOTE Touch Stop in the display, and select Yes. • When popping prepackaged popcorn, place the bag carefully in the oven so it does not touch the NOTE walls as it rotates. -
Page 26: Speed Cook Mode
us_main.book.book Page 26 Friday, December 3, 2021 2:25 PM 26 OPERATION Poultry (0.1 - 6.0 lbs) Set the power level in the display. • Poultry: Whole, cut-up, breast (boneless) • Cornish Hens: Whole Set the temperature. Scroll through the numbers on the display, or touch the number •... - Page 27 us_main.book.book Page 27 Friday, December 3, 2021 2:25 PM OPERATION The display shows the remaining heating time. For - Instructions: Use microwave safe mug or cup best results when sensor cooking, follow these without covering. After cooking, stir to recommendations. complete reheating.
-
Page 28: Microwave Quick Start Mode
us_main.book.book Page 28 Friday, December 3, 2021 2:25 PM 28 OPERATION - Instructions: Use microwave safe bowl. Cover Scroll through or tap the arrow key to select container with vented plastic wrap. After recommended amounts. Touch Next. cooking, let stand for 3 minutes. †... - Page 29 us_main.book.book Page 29 Friday, December 3, 2021 2:25 PM OPERATION - Instructions: Add water according to the • 16. Lamb chops, 1/2″ thick (6-7 oz) (1, 2, 3-4 quantity (4-12 oz: add 2 tbsp water, 13-20 oz: chops) add 4 tbsp water). Cover with vented plastic - Cookware: Metal tray wrap.
-
Page 30: Soften Mode
us_main.book.book Page 30 Friday, December 3, 2021 2:25 PM 30 OPERATION with vented plastic wrap. After cooking, let WARNING stand for 3 minutes. • Do not use recycled paper products in the upper • 22. Ribeye steak, 1″ thick (14-15 oz) (1, 2 oven. -
Page 31: Melt Mode
us_main.book.book Page 31 Friday, December 3, 2021 2:25 PM OPERATION - Food temperature: Refrigerated • 3. Cheese (4, 8, 12 oz) - Instructions: Frosting will be at room - Cookware: Microwave-safe bowl on the glass temperature and ready for use in a recipe. tray •... -
Page 32: Proof Mode
us_main.book.book Page 32 Friday, December 3, 2021 2:25 PM 32 OPERATION NOTE • It is normal for the fan to operate during this function. Proof Mode This function maintains a warm oven for rising yeast-leavened products before baking. Setting the Proof Mode Touch Proof in the cooking mode screen. -
Page 33: Operating The Lower Oven
us_main.book.book Page 33 Friday, December 3, 2021 2:25 PM OPERATION Operating the Lower Oven Removing Racks Pull the rack straight out until it stops. Before Using the Oven Lift up the front of the rack and pull it out. NOTE •... -
Page 34: Instaview
us_main.book.book Page 34 Friday, December 3, 2021 2:25 PM 34 OPERATION • The InstaView function is disabled when the oven door is opened and for one second after closing the door. • The InstaView function is disabled during Self Clean, Lockout, Sabbath Mode and initial power input (on some models only). -
Page 35: Bake Mode
us_main.book.book Page 35 Friday, December 3, 2021 2:25 PM OPERATION If the cook time is set, the remaining time • When using Convection Bake with a single rack, appears in the display. If a delayed start time place oven rack in position . -
Page 36: Recommended Baking Guide
us_main.book.book Page 36 Friday, December 3, 2021 2:25 PM 36 OPERATION Setting the Bake Function Baking Tips • For best results, food should be placed on a Touch Bake in the cooking mode screen. single rack with at least 1” to 1 1/2” of air space between the pans and oven walls. -
Page 37: Broil Mode
us_main.book.book Page 37 Friday, December 3, 2021 2:25 PM OPERATION Multiple Rack CAUTION • Do not use a broiler pan without a grid. Oil can cause a grease fire. • Do not cover the grid and broiler pan with aluminum foil. Doing so will cause a fire. •... -
Page 38: Recommended Broiling Guide
us_main.book.book Page 38 Friday, December 3, 2021 2:25 PM 38 OPERATION Tips for Reducing Smoke Let the oven preheat for approximately 5 minutes before cooking the food. Due to the intense heat associated with broiling, it is normal to experience smoke during the cooking process. - Page 39 us_main.book.book Page 39 Friday, December 3, 2021 2:25 PM OPERATION Broiler pan First Second Quantity and/or Rack Side Side Food Comments Thickness Position Time Time (min.) (min.) Space evenly. Up to 9 1 lb (9 patties) Ground Beef patties may be broiled 1/2 to 3/4"...
-
Page 40: Warm Mode
us_main.book.book Page 40 Friday, December 3, 2021 2:25 PM 40 OPERATION First Second Quantity and/or Rack Side Side Food Comments Thickness Position Time Time (min.) (min.) 2 (1" thick) Medium about 10 to 12 Well done Lamb Chops Slash fat. Medium 2 (1 "... -
Page 41: Proof Mode
us_main.book.book Page 41 Friday, December 3, 2021 2:25 PM OPERATION Setting the Warm Mode Scroll through the numbers to set a proofing time or touch the number pad icon to enter the numbers directly. Touch Warm in the cooking mode screen. Number pad icon Scroll to set the desired temperature: Low, Medium, or High. - Page 42 Settings screen. • Use either the optional air fry tray available from LG or a dark baking tray with no sides or short sides that does not cover the entire rack. This Adjust the settings using the number pad or allows for better air circulation.
-
Page 43: Recommended Air Frying Guide
us_main.book.book Page 43 Friday, December 3, 2021 2:25 PM OPERATION Recommendations When Air Frying • Open a window or sliding glass door, if possible, to make sure the kitchen is well-ventilated. High-Fat Foods • Clean the grease filters on your exhaust hood Foods high in fat will smoke when using the Air Fry regularly. -
Page 44: Probe Mode
us_main.book.book Page 44 Friday, December 3, 2021 2:25 PM 44 OPERATION Quantity Rack Recommended Items Temp. (°F) Time Guide (oz) Position CHICKEN-Frozen Frozen Chicken Nuggets, 15-25 Crispy Frozen Chicken Strips 25-35 Frozen Hot Wings, Bone- 25-35 CHICKEN-Fresh, Skin on 25-35 Brush or lightly spray with †... -
Page 45: Recommended Probe Guide
us_main.book.book Page 45 Friday, December 3, 2021 2:25 PM OPERATION • For thin cuts of meat, insert probe in thickest If desired, set the delayed start time using the side of meat. same method. Touch the arrow key on the right side of the display to see the additional settings. - Page 46 us_main.book.book Page 46 Friday, December 3, 2021 2:25 PM 46 OPERATION Category Examples of Food Probe Placement Insert in the thickest part, away Fresh Beef, Veal, Lamb Steaks, Roasts, Chops from bone, fat and gristle Whole Chicken or Turkey Insert in the thickest part of thigh, Poultry Breasts or Roasts avoiding bone Poultry...
-
Page 47: Favorite Mode
us_main.book.book Page 47 Friday, December 3, 2021 2:25 PM OPERATION Target Internal Category Examples of Food Desired Doneness Temp. Seafood Whole Fish Fish Fillet (Side of Fish) 145 ℉ (62.8 ℃) Fish Steaks or Portions Favorite Mode • After the steam mode is used for 8 hours, a reminder to descale the product appears in the For frequently used cooking menus, you can display the next time the steam mode is... -
Page 48: Auto Cook Mode
us_main.book.book Page 48 Friday, December 3, 2021 2:25 PM 48 OPERATION Select the recipe and touch the trash can icon at the bottom left of the screen. Touch Yes. Auto Cook Mode The Auto Cook function provides guidance for cooking foods or dishes that may be unfamiliar. It contains preset programs for cooking many popular food items, with information on recommended preheating, accessories, and rack... -
Page 49: Auto Cook Guide
us_main.book.book Page 49 Friday, December 3, 2021 2:25 PM OPERATION Auto Cook Guide • Preheat oven first for most items. • Preheat for 5 minutes when broiling. • If using probe, insert after preheating. NOTE • When cooking thin cuts of meat, insert the probe into the thickest part of the meat. If the probe is inserted incorrectly, the oven could turn off too soon. - Page 50 us_main.book.book Page 50 Friday, December 3, 2021 2:25 PM 50 OPERATION Accessories/ Shelf Cooking Menu Cookware Position time in min. Pork Butt Casserole dish 60~90 Pork Chops 30~50 Pork Pork Loin 50~80 Pork Tenderloin 20~40 Rack 10~30 Lamb Bone-in Leg of Lamb 20~40 Grid on broiler pan Veal Top Sirloin...
- Page 51 us_main.book.book Page 51 Friday, December 3, 2021 2:25 PM OPERATION Accessories/ Shelf Cooking Menu Cookware Position time in min. Directly on rack 10~20 Frozen Thin Crust On pizza pan 10~20 On pizza stone 10~20 Directly on rack 10~20 Pizza Frozen Rising Crust On pizza pan 10~20 On pizza stone...
-
Page 52: Steam Function
us_main.book.book Page 52 Friday, December 3, 2021 2:25 PM 52 OPERATION Accessories/ Shelf Cooking Menu Cookware Position time in min. Homemade 20~50 White Bread Frozen Loaf pan 20~50 Par Baked 20~50 Homemade 15~35 Perforated Baguette Frozen 15~35 baguette pan Par Baked 15~35 Bread (Steam) Cinnamon Raisin Bread... -
Page 53: Steam Bake Mode
us_main.book.book Page 53 Friday, December 3, 2021 2:25 PM OPERATION Steam Bake Mode The Steam Bake mode heats food gradually, using both the oven heating elements and moist steam heat. The oven can be programmed to cook at any temperature from 210 ℉ (100 ℃) to 550 ℉ (285 ℃). Preset temperature options start at 350 ℉... -
Page 54: Sous Vide
us_main.book.book Page 54 Friday, December 3, 2021 2:25 PM 54 OPERATION Adjust the settings as desired. Place the standard rack in position place the sealed food bag on it. Touch Start. Touch Steam Cook in the Cooking Modes screen. To Stop Steam Cooking Touch Stop in the display, and select Yes. -
Page 55: Remote Start Mode
• A faulty Wi-Fi connection could delay the Remote network, the preheating function of the oven can Start function. be started or stopped using the LG ThinQ smartphone app. • Disconnect the probe if attached. Preparing the Oven for a Remote Start Open the oven door to make sure the oven is empty and ready for preheating. -
Page 56: Smart Functions
Internet service provider or refer to your wireless router manual. • Firmware Update - Keep the appliance updated. • LG ThinQ is not responsible for any network connection problems or any faults, malfunctions, or errors caused by network connection. NOTE •... -
Page 57: Installing The Lg Thinq Application
Connecting to Wi-Fi connected. The Wi-Fi button, when used with the LG ThinQ • Consult the dealer or an experienced radio/TV application, allows the appliance to connect to a technician for help. -
Page 58: Open Source Software Notice Information
Page 58 Friday, December 3, 2021 2:25 PM 58 SMART FUNCTIONS Open Source Software Notice • Launch the LG ThinQ application and select the Smart Diagnosis feature in the menu. Follow Information the instructions for audible diagnosis provided To obtain the source code under GPL, LGPL, MPL, in the LG ThinQ application. -
Page 59: Maintenance
us_main.book.book Page 59 Friday, December 3, 2021 2:25 PM MAINTENANCE MAINTENANCE Cleaning cleaner. Remove heavier soil with warm, soapy water. Do not use abrasives of any kind. General Cleaning Tips Painted and Decorative Trim • A plastic spatula can be used as a scraper to For general cleaning, use a cloth with hot soapy scrape off any chunks or debris before and water. -
Page 60: Easyclean
Clean with a mild, abrasive cleaner. cleaning options for the inside of the oven. The • Food spilled into the tracks could cause the EasyClean feature takes advantage of LG’s new racks to become stuck. enamel to help lift soils without harsh chemicals,... - Page 61 Compared to the cavity is above 150 ℉ (65 ℃), the EasyClean cycle more intense Self Clean process, your LG oven will not be activated until the oven cavity cools gives you the option of cleaning with LESS HEAT, down.
-
Page 62: Self Clean (Lower Oven)
us_main.book.book Page 62 Friday, December 3, 2021 2:25 PM 62 MAINTENANCE Clean the oven cavity immediately after the EasyClean cycle by scrubbing with a wet, non- scratch scouring sponge or pad. (The scouring side will not scratch the finish.) Some water may spill into the bottom vents while cleaning, but it will be captured in a pan under the oven cavity and will not hurt the burner. - Page 63 us_main.book.book Page 63 Friday, December 3, 2021 2:25 PM MAINTENANCE smoking or an odor. This is normal, especially if or breaker and have the oven serviced by a the oven is heavily soiled. During Self Clean, the qualified technician. kitchen should be well ventilated to minimize the •...
- Page 64 us_main.book.book Page 64 Friday, December 3, 2021 2:25 PM 64 MAINTENANCE • Common food items that can soil your oven: NOTE Casseroles • If oven racks were left in the oven and do not slide smoothly after a Self Clean cycle, wipe NOTE racks and rack supports with a small amount of •...
-
Page 65: Cleaning The Steam Feeder Tank
us_main.book.book Page 65 Friday, December 3, 2021 2:25 PM MAINTENANCE • It may become necessary to cancel or interrupt a • If the steam feeder tank does not slide in as Self Clean cycle due to excessive smoke or fire in smoothly as it should, clean the bottom of the the oven. -
Page 66: Drying The Lower Oven Interior
us_main.book.book Page 66 Friday, December 3, 2021 2:25 PM 66 MAINTENANCE Setting Evaporation After 1 hour 43 minutes of descaling, a popup will appear in the display. Following the instructions, drain the tank and fill it with Touch Clean in the Cooking Modes screen. clean water. - Page 67 us_main.book.book Page 67 Friday, December 3, 2021 2:25 PM MAINTENANCE Remove the bulb from the socket. Replace the bulb, and reassemble the light cover by snapping it back into place. Plug in the oven or reconnect power.
-
Page 68: Troubleshooting
us_main.book.book Page 68 Friday, December 3, 2021 2:25 PM 68 TROUBLESHOOTING TROUBLESHOOTING FAQs Frequently Asked Questions About the Upper Oven Can I use a rack in my upper oven to reheat or cook on two levels at once? Only use the rack that is supplied with your upper oven. Use of any other rack can result in poor cooking performance and/or arcing and may damage your oven. - Page 69 us_main.book.book Page 69 Friday, December 3, 2021 2:25 PM TROUBLESHOOTING The correct side of the tray should be facing up and the tray should sit firmly on the center hub. The support is not operating correctly. Reinstall the glass tray and restart the oven. Cooking without the glass tray can give you poor results.
- Page 70 us_main.book.book Page 70 Friday, December 3, 2021 2:25 PM 70 TROUBLESHOOTING Do not cover racks with aluminum foil. Covering entire racks with foil restricts air flow, leading to poor cooking results. Use a sheet pan lined with foil under fruit pies or other acidic or sugary foods to prevent spillovers from damaging the oven finish.
- Page 71 us_main.book.book Page 71 Friday, December 3, 2021 2:25 PM TROUBLESHOOTING Do I need to use all 1 ¼ cups (10 oz or 300 ml) of water for EasyClean? Yes. It is highly recommended that 1 cup (8 oz or 240 ml) of water be sprayed or poured on the bottom and an additional ¼...
-
Page 72: Before Calling For Service
us_main.book.book Page 72 Friday, December 3, 2021 2:25 PM 72 TROUBLESHOOTING Before Calling for Service Review this section before calling for service; doing so will save you both time and money. Cooking Problem Possible Cause & Solution Arcing or Sparking Cookware is not microwave safe. - Page 73 us_main.book.book Page 73 Friday, December 3, 2021 2:25 PM TROUBLESHOOTING Problem Possible Cause & Solution Oven smokes Control not set properly. excessively during • Follow instructions under Changing Settings. broiling. Meat too close to the element. • Reposition the rack to provide proper clearance between the meat and the element. Preheat broil element for searing.
-
Page 74: Parts & Features
us_main.book.book Page 74 Friday, December 3, 2021 2:25 PM 74 TROUBLESHOOTING Problem Possible Cause & Solution Burning or oily odor This is normal in a new oven. emitting from the • This will disappear in time. To speed the process, set a Self Clean cycle for a minimum of 3 vent hours. -
Page 75: Noises
us_main.book.book Page 75 Friday, December 3, 2021 2:25 PM TROUBLESHOOTING Problem Possible Cause & Solution Oven will not Self The oven temperature is too high to set a Self Clean operation. Clean. • Allow the appliance to cool and reset the controls. Oven controls improperly set. -
Page 76: Wi-Fi
During Wi-Fi setup, the app is requesting a password to connect to the product (on certain phones). • Locate the network name which starts with "LG" under Settings > Networks. Note the last part of the network name. - If the network name looks like LGE_Appliance_XX-XX-XX, enter lge12345. -
Page 77: Limited Warranty
Should your LG Electric Oven ("Product") fail due to a defect in materials or workmanship under normal and proper use, during the warranty period set forth below, LG will, at its option, repair or replace the Product. This limited warranty is valid only to the original retail purchaser of the Product (“You”) and applies only when purchased lawfully and used within the United States including U.S. -
Page 78: Procedure For Resolving Disputes
Notice of Dispute. In the event you intend to commence an arbitration proceeding, you must first notify LG in writing at least 30 days in advance of initiating the arbitration by sending a letter to LG at LG Electronics, USA, Inc. Attn: Legal Department- Arbitration 111 Sylvan Avenue, Englewood Cliffs, NJ 07632 USA. - Page 79 AAA in the manner described in the AAA Rules. You must also send a copy of your written demand to LG at LG Electronics, USA, Inc.
- Page 80 us_main.book.book Page 80 Friday, December 3, 2021 2:25 PM 80 LIMITED WARRANTY way, and you will continue to enjoy the full benefits of the Limited Warranty. If you keep this product and do not opt out, then you accept all terms and conditions of the arbitration provision described above.
- Page 81 Page 1 Friday, December 3, 2021 2:41 PM MANUAL DEL PROPIETARIO HORNO DE PARED COMBINADO Lea el manual del propietario detenidamente previo a operar el electrodoméstico y mantengalo al alcance para futuras referencias. ESPAÑOL WCES6428F www.lg.com Copyright © 2021 LG Electronics Inc. Todos los derechos reservados...
- Page 82 ls_main.book.book Page 2 Friday, December 3, 2021 2:39 PM ÍNDICE INSTRUCCIONES IMPORTANTES 18 Inicio remoto DE SEGURIDAD 18 Brillo 18 Pantalla LEA TODAS LAS INSTRUCCIONES ANTES DE 18 Conversión automática a convección UTILIZAR 19 Selección de idioma 4 Precauciones para evitar una posible 19 Volumen exposición a niveles excesivos de energía 19 Luz de alarma de precalentamiento...
- Page 83 Aplicación LG ThinQ SIGUIENTE 64 Funciones de la aplicación LG ThinQ 86 PROCEDIMIENTO PARA RESOLVER 64 Antes de usar la aplicación LG ThinQ CONFLICTOS 65 Instalación de la aplicación LG ThinQ 65 Conexión a Wi-Fi 65 Especificaciones del módulo LAN inalámbrico...
- Page 84 ls_main.book.book Page 4 Friday, December 3, 2021 2:39 PM INSTRUCCIONES IMPORTANTES DE SEGURIDAD INSTRUCCIONES IMPORTANTES DE SEGURIDAD LEA TODAS LAS INSTRUCCIONES ANTES DE UTILIZAR Precauciones para evitar una posible exposición a niveles excesivos de energía de microondas (a) No trate de operar este horno con la puerta abierta, ya que hacerlo puede causar una exposición perjudicial a la energía de microondas.
- Page 85 ls_main.book.book Page 5 Friday, December 3, 2021 2:39 PM INSTRUCCIONES IMPORTANTES DE SEGURIDAD • Este aparato no está destinado para ser utilizado por personas (incluyendo niños) con capacidades físicas, sensoriales o mentales reducidas, o con falta de experiencia o conocimiento, a menos que hayan recibido una supervisión o capacitación concerniente a el uso del aparato por una persona responsable de su seguridad.
- Page 86 ls_main.book.book Page 6 Friday, December 3, 2021 2:39 PM INSTRUCCIONES IMPORTANTES DE SEGURIDAD - No caliente demasiado los líquidos. Revuelva los líquidos antes y en la mitad del proceso de calentarlos. - No use recipientes de lados rectos que tengan cuellos angostos. Tenga sumo cuidado al insertar una cuchara u otro utensilio en el recipiente.
- Page 87 ls_main.book.book Page 7 Friday, December 3, 2021 2:39 PM INSTRUCCIONES IMPORTANTES DE SEGURIDAD húmedas o mojadas sobre superficies calientes podrían producir quemaduras por vapor. No permita que la agarradera toque los elementos calentadores. No utilice una toalla u otra tela gruesa para retirar alimentos.
- Page 88 ls_main.book.book Page 8 Friday, December 3, 2021 2:39 PM INSTRUCCIONES IMPORTANTES DE SEGURIDAD • Si el horno está muy sucio con aceite, realice una autolimpieza del horno antes de volver a utilizarlo. El aceite puede provocar un incendio. • En caso de un incendio en el horno durante la autolimpieza, apáguelo y espere a que se apague el fuego. No fuerce la puerta para abrirla.
- Page 89 ls_main.book.book Page 9 Friday, December 3, 2021 2:39 PM INSTRUCCIONES IMPORTANTES DE SEGURIDAD interferencia. Esta interferencia no indica que existan defectos en el producto o su funcionamiento. El producto se puede usar sin riesgos. • No use equipos médicos cerca del horno de microondas, ya que la interferencia podría afectar el funcionamiento de dichos equipos.
- Page 90 ls_main.book.book Page 10 Friday, December 3, 2021 2:39 PM 10 INSTRUCCIONES IMPORTANTES DE SEGURIDAD • No coloque alimentos ni utensilios de cocina en el fondo de la cavidad del horno. Si lo hace, causará daños permanentes al acabado de la base del horno. •...
- Page 91 ls_main.book.book Page 11 Friday, December 3, 2021 2:39 PM DESCRIPCIÓN GENERAL DEL PRODUCTO DESCRIPCIÓN GENERAL DEL PRODUCTO Características del Producto La apariencia y las especificaciones detalladas en este manual podrían variar debido a mejoras constantes en el producto. Interior/exterior Controlador del horno Asadera y rejilla Puerta del horno superior Estantes estándar...
- Page 92 Estante estándar resistente NOTA Asadera • Comuníquese con el Servicio de atención al cliente de LG al 1-800-243-0000 (1-888-542-2623 Estante deslizante (2 c/u) en Canadá) si le falta algún accesorio. Meat probe (Sonda para carne) • Para su seguridad y una mayor duración del producto, utilice únicamente componentes...
- Page 93 ls_main.book.book Page 13 Friday, December 3, 2021 2:39 PM DESCRIPCIÓN GENERAL DEL PRODUCTO causados por el uso de componentes o piezas no autorizados y comprados por separado. • Las ilustraciones en esta guía pueden diferir de los componentes y accesorios reales, los cuales están sujetos a cambios sin previo aviso por parte del fabricante a fin de introducir mejoras en el producto.
- Page 94 ls_main.book.book Page 14 Friday, December 3, 2021 2:39 PM 14 FUNCIONAMIENTO FUNCIONAMIENTO Funcionamiento del panel de control Funciones del panel de control LCD Display On/Off (Encendido/Apagado de LCD Touchscreen for Oven (Pantalla táctil LCD pantalla LCD) para el horno) Íconos de pantalla Los íconos aparecen en la pantalla cuando están activos.
- Page 95 ls_main.book.book Page 15 Friday, December 3, 2021 2:39 PM FUNCIONAMIENTO Ícono de sonda Aparece cuando la sonda está conectada Auto Conversion Icon (Icono de conversión automática) Aparece cuando se enciende la Conversión automática a convección Wi-Fi Icon (Icono de Wi-Fi) •...
- Page 96 ls_main.book.book Page 16 Friday, December 3, 2021 2:39 PM 16 FUNCIONAMIENTO Configure el nivel de potencia y el tiempo de Cambie de pantalla o pulse las teclas de flecha cocción. para navegar por las pantallas de Configuración. Presione OK (INICIAR). Lockout (Bloqueo) La función de Bloqueo evita automáticamente que se enciendan la mayoría de los controles del...
- Page 97 ls_main.book.book Page 17 Friday, December 3, 2021 2:39 PM FUNCIONAMIENTO Configuración de la hora Configuración del modo Sabbath Pulse Configuración en la parte inferior Desconecte la sonda. La función Sonda no central de la pantalla principal. Luego, pulse está disponible en modo Sabbath. Fecha y hora en la pantalla Configuración.
- Page 98 ls_main.book.book Page 18 Friday, December 3, 2021 2:39 PM 18 FUNCIONAMIENTO Pantalla Seleccione ON, OFF o RESET, y pulse OK. Configure la duración de la hora antes de que la pantalla entre en suspensión. Si seleccionó ON, aparecerá el icono de Wi-Fi en la parte superior de la pantalla.
- Page 99 ls_main.book.book Page 19 Friday, December 3, 2021 2:39 PM FUNCIONAMIENTO Cuando la conversión automática a Puede encender o apagar la luz de alarma de convección está encendida, aparece el icono precalentamiento. correspondiente en la parte superior de la pantalla. Configuración de la alarma de precalentamiento Icono de conversión automática a...
- Page 100 ls_main.book.book Page 20 Friday, December 3, 2021 2:39 PM 20 FUNCIONAMIENTO Cuando aparezca el cambio deseado sobre la Pulse Configuración en la parte inferior cocina, pulse OK. central de la pantalla principal, cambie a la tercera pantalla de Configuración y pulse Actualización del programa.
- Page 101 ls_main.book.book Page 21 Friday, December 3, 2021 2:39 PM FUNCIONAMIENTO Licencia de código abierto Esta pantalla muestra una lista del software de 9:20 código abierto que contiene este producto. Consulte las licencias indicadas para ver los términos y condiciones de uso. Pulse Configuración en la parte inferior central de la pantalla principal y cambie a la cuarta pantalla de Configuración.
- Page 102 ls_main.book.book Page 22 Friday, December 3, 2021 2:39 PM 22 FUNCIONAMIENTO Funcionamiento del horno ADVERTENCIA de microondas superior • No permita que los niños usen utensilios de cocina plásticos sin una atenta supervisión. Antes de usar • Vidrio para horno ADVERTENCIA - Los recipientes de cocina de vidrio aptos para hornos se tratan para resistir el calor de alta...
- Page 103 ls_main.book.book Page 23 Friday, December 3, 2021 2:39 PM FUNCIONAMIENTO usar utensilios que ya tiene en su casa en lugar - Mantenga TODOS los papeles de aluminio a 1 de invertir en un nuevo equipo de cocina. pulgada (2.54 cm) de distancia, como mínimo, de las paredes laterales y la puerta del horno.
- Page 104 ls_main.book.book Page 24 Friday, December 3, 2021 2:39 PM 24 FUNCIONAMIENTO aluminio y fije las tiras al plato. El aluminio comprobar con frecuencia cómo avanza la puede provocar arcos eléctricos si queda muy cocción de la comida. Algunos alimentos se cerca de las paredes del horno durante la dejan en el microondas hasta que se cocinan cocción.
- Page 105 ls_main.book.book Page 25 Friday, December 3, 2021 2:39 PM FUNCIONAMIENTO están sólidos en el centro, vuelva a colocarlos Nivel en la parte superior del horno para descongelarlos más. potenc - Según la forma del alimento, algunas áreas pueden descongelarse más rápidamente que •...
- Page 106 ls_main.book.book Page 26 Friday, December 3, 2021 2:39 PM 26 FUNCIONAMIENTO Configure el tiempo de cocción en la pantalla. Una vez que el precalentamiento haya finalizado, suena una alarma. Configure el nivel de potencia en la pantalla. Cuando termina el tiempo de cocción configurado suena una alarma y aparece una Pulse Start (Iniciar) para iniciar la cocción.
- Page 107 ls_main.book.book Page 27 Friday, December 3, 2021 2:39 PM FUNCIONAMIENTO Cómo cambiar la configuración de Para detener la cocción asado Pulse Stop (Detener) en la pantalla y seleccione Yes (Sí). Pulse Edit (Editar) en la pantalla para que aparezca la pantalla Cook Settings PRECAUCIÓN (Configuración de cocción).
- Page 108 ls_main.book.book Page 28 Friday, December 3, 2021 2:39 PM 28 FUNCIONAMIENTO Tabla de conversión de pesos NOTA La mayoría de los pesos de los alimentos se dan en • No use dispositivos para hacer explotar libras y onzas. Si usa libras, el peso de los palomitas de maíz en el horno de microondas alimentos debe ingresarse en el Auto Defrost con esta función.
- Page 109 ls_main.book.book Page 29 Friday, December 3, 2021 2:39 PM FUNCIONAMIENTO • Dar vuelta los alimentos cuando suene el pitido. Configure la temperatura. Deslícese por los números en la pantalla o pulse el ícono del • Tiempo de reposo: 60 minutos teclado numérico para ingresar los números directamente.
- Page 110 ls_main.book.book Page 30 Friday, December 3, 2021 2:39 PM 30 FUNCIONAMIENTO Características Pulse Start (Iniciar). Esta función se usa para recalentar alimentos • Cuando finaliza el tiempo de cocción, suena favoritos sin seleccionar tiempos de cocción ni una melodía. niveles de potencia. El horno determina el tiempo de cocción necesario para cada alimento de Para detener la cocción manera automática.
- Page 111 ls_main.book.book Page 31 Friday, December 3, 2021 2:39 PM FUNCIONAMIENTO Modo de Inicio rápido de que permita la ventilación. Después de la cocción, deje reposar durante 3 minutos. microondas • 5. Pizza (1-3 porciones) Use este modo para agregar 30 segundos al - Utensilio de cocina: bol apto para microondas tiempo de cocción por microondas.
- Page 112 ls_main.book.book Page 32 Friday, December 3, 2021 2:39 PM 32 FUNCIONAMIENTO • 2.Bagels (1 o 2-3 bagels) - Instrucciones: dé vuelta los alimentos cuando suene el pitido. - Utensilio de cocina: bandeja de metal • 10.Papas fritas congeladas (1-2, 3-4 porciones - Temperatura del alimento: congelado [3.5 oz/100 g por porción]) •...
- Page 113 ls_main.book.book Page 33 Friday, December 3, 2021 2:39 PM FUNCIONAMIENTO • 17.Pan de carne (9″ X 5″) la ventilación. Después de la cocción, deje reposar durante 3 minutos. - Utensilio de cocina: recipiente para hornear de silicona o vidrio apto para microondas •...
- Page 114 ls_main.book.book Page 34 Friday, December 3, 2021 2:39 PM 34 FUNCIONAMIENTO • 28.Vegetales enlatados (4-6, 7-9, 10-12, 13-15, - Temperatura del alimento: refrigerado 16-20 oz) - Instrucciones: la mantequilla quedará a - Utensilio de cocina: bol apto para microondas temperatura ambiente y lista para usar en una sobre la bandeja de vidrio receta.
- Page 115 ls_main.book.book Page 35 Friday, December 3, 2021 2:39 PM FUNCIONAMIENTO Para detener la cocción Configuración del modo Warm (Calentar) Pulse Stop (Detener) en la pantalla y seleccione Yes (Sí). Pulse Warm (Calentar) en la pantalla del modo de cocción. Tabla para derretir •...
- Page 116 ls_main.book.book Page 36 Friday, December 3, 2021 2:39 PM 36 FUNCIONAMIENTO NOTA • Revise los alimentos panificados con tiempo para evitar un leudado excesivo. • No use el modo Proof (Leudar) para calentar comida ni para mantener calientes los alimentos. La temperatura del horno para el leudado no es lo suficientemente alta para mantener alimentos a temperaturas seguras.
- Page 117 ls_main.book.book Page 37 Friday, December 3, 2021 2:39 PM FUNCIONAMIENTO Funcionamiento del horno parte inferior del horno. Si lo hace, podría generar un proceso de horneado deficiente y inferior dañar la base del horno. • Acomode los estantes del horno solo cuando el Antes de usar el horno horno esté...
- Page 118 ls_main.book.book Page 38 Friday, December 3, 2021 2:39 PM 38 FUNCIONAMIENTO Golpee suavemente dos veces el centro del panel de vidrio para revelar el contenido del horno sin abrir la puerta. Guías del estante Una vez que el estante está asegurado en la parte trasera, tire de él hacia afuera hasta que se bloquee en el lugar.
- Page 119 ls_main.book.book Page 39 Friday, December 3, 2021 2:39 PM FUNCIONAMIENTO Es posible programar el horno para hornear a NOTA cualquier temperatura entre 170 °F (80 °C) y 550 °F (285 °C). La temperatura predeterminada es 350 °F • Si no se configura un tiempo de cocción, el (175 °C).
- Page 120 ls_main.book.book Page 40 Friday, December 3, 2021 2:39 PM 40 FUNCIONAMIENTO Configuración de la función Bake • La cocción con varios estantes puede aumentar ligeramente los tiempos de cocción de algunos (Hornear) alimentos. Pulse Bake (Hornear) en la pantalla del modo •...
- Page 121 ls_main.book.book Page 41 Friday, December 3, 2021 2:39 PM FUNCIONAMIENTO Pulse Start (Iniciar). coloque los estantes del horno en las posiciones que se muestran. Para detener la cocción La cocción con varios estantes ahorra tiempo y energía. Siempre que sea posible, cocine los Pulse Stop (Detener) en la pantalla y seleccione alimentos que requieran la misma temperatura de Yes (Sí).
- Page 122 ls_main.book.book Page 42 Friday, December 3, 2021 2:39 PM 42 FUNCIONAMIENTO - Siempre use guantes de cocina al insertar o Posición quitar alimentos Tipo de alimento estante NOTA Pollo rostizado • Este electrodoméstico está diseñado para asar con la puerta cerrada. Cierre la puerta para NOTA configurar la función Asar.
- Page 123 ls_main.book.book Page 43 Friday, December 3, 2021 2:39 PM FUNCIONAMIENTO preocuparlo. Si hay más humo del esperado, siga NOTA estos consejos para reducir la cantidad de humo en su horno. • Si no se configura un tiempo de cocción, el horno se apagará...
- Page 124 ls_main.book.book Page 44 Friday, December 3, 2021 2:39 PM 44 FUNCIONAMIENTO Tiempo Tiempo Posición en el en el Comida Cantidad y/o espesor primer segundo Comentarios estante lado lado (min) (min) Espaciar de manera Carne vacuna 1 lb (9 hamburguesas) uniforme. Se pueden molida de 1/2 a 3/4"...
- Page 125 ls_main.book.book Page 45 Friday, December 3, 2021 2:39 PM FUNCIONAMIENTO Tiempo Tiempo Posición en el en el Comida Cantidad y/o espesor primer segundo Comentarios estante lado lado (min) (min) Aumente el tiempo de 5 a 10 minutos por Fetas de lado para un espesor jamón "...
- Page 126 ls_main.book.book Page 46 Friday, December 3, 2021 2:39 PM 46 FUNCIONAMIENTO menos humo al asar. Los tiempos de cocción probablemente serán más cortos que los tiempos indicados en la Tabla para asar. • En el caso de los bistecs con hueso o las chuletas deshuesadas (que se les quitó toda la carne alrededor del hueso), envuelva las secciones expuestas del hueso en papel de aluminio para reducir el quemado.
- Page 127 ls_main.book.book Page 47 Friday, December 3, 2021 2:39 PM FUNCIONAMIENTO Configuración del modo Leudar • La función de leudado proporciona automáticamente la temperatura óptima para el proceso de leudado y, por lo tanto, no tiene una Pulse Proof (Leudar) en la pantalla del modo función de ajuste de temperatura.
- Page 128 (Configuración de cocción). • Use la bandeja para freír con aire opcional disponible de LG o una bandeja para hornear oscura sin lados o con lados bajos que no cubra Ajuste la configuración con el teclado todo el estante. Esto permite una mejor numérico o la función de deslizamiento.
- Page 129 ls_main.book.book Page 49 Friday, December 3, 2021 2:39 PM FUNCIONAMIENTO • Limpie los filtros de grasa de la campana PRECAUCIÓN extractora con regularidad. • Nunca cubra ranuras, orificios o pasajes en la • Mantenga el horno libre de grasa acumulada. base del horno ni cubra todos los estantes con Limpie el interior del horno antes y después de materiales como papel de aluminio.
- Page 130 ls_main.book.book Page 50 Friday, December 3, 2021 2:39 PM 50 FUNCIONAMIENTO Cantidad Posición del Puntos recomendados Temp. (°F) Hora Guía (onzas) estante Papas fritas caseras 20-30 Corte las papas y (10 x 10 mm) sumérjalas durante 30 minutos en agua caliente Gajos de papas caseras 30-40 del grifo.
- Page 131 ls_main.book.book Page 51 Friday, December 3, 2021 2:39 PM FUNCIONAMIENTO Modo Probe (Sonda) Configure la temperatura del horno y de la sonda. Deslícese por los números en la La sonda mide con precisión la temperatura pantalla o pulse el ícono del teclado numérico interna de la carne, las aves y los estofados.
- Page 132 ls_main.book.book Page 52 Friday, December 3, 2021 2:39 PM 52 FUNCIONAMIENTO • Mientras el modo de sonda está en NOTA funcionamiento, la función SpeedClean (Limpieza rápida) no responde. • Para evitar que se dañe la sonda, asegúrese de que la comida esté totalmente descongelada antes de insertarla.
- Page 133 ls_main.book.book Page 53 Friday, December 3, 2021 2:39 PM FUNCIONAMIENTO Temperatura Categoría Ejemplos de alimento Cocción deseada interna objetivo Pollo o pavo enteros Asados o pechugas de aves Aves 165 °F (74 °C) Pato, ganso, faisán Relleno (solo o en el ave) Cerdo jugoso Bien cocido: 170 °F (77 °C) 145 °F (63 °C)
- Page 134 ls_main.book.book Page 54 Friday, December 3, 2021 2:39 PM 54 FUNCIONAMIENTO Modo Auto Cook (Cocción NOTA automática) • Si aparece el recordatorio de eliminación de La función Auto Cook (Cocción automática) ofrece sarro, pulse OK para ejecutar la función orientación para cocinar alimentos o platos que Descaling (Eliminar sarro).
- Page 135 ls_main.book.book Page 55 Friday, December 3, 2021 2:39 PM FUNCIONAMIENTO Guía de Auto Cook (Cocción automática) • Primero precaliente el horno para la mayoría de los elementos. • Precaliente durante 5 minutos durante el asado. • Si utiliza una sonda, inserte después de precalentar. NOTA •...
- Page 136 ls_main.book.book Page 56 Friday, December 3, 2021 2:39 PM 56 FUNCIONAMIENTO Accesorios/ Tiempo de Posición del Menú Utensilios de cocción en estante cocina minutos. Poco cocidos 30~60 Medio cocido 35~65 Lomo de carne Término medio Rostizar en la 40~70 de res asadera Término medio, 45~75...
- Page 137 ls_main.book.book Page 57 Friday, December 3, 2021 2:39 PM FUNCIONAMIENTO Accesorios/ Tiempo de Posición del Menú Utensilios de cocción en estante cocina minutos. Paleta de cerdo Cacerola 60~90 Chuletas de cerdo 30~50 Cerdo Lomo de cerdo 50~80 Solomillo de cerdo 20~40 Estante 10~30...
- Page 138 ls_main.book.book Page 58 Friday, December 3, 2021 2:39 PM 58 FUNCIONAMIENTO Accesorios/ Tiempo de Posición del Menú Utensilios de cocción en estante cocina minutos. Directamente 10~20 sobre el estante Sobre asadera para Masa fina congelada 10~20 pizza Sobre piedra para 10~20 pizza Directamente...
- Page 139 ls_main.book.book Page 59 Friday, December 3, 2021 2:39 PM FUNCIONAMIENTO Accesorios/ Tiempo de Posición del Menú Utensilios de cocción en estante cocina minutos. Bol para horno con Proof (Leudar) 30~40 tapa Secado/Deshidratación (frutas o Bandejas para Varios 120~480 vegetales) hornear Rostizar en la Rostizado lento 120~240...
- Page 140 ls_main.book.book Page 60 Friday, December 3, 2021 2:39 PM 60 FUNCIONAMIENTO Cómo usar el tanque del alimentador PRECAUCIÓN de vapor • Asegúrese de que la cubierta del tanque y la El tanque del alimentador de vapor se ubica sobre tapa de llenado estén cerradas antes de colocar la cavidad del horno.
- Page 141 ls_main.book.book Page 61 Friday, December 3, 2021 2:39 PM FUNCIONAMIENTO Sous vide (Cocción al vacío) Pulse Steam Bake (Hornear a vapor) en la pantalla. La función Sous vide (Cocción al vacío) utiliza vapor para cocinar alimentos de modo "lento y suave". Utilícela para cocinar carne, pescado, mariscos, Seleccione la temperatura deseada y el nivel aves o verduras.
- Page 142 Abra la puerta del horno para asegurarse de del horno puede iniciarse o detenerse a través de que esté vacío y listo para el la aplicación para teléfonos inteligentes LG ThinQ. precalentamiento. No coloque alimentos en su interior. Cierre la puerta del horno. El Inicio remoto solo se puede configurar cuando la puerta del horno está...
- Page 143 (Encender). Siga las instrucciones del mensaje emergente que aparece en la pantalla. Siga las instrucciones que se detallan en la aplicación de teléfonos inteligentes LG ThinQ para utilizar la función de inicio remoto. NOTA • La función Inicio remoto se encuentra desconectada en las siguientes situaciones: - Inicio remoto nunca está...
- Page 144 • Actualización de Firmware de su red. - Mantiene el electrodoméstico actualizado. • LG ThinQ no es responsable por ningún problema de conexión de red, falla, mal NOTA funcionamiento o error causado por la conexión de red.
- Page 145 Conexión a Wi-Fi • Conecte el equipo a una toma de corriente en un circuito diferente al que está conectado el El botón Wi-Fi, al ser usado con la aplicación LG receptor. ThinQ, permite al electrodoméstico conectarse a la red Wi-Fi doméstica. El ícono muestra el •...
- Page 146 ThinQ. El equipo se debe instalar y operar con una • Inicie la aplicación LG ThinQ y seleccione la distancia mínima de 20 cm (7.8 pulg.) entre la función Smart Diagnosis en el menú. Siga las antena y su cuerpo. Los usuarios deben seguir las instrucciones provistas en la aplicación LG...
- Page 147 ls_main.book.book Page 67 Friday, December 3, 2021 2:39 PM MANTENIMIENTO MANTENIMIENTO Limpieza Exterior Panel de control Consejos Generales de Limpieza Para evitar que el panel de control se active • Se puede usar una espátula plástica como durante la limpieza, desconecte el raspador para quitar los restos o residuos antes electrodoméstico de la alimentación eléctrica.
- Page 148 ls_main.book.book Page 68 Friday, December 3, 2021 2:39 PM 68 MANTENIMIENTO Puerta del horno toallas de papel húmedas o un paño de cocina. Al sumergir la asadera se removerán los restos de comida quemada. PRECAUCIÓN • Tanto la asadera como la rejilla se pueden •...
- Page 149 Guía de instrucciones de EasyClean ventanas para ventilar. En comparación con el proceso más intenso de Self Clean, el horno LG le NOTA brinda la opción de limpiar con MENOS CALOR, en •...
- Page 150 ls_main.book.book Page 70 Friday, December 3, 2021 2:39 PM 70 MANTENIMIENTO Pulse Start (Iniciar). El tiempo restante aparece en la pantalla. PRECAUCIÓN • Algunas superficies pueden quedar calientes después del ciclo EasyClean. Use guantes de • Raspadores plásticos sugeridos: goma cuando limpie para evitar quemaduras. - Espátula de plástico dura •...
- Page 151 ls_main.book.book Page 71 Friday, December 3, 2021 2:39 PM MANTENIMIENTO limpia y seca. Vuelva a colocar los estantes y - Si no retira el tanque de agua del horno, suena demás accesorios. un pitido y el ciclo Self Clean no se inicia. Si queda alguna suciedad leve, repita los pasos anteriores y asegúrese de empapar bien las áreas sucias.
- Page 152 ls_main.book.book Page 72 Friday, December 3, 2021 2:39 PM 72 MANTENIMIENTO aceite vegetal para que se desplacen con PRECAUCIÓN facilidad. • No deje a niños pequeños sin supervisión cerca • Tras un ciclo Self Clean, pueden aparecer líneas del electrodoméstico. Durante el ciclo Self finas en la porcelana, debido a que fue sometida Clean, el exterior del horno puede estar muy a frío y calor.
- Page 153 ls_main.book.book Page 73 Friday, December 3, 2021 2:39 PM MANTENIMIENTO Caso 3 Una vez que configura el ciclo de autolimpieza, la puerta del horno se bloquea • Forma de la suciedad: gotas o manchas automáticamente y aparece el icono de •...
- Page 154 ls_main.book.book Page 74 Friday, December 3, 2021 2:39 PM 74 MANTENIMIENTO Limpieza del tanque del Configuración de Descaling (Eliminación del sarro) alimentador de vapor El tanque del alimentador de vapor se usa durante Llene el tanque del alimentador de vapor con las funciones de cocción al vapor.
- Page 155 ls_main.book.book Page 75 Friday, December 3, 2021 2:39 PM MANTENIMIENTO poco más de 1 minuto y se ejecuta • Use guantes para cambiar la luz del horno. Los automáticamente después de cualquier ciclo de fragmentos de vidrio de las bombillas rotas cocción de vapor.
- Page 156 ls_main.book.book Page 76 Friday, December 3, 2021 2:39 PM 76 SOLUCIÓN DE PROBLEMAS SOLUCIÓN DE PROBLEMAS Preguntas Frecuentes Preguntas frecuentes Acerca del horno superior ¿Puedo usar una rejilla en mi horno superior para recalentar y cocinar en dos niveles al mismo tiempo? Solo use la rejilla que viene con su horno superior.
- Page 157 ls_main.book.book Page 77 Friday, December 3, 2021 2:39 PM SOLUCIÓN DE PROBLEMAS Este aspecto es normal y no afecta el funcionamiento de su horno. ¿Por qué no se mueve la bandeja de vidrio? El lado correcto de la bandeja debe mirar hacia arriba y la bandeja debe asentarse firmemente en el eje central.
- Page 158 ls_main.book.book Page 78 Friday, December 3, 2021 2:39 PM 78 SOLUCIÓN DE PROBLEMAS Nunca utilice papel de aluminio para revestir la base o los laterales del horno. El papel se derretirá y se pegará a la superficie de la base del horno y no se podrá quitar. En lugar de eso, coloque una bandeja forrada con papel de aluminio sobre un estante inferior del horno y úsela para recolectar el goteo.
- Page 159 ls_main.book.book Page 79 Friday, December 3, 2021 2:39 PM SOLUCIÓN DE PROBLEMAS Depende del tipo de suciedad. Las manchas de azúcar y algunas de grasa son particularmente difíciles de limpiar. Además, si las manchas no están muy empapadas en agua, esto puede tener un efecto negativo en el desempeño de la limpieza.
- Page 160 ls_main.book.book Page 80 Friday, December 3, 2021 2:39 PM 80 SOLUCIÓN DE PROBLEMAS Antes de llamar al servicio técnico Revise esta sección antes de llamar para servicio; hacerlo le ahorrará tiempo y dinero. Cocción Problemas Causas posibles y solución Arcos eléctricos o El utensilio de cocina no es apto para microondas.
- Page 161 ls_main.book.book Page 81 Friday, December 3, 2021 2:39 PM SOLUCIÓN DE PROBLEMAS Problemas Causas posibles y solución El horno hace El control no está configurado correctamente. demasiado humo • Siga las instrucciones que figuran en Cambio de configuraciones. durante el asado. La carne se encuentra muy cerca del elemento.
- Page 162 ls_main.book.book Page 82 Friday, December 3, 2021 2:39 PM 82 SOLUCIÓN DE PROBLEMAS Problemas Causas posibles y solución Hay demasiado Suciedad excesiva. humo durante el • Apague la función Self Clean (Autolimpieza). Abra las ventanas para que salga el humo. ciclo SelfClean (En Espere hasta que se cancele el modo Self Clean.
- Page 163 ls_main.book.book Page 83 Friday, December 3, 2021 2:39 PM SOLUCIÓN DE PROBLEMAS Problemas Causas posibles y solución La puerta del horno está bloqueada porque la temperatura dentro del horno no Se enciende en la descendió por debajo de la temperatura de bloqueo. pantalla cuando usted quiere cocinar.
- Page 164 Durante la configuración de Wi-Fi, la aplicación requiere una contraseña para conectar el producto (en determinados teléfonos). • Ubique el nombre de la red que comienza con "LG" en Configuración > Redes. Tenga en cuenta la última parte del nombre de la red.
- Page 165 VEA A CONTINUACIÓN LA SECCIÓN “PROCEDIMIENTO PARA RESOLVER CONFLICTOS”. En caso de que su Horno eléctrico LG ("Producto") presente alguna falla por defectos de materiales o de fabricación bajo uso apropiado y normal durante el período de garantía establecido más abajo, el mismo será...
- Page 166 MANERA CON ESTA GARANTÍA LIMITADA O CON EL PRODUCTO, SE RESOLVERÁN EXCLUSIVAMENTE A TRAVÉS DE UN ARBITRAJE VINCULANTE Y NO EN UNA CORTE DE JURISDICCIÓN GENERAL. ARBITRAJE VINCULANTE SIGNIFICA QUE USTED Y LG RENUNCIAN AL DERECHO DE UN JUICIO CON JURADO Y A REALIZAR O PARTICIPAR EN UNA DEMANDA COLECTIVA.
- Page 167 Aviso de disputa. En caso de que usted desee iniciar un procedimiento de arbitraje, primero debe notificar a LG por escrito al menos 30 días antes de iniciar el arbitraje enviando una carta a LG a LG Electronics, USA, Inc. Atención: Legal Department- Arbitration 111 Sylvan Avenue, Englewood Cliffs, NJ 07632 USA.
- Page 168 LG pueden solicitar al otro que participe en un procedimiento de arbitraje. Para excluirse usted debe enviar una notificación a LG, en un lapso de hasta 30 días continuos, contados a partir de la fecha de la primera compra del consumidor del producto, ya sea por: (i) el envío de un correo electrónico a optout@lge.com con el siguiente Asunto: “Exclusión del arbitraje”...
- Page 169 ls_main.book.book Page 89 Friday, December 3, 2021 2:39 PM Memorándum...
- Page 170 ls_main.book.book Page 90 Friday, December 3, 2021 2:39 PM 90 Memorándum...
- Page 171 ls_main.book.book Page 91 Friday, December 3, 2021 2:39 PM Memorándum...
- Page 172 Page 89 Friday, December 3, 2021 2:39 PM LG Customer Information Center For inquiries or comments, visit www.lg.com or call: U.S.A. 1-800-243-0000 1-888-542-2623 CANADA Register your product Online! www.lg.com...