Table of Contents
Advertisement
Advertisement
Table of Contents

Related Manuals for Sony BDV-Z7


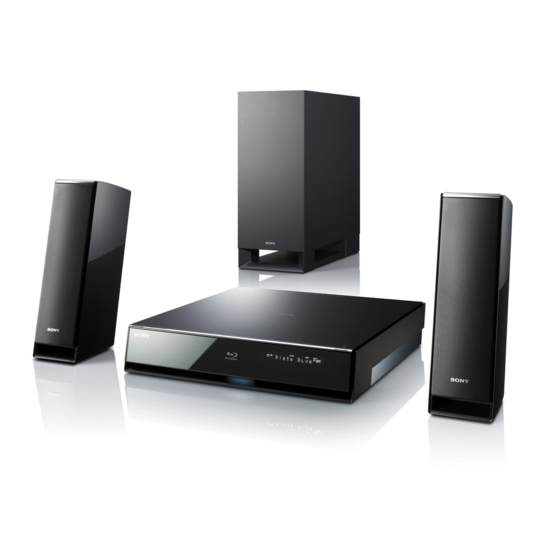
Summary of Contents for Sony BDV-Z7
-
Page 1: Operating Instructions
The software of this player may be updated in the future. To find out details on any available updates, please visit: http://support.sony-europe.com Sony Corporation Printed in Malaysia BD/DVD Home Theatre System Operating Instructions BDV-Z7 © 2009 Sony Corporation 4-136-891-11(1) - Page 2 WARNING Do not install the appliance in a confined space, such as a bookcase or built-in cabinet. To reduce the risk of fire, do not cover the ventilation opening of the apparatus with newspapers, tablecloths, curtains, etc. Do not place the naked flame sources such as lighted candles on the apparatus.
-
Page 3: Copyrights And Trademarks
Notice for customers: the following information is only applicable to equipment sold in countries applying EU directives. The manufacturer of this product is Sony Corporation, 1-7-1 Konan Minato-ku Tokyo, 108-0075 Japan. The Authorized Representative for EMC and product safety is Sony Deutschland GmbH, Hedelfinger Strasse 61, 70327 Stuttgart, Germany. -
Page 4: About These Operating Instructions
About These Operating Instructions • The instructions in these Operating Instructions describe the controls on the remote. You can also use the controls on the control unit if they have the same or similar names as those on the remote. •... -
Page 5: Table Of Contents
Table of Contents About These Operating Instructions ... 4 Unpacking ... 6 Index to Parts and Control ... 8 Getting Started Step 1: Installing the System... 14 Step 2: Connecting the System... 17 Step 3: Performing the Easy Setup... 29 Step 4: Selecting the Source ... -
Page 6: Unpacking
Unpacking • Control unit (1) • Front speakers (2) • Subwoofer (1) • FM wire antenna (aerial) (1) • Speaker cords (2, white/red) • Video cord (1) • Remote commander (remote) (1) • R6 (size AA) batteries (2) • Cleaning cloth (1) •... - Page 7 Preparing the remote Inserting batteries into the remote Insert two R6 (size AA) batteries (supplied) by matching the 3 and # ends on the batteries to the markings inside the compartment. Note • Do not leave the remote in an extremely hot or humid place. •...
-
Page 8: Index To Parts And Control
Index to Parts and Control For more information, refer to the pages indicated in parentheses. Remote control ONE-TOUCH THEATRE PLAY BRAVIA Sync DYNAMIC SLEEP NIGHT BASS CLEAR DIGITAL ANALOG D.TUNING FUNCTION PRESET REPLAY ADVANCE TUNING SCENE SEARCH PROG Number 5, /DIGITAL, PROG +, and N buttons have a tactile dot. - Page 9 D.TUNING (page 53) Selects the radio frequencies. (angle) (page 38) Switches to other viewing angles when multi-angles are recorded on a BD-ROM/ DVD VIDEO. SYSTEM MENU (pages 33, 42, 50, 54, 63, 64) Enters the system menu. DIGITAL (page 62) Switches to digital mode.
- Page 10 SCENE SEARCH (page 39) Switches to Scene Search mode that lets you move quickly between scenes within the title currently being played back. (muting) (pages 35, 44, 62) Turns off the sound temporarily. 2 (volume) +/– (pages 35, 62) Adjusts the volume. PROG +/–...
- Page 11 Control unit Top view With the front cover closed With the front cover opened A "/1 (on/standby) (page 35) Turns on the system, or sets to standby mode. B Z (open/close) Opens or closes the disc tray. C Illumination LED (page 64) D Logo illumination LED (page 64) E Disc tray (page 35) (remote sensor) (page 7)
-
Page 12: Front Panel Display
Front panel display About the indications in the front panel display SLEEP TUNED MONO A Lights up when the system is accessing the network. B Flashes when the sleep timer is set. (page 63) C Lights up when a station is received. (Radio only) (page 52) D Lights up when [FM Mode] is set to [Monaural]. - Page 13 Rear of the control unit DC5V 0.5A MAX HDMI LAN(100) A EXT slot (page 26) B COMPONENT VIDEO OUT jacks (page C ANTENNA (FM 75Ω COAXIAL) jack (page 25) D DMPORT (DIGITAL MEDIA PORT) jack (page 23) E AUDIO (AUDIO IN L/R) jacks (page 23) F VIDEO OUT jack (page 20) Subwoofer FRONT R...
-
Page 14: Getting Started
Getting Started Step 1: Installing the System Positioning the speakers For the best possible sound, place all speakers at the same distance from the listening position (A). Place the system as illustrated below. Note • Use caution when placing the speakers and/or speaker stands attached to the speakers on a specially treated (waxed, oiled, polished, etc.) floor, as staining or discoloration may result. - Page 15 Install the speakers on a vertical and flat wall where reinforcement is applied. • Sony is not responsible for accidents or damage caused by improper installation, insufficient wall strength or improper screw installation, natural calamity, etc.
- Page 16 Before installing the speakers on a wall, check that the adjustable support is returned to its original position on the bottom of the speakers. Connect the speaker cord to the speaker. Be sure to match the speaker cords to the appropriate terminals on the speakers: the speaker cord with the color tube to 3, and the speaker cord without the color tube to #.
-
Page 17: Step 2: Connecting The System
Step 2: Connecting the System Do not connect the AC power cord (mains lead) of the subwoofer to a wall outlet (mains) until all the other connections are made. Front left speaker (L) FM wire antenna (aerial) Bottom of the subwoofer SYSTEM CONTROL ONLY FOR HCD-Z7 SPEAKER... - Page 18 Connecting the Control unit Connect the system connector of the control unit to the SYSTEM CONTROL jack on the bottom of the subwoofer. Insert the plug of the SYSTEM CONTROL connector, then secure the screws of the plug. Plug SYSTEM CONTROL cable Screws Bottom of the subwoofer DC5V...
-
Page 19: Connecting The Speakers
Connecting the speakers To connect speaker cords to the subwoofer The connector of the speaker cords and the color tube are color-coded depending on the type of speaker. Connect the speaker cords to match the color of the SPEAKER jacks of the subwoofer. When connecting to the subwoofer, insert the connector until it clicks. -
Page 20: Connecting The Tv (Video Connection)
To avoid short-circuiting the speakers Short-circuiting of the speakers may damage the system. To prevent this, be sure to follow these precautions when connecting the speakers. Make sure the bare wire of each speaker cord does not touch another speaker terminal or the bare wire of another speaker cord, such as shown below. Stripped speaker cord is touching another speaker terminal. - Page 21 Method 2: HDMI* cable (B) and video cord (A) connection If your TV has an HDMI jack, connect to the TV both with an HDMI cable and video cord. Picture quality will be improved compared to using only the video cord connection. When connecting with the HDMI cable, you need to select the type of output signal (pages 29, 69).
-
Page 22: Connecting The Tv (Audio Connection)
Connecting the TV (Audio connection) This connection sends an audio signal to the system from the TV. To listen to TV sound via the system, perform this connection. Rear of the control unit E X T D C 5 V 0 .5 A M O U T 0 0 ) -
Page 23: Connecting The Other Components
Connecting the other components You can enjoy connected components via the system’s speakers. • DIGITAL MEDIA PORT adapter: E (TDM-iP20 is supplied with United Kingdom models. You can also use other DIGITAL MEDIA PORT adapters.) • VCR, digital satellite receiver, PlayStation, or portable audio source, etc. (not supplied): F •... - Page 24 If your TV has multiple audio/video inputs You can enjoy sound with the speakers of the system through the connected TV. Connect the components as follows. System Select the component on the TV. For details, refer to the operating instructions of the TV. If the TV does not have multiple audio/video inputs, a switcher will be necessary to receive sound from more than one component.
-
Page 25: Connecting The Antenna (Aerial)
Connecting the antenna (aerial) To connect the antenna (aerial) Rear of the control unit D C 5 V 0 .7 A M F M 7 5 O R T IA L C O A X D M P N N A A N T E Note •... - Page 26 Inserting the external memory Insert the external memory device (1 GB or larger USB flash memory, such as Sony USM2GL, or USM2GH, not supplied) into the EXT slot. Check that “EXT” lights up in the front panel display when turning the system on. By connecting an external memory, you can enjoy additional contents (BonusView/BD-Live) depending on the disc (page 43).
-
Page 27: Connecting To The Network
Connecting to the network Connect the LAN (100) terminal of the control unit to your Internet source using a network cable to update the system’s software using the network. You can also enjoy BD-Live (page 43). Make the appropriate settings in [Internet Settings] under [Network Settings] (page 75). Rear of the control unit DC5V 0.5A MAX... - Page 28 Connecting the AC power cord (mains lead) Before connecting the AC power cord (mains lead) of the subwoofer to a wall outlet (mains), connect all the speakers to the subwoofer. Wall outlet (mains): The shape of the wall outlet (mains) differs depending on the area.
-
Page 29: Step 3: Performing The Easy Setup
Step 3: Performing the Easy Setup Follow the Steps below to make the basic adjustments for using the system. Displayed items vary depending on the country model. C/X/x/c, Turn on the TV. Press [/1. Switch the input selector on your TV so that the signal from the system appears on the TV screen. -
Page 30: Output Resolution
Easy Setup - Control for HDMI You can operate this unit in conjunction with a TV connected by HDMI. Check your TV settings when using this function. Select [On] to use the [Control for HDMI] function (page 58) when connecting Sony... - Page 31 components that are compatible with the Control for HDMI function. If you do not use the [Control for HDMI] function, select [Off]. or c. Press The Setup Display for [BD Internet Connection] appears. Press X/x to select the setting for the BD Internet connections.
-
Page 32: Step 4: Selecting The Source
Step 4: Selecting the Source You can select the playback source. FUNCTION Press FUNCTION repeatedly until the desired function appears in the front panel display. Each time you press FUNCTION, the function changes as follows. “BD/DVD” t “TUNER FM” t“TV” t “SAT/CABLE”... -
Page 33: Step 5: Enjoying Surround Sound Effect
Step 5: Enjoying Surround Sound Effect You can enjoy surround sound effect simply by selecting one of the “DEC. MODE” (decoding mode) settings. They bring the exciting and powerful sound of movie theaters into your home. X/x/c, Selecting surround sound effects based on your listening preference Press SYSTEM MENU. - Page 34 About speaker output The default setting is “AUTO.” “DEC. MODE” setting Surround sound effect “AUTO” The system outputs the sound with suitable effect automatically depending on the source. • 2 channel source: Outputs 2 channel sound as it is. • Multi-channel source: Simulates 5.1 surround sound with two front speakers and a subwoofer.
-
Page 35: Playback
Playback Playing a BD/DVD Depending on the disc, some operations may be different or restricted. Refer to the operating instructions supplied with your disc. Top view "/1 With the front cover closed FUNCTION With the front cover opened FUNCTION Disc tray FUNCTION ONE-TOUCH PLAY... -
Page 36: Parental Control
Press +/– to adjust the volume. The volume level appears on the TV screen and in the front panel display. Note • When you set the [Control for HDMI] function to [On], the TV that is connected to the system with an HDMI cable (not supplied) can be sync-operated with the system. - Page 37 When you play a restricted DVD Change [DVD Parental Control] in [BD/DVD Viewing Settings] (page 72). When you play a restricted BD or DVD, the display for entering your password appears on the screen. Enter your four-digit password using the number buttons, and press Playback starts.
-
Page 38: Changing The Angles
Changing the angles If various angles (multi-angles) for a scene are recorded on a disc, you can change the viewing angle. Press during playback to select the desired angle. Displaying the subtitles If subtitles are recorded on a disc, you can turn the subtitles on/off during playback. - Page 39 Using the BD’s or DVD’s menu To display the Top Menu A BD/DVD is divided into a lot of sections, which make up a picture or music feature. These sections are called “titles.” When you play a BD/ DVD which contains several titles, you can select the title you want using the Top Menu.
- Page 40 Searching for a Title/Chapter You can search for a chapter if the title contains chapter marks. Press OPTIONS during playback or in pause mode. The options menu appears. Press X/x to select a search method, then press • [Title Search] (for a BD-ROM/DVD VIDEO): Searches the desired title.
- Page 41 To view the playing time and remaining time in the front panel display Press TIME repeatedly. Each time you press TIME while playing the disc, the display changes: 1 y 2 1 Playing time of the current title 2 Remaining time of the current title Some displayed items may disappear after a few seconds.
- Page 42 Note • Set the picture setting of your TV to [Standard] before changing [Picture Quality Mode]. • [Video Settings] is disabled when the connected TV is set to Theatre Mode (page 59). • Depending on the disc or the scene being played, [FNR], [BNR], or [MNR] effects may be hard to discern.
-
Page 43: Enjoying Bonusview/Bd-Live
Enjoying BonusView/BD- Live Some BD-ROMs with “BD-LIVE Logo” have bonus contents and other data that can be downloaded to the external memory (local storage) for enjoyment. If a disc is inserted, remove the disc from the control unit. Turn the system off. Insert the external memory (not supplied) into the EXT slot on the rear of the control unit. -
Page 44: Playing A Cd
Playing a CD C/X/x/c, HOME FUNCTION 2 +/– Press FUNCTION repeatedly until “BD/ DVD” appears in the front panel display. Place a CD. The Music Player screen appears. Press N. Playback starts. Music CD Current track number and elapsed time Press +/–... -
Page 45: Playing Photo Files
Available OPTIONS Press OPTIONS. The options menu appears. Press X/x to select an item, then press The available items differ depending on the disc type or system situation. Items Details [Play] Plays the selected track. [Play from start] (during Plays the current track from playback) the beginning. -
Page 46: Available Options
Press The file list or folder list appears. Thumbnails of files* * Appears only when the file has thumbnail information. Press X/x to select a file or folder, then press When you select a folder, press X/x to select a file in the folder, then press The selected photo file is displayed. - Page 47 • Large photo files may take some time to display or to start a slideshow. To view images in high picture quality If you have a Sony TV compatible with “PhotoTV HD,” you can enjoy images in high picture quality by the following connection and setting.
-
Page 48: Sound Adjustment
Sound Adjustment Selecting the Effect to Suit the Source You can select a suitable sound mode for movies or music. Press SOUND MODE repeatedly during playback until the desired mode appears in the front panel display. • “AUTO”: The system selects “MOVIE” or “MUSIC”... -
Page 49: Selecting The Audio Format, Multilingual Tracks, Or Channel
Selecting the Audio Format, Multilingual Tracks, or Channel When the system is playing a BD/DVD VIDEO recorded in multiple audio formats (PCM, Dolby Digital, MPEG audio, or DTS), you can change the audio format. If the BD/DVD VIDEO is recorded with multilingual tracks, you can also change the language. -
Page 50: Enjoying Multiplex Broadcast Sound
Enjoying Multiplex Broadcast Sound (DUAL MONO) You can enjoy multiplex broadcast sound when the system receives or plays a Dolby Digital multiplex broadcast signal. Note • To receive the Dolby Digital signal, you need to connect a TV or other component to the system with an optical or coaxial digital cord (pages 22, 23) and set the digital output mode of the TV or other component to Dolby Digital. - Page 51 To turn off the sound effect Press NIGHT so that “NIGHT” disappears from the front panel display. Changing the tonal balance You can adjust the sound by changing the tonal balance of the sound. Press SYSTEM MENU. Press X/x repeatedly until “AUDIO MENU”...
-
Page 52: Tuner
2 +/– Current band and preset number FM 7 88.00 SONY RADIO Station name • You can operate the tuner function using the tuner menu on the front panel display. See “Operating the tuner function using the system menu” (page 54) Press FUNCTION repeatedly until “TUNER FM”... -
Page 53: Presetting Radio Stations
Presetting radio stations You can preset 20 FM stations. Before tuning, make sure to turn down the volume to minimum. Press FUNCTION repeatedly until “TUNER FM” appears in the front panel display. Press and hold TUNING +/– until the auto scanning starts. [Auto Tuning] appears on the TV screen. -
Page 54: Naming Preset Stations
Press The setting is made. Naming preset stations You can enter a name for preset stations. These names (for example, “XYZ”) appear in the front panel display when a station is selected. Only one name can be entered for each preset station. - Page 55 Press X/x repeatedly until “MEMORY” appears in the front panel display, then press or c. A preset number appears in the front panel display. TUNED STEREO Press X/x to select the preset number you want. TUNED STEREO • You can select the preset number directly by pressing the number buttons.
-
Page 56: Using The Radio Data System (Rds)
Press “COMPLETE!” appears in the front panel display, and the station name is stored. Press SYSTEM MENU. The system menu turns off. Using the Radio Data System (RDS) What is the Radio Data System? The Radio Data System (RDS) is a broadcasting service that allows radio stations to send additional information along with the regular program signal. -
Page 57: External Audio Device
External Audio Device Using the DIGITAL MEDIA PORT Adapter The DIGITAL MEDIA PORT (DMPORT) adapter is for enjoying sound from a portable audio source or computer. By connecting a DIGITAL MEDIA PORT adapter, you can enjoy sound from the connected component on the system. -
Page 58: Other Operations
HDMI function may not work. Refer to the operating instructions supplied with the component. • The Control for HDMI function may not work if you connect a component other than Sony, even if the component is compatible with the Control for HDMI function. - Page 59 To set the [Control for HDMI] function of the system to on/off manually Press HOME. The home menu appears on the TV screen. Press C/c to select [Setup]. Press X/x to select [HDMI Settings], then press The options for [HDMI Settings] appear. Press X/x to select [Control for HDMI], then press Press X/x to select the setting, then...
-
Page 60: Setting The Speakers
• When TV sound is output from the speakers of the system, you can adjust the volume and turn off the sound of the system using the TV remote. Note • While the TV is in PAP (picture and picture) mode, the System Audio Control function will not work. - Page 61 Note • Depending on the input stream, [Distance] may not be effective. x [Level] You can adjust the sound level of the speakers. You can set the parameters from –6.0 dB to +6.0 dB. Be sure to set [Test Tone] to [On] for easy adjustment.
-
Page 62: Controlling The Tv With The Supplied Remote
By adjusting the remote signal, you can control your TV with the supplied remote. Note • When you replace the batteries of the remote, the code number may reset itself to the default (SONY) setting. Reset the appropriate code number. Preparing the remote for controlling the TV Press and hold TV [/1 while entering your TV’s manufacturer’s code (see the table) -
Page 63: Using The Sleep Timer
C/X/x/c, Select the item on the menu. • The function of these buttons are same as the remote buttons of the SONY TV. For details, refer to the operating instructions of the TV. Using the Sleep Timer You can set the system to turn off at a preset time, so you can fall asleep listening to music. -
Page 64: Using The Dimmer Function
Using the Dimmer Function The brightness of the front panel display, logo illumination LED and illumination LED can be set. Press SYSTEM MENU. Press X/x repeatedly until “DISP MENU” appears in the front panel display, then press Press X/x repeatedly until “DIMMER” appears in the front panel display, then press or c. -
Page 65: Deactivating The Buttons On The Control Unit
Deactivating the Buttons on the Control Unit (Child Lock) You can deactivate the buttons on the control unit (except for "/1) for preventing misoperation, such as child mischief (child lock function). Press x on the control unit for more than 5 seconds. -
Page 66: Settings And Adjustments
Settings and Adjustments Using the Setup Display You can make various adjustments of items such as picture and sound. Select (Setup) on the home menu when you need to change the settings of the system. Note • Playback settings stored in the disc take priority over the Setup Display settings and not all the functions described may work. -
Page 67: [Network Update]
You can update and improve the functions of the system. For information about update functions, refer to the following website: http://support.sony-europe.com/ Note • Do not disconnect the AC power cord (mains lead) or 4 : 3 network cable while downloading or updating Original software. -
Page 68: [Video Settings]
Updating the system’s software using an update disc You can update and improve the functions of the system using an update disc provided by a Sony dealer or local authorized Sony service facility. Insert the update disc. The display asks for confirmation. - Page 69 x [Cinema Conversion Mode] You can set the video conversion method for 480p/576p, 720p, 1080i, or 1080p* signals from the HDMI OUT jack or the COMPONENT VIDEO OUT jacks. * HDMI only [Auto]: Normally select this. The system automatically detects whether the material is video-based or film-based, and switches to the appropriate conversion method.
-
Page 70: [Audio Settings]
[Auto]: Outputs 1920 × 1080p/24 Hz video signals only when connecting a 1080/24p- compatible TV using the HDMI OUT jack. [On]: Outputs 1920 × 1080p/24 Hz video signals regardless of the connected TV type. [Off]: Select this when your TV is not compatible with 1080/24p video signals. -
Page 71: [Bd/Dvd Viewing Settings]
[Speaker priority]: Outputs multi-channel sound from the system’s speakers and 2-channel linear PCM signals from the HDMI OUT jack. [HDMI priority]: Outputs 2-channel stereo sound from the system’s speakers, and enables sound output from the HDMI OUT jack. Sound format from the HDMI OUT jack depends on the connected component. - Page 72 to [255] using C/X/x/c and the number buttons. To cancel the Parental Control setting Select [No Restrictions]. Note • If you forget the password, reset the system (page 77) and set a new password (see [Password] (page 72)). • When you play discs which do not have the Parental Control function, playback cannot be limited on this system.
-
Page 73: [Photo Settings]
Enter a new password using the number buttons. Press X/x to select [OK], then press x [Hybrid Disc Playback Layer] You can select the layer priority when playing a Hybrid Disc. To change the setting, turn the system off and on again. [BD]: Plays BD layer. -
Page 74: [Hdmi Settings]
[HDMI Settings] You can make the HDMI settings. x [Control for HDMI] You can set the [Control for HDMI] function to on/off. This function is available when you connect the system and TV with an HDMI cable. For details, see “Using the Control for HDMI Function for “BRAVIA”... -
Page 75: [Network Settings]
x [Software Update Notification] You can get information on newer software versions. The information appears on the TV screen when you turn the system on. Network connections and settings are required when using this function (page 75). [On]: Sets the system to inform you of newer software version information (page 67). - Page 76 If your ISP has a specific proxy server setting, press X/x to select [Proxy Settings], then press The [Proxy Settings] display appears. If the proxy server does not have a specific setting, go to step 8. Press X/x to select [Use of Proxy Server], then press Press X/x to select [On], then press Select [Proxy Server] and [Port], and...
-
Page 77: [Easy Setup]
[Easy Setup] You can recall the Easy Setup to make the basic settings. Press C/c to select [Start], then press Follow the instructions for “Step 3: Performing the Easy Setup” (page 29) from step 4. [Resetting] Resetting the system settings other than the settings related to password You can reset the system settings to their factory... - Page 78 Resetting all the system settings to the default You can reset all the system settings—including the settings related to password—to the default settings. Press to select [Reset to Factory Default Settings], then press Press X/x to select [All Settings], then press The display asks for confirmation.
-
Page 79: Additional Information
If you have any questions or problems concerning your system, please consult your nearest Sony dealer. On cleaning discs, disc/lens cleaners • Do not use cleaning discs or disc/lens cleaners (including wet or spray types). -
Page 80: Notes About The Discs
On moving the system Before moving the system, make sure that there is no disc inserted, and remove the AC power cord (mains lead) from the wall outlet (mains). Notes about the Discs On handling discs • To keep the disc clean, handle the disc by its edge. -
Page 81: Troubleshooting
• Is any foreign object stopping the fan? • After checking the above items and fixing any problems, turn on the system. If the cause of the problem cannot be found even after checking all the above items, consult your nearest Sony dealer. - Page 82 Picture Symptom There is no picture. No picture appears when the video output resolution selected in [Output Video Format] is incorrect. Video signals are not output from the jacks, other than from the HDMI OUT jack, when connecting the HDMI OUT jack and other video output jacks at the same time.
- Page 83 Sound Symptom Remedy There is no sound. • The speaker cord is not connected securely. • Press % on the remote if MUTING indicator is displayed in the front panel display. • The system is in pause mode. Press N to return to normal play mode. •...
- Page 84 Operation Symptom Radio stations cannot be tuned The remote does not function. The disc does not play. The JPEG image file cannot be played. File names are not displayed correctly. A disc does not start playing from the beginning. The system starts playing the disc automatically.
- Page 85 (mains lead) from the wall outlet (mains), then reconnect after several minutes. A disc cannot be ejected and • Contact your Sony dealer or local authorized Sony service facility. “LOCKED” appears in the front panel display. The system does not work •...
- Page 86 Symptom A message indicating that the local storage does not have enough space appears on the screen. The system does not work and “CHILD LOCK” appears in the front panel display when you press any button on the control unit. The system menu does not work.
-
Page 87: Self-Diagnosis Function
If the system does not work normally, consult your nearest Sony dealer or local authorized Sony service facility. When just appears without any messages on the entire screen Contact your nearest Sony dealer or local authorized Sony service facility. -
Page 88: Playable Discs
Playable Discs Type Disc logo Blu-ray Disc DVD VIDEO DVD/DATA DVD AVCHD DATA CD * JPEG format conforming to UDF (Universal Disk Format). ** Some AVCHD format discs may not play, depending on the recording condition. The AVCHD format disc will not play if it has not been correctly finalized. - Page 89 • A disc with paper or stickers on it • A disc that has the adhesive of cellophane tape or a sticker still left on it Note on playback operations of a BD/DVD Some playback operations of a BD/DVD may be intentionally set by software producers. Since this system plays a BD/DVD according to the disc contents the software producers designed, some playback features may not be available.
-
Page 90: Supported Audio Formats
Supported Audio Formats Audio formats supported by this system are as follows. Format LPCM 2ch Function “BD/DVD” “SAT/CABLE” “TV” (DIGITAL IN) a: Supported format. –: Unsupported format. * BD only. Note • The table above is valid only when you set [BD Audio Setting] to [Direct] (page 70). If another setting is used, depending on the audio format, sound may be decoded to a suitable format automatically. -
Page 91: Video Output Resolution
Video Output Resolution Output resolution differs depending on the [Output Video Format] setting in [Video Settings] (page 68). When [Output Video Format] is set to [HDMI] Resolution COMPONENT setting VIDEO OUT jack 480i/576i 480i/576i 480p/576p 480i/576i 720p 480i/576i 1080i 480i/576i 1080p no picture * Protected contents on DVDs are output at 480p/576p resolution. -
Page 92: Specifications
Specifications Amplifier Section Power output (rated) RMS output power (reference) * Depending on the “DEC. MODE” settings and the source, there may be no sound output. Inputs (Analog) AUDIO Inputs (Digital) SAT/CABLE (COAXIAL) BD/DVD/CD System Signal format system Tuner Section System FM tuner section Tuning range... -
Page 93: Language Code List
Language Code List The language spellings conform to the ISO 639: 1988 (E/F) standard. Code Language Code Language 1027 Afar 1183 Irish 1028 Abkhazian 1186 Scots Gaelic 1032 Afrikaans 1194 Galician 1039 Amharic 1196 Guarani 1044 Arabic 1203 Gujarati 1045 Assamese 1209 Hausa 1051 Aymara 1217 Hindi... -
Page 94: Terms And Conditions Of Use And End User License Agreement
The Software contains a functionality by which it is updated automatically when the Product is connected to a server belonging to Sony or to a third party designated by Sony. When you specify your intention not to use this automatic update functionality, or when the... - Page 95 6. Changes to Service Sony reserves the right to discontinue one, some, or all of the features of the Service you receive at any time at its discretion. Sony may, at its discretion and from time to time change, add or remove features and functionality, upgrade or modify the Service, Site and/ or Software without notice.
-
Page 96: Glossary
Sony and you with respect to your use of the Product, Service, Site, Content, and Software. Any notice by Sony hereunder may be made by letter, email, or posting on the Service or Site. Any cause of action you may have with respect to your use of this Site must be commenced within one (1) year after the claim or cause of action arises. - Page 97 BD-ROM BD-ROMs (Blu-ray Disc Read-Only Memory) are commercially produced discs and are available in the same capacities as the BD below. Other than conventional movie and video contents, these discs have enhanced features such as interactive content, menu operations using pop-up menus, selection of subtitle display, and slideshow.
- Page 98 PhotoTV HD “PhotoTV HD” allows for a highly-detailed pictures, and photo-like expression of subtle textures and colors. By connecting Sony “PhotoTV HD” compatible devices using an HDMI cable, whole new world of photos can be enjoyed in breathtaking Full HD quality. For...
-
Page 99: Index
Index Numerics 24p True Cinema 98 A/V SYNC 42 Angle 38 Attenuate - AUDIO 70 Audio 71 Audio DRC 70 Audio Settings 70 Auto Display 74 AVCHD 88, 96 BD Audio Setting 70 BD Data 43 BD Internet Connection 73 BD Parental Control 71 BD/DVD Menu 71 BD/DVD Viewing Settings 71...