
Related Manuals for Philips BTD2336


Summary of Contents for Philips BTD2336
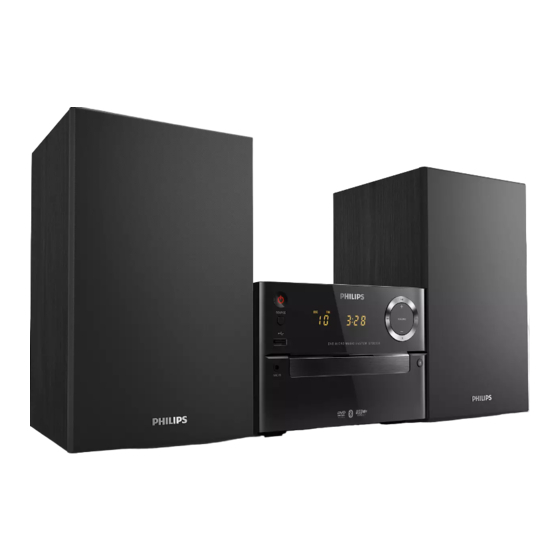
- Page 1 Always there to help you Register your product and get support at www.philips.com/support BTD2336 Question? Contact Philips User manual...
-
Page 3: Table Of Contents
Contents 1 Important 6 Listen to the radio Safety Tune to a radio station Program radio stations automatically Program radio stations manually 2 Your micro system Select a preset radio station Introduction What's in the box 7 Other features Overview of the main unit Overview of the remote control Set the alarm timer Set the sleep timer... -
Page 4: Important
1 Important fallen into the device, the device has been exposed to rain or moisture, does not operate normally, or has been dropped. • Battery usage CAUTION – To prevent battery leakage which may result in bodily injury, property damage, or damage to the Safety unit: • Install all batteries correctly, + and - as... -
Page 5: Your Micro System
2 Your micro system Congratulations on your purchase, and welcome to Philips! To fully benefit from the support that Philips offers, register your product at www.philips.com/welcome. Introduction With this unit, you can: Region code • watch video from DVD/VCD/SVCD, or This player can play discs with the following USB storage devices. -
Page 6: Overview Of The Main Unit
• Press to tune to a radio station. Overview of the main unit DV D M I C RO M U S I C S Y S T E M B T D 2 33 6 (power button/indicator and Bluetooth • Press and hold to search for radio indicator) stations automatically. -
Page 7: Overview Of The Remote Control
• SUBTITLE ( ): Select a preset radio Overview of the remote station. control • AUDIO ( ): Set the subtitle language. • Set time. • Return to the previous display menu. g +/- • Adjust volume. • Skip to the previous or next title chapter, track, or file. -
Page 8: Connect
3 Connect t SOURCE • Select a source: BT (Bluetooth), DISC, USB, FM, AUX. u EJECT • Press to open or close the disc compartment. Place the unit Place the unit near the TV. Place the left and right speakers at equal distance from the TV and at an angle of approximately 45 degrees from the listening position. -
Page 9: Connect Video Cables
Hold down the socket flap. Insert the stripped part of the wire completely. • Insert the right speaker wires to "R", left speaker wires to "L". • Insert the red wires to "+", black wires Option 2: Connect through to "-". component video cables Release the socket flap. -
Page 10: Connect An External Audio Device
• the audio output sockets on the external audio device. If the external audio device has a 3.5mm audio output socket: COMPONENT VIDEO INPUT Connect an external audio device You can route audio from an external audio device to this unit. •... -
Page 11: Connect Power
Always follow the instructions in this chapter in you have completed all other connections. sequence. If you contact Philips, you will be asked for the model and serial number of this apparatus. The model number and serial number are on the back of the apparatus. -
Page 12: Set Clock
To switch to ECO standby mode: Set clock • Press and hold for more than two seconds. In standby mode, press and hold CLOCK » The display panel is dimmed. SET on the remote control for more than two seconds. Note »... -
Page 13: Select The Correct Tv System
Select the correct TV system Turn on Progressive Scan Change this setting if the video is not displayed Progressive scan displays twice the number of correctly. By default, this setting matches the frames per seconds than interlaced scanning most common setting for TVs in your country. (ordinary TV system). -
Page 14: Play
5 Play • To play a locked DVD, enter the 6-digit parental control password. Play from disc Use the disc menu Caution When you load a DVD/(S)VCD disc, a menu may be displayed on the TV screen. • Risk of product damage! Never play discs with Press MENU to access or exit disc menu •... -
Page 15: Play From Usb Or Recored Discs
Note Note • • For some DVDs, the language can only be changed You can only play DivX (Home Theater 3.1) videos from the disc menu. Press MENU to access the disc rented or purchased through the DivX registration menu. code of this unit. • Subtitle files with the following filename extensions (.srt, .smi, .sub, .ssa, .ass) are supported but do not appear on the file navigation menu. -
Page 16: Control Play
To stop play completely: [Aspect Ratio](Aspect ratio): select a • • In stop mode, press . picture display format to fit the TV screen. • [Angle] (Angle): switch between camera angles. Control play Note Select a folder. • Fast backward/forward. Some DVDs contain alternate scenes, such as scenes recorded from different camera angles. For such DVDs, you can select from the available alternate scenes. -
Page 17: Enjoy Karaoke
1) In the [Karaoke Scoring] (Karaoke Scoring) Enjoy karaoke option, select a level (basic/intermediate/ advance). You can connect a microphone (not supplied) 2) In the [Karaoke Idol] (Karaoke Idol) option, to sing along with a music source. turn on the contest. » The song selection menu is displayed. Note 3) Input a track (VCD/SVCD) or a title/ • Before you connect a microphone, set the microphone chapter (DVD) as the first song. - Page 18 To clear Bluetooth pairing history: • Pressand hold on the main set for 10 seconds. » The current Bluetooth connection is disconnected. BTD2336 0000 Press SOURCE repeatedly to select the Bluetooth source. » [BT] (Bluetooth) is displayed. » The power/Bluetooth indicator flashes blue. On your device that supports A2DP...
-
Page 19: Listen To The Radio
6 Listen to the Program radio stations radio manually Tune to a radio station. Press PROG, and then press Tune to a radio station select a number from 1–20. Press PROG to confirm. » [SAVE] (save) is displayed. • Position the antenna as far as possible from TV, VCR, or other radiation source. -
Page 20: Other Features
7 Other features Set the sleep timer • To set the sleep timer, in power-on mode, press SLEEP repeatedly to select a set period of time (in minutes). » When the sleep timer is activated, Set the alarm timer is displayed. To deactivate sleep timer: This unit can be used as an alarm clock. -
Page 21: Adjust Settings
8 Adjust settings • [PAL] (PAL) - For TV with PAL color system. • [Multi] (Multi) - For TV that is compatible with both PAL and NTSC. • [NTSC] (NTSC) - For TV with NTSC Press . color system. Select the [Setup] (Setup) page. Select a setting and press OK. [TV Display] (TV Display) • To return to the previous menu, press The TV format determines the aspect ratio of • To exit the menu, press . -
Page 22: Audio Setup
[Parental Control] (Parental Control) Audio setup Restrict access to discs that are unsuitable for children. These types of discs must be recorded On the [Audio] (Audio) page, you can set the with ratings. following options: 1) Press OK. [Surround Mode] (Surround Mode) • [Stereo] (Stereo) 2) Select a rating level, and then press OK. • [LT/RT] (left/right) 3) Press the numeric keys to enter the [Sound Mode] (Sound Mode) password. - Page 23 Note • If you forget the password, enter '000000' before you set a new password. [DivX Subtitle] (DivX Subtitle) Select a character set that supports the DivX subtitle. Note • Ensure that the subtitle file has the exact same file name as the movie file. If for example the file name of the movie is ‘Movie.avi’, and then you will need to name the text file ‘Movie.sub’...
-
Page 24: Product Information
9 Product Sensitivity <22 dBf information - Mono, 26dB S/N Ratio <45 dBf - Stereo, 46dB S/N Ratio Search Selectivity <30 dBf Total Harmonic Distortion <3% Note Signal to Noise Ratio >45 dB • Product information is subject to change without prior notice. -
Page 25: Supported Disc Formats
• USB flash memory (USB2.0 or Dimensions 180 x 121 x USB1.1) 239 mm - Main Unit (W x H x D) • USB flash players (USB2.0 or USB1.1) 150 x 238 x - Speaker Box (W x H x D) • memory cards (requires an additional 125 mm card reader to work with this unit) Weight 1.5 kg Supported formats: - Main Unit 0.98 x 2 kg • USB or memory file format: FAT12, - Speaker Box FAT16, FAT32 (sector size: 512 bytes) • MP3 bit rate (data rate): 32-320 Kbps... -
Page 26: Troubleshooting
• Check the disc type, color system and requesting service. If the problem remains regional code. Check for any scratches or unsolved, go to the Philips Web page (www. smudges on the disc. philips.com/support). When you contact Philips, • Press to exit the system setup menu. - Page 27 DivX video files cannot be played. • The device does not support the profiles required for this unit. • Ensure that the DivX video file is complete. • The Bluetooth function of the device is not enabled. Refer to the user manual of • Ensure that the file extension is correct. the device to find out how to enable the • Due to Digital Rights issue, the DRM- function.
-
Page 28: Notice
This equipment should not be used for such purposes. Disposal of your old product Philips and the Philips’ Shield Emblem are and batteries registered trademarks of Koninklijke Philips N.V. and are used by WOOX Innovations Limited under license from Koninklijke Philips N.V. - Page 29 registration code, locate the DivX VOD section in your device setup menu. Go to vod.divx.com for more information on how to complete your registration. DivX®, DivX Certified® and associated logos are trademarks of Rovi Corporation or its subsidiaries and are used under license. This apparatus includes this label: Note •...
- Page 30 Specifications are subject to change without notice 2014 © WOOX Innovations Limited. All rights reserved. Philips and the Philips’ Shield Emblem are registered trademarks of Koninklijke Philips N.V. and are used by WOOX Innovations Limited under license from Koninklijke Philips N.V.