
Related Manuals for Electrolux SPEEDELIGHT


Summary of Contents for Electrolux SPEEDELIGHT
- Page 1 SPEEDELIGHT Installation and operating manual * 595402901- 2021.03 *Original instructions...
- Page 2 Installation diagram...
- Page 3 Installation diagram – Marine...
- Page 4 Foreword The installation, use and maintenance manual (hereinafter Manual) provides the user with information necessary for correct and safe use of the machine (or “appliance“). The following must not be considered a long and exacting list of warnings, but rather a set of instructions suitable for improving machine performance in every respect and, above all, preventing injury to persons and animals and damage to property due to im- proper operating procedures.
-
Page 5: Table Of Contents
Contents A SAFETY INFORMATION ......................... 7 Children and vulnerable people safety....................7 General information ........................7 General safety ..........................8 Transport, handling and storage ...................... 8 Installation and assembly ....................... 8 Electrical connection ........................9 Use: Warnings ..........................9 Machine cleaning and maintenance....................10 Ordinary maintenance ......................... - Page 6 Advanced settings ........................26 Daily use ..........................31 K REMOVABLE TEFLON PLATE (RTP) ...................... 31 Removable Teflon Plate (RTP) use ....................31 Replacement of Removable Teflon Plate (RTP) on top heating plate ............31 K.2.1 Tip ..........................32 L TROUBLESHOOTING .......................... 32 Suggestions for quality cooking .....................
-
Page 7: Asafety Information
SAFETY INFORMATION Children and vulnerable people safety • This appliance must not be used by persons without adequate experience and knowledge its use. Only specialized personnel are authorized to operate on the appliance. • Children must not use this appliance or play with it. •... -
Page 8: General Safety
Clarifications and explanations General safety • The machines are provided with electric and/or mechanical safety devices for protecting workers and the machine itself. • Never operate the machine, removing, modifying or tampering with the guards, protection or safety devices. • Do not make any modifications to the parts supplied with the appliance. •... -
Page 9: Electrical Connection
• Disconnect the appliance from the power supply before carrying out any installation procedure. Electrical connection • Work on the electrical systems must only be carried out by a qualified electrician, to prevent any risk. • If the power cable is damaged or too short, call the Customer Care Service or a qualified electrician to replace it. -
Page 10: Machine Cleaning And Maintenance
18. Do not let cord hang over edge of table or counter. 19. To reduce the risk of fire in the heating cavity: a. The appliance is designed for direct heating/cooking of sandwich. Any other use is to be considered improper. b. -
Page 11: Ordinary Maintenance
Preventive Maintenance • Preventive Maintenance reduces downtime and maximizes machines efficiency. Customer Care Service can provide advice on the best maintenance plan to be purchased based on the intensity of use and the age of the equipment. Repair and extraordinary maintenance •... -
Page 12: Bwarranty
– inadequate or interrupted water supply, steam, air, gas subject to local terms and conditions. (including impurities and/or other that does not comply Check on Electrolux Professional website the list of authorized with the technical requirements for each machine); customer care. -
Page 13: New Concept Appliance
IPX4 • missing, lack or inadequate maintenance; • improper machine use; Electrolux Professional spa - Viale Treviso, 15 - 33170 Pordenone (Italy) • unforeseeable extraordinary events; The data plate gives the product identification and technical • use of the machine by uninformed and / or untrained data. -
Page 14: Personal Protection Equipment
Personal protection equipment Summary table of the Personal Protection Equipment (PPE) to be used during the various stages of the machine's service life. Stage Protective Safety footwear Gloves Glasses Safety helmet garments ● ○ ○ — — Transport ● ● ○... -
Page 15: Introduction
Introduction During maintenance several risks remain, as these could not be eliminated, and must be neutralised by adopting specific The machines are provided with electric and/or mechanical measures and precautions. safety devices for protecting workers and the machine itself. Do not carry out any checking, cleaning, repair or maintenance Therefore the user must not remove or tamper with such operations on moving parts. -
Page 16: Residual Risks
Residual risks Residual risk Description of hazardous situation The machine has several risks that were not completely eliminated from a design standpoint or with the installation of Electrocution Contact with live parts during adequate protection devices. Nevertheless, through this maintenance operations carried manual the Manufacturer has taken steps to inform operators out with the electrical panel of such risks, carefully indicating the personal protection... -
Page 17: Characteristics Of Power Supply
Weight Equivalent sound pressure level Leq dB(A) dB(A) <70 200 V 50Hz 220 V 60Hz 220-230 V ~ 50Hz Power supply voltage and frequency 220 V ~ 60Hz 380-400 V 3N~ 50Hz 420 V 3N~ 50Hz The noise emission values have been obtained according to EN ISO 11204. The value could increase depending on the workplace where measured. Depending on your model. -
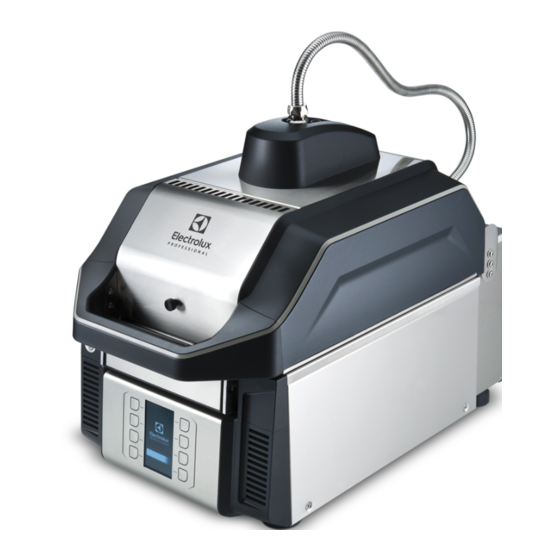
Page 18: Fproduct Description
PRODUCT DESCRIPTION Appliance overview Control panel overview ON OFF button Program selection buttons Display F.2.1 Display The display is divided in 8 equal parts. Each part is linked to a program button. When you press a program button the corresponding part of the display is on. -
Page 19: Gtransport, Handling And Storage
TRANSPORT, HANDLING AND STORAGE WARNING G.3.1 Procedures for handling operations Refer to “Safety Information“ Before lifting: • send all operators to a safe position and prevent persons from entering the handling area; Introduction • make sure the load is stable; Transport (i. -
Page 20: Positioning
Positioning • Correct lighting of workplaces. • Safety in the workplace, accident prevention. CAUTION • Compulsory signs and signals. This appliance is not designed for built-in • Hygiene. installation. • Work zones and separation of paths for hygienic purposes. The appliance must be levelled. •... -
Page 21: Disposal Of Packing
IMPORTANT Whenever the power cable has to be replaced, call a technical Connection to the power supply must be carried out service agent and replace by original spare parts: only the in compliance with the regulations and provisions in manufacturer of the appliance is authorized to supply the force in the country of use. -
Page 22: Operator Qualified For Normal Machine Use
• receive adequate training and instruction for their duties in • sufficient technical knowledge for safely performing his order to perform them safely; duties as specified in the manual; • receive specific training for correct machine use. • knowledge of the regulations on work hygiene and safety. In case of a significant anomaly (e. -
Page 23: Basic Set Up Settings
1. Press simultaneously buttons “7“ and “8“ (or “–“ and “–“ , depending on the model) for two seconds until the pass- word menu activates. Yellow triangle icon • When the display shows the yellow triangle icon switch the appliance OFF and ON. •... - Page 24 UPLOAD / DOWNLOAD APPLIANCE AND PROGRAM UPLOAD / DOWNLOAD APPLIANCE SETTINGS INTO / SETTING INTO / FROM USB KEY (cont'd.) FROM USB KEY Download appliance settings into USB key. For the next steps, please refer to points 4 – 5 and to points Upload appliance settings from USB key.
- Page 25 BUZZER SET UP TIME SETTING (cont'd.) 16 : 16 32 16 32 MELODY SET UP INFO DATA UI Firmaware: ACU Firmware: 3.4.5 Appliance PNC: Appliance SN: CONNECTIVITY 2 SIGNAL CONTROL SELECTION TIME SETTING This function allows to con- It is advisable to check the nect the appliance to the signal quality before putting the appliance in remote.
-
Page 26: Advanced Settings
CONNECTIVITY (cont'd.) PROGRAM SETTING - Single Phase (cont'd.) If it is necessary to interrupt the remote connection with the Service press simultaneously the buttons “7“ and “8“ and Full program duration go straight to step 8 CONNECTION EXIT. 0:20 • Increase or decrease the full duration of 7 REMOTE CONNECTION 8 CONNECTION EXIT the program. - Page 27 FLEX (models equipped only) PROGRAM SETTING Multiphase (cont'd.) The Flex use allows you to cook food without being crushed by the upper plate. With this option, it is possible to adjust the Flex if the parameter is activated (models equipped only). 16 (models equipped only) Phase_1_Heathing 1:15 Phase_2_Microw 0:45...
- Page 28 PROGRAM SETTING Multiphase (cont'd.) STOP CYCLE OPTION SETTING For the next steps, please 14 TIME MICROWAVE (Mw) refer to points 5 – 6 – 7 of PROGRAM SETTING - Single Phase table. NOTE! In the Multiphase cycle the MW can be set only YE S for one phase of the cycle (ON / OFF on the display).
- Page 29 STAND-BY SETTING COUNTERS CONTROL 59:59 0°F ° For its setting see COUNTERS CONTROL section described in J.4 Basic settings chapter. Stand-by time • You can set the “Stand-by“ up to 59 BRIGHTNESS minutes and 59 seconds. ° Upper plate and glass temperature during Stand-by •...
- Page 30 CHANGE PASSWORD (cont'd.) EXPERT - UNEXPERT SETTING 2 EXPERT/UNEXPERT 5 ADVANCED SETTINGS 6 ADVANCED SETTINGS SELECTION 3 EXPERT/UNEXPERT SETTING Insert 4 digit to set a new password. RESET PASSWORD UNEXPERT mode becomes useful when switching from FLEX ON program to FLEX OFF one and viceversa. 2 BASIC SETTINGS In the first case after a FLEX OFF program (before it was set ON), the icon...
-
Page 31: Daily Use
CONNECTIVITY SETTING 5. Remove the sandwich from the glass by the delivered plastic spatula (ANC 653625). NOTE! To interrupt the cycle press the buttons “7“ and “8“ or open the lid within 9 seconds after the program start. To restart the appliance again close the lid and select a program again. -
Page 32: Tip
3. Help the descent of the upper heating plate by guiding the 6. Place the replaced RTP on the clean top plate with the flexible tube “C“. grooves in the same direction and secure it with the 4 clips. 7. Put the upper heating plate in the original position. Guide the flexible tube to avoid any damages. -
Page 33: Anomaly Table
Anomaly table If the appliance does not start or stops during operation, first try to find a solution to the problem referring to the table below. If not, contact the Customer Service. With some anomalies, you can hear some acoustic signals and the display shows an error massage. Anomaly Anomaly type Description... - Page 34 Anomaly Anomaly type Description Possible causes Actions LID_BLK Blocking machine Locked lid: the • The lid is blocked; • Turn OFF and ON the appli- machine cannot open ance. Lid should unlock; • The lid is intentionally the lid. either lowered for •...
- Page 35 Anomaly Anomaly type Description Possible causes Actions FAN2_SP Warning Fan 2 is not running Air duct or Fan 2 dirty. Check: properly. 1. If any visible dirt at the filters louvers 2. If any fan sound can be heard when operating with the machine Report to service if needed.
- Page 36 Anomaly Anomaly type Description Possible causes Actions ACU_OT Blocking Machine ACU board over ACU board over Wait for the unit to cool down temperature. temperature; and reset the Error by switching Off/On. Air duct dirty; If the error re-occurs call Any of Fan1, Fan2 or Service.
- Page 37 Anomaly Anomaly type Description Possible causes Actions The lid doesn't Blocking machine Refer to the anomaly: open and the dis- LID_BLK play shows the symbol with the BIG YELLOW TRIANGLE The lid does not Warning It is needed to keep Lid springs need adjust- Remove dirt/debris from the lid open completely...
- Page 38 Anomaly Anomaly type Description Possible causes Actions The upper plate Warning When trying to unlock The tube of the upper Carefully try to unlock the tube. does not get the upper plate it plate or the upper plate WARNING down does not move.
-
Page 39: Mappliance Cleaning
APPLIANCE CLEANING Precautions for cleaning 2. Sweep the dirty with the Teflon brush. 3. Wipe the glass and the metallic frame with a damp cloth. WARNING Refer to “Safety Information“ Use specific gloves for high tem- perature. Refer to “C.9 Personal protection equipment“. - Page 40 5. Wipe with a cloth-paper. Rinse with a new wet cloth-paper; 12. Scrub the RTP with the delivered Teflon brush 653623; Wipe the RTP with a cloth-paper and rinse it with a new wet cloth-paper; DETERGENT 1 min DETERGENT 6. Remove dirt and food residues from the rear slot between the working top and the lid by sliding the cloth-paper previously put in there (see point 2);...
-
Page 41: Weekly Cleaning
Choke cover cleaning 23. Using a damp cloth or a sponge soaked with the detergent, clean both the steam exhaust chamber and 20. Fit back the upper plate with the RTP in the lid the inside of the front top cover. respecting right position of the upper heating plate. -
Page 42: Nappliance Maintenance
C. Use the delivered Teflon brush 653623; do not use any C. Remove the filters from the masks and carefully clean razor blade or metallic tool. them from grease, crumbs and dust, then dry the filters; D. Separately clean the masks eliminating any deposits UPPER PLATE deposited in the ventilation grooves, especially from the inside, then dry the masks carefully;... -
Page 43: Disassembly
Disassembly Maintenance, inspections, Frequency Responsi- checks and cleaning bility If the appliance has to be disassembled and then reassembled, make sure the various parts are assembled in the correct order Safety signs (if necessary mark them during disassembly). Yearly Service •... - Page 44 NOTE! In general, the appliance must be taken to a specialised When scrapping the machine, any marking, this collection/ scrapping centre. manual and other documents concerning the appli- Dismantle the appliance, grouping the components according ance must be destroyed. to their chemical characteristics, remembering that the com- pressor contains lubricant oil and refrigerant fluid which can be •...
- Page 46 Electrolux Professional SPA Viale Treviso 15 33170 Pordenone www.electroluxprofessional.com...