LG 22XE1J User Manual
Lg digital signage
Hide thumbs
Also See for 22XE1J:
- Quick start manual (12 pages) ,
- Owner's manual (36 pages) ,
- User manual (32 pages)

Related Manuals for LG 22XE1J


Summary of Contents for LG 22XE1J
- Page 1 User Manual LG Digital Signage (MONITOR SIGNAGE) Please read the user manual before using this product to ensure safe and convenient use. 22XE1J www.lg.com Copyright © 2021 LG Electronics Inc. All Rights Reserved.
-
Page 2: Table Of Contents
TABLE OF CONTENTS BASIC ..........3 - Checking the Accessories ........3 - Checking the Product Components ....4 GETTING READY ......4 - Connecting the Cables ..........4 CHECKING BEFORE INSTALLATION ......10 - Installation Orientation ......... 10 - Installation Location ..........12 - Wall Mount Holder .......... -
Page 3: Basic
WARNING - This equipment is compliant with Class A of CISPR 32. In a residential environment this equipment may cause radio interference. BASIC NOTE • The accessories provided with your product may vary depending on the model or region. • Product specifications or contents in this manual may be changed without prior notice due to upgrade of product functions. -
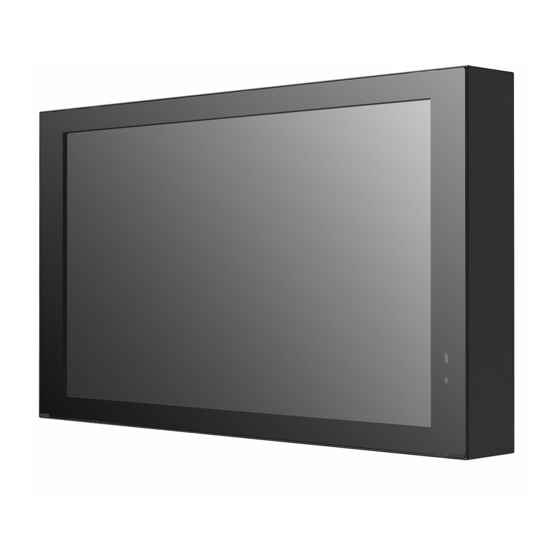
Page 4: Checking The Product Components
Checking the Product Components The illustrations may differ depending on the model. Ambient Light Sensor / Infrared Receiver Power Indicator • Ambient Light Sensor: Adjusts the screen brightness by measuring the amount of light. • Infrared Receiver: The part that receives the signal from the remote control. •... - Page 5 Power Cord Insertion Power Cord Insertion (Angle) (Straight) Remove the square rubbers before connecting the cables. 7: insert power cord (Angle) : insert power cord (Straight) CAUTION • Do not remove the square rubbers when the cables are not connected. • If the square rubbers are not inserted without a cable, water may enter the product and cause malfunction, which is not covered by the warranty.
- Page 6 Power Cord Insertion Power Cord Insertion (Angle) (Straight)
- Page 7 Power Cord Insertion (Angle) Power Cord Insertion (Straight)
-
Page 10: Checking Before Installation
CHECKING BEFORE INSTALLATION We are not responsible for product damage caused by failure to follow the guide. Installation Orientation Using Vertically When installing vertically, rotate the monitor 90 degrees clockwise while facing the front of the screen. Tilt Angle You can install the product by tilting it horizontally or vertically. You can tilt the product up to 15 degrees for installation, while the product should be spaced at least 40 mm apart from the wall. 15 ˚ 40 mm... - Page 11 Ceiling, Floor Orientation CAUTION • Do not hang the product on the ceiling or lay it on the floor.
-
Page 12: Installation Location
Installation Location We are not responsible for product damage caused by failure to follow the guide. Outdoor Installing on a Wall • When installing the product on a wall, install a partition to separate the air from the inlet and outlet. Otherwise, the product may malfunction, which is not covered by the warranty. - Page 13 Installation of the Cased Product • When installing a separate case outside the product and installing it near a wall, a minimum distance of 100 mm or more is required. • Do not block the ventilation openings or place objects near them. A: 100 mm or more Installation Area • Do not allow foreign substances such as snow to accumulate on the inlet and outlet of the product. •...
-
Page 14: Wall Mount Holder
Length (Maximum) Model Standard Dimensions Quantity (A x B) (mm) (mm) 22XE1J 100 x 100 CAUTION • Disconnect the power cord first, and then move or install the monitor. Otherwise, it may result in electric shock. • If the monitor is installed on a ceiling or inclined wall, it may fall and result in injury. -
Page 15: Safety And Precaution Guide For Installation
Safety and Precaution Guide for Installation When Exposed to Direct Sunlight • While powered off, make sure the device is not exposed to direct sunlight for a prolonged period. - Protect the display with cloth or a box when storing the device after it has been powered off. - This can prevent faults such as black spots, creases, and yellowing. -
Page 16: Installing The Product
INSTALLING THE PRODUCT Installation Conditions Inlet and Outlet Direction • For cooling, the inlet uses a fan to draw in air and exhaust hot air to the outlet. Air Inlet Air Outlet Definitions of Inlet and Outlet Terminology Aperture Size Aperture Size: The size of the rectangular area of the inlet •... -
Page 17: Precautions When Designing A Case
Precautions When Designing a Case • Separate the inlet and outlet with a partition. • Place an item such as a sponge pad between the partition and the product to completely block airflow. • Place the air vent of the case close to the air vent of the product so that the air circulates well in the product. - Page 18 Precautions on Partition Designing When Installing the Media Player • When installing a media player as an external component, ensure it is separated from the product. NOTE • When applying a partition between the media player and the product, there should be no gaps other than cables. •...
- Page 19 Inlet and Outlet Design • In all cases, the aperture ratio of the case must be at least 50 %. For Stand-Alone Installation • Make sure to separate the inlet and outlet to prevent the air around one from entering the other. When Drilling the Inlet and Outlet on the Back of the Case Partition •...
- Page 20 When Drilling the Inlet and Outlet on the Side of the Case Partition • Aperture Size Air Inlet 144,000 mm or more Air Outlet 210,000 mm or more Minimum Separation Distance: 200 mm Case 265 + mm Product...
- Page 21 For 1 x N Line Installation • When installing more than one product together, make sure to separate the inlet and outlet to prevent the air around one from entering another. • When installing multiple products together, drill the case air vent on the backside, not the side. Partition Partition Partition...
- Page 22 When Designing Both Sides • When installing products in a back-to-back configuration, make sure to separate the inlet and the outlet to prevent the air around one from entering another. • When installing the product on both sides, place the air vent on the top, bottom, left, and right sides. •...
- Page 23 Product 100 mm 200 mm Case Product CAUTION • When designing the inlet and outlet, the above aperture area must be satisfied. Failure to do so may result in issues with the product, which are not covered by the warranty. • When installing a separate case on the product, consider the recommended aperture area and aperture ratio when designing.
- Page 24 When Connecting a Media Player/PC Inside NOTE • When configuring the tile mode with , you cannot view the contents with applied. • If the signal cable between the PC and the product is long, use a booster or an optical cable. •...
-
Page 25: Precautions For Use
PRECAUTIONS FOR USE WARNING • Do not put metals such as coins, hairpins, or metal attachments, or flammable objects such as paper or matches into the product. Dust The warranty will not cover any damage caused by using the product in an excessively dusty environment. Afterimage •... - Page 26 • Recommended Usage Condition Change the background colour and text colour at equal intervals. - Afterimages occur less when the colours to be changed are complementary to one another. ITO or MoTi Pixel Layer Switch the screen at equal time intervals. - Take caution, and ensure that text or images from before the screen change are not left in the same location after the screen change.
-
Page 27: Product Specifications
Operating Humidity 5 % to 100 % (Condition for preventing condensation) Environmental Storage Temperature -20 °C to 60 °C Conditions Storage Humidity 5 % to 100 % (Condition for preventing condensation) * Product box packaging storage conditions On Mode 85 W (Typ.) / 115 W (Max.) Power Sleep Mode / Consumption ≤ 0.5 W Standby Mode Model Name Dimensions (Width x Height x Depth) (mm) Weight (kg) 22XE1J 557.3 x 319.8 x 65.0... - Page 28 HDMI (PC) Support Mode Resolution Horizontal Frequency (kHz) Vertical Frequency (Hz) 640 x 480 31.469 59.94 800 x 600 37.879 60.317 1024 x 768 48.363 1280 x 720 44.772 59.855 1366 x 768 47.712 1280 x 1024 63.981 60.02 1680 x 1050 65.29 59.954 1920 x 1080 67.5 HDMI (DTV) Support Mode Resolution Horizontal Frequency (kHz) Vertical Frequency (Hz) 480/60p 31.5...
- Page 29 Wireless module(LGSBWAC72) Specifications Wireless LAN (IEEE 802.11a/b/g/n/ac) Frequency range (MHz) Output power (Max.) (dBm) 2400 to 2483.5 5150 to 5725 16.5 5725 to 5850 (Not for EU) 11.5 Bluetooth Frequency range (MHz) Output power (Max.) (dBm) 2400 to 2483.5 • As band channels can vary per country, the user cannot change or adjust the operating frequency. This product is configured for the regional frequency table.
-
Page 30: Licence
Reserved. The Bluetooth ® word mark and logos are registered trademarks owned by Bluetooth SIG, Inc. and any use of such marks by LG Electronics Inc. is under license. Other trademarks and trade names are those of their respective owners. - Page 31 The model and serial number of the product are located on the back and on one side of the product. Record them below in case you ever need service. Temporary noise is normal when powering ON or MODEL OFF this device. SERIAL NO.