Advertisement
SERVICE MANUAL
10
SERVICE MANUAL
PA045<Rev.001>
2012
DLA-X35BE, DLA-X35BU, DLA-X35WE,
DLA-X35WU, DLA-X55RBE, DLA-X55RBU,
DLA-X55RWE, DLA-X75RBE, DLA-X75RBU,
DLA-X95RBE, DLA-X95RBU, DLA-XC3800B,
DLA-XC5800RB, DLA-XC5800RW, DLA-XC7800RB,
DLA-XC9800RB
COPYRIGHT © 2012 JVC KENWOOD Corporation
1
PRECAUTION. . . . . . . . . . . . . . . . . . . . . . . . . . . . . . . . . . . . . . . . . . . . . . . . . . . . . . . . . . . . . . . . . . . . . . . . . 1-3
2
SPECIFIC SERVICE INSTRUCTIONS . . . . . . . . . . . . . . . . . . . . . . . . . . . . . . . . . . . . . . . . . . . . . . . . . . . . . . 1-7
3
DISASSEMBLY . . . . . . . . . . . . . . . . . . . . . . . . . . . . . . . . . . . . . . . . . . . . . . . . . . . . . . . . . . . . . . . . . . . . . . 1-16
4
ADJUSTMENT . . . . . . . . . . . . . . . . . . . . . . . . . . . . . . . . . . . . . . . . . . . . . . . . . . . . . . . . . . . . . . . . . . . . . . . 1-21
5
TROUBLESHOOTING . . . . . . . . . . . . . . . . . . . . . . . . . . . . . . . . . . . . . . . . . . . . . . . . . . . . . . . . . . . . . . . . . 1-24
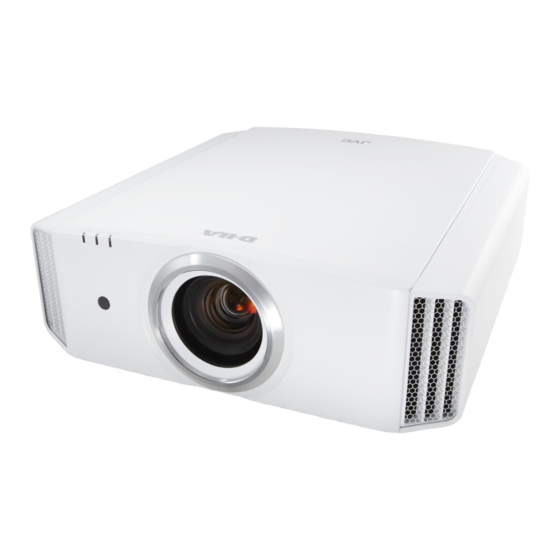
D-ILA PROJECTOR
TABLE OF CONTENTS
COPYRIGHT © 2012 JVC KENWOOD Corporation
No.PA045<Rev.001>
2012/10
Advertisement

Related Manuals for JVC DLA-X35BE


Summary of Contents for JVC DLA-X35BE
-
Page 1: Table Of Contents
DLA-XC5800RB, DLA-XC5800RW, DLA-XC7800RB, DLA-XC9800RB COPYRIGHT © 2012 JVC KENWOOD Corporation TABLE OF CONTENTS PRECAUTION............... . . 1-3 SPECIFIC SERVICE INSTRUCTIONS . - Page 2 SPECIFICATION GENERAL Type D-ILA PROJECTOR Power requirements AC 110 to 240 V 50 Hz / 60 Hz Power Consumption 330 W (Standby mode: 0.4 W) [X35/XC3800] 360 W (Standby mode: 0.4 W) [X55R/XC5800R/X75R/XC7800R/X95R/XC9800R] Operating temperature +5°C to +35°C Operating humidity 20%~80% (no-condensation) Storage temperature -10°C to +60°C...
-
Page 3: Precaution
SECTION 1 PRECAUTION SAFETY PRECAUTIONS Prior to shipment from the factory, JVC products are strictly in- Consequently, when servicing these products, replace the spected to conform with the recognized product safety and elec- cathode ray tubes and other parts with only the specified trical codes of the countries in which they are to be parts. - Page 4 1.1.2 SAFETY CHECK AFTER SERVICING Examine the area surrounding the repaired location for damage (4) Leakage current test or deterioration. Observe that screws, parts and wires have been Confirm specified or lower leakage current between earth returned to original positions, Afterwards, perform the following ground/power cord plug prongs and externally exposed ac- tests and confirm the specified values in order to verify compli- cessible parts (RF terminals, antenna terminals, video and...
- Page 5 Do not block the ventilation holes as this may cause the internal temperature torise and possibly result fire. When the inside of the unit requires cleaning consult your nearest JVC dealeror service center. CAUTION High-pressure lamp may explode if inproperly handled. Refer to lamp replacement instructions. REAR PANEL CAUTION Never look into the lens while the projector is on.
- Page 6 INSTALLATIONS 1.4.2 INSTALLATION SITE AND STATUS The projector contains some fans for cooling. If the air inlets or 1.4.1 INSTALLATION METHOD the vent holes of cooling fans are blocked, cooling efficiency may This projector comes with the D-ILA system (reflecting type ac- deteriorate and temperature inside this unit will rise, and then it tive matrix liquid crystal system) that does not require conver- can lead to abnormal operation and failure.
-
Page 7: Specific Service Instructions
SECTION 2 SPECIFIC SERVICE INSTRUCTIONS DIFFERENCE POINT DLA-X35B DLA-X55RB DLA-X75RB DLA-X95RB Item DLA-X35W DLA-XC3800B DLA-XC5800RB DLA-XC7800RB DLA-XC9800RB Cabinet color Black White Black ← ← Remote Controller RM-MH15G RM-MH17G RM-MH18G ← ← PC terminal ← ← ← Lens shutter ← ← ←... - Page 8 FUNCTIONS 2.3.3 LED LOCATION 2.3.1 LED INDICATIONS FRONT VIEW The LED operations are as follows. STAND BY/ON STAND-BY LED LAMP Light on (Red): Standby mode WARNING Light on (Green): While activating the lamp(about 1 minute) Blinking (Green): When "Hide" is set to ON Blinking (Red): Cool Down mode STANDBY/ON LAMP...
- Page 9 LAMP UNIT INSTRUCTIONS 2.4.4 LAMP USE TIME RESET • Be sure to reset the Lamp use time after replacing the lamp Refer to the INSTRUCTIONS for a detailed operating descrip- unit. Unless reset, the projector will cease operation (lamp will tion.
- Page 10 SERVICE MENU The service menu contains items not ordinarily needed by the user. Use these as necessary during service. 2.6.1 ENTER 2.6.3 BASIC OPERATION (1) No menu shown. Use the following buttons to operate the service menu. (2) Press the [ ] button. (1) Choose the SETTING MENU with the [ ] or [ ] button.
- Page 11 2.6.4 SETTING ITEMS Item Adjustment range Initial value Function Model Only the display Display of model name Main Only the display Display of Main CPU software version Only the display Display of Sub CPU software version Swither Only the display Display of processor FPGA version Only the display Display of CMS CPU version...
- Page 12 ADJUST PATTERN Option Screen Adjust Pattern Screen Soft Ver. Adjust Option Adjust Pattern Protocol Cedia Lens Slide Cover UART 3D L/R Picture Standard Select Lens Center Adjust Pattern IR Code Color Crosshatch Color Pallette Factory Reset Exit Back Operate MENU Select BACK crosshatch...
- Page 13 PICTURE MODE INITIAL SETTING VALUE X35/XC3800 Film Cinema Animation Natural Stage User1~5 Color Temp 6000K 6500K 8000K 6500K 7500K 7500K 6500K Gamma Normal A(3D) Normal Brightness Contrast Color Tint Sharpness Detail Enhance Color Space Standard Wide Wide Wide Wide Wide Wide Custom Gamma Lens Aperture...
- Page 14 X75R/XC7800R/X95R/XC9800R Profile: Off and the Film Cinema Animation Natural Stage User1~5 Custom Profile Film1 Cinema1 Anime1 Video Stage 3D Cinema Video Custom1~2 Color Temp Xenon1 Xenon2 8000K 6500K 7500K 7500K 6500K 6500K High Bright Gamma Film1 Normal Normal Normal Dark Level W Dark Level R Dark Level G Dark Level B...
- Page 15 THX-Bright/Dark THX-Bright/Dark isf-Day/Night isf-Day/Night Adjust Adjust Color Profile Standard Standard Color Temp THX-Bright/Dark THX-Bright/Dark isf-Day/Night isf-Day/Night Gamma THX-Bright/Dark THX-Bright/Dark isf-Day/Night isf-Day/Night Dark Level W Dark Level R Dark Level G Dark Level B Bright Level W Bright Level R Bright Level G Bright Level B Tone W Tone R...
-
Page 16: Disassembly
SECTION 3 DISASSEMBLY CAUTION AT DISASSEMBLY • Make sure that the power cord is disconnected from the outlet. • Pay special attention not to break or damage the parts. • Make sure that there is no bent or stain on the connectors before inserting, and firmly insert the connectors. •... - Page 17 3.2.13 REMOVING THE BLIND INTAKE (Fig.3-3) (1) Remove the 2 screws [A], then remove the BLIND IN- TAKE. 3.2.14 REMOVING THE INTAKE FAN (Fig.3-3) (1) Remove the 2 screws [B], then remove the INTAKE FAN. 3.2.15 REMOVING THE PCS COOLING FAN [X75R/XC7800R/ X95R/XC9800R] (Fig.3-3) PCS COOLING FAN (1) Remove the 3 screws [C], then remove the FAN UNIT-1.
- Page 18 3.2.24 REMOVING THE DD PWB (Fig.3-4) (1) Remove the 6 screws [B], then remove the PROCESSOR (1) Remove the 4 screws [G], then remove the DD SHIELD PWB. CASE. 3.2.29 REMOVING THE DD COOLING FAN (Fig.3-5) (2) Remove the 4 screws [H], then remove the DD SHIELD (1) Remove the 3 screws [C], then remove the DD COOLING TOP.
- Page 19 (1) Remove the 6 screws [F], then remove the SHIELD CEN- DD SUB PWB TER. SHIELD POWER SHIELD MD BLIND EXHAUST PROCESSOR PWB EXHAUST FAN MD PWB] (TOP) SHIELD MD BALLAST PWB DUCT BALLAST DD COOLING SHIELD CENTER MD PWB (BOTTOM) DD COOLING SHIELD RIGHT...
- Page 20 POWER PWB AC CONNECTOR LAMP COVER PWB BOTTOM CHASSIS FOOT Fig.3-7 1-20 (No.PA045<Rev.001>)
-
Page 21: Adjustment
SECTION 4 ADJUSTMENT BEFORE STARTING ADJUSTMENT (1) Adjustment items utilize a personal computer. (2) Data back up is required before adjustments. (3) Allow the equipment and test instruments adequate time (at least 10 minutes) to warm-up. (4) Confirm the set is properly connected to the specified AC power source. (5) Use care not to disturb internal controls and parts not specifically mentioned. - Page 22 ADJUSTMENT PROCEDURE ADJUSTMENT (1) Run Scaler Service Software. (2) Select Com Port, click [Connect to FPJ] to connect the PC and the projector. (3) Click [Save data] and save text file to PC. (4) After replacing the PROCESSOR PWB, click [Write data] and select the saved text file.
- Page 23 4.4.4 DESTINATION WRITING (4) Adjust [V Pixel Adj.R], [V Pixel Adj.G] to make V direction (Pixel Shift) to bectom best point. Instruments Scaler Service Software REPLACING COMPONENTS Test point 4.4.7 CW DATA BACKUP PROCESSOR Adjustment menu Instruments Scaler Service Software REPLACING COMPONENTS Preparation Test point...
-
Page 24: Troubleshooting
SECTION 5 TROUBLESHOOTING PROTECTIVE SENSOR AND PROTECTIVE SWITCH In event of abnormal operation due to circuit or component failure, setting error or other reason, in order to prevent serious damage to the set and preserve the integrity of peripheral equipment, sensors and switches are provided for protective functions. Cooling is conducted at the same time a corresponding LED flashes (about 90 seconds). - Page 25 ERROR LOG (SELF-DIAGONOSIS RECORD AND INDICATION) 5.3.1 Outline By using the special setting and adjustment software, data related to abnormal operation (history) stored in the projector can be load. On the basis of contents "LED (INDICATOR) WARNING INDICATONS" set and lamp use time, internal and external temperature, and ther data prior to the previous usage time can be viewed as a table.
- Page 26 4: EMERGENCY MODE Update of DD CPU Firmware (12) Check the version in the service menu. * For information on how to operate the service menu, Before repairing or adjusting the projector, make sure to back up please refer Section 2, Service Menu. the ROM data.
- Page 27 5.5.3 LAN Settings of Projector 5.5.4 How to Use the Update Tool (1) Connect the PC to the projector with a LAN cable. (1) Set the projector to the standby state. (2) Plug in the power cable, and turn on the power of the pro- (2) Start up the update tool, and click the [Update Firmware] jector.
- Page 28 (4) Start up the updater application, and select from the menu at the top of the application [Settings] -> [Advance mode]. Once selected, a menu will pop up, prompting you to enter a password. Enter [hercules], and press the [OK] button. (5) A [Manually switch to download mode] checkbox appears on the application screen.
- Page 29 JVC KENWOOD Corporation Projector Operation 7,58, shinmei-cho, Kanagawa-ku, Yokosuka-city, Kanagawa-prefecture, 239-8550, Japan (No.PA045<Rev.001>) Printed in Japan...
- Page 30 PARTS LIST D-ILA PROJECTOR DLA-X35BE DLA-X35BU DLA-X35WE DLA-X35WU DLA-X55RBE DLA-X55RBU DLA-X55RWE DLA-X75RBE DLA-X75RBU DLA-X95RBE DLA-X95RBU DLA-XC3800B DLA-XC5800RB DLA-XC5800RW DLA-XC7800RB DLA-XC9800RB (No.PA045<Rev.001>)1/8...
- Page 31 ■ PRECAUTIONS ON SCHEMATIC DIAGRAMS Due to the improvement in performance, some part numbers shown in the circuit diagrams may not agree with those indicated in the Parts List. The parts numbers, values and rated voltage etc. in the Schematic Diagrams are for reference only.
- Page 32 EXPLODED VIEW WR16 WR28 WR19 WR17 WR31 WR20 WR25 WR33 WR11 WR29 WR39 WR29 WR32 WR10 WR24 PW13 WR23 WR36 PW15 WR40 PW16 PW10 WR37 WR18 WR27 WR26 WR15 WR30 WR14 PW11 WR14 No.PA045 created date:2012-10-29 (No.PA045<Rev.001>)3/8...
- Page 33 MODEL MARK MODEL MARK MODEL MARK MODEL MARK DLA-X35BE DLA-X35BU DLA-X35WE DLA-X35WU DLA-X55RBE DLA-X55RBU DLA-X55RWE DLA-X75RBE DLA-X75RBU DLA-X95RBE DLA-X95RBU DLA-XC3800B DLA-XC5800RB DLA-XC5800RW DLA-XC7800RB DLA-XC9800RB Safe Symbol No. Parts No. Parts Name Description Local EXPLODED VIEW <M1MM> EWI1030009 WIRE CW PWB CN2001 or CN1001 -...
- Page 34 MODEL MARK MODEL MARK MODEL MARK MODEL MARK DLA-X35BE DLA-X35BU DLA-X35WE DLA-X35WU DLA-X55RBE DLA-X55RBU DLA-X55RWE DLA-X75RBE DLA-X75RBU DLA-X95RBE DLA-X95RBU DLA-XC3800B DLA-XC5800RB DLA-XC5800RW DLA-XC7800RB DLA-XC9800RB Safe Symbol No. Parts No. Parts Name Description Local PB006571299 HDMI SCREW PC010666799 TAPPING SCREW PC010666599...
- Page 35 MODEL MARK MODEL MARK MODEL MARK MODEL MARK DLA-X35BE DLA-X35BU DLA-X35WE DLA-X35WU DLA-X55RBE DLA-X55RBU DLA-X55RWE DLA-X75RBE DLA-X75RBU DLA-X95RBE DLA-X95RBU DLA-XC3800B DLA-XC5800RB DLA-XC5800RW DLA-XC7800RB DLA-XC9800RB Safe Symbol No. Parts No. Parts Name Description Local PC021063199 SHIELD MD PC021062999 BRACKET PC021062899 BRACKET...
- Page 36 PACKING No.PA045 created date:2012-10-29 (No.PA045<Rev.001>)7/8...
- Page 37 MODEL MARK MODEL MARK MODEL MARK MODEL MARK DLA-X35BE DLA-X35BU DLA-X35WE DLA-X35WU DLA-X55RBE DLA-X55RBU DLA-X55RWE DLA-X75RBE DLA-X75RBU DLA-X95RBE DLA-X95RBU DLA-XC3800B DLA-XC5800RB DLA-XC5800RW DLA-XC7800RB DLA-XC9800RB Safe Symbol No. Parts No. Parts Name Description Local PACKING <M4MM> PC023482799 INST BOOK A,C,E,G,H,J PC023482899...
- Page 38 SCHEMATIC DIAGRAMS D-ILA PROJECTOR DLA-X35BE DLA-X35BU DLA-X35WE DLA-X35WU DLA-X55RBE DLA-X55RBU DLA-X55RWE DLA-X75RBE DLA-X75RBU DLA-X95RBE DLA-X95RBU DLA-XC3800B DLA-XC5800RB DLA-XC5800RW DLA-XC7800RB DLA-XC9800RB (No.PA045<Rev.001>)1/5...
- Page 39 ■ PRECAUTIONS ON SCHEMATIC DIAGRAMS Due to the improvement in performance, some part numbers shown in the circuit diagrams may not agree with those indicated in the Parts List. The parts numbers, values and rated voltage etc. in the Schematic Diagrams are for reference only.
- Page 40 WIRING DIAGRAM <DLA-X35/DLA-XC3800> TEMP SENSOR PWB MOTOR PWB G DEVICE H/S LED&IR PWB LAMPCOVER PWB NOT USE No.PA045 created date:2012-10-29 (No.PA045<Rev.001>)3/5...
- Page 41 WIRING DIAGRAM <DLA-X55/DLA-XC5800> TEMP SENSOR PWB MOTOR PWB G DEVICE H/S LED&IR PWB LAMPCOVER PWB No.PA045 created date:2012-10-29 (No.PA045<Rev.001>)4/5...
- Page 42 WIRING DIAGRAM <DLA-X75/DLA-XC7800/DLA-X95/DLA-XC9800> TEMP SENSOR PWB MOTOR PWB SOLENOID PWB G DEVICE H/S LED&IR PWB LAMPCOVER PWB No.PA045 created date:2012-10-29 (No.PA045<Rev.001>)5/5...