
Related Manuals for Siemens HL9S5A340


Summary of Contents for Siemens HL9S5A340
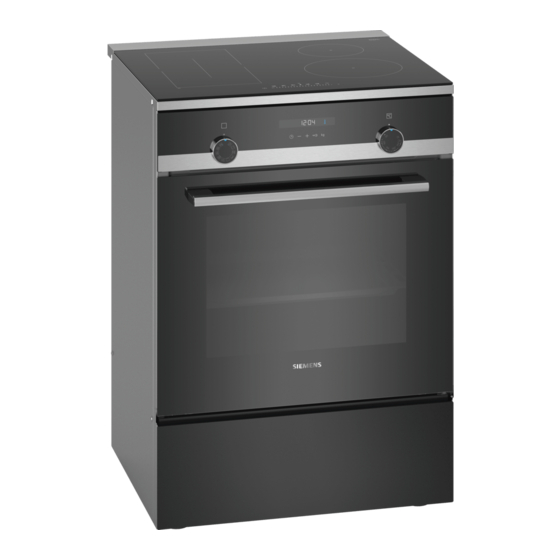
- Page 1 Free standing cooker HL9S5A340 User manual Register your product on My Siemens and discover exclusive ser- vices and offers. siemens-home.bsh-group.com/welcome The future moving in. Siemens Home Appliances...
- Page 2 1.800W 3.100W 18 x 18 3.600W 14,5 1.400W 2.200W 21 2.200W 3.700W IEC 60335-2-6 Ø = cm...
-
Page 3: Table Of Contents
Safety en Table of contents 1 Safety Safety .............. 3 Observe the following safety instructions. Preventing material damage ....... 6 1.1 Intended use Environmental protection and saving en- Read the information on intended use to en- ergy ............... 7 sure that you use the appliance correctly and safely. -
Page 4: Safety
en Safety The hotplate heats up but the display does Keep children under the age of 8 years away not work. from the appliance and power cable. ▶ Switch off the fuse in the fuse box. 1.3 Safe use ▶ Call the customer service. Accessories and cookware get very hot. - Page 5 Safety en If the insulation of the power cord is dam- If there is water in the cooking compartment aged, this is dangerous. when it is hot, this may create hot steam. ▶ Never let the power cord come into contact ▶...
-
Page 6: Preventing Material Damage
en Preventing material damage 2 Preventing material damage If the seal is very dirty, the appliance door will no 2.1 Oven area longer close properly during operation. This may dam- Follow the corresponding instructions when using the age the front of adjacent kitchen units. oven. -
Page 7: Environmental Protection And Saving En- Ergy
Environmental protection and saving energy en Damage Cause Measure Stains Food boiling over Remove boiled-over food immedi- Unsuitable cleaning products ately with a glass scraper. Only use cleaning products that are suitable for this type of hob. Scratches Salt, sugar or sand Do not use the hob as a work sur- Rough pot or pan bases face or storage space. -
Page 8: Induction Cooking
en Induction cooking Cook with only a little water. Turn down to a lower power level early on. Use a suit- ¡ The more water that is contained in cookware, the able ongoing power level. more energy is required to heat it up. ¡... -
Page 9: Installation And Connection
Installation and connection en not touch the cookware and switch off the cooking Cookware detection zone. If the cooking zone no longer works after cooling Each cooking zone has a minimum limit for the cook- down, contact the technical after-sales service. ware detection and this depends on the ferromagnetic diameter and the material of the base of the cookware. - Page 10 en Installation and connection Use an Allen key to raise or lower the adjustable feet until the cooker is level. Push in the plinth drawer. Adjacent units Any adjacent units must not be made of flammable ma- terials. The fronts of any adjacent units must be heat- resistant up to at least 90 °C.
-
Page 11: Familiarising Yourself With Your Appliance
Familiarising yourself with your appliance en 6 Familiarising yourself with your appliance 6.1 Your appliance 6.2 Control panels You can find an overview of the parts of your appliance You can use the control panel to configure all functions here. of your appliance and to obtain information about the operating status. - Page 12 en Familiarising yourself with your appliance Control Explanation Control Explanation Use the temperature se- You can use the four hot- Temperature selector Hotplate control lector to set the temperat- plate switches to control ure for the type of heating the output provided by and select settings for each individual hotplate.
- Page 13 Familiarising yourself with your appliance en Symbol Type of heating What it's used for and how it works Hot air grilling Roast poultry, whole fish or large pieces of meat. The grill element and the fan switch on and off alternately. The fan circulates the hot air around the food.
- Page 14 en Familiarising yourself with your appliance Selection sensors The cook- ing zones Sensor Function Combi You can find additional in- Main switch cooking formation about this in the Select a cooking zone zone section entitled → "combiZone", Page 18. Settings range ...
-
Page 15: Accessories
Accessories en You can remove the rails, e.g. for cleaning. Lighting → "Rails", Page 31 The oven light lights up the cooking compartment. With most types of heating and functions, the lighting lights up during operation. If you use the function se- lector to end the operation, the lighting switches off. The oven light setting on the function selector can be used to switch on the light without heating. -
Page 16: Before Using For The First Time
Accessories vary from one appliance to another. When Baking tray Slide the tray in with the sloping purchasing accessories, always quote the exact E.g. - Page 17 Operating the hotplate en Select the required power level in the settings 9.2 Setting the cooking zones range. Select the required power level in the settings range. Performance level Lowest performance level Highest performance level Each power level has an intermediate level. This is marked with a dot.
- Page 18 en combiZone Poultry breast, 2 cm thick 5 - 6 10 - 20 Poaching, simmering Potato dumplings 4. - 5. 20 - 30 Poultry breast, frozen 5 - 6 10 - 30 Fish 4 - 5 10 - 15 Patties, 3 cm thick 4. - 5. 20 - 30 White sauces, e.g. Béchamel 1 - 2 3 - 6 Hamburgers, 2 cm thick 6 - 7 10 - 20 sauce Fish and fish fillet, plain 5 - 6 8 - 20 Whisked sauces, e.g.
-
Page 19: Move Function
Move function en 10.3 Changing the power level 10.4 Deactivating the CombiZone function Select one of the two cooking zones assigned to the CombiZone function. Select one of the two cooking zones assigned to the Change the power level in the settings area. CombiZone function. -
Page 20: Powerboost
en powerBoost Touch . Once the cooking time has elapsed a The display lights up in the cooking zone. The cooking zone switches itself off. An audible signal lights up in the timer display. sounds and the appears in the timer display for Within the next 10 seconds, set the required cook- 10 seconds. -
Page 21: Childproof Lock
Childproof lock en 14 Childproof lock The hob is equipped with a childproof lock. This pre- 14.2 Deactivating the childproof lock vents children from switching on the hob. Touch and hold for four seconds. ▶ a The lock is released. 14.1 Activating the childproof lock Requirement: The hob must be switched off. -
Page 22: Energy Consumption Display
en Energy consumption display Within the next 10 seconds, touch and hold Display Function four seconds. Automatic switch-off of the cooking zones Product information Display Switched off. Directory for the technical after-sales - Time until automatic switch-off. service (TK) ... -
Page 23: Checking The Cookware
Checking the cookware en 19 Checking the cookware You can use this function to check the speed and qual- Note: If the diameter of the cooking zone that is used ity of the cooking process depending on the cookware. is much smaller than the diameter of the cookware, The result is a reference value and depends on the only the middle of the cookware can be expected to properties of the cookware and the cooking zone being... -
Page 24: Rapid Heating
en Rapid heating Changing the type of heating 21.3 Types of heating and temperature You can change the type of heating at any time. Use the function selector to set the type of heating. Use the function selector to set the required type of ▶... - Page 25 Time-setting options en Use the button to change the timer duration. ¡ In order to achieve a good cooking result, do not ▶ delay the end time once the appliance is already op- a The appliance applies the change after a few erating.
-
Page 26: Programmes
en Programmes 24 Programmes The programmes help you to use your appliance to Cookware made from the following material is not prepare different dishes by selecting the optimum set- suitable: tings automatically. ¡ Bright, shiny aluminium ¡ Unglazed clay ¡ Plastic or plastic wire rack 24.1 Suitable cookware for programmes You should therefore use heat-resistant cookware that is suitable for temperatures up to 300 °C. -
Page 27: Childproof Lock
Childproof lock en No. Meal Cookware Adjustment Add liquid Shelf Information weight posi- tion Roasting dish with Weight of meat Cover the Do not sear the meat 09 Joint of veal, lean E.g. tenderloin or eye bottom of the beforehand. roasting dish, and add up to 250 g ve- getables, if... -
Page 28: Basic Settings
en Basic settings 26 Basic settings You can configure the appliance to meet your needs. 26.1 Overview of the basic settings Here you can find an overview of the basic settings and factory settings. The basic settings depend on the features of your appliance. Display Basic setting Selection... - Page 29 Cleaning and servicing en Suitable cleaning agents Only use cleaning agents that are suitable for the differ- Follow the instructions on cleaning the appliance. ent surfaces on your appliance. → "Cleaning the appliance", Page 30 Appliance Surface Suitable cleaning agents Information Stainless steel ¡...
- Page 30 en Cleaning and servicing Area Suitable cleaning agents Information Rails ¡ Hot soapy water Soak any heavily soiled areas and use a brush or steel wool. Tip: Remove the shelf supports for cleaning. → "Rails", Page 31 Accessories ¡ Hot soapy water Soak any heavily soiled areas and use a brush or steel wool. ¡...
-
Page 31: Humidclean Cleaning Support
humidClean cleaning support en Remove heavy dirt using a glass scraper. 27.6 Cleaning the hob Clean the hob with a cleaning product for glass Clean the hob after every use to stop cooking residues ceramic. from getting burnt on. Follow the cleaning instructions on the product Note: Note the information on unsuitable cleaning packaging. - Page 32 en Appliance door Then push the entire rail to the front and remove it. and insert it into the socket at the front. The rails fit both on the left and right sides. Shelf po- sitions 1 and 2 are located at the bottom and shelf 29.2 Attaching the rails positions 3, 4 and 5 are located at the top.
-
Page 33: Appliance Door
Appliance door en When the locking levers are open in order to detach Detach the oven door. the oven door, the hinges are secured. → "Removing the appliance door", Page 33 Position it on a cloth with its handle pointing down- wards. To remove the upper cover of the oven door, press in the tabs on the left and right using your fingers. - Page 34 en Appliance door When attaching the oven door, ensure that both 30.4 Fitting the door panes hinges are inserted in the opening direction. When fitting the panes, ensure that the lettering "top right" is not upside down at the bottom left. Insert the pane diagonally towards the back. The notch on the hinge must engage on both sides.
-
Page 35: Faqs
FAQs en 31 FAQs 31.1 Using the appliance Question Answer Why can I not switch on the ¡ The childproof lock is activated. You can find further information about this func- hob and why is the child- tion under proof lock symbol lit? → "Childproof lock", Page 21. -
Page 36: Troubleshooting
en Troubleshooting Question Answer Why is the cooking zone ¡ The cookware is on a different cooking zone to the one that has been switched not heating up and why is the heat setting flashing? Ensure that you have switched on the correct cooking zone for the cookware. ¡... - Page 37 Troubleshooting en Fault Cause and troubleshooting The appliance does At the end of a cooking time, the appliance stops heating up. The oven light and cooling fan not switch off fully at do not switch off. For types of heating with air recirculation, the fan continues to run in the the end of a cooking back wall of the cooking compartment.
-
Page 38: Transportation And Disposal
en Transportation and disposal Fault Cause and troubleshooting The cooking zone has been operating continuously for an extended period. The automatic safety switch-off function has been activated. Touch any symbol to switch ▶ off the display so that you can set the cooking zone again. The operating voltage is incorrect and outside of the normal operating range. -
Page 39: Customer Service
Customer Service en Secure the door and, if available, the top cover to 33.2 Transporting the appliance the appliance sides using adhesive tape. Keep the original appliance packaging. Only transport the appliance in the original packaging. Observe the If the original packaging is no longer available transport arrows on the packaging. - Page 40 en How it works cient, only a small amount of heat escapes during op- WARNING ‒ Risk of fire! eration. Due to the significant differences in temperat- Opening the appliance door creates a draught. ure between the appliance interior and the external Greaseproof paper may come into contact with the parts of the appliance, condensation may build up on heating element and catch fire.
- Page 41 How it works en Baking tips Topic We have compiled a few tips to help you achieve a Determine whether the Push a cocktail stick into good baking result. cake is ready. the highest point on the cake. If the cocktail stick Topic comes out clean, the You want your cake to...
- Page 42 en How it works Meal Accessory/cookware Shelf posi- Type of Temperature Cooking tion heating in °C time, minutes Yeast cake with dry topping, 2 levels Universal pan 150–170 20–30 Baking tray Yeast cake with moist topping Universal pan 160–180 30–50 Yeast cake with moist topping, 2 levels Universal pan 150–170 40–65 Baking tray...
- Page 43 How it works en Meal Accessory/cookware Shelf posi- Type of Temperature Cooking tion heating in °C time, minutes Biscuits, 2 levels Universal pan 130–150 25–35 Baking tray Biscuits, 3 levels 5+3+1 130–150 30–40 Baking tray Universal pan Meringues Universal pan 80-100 100-150 Meringues, 2 levels Universal pan 90-100 100-150...
- Page 44 en How it works 35.6 Bread and bread rolls Topic Your cake is cooked on ¡ Reduce the baking The values for bread dough apply to both dough the outside but is not fully temperature and in- placed on a tray and dough placed in a loaf tin. baked through on the in- crease the baking ATTENTION!
- Page 45 How it works en 35.7 Pizza, quiche and savoury cakes Here, you can find information about pizza, quiche and savoury cakes. Recommended settings Pizza, quiche and savoury cakes Meal Accessory/cookware Shelf posi- Type of Temperature Cooking tion heating in °C time, minutes Pizza, fresh Universal pan 170–190 20–30...
- Page 46 en How it works Meal Accessory/cookware Shelf posi- Type of Temperature Cooking tion heating in °C time, minutes Potato gratin, raw ingredients, 4 cm Ovenproof dish 150–170 60–80 deep Potato gratin, raw ingredients, 4 cm Ovenproof dish 150–160 70–80 deep, on 2 levels 35.9 Poultry, meat and fish Cookware with lid ¡...
- Page 47 How it works en ¡ When roasting, add a little liquid if the meat is lean. Tips for roasting and braising Cover the base of the glass cookware with ap- Use these tips for good results when roasting and prox. 1/2 cm of liquid. braising.
- Page 48 en How it works Meat Food Accessories/cook- Shelf posi- Type of Temperature Cooking ware tion heating in °C/grill time in mins setting Joint of pork without rind, e.g. neck, Cookware without lid 180–200 140–160 1.5 kg Joint of pork with rind, e.g. shoulder, Cookware without lid 170–190 190–200...
- Page 49 How it works en 35.10 Vegetables and side dishes This is where you can find information about preparing vegetable products that you can use as a side dish for your meals. Recommended settings Vegetables and side dishes Use the settings listed in the table. Food Accessories/cook- Shelf posi-...
- Page 50 en How it works be preserved. The thinner you cut the slices, the Ensure that neither fruit nor mushrooms overlap on quicker the drying process will be and the more flavour the wire rack. the dried food will retain. Settings ranges are specified Grate vegetables and then blanch them.
- Page 51 How it works en Remove the jars from the cooking compartment ATTENTION! ‒ after the specified residual heating time. If there are large temperature differences, the jars Vegetables may shatter. Once all of the jars are bubbling, reduce the tem- Do not place jars on cold or wet surfaces. ▶...
- Page 52 en How it works Recommended settings Proving dough The temperature and time are dependent on the type and quantity of the ingredients. The values in the table are therefore guide values only. Meal Accessory/cookware Shelf posi- Type of Temperature Cooking time, tion heating in °C...
- Page 53 How it works en If you can use your appliance to cook on multiple levels, position baking tins either next to one another or offset on different shelves so that they are not directly one above the other in the cooking compartment. Recommended settings Baking Meal...
- Page 56 Valid within Great Britain: Imported to Great Britain by BSH Home Appliances Ltd. Grand Union House Old Wolverton Road Wolverton, Milton Keynes MK12 5PT United Kingdom Manufactured by BSH Hausgeräte GmbH under the trademark licence of Siemens AG *9001679278* 9001679278 (010816)