Table of Contents
Advertisement
Quick Links
Advertisement
Table of Contents

Related Manuals for Husqvarna Eden Rose 250M LIMITED EDITION


Summary of Contents for Husqvarna Eden Rose 250M LIMITED EDITION
- Page 1 User’s Guide L I M I T E D E D I T I O N K E E P I N G T H E WO R L D S E W I N G...
- Page 2 This houshold sewing machine is designed to comply with IEC/EN 60335-2-28 and UL1594 IMPORTANT SAFETY INSTRUCTIONS When using an electrical appliance, basic safety precautions should always be followed, including the following: Read all instructions before using this household sewing machine. DANGER - To reduce the risk of electric shock: machine from the electric outlet immediately after using and before cleaning.
- Page 3 PRESSER FOOT KIT A limited edition accessory foot package is packed in the box with your HUSQVARNA VIKING ® EDEN ROSE™ sewing machine. The package contains the following optional presser feet: GATHERING FOOT (4127971-45) For Gathered Fabric: To Gather and Attach Gathered Fabric in One Step:...
- Page 4 CLEAR PIPING FOOT (4130971-45) To Make Piping From Your Fabric: Hint: When you sew this piping into a garment, adjust the needle position so it stitches one To Stitch Piping into a Seam...
-
Page 5: Table Of Contents
Table of Contents Basic sewing Overview ..............4 Straight Stitch Sewing ........22 Extension Table ............5 Finishing sewing .............23 Standard Accessories and Storage ....6 Seam Guides on the Needle Plate ....24 Getting Ready to Sew Pivoting ..............24 Connecting the Power Supply......7 Utility Sewing Adjusting the Sewing Speed ......8 Basic Zigzag .............25 Three-step Zigzag ..........25... -
Page 6: Overview
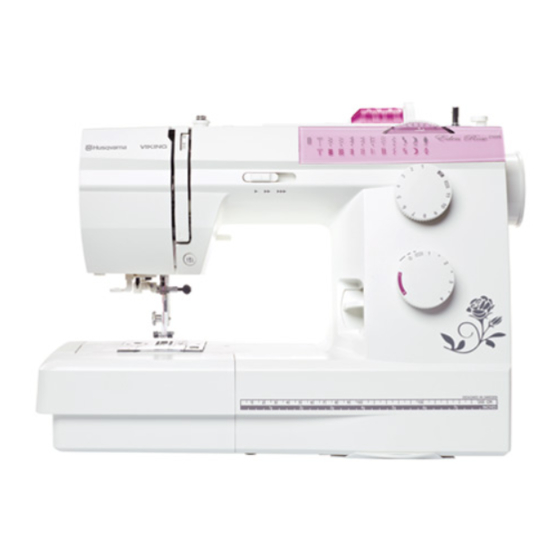
OVERVIEW 18 19... -
Page 7: Extension Table
EXTENSION TABLE To remove Free-arm sewing To attach Some fabrics have a lot of excess dye which can cause discoloration on other fabric but also on If you suspect that your fabric/ready-to-wear garment contains a lot of excess dye, always pre-... -
Page 8: Standard Accessories And Storage
STANDARD ACCESSORIES AND STORAGE... -
Page 9: Getting Ready To Sew
Getting Ready to Sew CONNECTING THE POWER SUPPLY Before plugging in the foot control, check to ensure that it is of type “21361” (see underside of foot 1. Power switch 2. Foot control plug 3. Machine plug 4. Machine socket 5. -
Page 10: Adjusting The Sewing Speed
ADJUSTING THE SEWING SPEED Speed Control Slide Foot Control NEEDLE UP/DOWN 8 – Getting Ready to Sew... -
Page 11: Sewing Guide Reference Chart
SEWING GUIDE REFERENCE CHART WOVEN FABRICS STRETCH FABRICS LEATHER VINYL SEAM Note: For Stretch Fabrics the Sewing Guide Reference Chart recommends setting the zig zag OVERCAST SEAM OVERCAST BASTE Note: Basting will leave permanent holes in BLIND HEM BUTTONHOLE Getting Ready to Sew – 9... -
Page 12: Reverse Lever
REVERSE LEVER PRESSER FOOT PRESSURE DIAL LOWERING THE FEED TEETH 10 – Getting Ready to Sew... -
Page 13: Raising And Lowering The Presser Foot
RAISING AND LOWERING THE PRESSER FOOT CHANGING THE PRESSER FOOT 1. Make sure the needle is in the highest position. Pull the presser foot towards you. 2. To put foot on, line up the cross pin on the foot between the spring and Getting Ready to Sew –... -
Page 14: Changing The Needle
CHANGING THE NEEDLE To Check for a Good Needle: Note: Check the needle frequently for barbed or 12 – Getting Ready to Sew... -
Page 15: Placing The Thread Spool On The Spool Pin
PLACING THE THREAD SPOOL ON THE SPOOL PIN REMOVING THE BOBBIN Getting Ready to Sew – 13... -
Page 16: Bobbin Winding
BOBBIN WINDING Guide the thread around the bobbin with the free end of the thread coming Note: Do not move the bobbin winder spindle while 14 – Getting Ready to Sew... -
Page 17: Placing The Bobbin
PLACING THE BOBBIN Guide the thread into the front Getting Ready to Sew – 15... -
Page 18: Threading The Machine
THREADING THE MACHINE Guide the thread around the bottom 16 – Getting Ready to Sew... -
Page 19: Needle Threader
NEEDLE THREADER Guide Getting Ready to Sew – 17... -
Page 20: Bringing Up The Bobbin Thread
BRINGING UP THE BOBBIN THREAD 18 – Getting Ready to Sew... -
Page 21: Stitches
STITCHES STRETCH STITCHES STITCH SELECTION Note Always raise the needle above the fabric and presser foot before you turn the stitch STITCH LENGTH Note: Always raise the needle above the fabric and presser foot before you turn the stitch length Getting Ready to Sew –... -
Page 22: Adjusting Stretch Stitch Balance
ADJUSTING STRETCH STITCH BALANCE To Adjust the Distorted Stitches: STITCH WIDTH Note: Always raise the needle above the fabric and presser foot before you turn the stitch width VARIABLE NEEDLE POSITION 20 – Getting Ready to Sew... -
Page 23: Balancing Needle Thread Tension
BALANCING NEEDLE THREAD TENSION Balanced Tension: Needle Thread Tension Is Too Tight: Needle Thread Tension Is Too Loose: Getting Ready to Sew – 21... -
Page 24: Basic Sewing
Basic Sewing STRAIGHT STITCH SEWING Machine Setting Starting to Sew Changing the Sewing Direction 22 – Basic Sewing... -
Page 25: Finishing Sewing
FINISHING SEWING Basic Sewing – 23... -
Page 26: Seam Guides On The Needle Plate
SEAM GUIDES ON THE NEEDLE PLATE NUMBER SPACING (CM) PIVOTING 24 – Basic Sewing... -
Page 27: Utility Sewing
Utility Sewing BASIC ZIGZAG THREE-STEP ZIGZAG When using the Edging Foot J for three- step zigzag, make sure the needle does not hit the pin in the needle hole SEAM AND OVERCAST Utility Sewing – 25... -
Page 28: Reinforced Straight Stitch
REINFORCED STRAIGHT STITCH BUTTON SEWING Note: Do not use this technique if the button is 26 – Utility Sewing... -
Page 29: Automatic Buttonhole
AUTOMATIC BUTTONHOLE foot R set by placing the button in the automatic sample duplicating the interfacing and seams Utility Sewing – 27... - Page 30 the length of the right and left rows of the 28 – Utility Sewing...
- Page 31 Utility Sewing – 29...
- Page 32 Adjusting the Buttonhole Stitch Density the range of Note: If the button is extremely thick, make a through the test buttonhole, lengthen the size by pulling back the button holder which will 30 – Utility Sewing...
-
Page 33: Corded Buttonhole
CORDED BUTTONHOLE foot R Utility Sewing – 31... -
Page 34: Manual Buttonhole
MANUAL BUTTONHOLE 32 – Utility Sewing... - Page 35 Utility Sewing – 33...
-
Page 36: Sewing Zipper
SEWING ZIPPER To Snap On the Zipper Foot Fabric Preparation 34 – Utility Sewing... - Page 37 To Sew Utility Sewing – 35...
- Page 38 36 – Utility Sewing...
- Page 39 Utility Sewing – 37...
-
Page 40: Blind Hem
BLIND HEM 38 – Utility Sewing... -
Page 41: Presser Feet
PRESSER FEET Non-stick Glide Foot H Quilting Guide Transparent Foot B Utility Sewing – 39... - Page 42 Quilter’s 1/4” Piecing Foot 40 – Utility Sewing...
-
Page 43: Care And Maintenance
Care and Maintenance CLEANING THE HOOK ASSEMBLY AREA AND FEED TEETH Care and Maintenance – 41... -
Page 44: Replacing The Bobbin Case
REPLACING THE BOBBIN CASE REPLACING THE LIGHT BULB Note: Replace bulb with same type rated 42 – Care and Maintenance... -
Page 45: Troubleshooting
Troubleshooting CONDITION /CAUSE REFERENCE The Needle Thread Breaks Page 16 The Bobbin Thread Breaks Change the bobbin The Needle Breaks Skipped Stitches Page 16 Seam Puckering Page 16... - Page 46 CONDITION /CAUSE REFERENCE The Cloth Is Not Fed Smoothly Loops On The Seams The Machine Does Not Work Page 7 Noisy Operation Buttonhole Is Not Sewn Neatly Layer Slippage Buttonhole Won't Sew Buttonhole has Gaps...
- Page 47 INTELLECTUAL PROPERTY SERVICING OF DOUBLE INSULATED PRODUCTS CE - Authorised Representative SVP Worldwide...
- Page 48 www.hus qv a r nav iking .c o m...