Table of Contents
Advertisement
Quick Links
Advertisement
Table of Contents

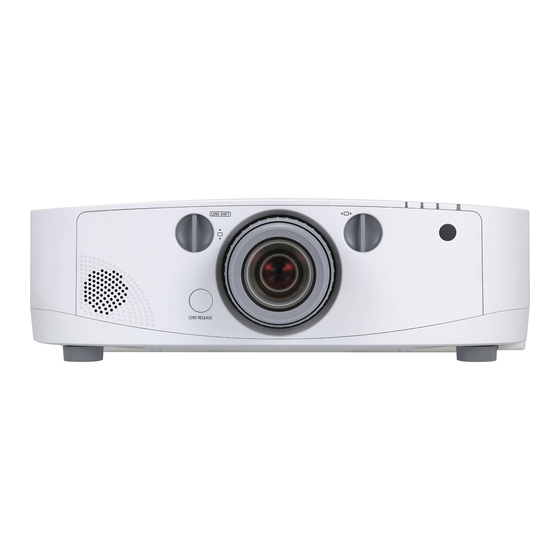
Related Manuals for NEC NP-PA600 Series


Summary of Contents for NEC NP-PA600 Series
- Page 1 NEC Projector User Supportware Multi Screen Tool User’s Manual...
- Page 2 Great care has been given to the creation of the content of this manual; however, should you notice any questionable points, errors, or omissions, please contact us. Notwithstanding section (3), NEC will not bear any responsibility for claims due to loss, lost profit, or other matters for reason of the use of this software.
-
Page 3: Effects Of Stacking/Tiling Correction
Effects of stacking/tiling correction Stacking correction Create the geometric correction data so that the projected images of two to four projectors are superimposed on one another. Stacking lets you achieve high brightness projections. Tiling correction Create geometric correction data to project a single image using two to four projectors. - Page 4 • The resolution of the projected image is the same as Note the projector's display resolution. • The geometric correction data is created by using a web camera to photograph the projected images of projectors to which the same video signal is input then zooming in or out and masking the images based on the images that have been photographed to fit on the screen (specified projection range).
-
Page 5: Precautions In Projector Installation
Precautions in Projector Installation For details on the installation precautions, see the operating instructions of the projector you are using. The precautions below are for the NP-PA600 series. • Leave sufficient space to the left and right of the projectors so that there is no obstruction of projector air intake and exhaust. -
Page 6: Restrictions On Projectors That Are To Be Installed
Restrictions on Projectors that Are to Be Installed • Install all projectors on the same network. • Use projectors with the same resolution. • Use the same model to the extent possible. * When there is a difference in the brightness of the projectors, the web camera might not accurately read the projection image at the time of calibration. -
Page 7: Flow Through Stacking/Tiling Correction
Flow through stacking/tiling correction Install the Multi Screen Tool Page Install and connect the computer, projector, or web camera Page Setup the Multi Screen Tool Page Make adjustments to the projector or web camera Projector preparation Page Perform stacking/tiling correction Page... -
Page 8: Table Of Contents
Table of Contents Effects of stacking/tiling correction ..............Precautions in Projector Installation ............... Installation Example Using 2 Projectors ..............5 Restrictions on Projectors that Are to Be Installed ........Application Environment of the Multi Screen Tool .......... Flow through stacking/tiling correction ............1. -
Page 9: Installation Of The Multi Screen Tool
1. Installation of the Multi Screen Tool Preparation: Save the downloaded Multi Screen Tool file to the desired location * The same installation procedure is used for Windows 7/Windows Vista and Windows XP. This software cannot be used simultaneously with the Stacking Correction Tool. If the Stacking Correction Note Tool is already installed, uninstall it. - Page 10 1. Installation of the Multi Screen Tool 2. Select "I accept the terms in the license agreement" and click [Next]. Please read the content of the END USER LI- CENSE AGREEMENT carefully. A screen for verifying the installation location will be dis- played.
- Page 11 1. Installation of the Multi Screen Tool DirectX 9 or later (DirectX 10 for Windows 7) is required to Note use this application. If this condition is not met, the screen at the right appears when MSTxxx.exe is launched. Follow the instructions on the screen to complete setup of DirectX Installation Screen DirectX 9.
-
Page 12: Uninstallation Of The Multi Screen Tool
1. Installation of the Multi Screen Tool Uninstallation of the Multi Screen Tool Windows 7/Windows Vista Select the Multi Screen Tool from [Uninstall a program] under [Control Panel] and uninstall it. Windows XP Select the Multi Screen Tool from [Add/Remove Programs] under [Control Panel] and uninstall it. -
Page 13: Installation And Connection Of Equipment
2. Installation and Connection of Equipment Connections for stacking/tiling correction See page for projectors supporting stacking/tiling correction. Web camera PA600 series PA600 series PA600 series To USB port To LAN port Computer (for correction) • Install the web camera facing the projection image. Note •... -
Page 14: Connections For Projecting An Image
2. Installation and Connection of Equipment Connections for Projecting an Image For analog RGB signals COMPUTER1 IN COMPUTER1 IN COMPUTER1 IN Projector Projector Projector Computer cable (VGA) Computer cable (VGA) Analog RGB signal divider Analog RGB output Computer (Mini D-Sub 15 pin) Analog RGB input To displayed output connector (Mini D-Sub 15 pin) -
Page 15: For Digital Rgb Signals
2. Installation and Connection of Equipment Make connections as illustrated in the diagrams below when connecting video equipment other than the computer (e.g., DVD players etc.). For digital RGB signals HDMI IN HDMI IN HDMI IN Projector Projector Projector HDMI cable HDMI cable HDMI Output HDMI signal distributor... -
Page 16: Multi Screen Tool Settings
The same Multi Screen Tool starting method is used for Windows 7/Windows Vista and Windows XP. Select the Multi Screen Tool from [Start] [All Programs] [NEC Projector User Supportware] and start it. → → Names of the Multi Screen Tool Screen Multi Screen Tool Main Screen ❶... - Page 17 3. Multi Screen Tool Settings Master Projector: The projector that will serve as the master is determined, and the projection image of another projector undergoes stacking correction so that it is in agreement with the projection image of the master projector. In this instance, the [GEOMETRIC CORRECTION] of the master projector does not change.
-
Page 18: Multi Screen Tool Menu
3. Multi Screen Tool Settings Multi Screen Tool Menu File Open the GCXS file (extension .gcxs) saved with the [Save as] command and send the geometric correction data to all connected projectors. When using a GCXS file to reproduce projected images to which stacking/tiling correction has been applied, make sure the installation and connections of all the projectors are the same as when the GCXS file was saved. -
Page 19: Names Of The Calibration Screen
3. Multi Screen Tool Settings Names of the Calibration Screen Calibration Screen ❶ ❷ ❸ ❹ ❺ Setup Performs the angle of view check and other camera checks. ❶ Starts stacking/tiling correction. Calibrate ❷ When "Specify Four Points" is selected for tiling correction, the points at the four corners of the image for tiled projection can be fine-adjusted, updating the calibration. - Page 20 3. Multi Screen Tool Settings Setup Screen ❾ ❼ ❶ ❽ ❷ ❺ ❸ ❹ ❻ ❿ Takes the photo. If no camera is connected, this button is displayed as "Connect to Camera" Take Picture ❶ instead of "Photograph". Connect a camera. When in the continuous capture mode, this changes to the [Start Capture] button.
-
Page 21: Preparation Of The Projectors
4. Preparation of the Projectors Prepare the projectors to be used for stacking/tiling correction. In addition to the explanations in this manual, also refer to the projectors' operating instructions. 1. Install and connect the projectors that will be used, and project them onto the screen (The portion of projectors that will be used) Connection of the Equipment Page... -
Page 22: Performing Stacking/Tiling Correction
5. Performing Stacking/Tiling Correction Preparations: Connect the web camera t o a c o m p u t e r o n w h i c h t h e M u l t i Screen Tool and the web camera's utility software are installed, then connect the computer to the same LAN as the projectors. - Page 23 5. Performing Stacking/Tiling Correction 4. Select the type of calibration mode. To perform stacking correction, select "Stacking", then select "Master Projector" or "Auto" for the calibration mode. * When performing stacking correction by specifying the master projector, select the number of the projector to be the master.
- Page 24 5. Performing Stacking/Tiling Correction First: Completely black image Second: Completely white image Third: Image of dots (Five dots at screen center) Fourth: Image of dots (Screen full of dots) Test images for the number of projectors connected will be sent and projected. * The web camera photographs the screen on which the test image is projected, and this is used as the calculation data for stacking/tiling correction.
-
Page 25: Calibration
6. Calibration In calibration, differences in brightness on the screen are identified and calculations are performed. Also, for the purpose of the calculations, the contour of the projection image, and the position and shape of the test image are photographed with a web camera. If an error message is displayed during the calibration, first check the items listed below. - Page 26 6. Calibration After checking the items on the previous pages, if an error still occurs during calibration, it is possible that the quality of the image photographed by the web camera is insufficient and cannot be recognized. Please pay attention to the points described below and make adjustments of the photographic image using the camera setup screen or the utility of the web camera, then try the calibration.
-
Page 27: List Of Error Messages
7. List of Error Messages When an error occurs during the calibration and a message is displayed, please refer to the table below and respond as indicated. Reference • Error messages extract a portion of the display content. • Rarely, an error message that is not listed in this manual may be displayed. If this happens, check the photographic image of the camera or the adjustment and position of the camera according to the error message. - Page 28 • Powered by Scalable Display Technologies Protected by US Patent 6,456,339 and patents pending • Logitech is a registered trademark of Logitech Inc. • HDMI is a registered trademark or trademark of HDMI Licensing, LLC. © NEC Display Solutions, Ltd. 2011-2012 Ver.4 07/12...