Table of Contents
Advertisement
KDC-X715
KDC-8015
KDC-715S
CD-RECEIVER
INSTRUCTION MANUAL
COMPACT
DIGITAL AUDIO
Take the time to read through this instruction manual.
Familiarity with installation and operation procedures will help you obtain the
best performance from your new CD-receiver.
For your records
Record the serial number, found on the back of the unit, in the spaces designated on
the warranty card, and in the space provided below. Refer to the model and serial
numbers whenever you call upon your KENWOOD dealer for information or service on
the product.
Model KDC-X715/8015/715S Serial number
©B64-1603-10 (KW)
Advertisement
Table of Contents

Related Manuals for Kenwood KDC-715S


Summary of Contents for Kenwood KDC-715S
-
Page 1: Instruction Manual
Record the serial number, found on the back of the unit, in the spaces designated on the warranty card, and in the space provided below. Refer to the model and serial numbers whenever you call upon your KENWOOD dealer for information or service on the product. -
Page 2: Table Of Contents
Contents Before use Warning...3 Safety precautions ...4 Handling Compact discs ...6 General features Power...7 Switching Modes ...8 Volume ...8 Attenuator ...8 Loudness ...8 Audio Control Setting...9 Mobile Preset...11 Switching Display...12 Non-Fading Output...12 Forced Closing ...12 Faceplate Angle Adjustment...13 Removing the Faceplate ...14 Tuner features Tuning ...16 Station Preset Memory...16... -
Page 3: Warning
KENWOOD CORPORATION 2967-3, ISHIKAWA-CHO, HACHIOJI-SHI TOKYO, JAPAN KENWOOD CORP. CERTIFIES THIS EQUIPMENT CONFORMS TO DHHS REGULATIONS N0.21 CFR 1040. 10, CHAPTER 1, SUBCHAPTER J. Location : Bottom Panel FCC WARNING This equipment may generate or use radio frequency energy. -
Page 4: Safety Precautions
• If the unit starts to emit smoke or strange smells, turn off the power immediately and consult your Kenwood dealer. • Make sure not to get your fingers caught between the faceplate and the unit. - Page 5 NOTE • If you experience problems during installation, consult your Kenwood dealer. • If the unit fails to operate properly, press the RESET button. When the faceplate controls are not visible, press the left part at the upper side of the faceplate (as illustrated on p.13) for as many times as you have preset...
-
Page 6: Handling Compact Discs
Handling Compact discs Playing a CD that is dirty, scratched or warped can cause the sound to skip and the unit to operate incorrectly, resulting in worsened sound quality. Take the following precautions to prevent your CDs from getting scratched or damaged. Handling CDs •... -
Page 7: General Features
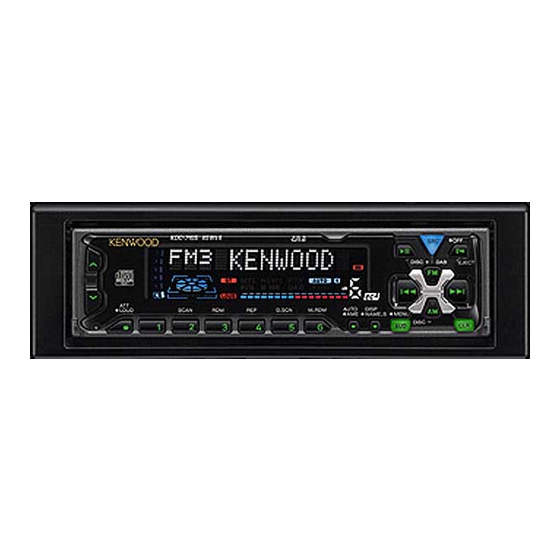
General features ATT / LOUD #1 - 6 ATT indicator LOUD indicator Power ¢ ¡ You can help prevent theft of the unit by reversing the faceplate so that the control panel cannot be seen, hiding the unit, and shutting off the audio. EJECT Power ON/OFF: When you turn your vehicle's ignition on, the unit's power will... -
Page 8: Switching Modes
General features Switching Modes Switching Modes: Each time you press the SRC (source) button, the mode switches as follows: Tuner mode CD mode External disc control mode 1 External disc control mode 2/AUX mode Standby mode Selecting standby mode: Press the SRC button repeatedly and switch to "ALL OFF" . When "ALL OFF"... -
Page 9: Audio Control Setting
Press the 4/¢ button. Please refer to the following for the adjusting values. Press the AUD button to end the control mode. "Kex"/"ec4"/"dB" : Recalling the kenwood preset sound setting Press the preset buttons (#1-6). Settings: #1;Flat, #2;Rock, #3;Pops/Top40, #4;Jazz, #5;Easy, #6;Scan of #1-5... - Page 10 General features Function of the KDC-X715 "TreF" : Adjust the center frequency of the treble. Setting values: 10.0 / 12.5 / 15.0 / 17.5 kHz NOTE This mode is available only when the Sound coordinate system is on. ( page36). "Treble"...
-
Page 11: Mobile Preset
Function of the KDC-X715 "NF Phase" : Adjust the phase for Non-Fading output. Setting values: Normal (0°) / Reverse (180°) NOTE • This mode is available only when the non-fading output function is set to on. • Not available during the Dual zone system is on. "V OFFSET"... -
Page 12: Switching Display
General features Switching Display You can change the display in each mode. Changing the Display: Each time you press the CLK button, the display switches as follows: Mode display Clock Date NOTE The £ indicator lights while the clock is displayed. Function of the KDC-X715 Non-Fading Output You can turn the non-fading output on and off while the preout... -
Page 13: Faceplate Angle Adjustment
Faceplate Angle Adjustment You can adjust the faceplate angle for easy viewing. Adjusting faceplate angle: Press the ¡ (EJECT) button to make the faceplate slide open, and then adjust the faceplate angle using the angle adjustment switch. Adjustment may be made from 0 to 2. 0 1 2 0 1 2 NOTE... -
Page 14: Removing The Faceplate
General features Removing the Faceplate The faceplate can be detached from the unit, helping to deter theft. Removing the faceplate: Choose the way from among the following and open the faceplate. Turn the ignition off, press the SRC button for at least one second, or press the left part at the upper side of the faceplate (as illustrated on p.13) for as many times as you have preset in the "Manual Open Button Setting"... - Page 15 the faceplate was mounted, check that the faceplate is securely attached to the faceplate bracket by holding its right side and pulling it gently towards you. Tuner features #1 - 6 AUTO/AME Frequency Band display ST indicator — 15 — ¢...
-
Page 16: Tuner Features Tuning
Tuner features Tuning You can choose from three tuning modes: auto seek, preset station seek, and manual. The "AUTO 1" indicator lights up when auto seek tuning is selected, and the "AUTO 2" indicator lights when preset station seek tuning is selected. Selecting Tuning Mode: Press the AUTO button. -
Page 17: Switching Display For Tuner
Press the preset station button (#1-6) for the desired station. The number of the recalled station is displayed. Switching Display for Tuner You can change the display used when listening to the radio. Changing the Display: Each time you press the DISP button, the display changes as follows: Station frequency SNPS name (only when being preset) /... -
Page 18: Station Name Preset (Snps)
Tuner features Station Name Preset (SNPS) You can assign names to radio stations with the Station Preset Memory. Up to 32 FM stations and 16 AM stations can be assigned names. Adjust the frequency to the station whose name you want to enter. -
Page 19: Rds Features
Press the DNPP button on the remote. "SNPP" will be displayed once the station name preset play mode is entered. The names of the stations stored in the band currently listened to are displayed in the following order for five seconds each: = FM1 Ô... -
Page 20: Rds (Radio Data System)
RDS features Function of the KDC-X715 RDS (Radio Data System) RDS is a service used by radio stations to transmit data outside normal radio broadcast signals. When an RDS station is received, you can immediately find out what kind of data is being transmitted by looking at the program service name, which appears in the display after the frequency. -
Page 21: Registration Of A Station As A Pty
3 above. Switching to Other Stations with the Same Type of Program: When "PTY" is blinking in the display, perform auto seek tuning. The tuner scans for another station with the same type of program. Canceling Program Type Function During Its Operation: Press the 38(PTY) button. -
Page 22: Cd/External Disc Control Features
CD/External disc control features DISC AUTO D.SCN DISP/NAME.S SCAN M.RDM Track number Disc number I When a unit equipped with an O-N switch is to be connected, please also see the instruction manual of this ¢ ¡ unit. Set the O-N switch to "N". "N"-operation will be set. "N"-operation: EJECT •... -
Page 23: Playing Other Disc Mode
Pausing and Restarting CD Play: Press the 38 button to make the disc pause. Press the same button again to start play again. Eject: Press the ¡(EJECT) button. The faceplate will slide to eject the CD. Press the ¡(EJECT) button to close the faceplate. 2CAUTION •... -
Page 24: Track Search
CD/External disc control features Track Search Search forward or backward through the tracks on the disc until you reach the one that you want to listen to. Making a Reverse Track Search: Press the 4 button to display the desired track number. Press once to search back to the beginning of the current track, twice to search back to the beginning of the previous track, and so forth. -
Page 25: Track Scan
NOTE • Input "0" to select disc 10. • If you input more than two numbers all at once, a search will be made only of the last number input. – Press either the DISC or DISC button while the number inputted is blinking. -
Page 26: Random Play
CD/External disc control features Random Play Play all the tracks on the current disc in random order. Press the RDM button to switch random play on and off. "Random ON" is displayed when random play is turned on. The track number will change over and over in the display as the next track is being selected. -
Page 27: Text Scroll
Text Scroll This function permits the text to be scrolled and the entire text to be displayed. The scrolling method differs depending on the setting of scrolling in the menu. To scroll automatically: Press the DISP button to display the disc title or the track title. The display of the text will be scrolled repeatedly. -
Page 28: Presetting Disc Names (Dnps)
CD/External disc control features Presetting Disc Names (DNPS) Store the names of discs to be displayed when played. Play the disc whose name you want to preset. NOTE • This function is not available for disc changers that do not feature the Disc Name Preset function. -
Page 29: Disc Name Preset Play (Dnpp)
connected. Please see your disc changer manual for details. Up to characters and 30 CDs can be registered with this unit. • Discs are identified by their total length and number of tracks. If another disc happens to have the same specifications as one that you have already stored a name for, the name will be displayed for it, too. -
Page 30: Menu Settings
Menu settings AUTO #1 - 4 Menu display Menu System ¢ You can set the defaults for additional functions in the menu mode. Make a setting for each function, referring to the following EJECT operations. Enter the menu mode DISP Press the MENU button for at least one second. -
Page 31: Touch Sensor Tone
Touch Sensor Tone This function produces a beep sound that accompanies button operation. It can be switched on or off. Display and setting: "Beep ON" : Beep setting is on. "Beep OFF" : Beep setting is off. NOTE The beep sound is not output from the preout jacks. Manual Time Adjustment Adjust the time manually. -
Page 32: Memo Mode
Menu settings Memo Mode You can input the text to be displayed and set the date when that text will appear in the display with the calendar function. Display and setting: Select the display "Memo Mode" during the selecting function in the menu mode. - Page 33 Adjusting Time Automatically: Tune to a RDS station and receive the signal for several minutes. The clock will adjust automatically to the local time. NOTE The clock will not adjust automatically if the RDS station tuned to is not transmitting time data. In such a case, try another RDS station.
-
Page 34: Security Code
Menu settings Security Code When the battery is removed from the unit's power switch, you cannot turn on the unit again unless the preset security code is input. This function helps prevent theft. NOTE You must follow steps 1 to 9 to be able to use the Security Code function. -
Page 35: Selectable Illumination
Selectable Illumination You can switch the color of the button illumination between green and red. Display and setting: "Color Green" : The color of the illumination is green. "Color Red" : The color of the illumination is red. Contrast Adjustment This adjustment permits easy viewing of the display. -
Page 36: Switching Preout
Menu settings Function of the KDC-X715 Switching preout Switch the preout between the rear and non-fading. When you switch to non-fading, you can adjust the volume separately. The factory default is rear preout. Display and setting: "SWPRE Rear" : Rear preout "SWPRE N-Fad"... -
Page 37: Traffic Information Function
Function of the KDC-X715 Traffic Information Function You can listen to traffic information. If you are listening to tapes or discs, they will continue playing until a traffic bulletin is broadcast. Display and setting: "TI ON" : The Traffic Information function is on. When the function is on, the TI indicator is turned on. -
Page 38: Text Scroll
Switching between manual scrolling and automatic scrolling is permitted. The factory default is automatic scrolling. Display and setting: "Scroll Auto" : Automatic scrolling "Scroll Manu" : Manual scrolling Basic Operations of remote Optional for the KDC-715S KDC-X715 FM/DISC ¢ TUNE TRACK DSIC AM/DISC —... - Page 39 2CAUTION Do not set the remote on hot places such as above the dashboard. Loading and Replacing the Batteries: Use two "AAA"-size batteries. Slide the cover while pressing downwards to remove it as illustrated. – Insert the batteries with the following the illustration inside the case.
- Page 40 Basic Operations of remote Optional for the KDC-715S Tuner features • 4/¢ (TUNE) buttons Press the 4 button to make decreasing seeks (using the preset tuning mode). Press the ¢ button to make increasing seeks (using the preset tuning mode).
-
Page 41: Accessories
Accessories External view External view ... Number of items ...1 ...1 ...1 ...1 ...2 ...2 2CAUTION Do not use any accessories other than those provided with your unit. If you use other accessories, you may damage the unit. Installation Procedure 1. -
Page 42: Connecting Wires To Terminals
– — 42 — NOTE To connect the Disc changer or DAB unit, consult each manual. KENWOOD disc changer / DAB control input / Display Data Output Jack Outputs data representing the unit's current state, causing it to appear in the external display.To... -
Page 43: Locking The Faceplate To The Unit
Installation (non-Japanese cars) Installation (non-Japanese cars) Firewall or metal support Accessory4 Phillips truss Accessory2 head sheet Metal mounting metal screw strap (commercially available) NOTE Make sure that the unit is installed securely in place. If the unit is unstable, it may malfunction (for example, the sound may skip). -
Page 44: Removing The Unit
Removing the Unit Removing the hard rubber frame Insert the removal tool into the indentations in the hard rubber frame, and pull it gently until the lock is released. Removing the Unit Make the faceplate control panel appear. Refer to the section “Removing the hard rubber frame” and then remove the hard rubber frame. -
Page 45: Installation (Japanese-Cars)
Installation (Japanese-cars) Installing Radio Bracket in Japanese-made Cars (J-Cars) On the factory-installed radio bracket, flatten all the tabs or holes that are not flush (except those used for screws), using a hammer or similar utensil. Hole Factory-installed Radio Bracket Factory trim bezel Accessory8 J-Car Bracket (follow indications for L/R) -
Page 46: Troubleshooting Guide
Troubleshooting Guide What might seem to be a malfunction in your unit may just be the result of slight misoperation or miswiring. Before calling service, first check the following table for possible problems. PROBLEM The power does not turn on. The fuse has blown. - Page 47 Troubleshooting Guide PROBLEM The faceplate does not open or The faceplate is incorrectly attached. close. CD/MD/External disc control mode PROBLEM The disc control mode cannot No wire has been connected to the disc changer input be selected. terminal on the unit. The specified disc does not The specified CD is quite dirty.
- Page 48 Troubleshooting Guide The following messages are displayed when certain problems are occurring in your system. Take the recommended actions. No disc magazine has been loaded in the changer. The disc magazine is not completely loaded. EJECT ] Load the disc magazine properly. No CD in the unit.
-
Page 49: Specifications
Channel separation (KDC-8015/715S) ...85 dB Audio section Preout Level(mV)/Load (during CD play) (KDC-X715/8015) ...4500 mV/10 kΩ (KDC-715S) ...1800 mV/10 kΩ Preout Impedance (KDC-X715/8015) ...80 Ω (KDC-715S) ...≤600 Ω Maximum output power ...45 W x 4 Full Bandwidth Power (at less than 1% THD) ...22 W x 4 Tone action Bass ...100 Hz ±10 dB...