Table of Contents
Advertisement
Quick Links
Advertisement
Table of Contents

Summary of Contents for Nokia 8000
-
Page 2: Table Of Contents
Terrestrial TV Adapter for Nokia Streaming Box 8000 User Manual Content 1. Safety & Product Information 2. Terrestrial TV Adapter 2.1. Streaming Box remote control options 2.2. RCU 110 2.3. RCU 130 3. Initial set-up 3.1. Packaging content 3.2. Set-up 3.3. -
Page 3: Safety & Product Information
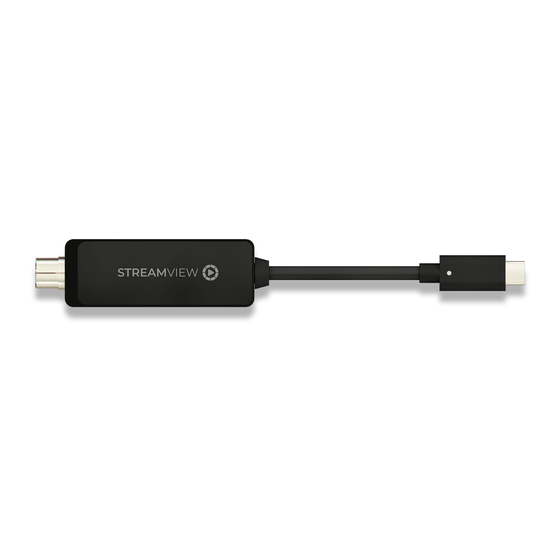
Directive 2014/53/EU. The full text of the EU declaration of conformity is available at the following internet address: Nokia.streamview.com/support 2. Terrestrial TV Adapter The Terrestrial TV Adapter for Nokia Streaming Box 8000 upgrades your TV to DVB-T2 reception. Simply connect it to the Nokia Streaming Box 8000 and access free-to-air channels. -
Page 4: Streaming Box Remote Control Options
2.1. Streaming Box remote control options 2.1.1. RCU 110 To open the main menu in Live TV mode, use the Bookmark button on your Streaming Box remote control. Use one of the four colored buttons on your Streaming Box remote control to follow on-screen instructions. Standby/Power ON 0–9 To enter numbers in the text box on the screen... -
Page 5: Rcu 130
2.1.2. RCU 130 To open the main menu in Live TV mode, use the Bookmark button on your Streaming Box remote control. Standby/Power ON Mutes the volume Launches YouTube application Launches Netflix application Launches Prime Video application Launches Disney+ application Launches Google Play to find apps Displays information about on-screen content Displays menu functions for Terrestrial TV Adapter in Live TV... -
Page 6: Set-Up
3.2. Set-up... -
Page 8: First Installation
3.3. First installation Note! Images of menu screens that are shown in this user manual, are for reference only and may vary in your country. Press the Live TV button on your remote control or select the Live TV application on the Home Screen and press OK to launch Live TV. -
Page 9: Channel Bar
3.4. Channel Bar Press the INFO button on your remote control to display information about the current program, the reception and teletext options. 3.5. Channel List To display the channel list and information about the current program of a channel in Live TV mode, press the OK button on your remote control. -
Page 10: Tv Guide
4. TV Guide Press the button (bookmark button) on your remote control and select TV Guide to display the 7-day program guide. The TV program can be displayed by groups or by channels. -
Page 11: Installation
5. Installation Press the button on your remote control and select Installation to display this menu. 5.1. Scan To search for further programs, perform a manual scan by setting the Search Mode to Manual. Use the directional buttons to navigate through the scan menu. -
Page 12: Lcn Switch
5.2. LCN Switch Logical channel numbering (LCN) is the function that assigns specific channel numbers to each program and service transmitted over broadcast multiplexes. Enable or disable the LCN switch in this menu. 6. Edit Channels Press the button on your remote control and select Edit Channels to display this menu. -
Page 13: Set Favorite Channel
6.1. Set Favorite Channel You can add your favorite channels to favorite groups. When the focus is on the left column, you can edit your favorite groups. Use the 4 colored buttons on your remote control to add, delete or edit your favorite groups. When the focus is on the right column, you can edit the channels in the selected favorite group. -
Page 14: Skip Channels
6.3. Skip Channels Press the OK button to skip a channel in the channel list. Use the directional buttons to navigate through the channel list. Channel(s) set for skipping will be marked with a symbol. To un-skip previously skipped channel(s), highlight the channel and press the OK button. -
Page 15: Audio Track
7. Option Press the button on your remote control and select Option to display this menu. 7.1. Audio Track Change the language of the current program. -
Page 16: Subtitle Track
7.2. Subtitle Track Turn on/off the subtitle and set the subtitle language. 7.3. Aspect Mode Select your preferred aspect mode by choosing between Auto, Full Screen, 4:3 Letter Box, 4:3 Pan Scan, 16:9 Letter Box, 16:9 Pan Scan. -
Page 17: Audio Mode
7.4. Audio Mode Select your preferred audio mode by choosing between Stereo, Left or Right. 7.5. Teletext To open the teletext of the current channel, press the yellow button on your remote control. Teletext option will be displayed only when RCU 110 is connected. To display the teletext of the current channel with the remote control RCU 130, press the button on your remote control and select Option >... -
Page 18: Language Settings
8.1. Language Settings Turn on/off the subtitle and set the subtitle language. 8.2. Time Settings Set the time by using the time settings from your TV or network. -
Page 19: Security Settings
8.3. Security Settings To open this menu, you need to enter the 4-digit pin (Default pin: 0000). Parental Control: This menu allows you to protect the installation menu and/or channels with a PIN code. Enable or disable parental control by using the directional buttons on your remote control. When the parental control is enabled, you can set the age limit according to your preferences. -
Page 20: Av Settings
8.4. AV Settings Turn on/off the audio description and set the volume for the audio description. 8.5. Other Settings Version: Displays the version number of your Terrestrial TV Adapter. Factory Reset: Resets your Terrestrial TV Adapter to factory settings. -
Page 21: Technical Specifications
9. Technical specifications System DVB-T/T2 Free-to-Air Ports Antenna input USB-C General data Operating temperature: 0 ~ +50°C Storage temperature: -40 ~ +65°C Dimensions (W x D x H in mm): 180 x 23,6 x 16 Weight (in kg): 0,03 Licenses Supplied by ©...


