
Related Manuals for GE JVM1540 OTR


Summary of Contents for GE JVM1540 OTR
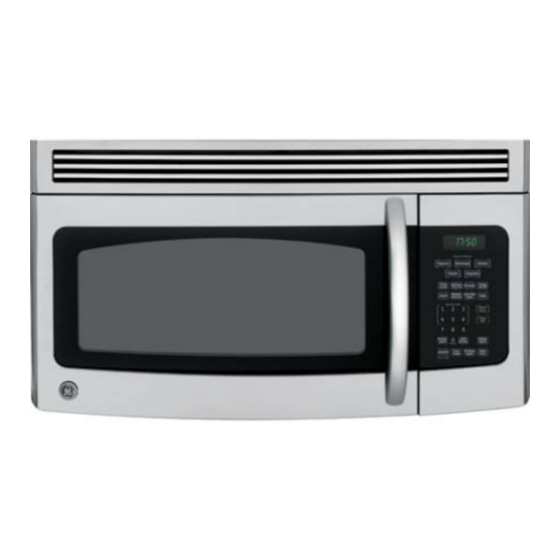
- Page 1 GE JVM1540 OTR Microwave OTR Models: JVM1540DP1BB JVM1540DP1WW JVM1540DP1CC JVM1540DP1SS...
- Page 2 IMPORTANT SAFETY NOTICE The information in this presentation is intended for use by individuals possessing adequate backgrounds of electrical, electronic, & mechanical experience. Any attempt to repair a major appliance may result in personal injury & property damage. The manufacturer or seller cannot be responsible for the interpretation of this information, nor can it assume any liability in connection with its use.
- Page 3 GE Factory Service Employees are required to use safety glasses with side shields, cut resistant (Dyneema®) gloves & steel toe shoes for all repairs. Plano Safety Glasses Steel Toe Shoes Dyneema® Cut Resistant Glove Prescription Safety Glasses Safety Glasses must be compliant with ANSI Z87.1-2003...
-
Page 4: Warranty
Warranty Copyright 2009... - Page 5 Nomenclature Copyright 2009...
- Page 6 Model/Serial Mini-Manual Copyright 2009...
-
Page 7: Grille Removal
Grille Removal To remove grille from OTR: 1. Remove three Phillips screws from the top, front of the cabinet. 2. Slide grille to the left and remove. 3. Reverse process to re-install grille. Copyright 2009... - Page 8 Control Panel Access / Removal To remove / access control panel: 1. Remove grille. 2. Remove a single Phillips securing control panel to frame. Copyright 2009...
- Page 9 Control Panel Access / Removal 3. Grasp panel on both sides and lift straight up to disengage four tabs from panel frame. 4. Panel is supported by and will pivot on two extended bottom tabs. 5. Continue to lift panel vertically to fully remove from frame. Copyright 2009...
- Page 10 Control Board – Plug Locations Key Panel Ribbon CN401 CN202 CN201 RY203 Copyright 2009...
-
Page 11: Control Panel Assembly
Control Panel Assembly Control panel assembly consists of a PCB, Key Panel / Escutcheon and metal support frame. Copyright 2009... -
Page 12: Key Panel Test
Key Panel Test If necessary, the key panel pads can be verified by a continuity test. Check continuity between the connections at the end of the ribbon. (Use high Ω scale). Top of Ribbon Pin #16 Pin #1 Copyright 2009... -
Page 13: Door Assembly
Door Assembly On the door assembly itself, there is a pin at the top and a pin at the bottom of the door on the hinge side. Copyright 2009... - Page 14 Door Assembly The door pins merely drop into circular openings on the chassis hinge arms. To remove the door assembly: • Remove the grille. • Open door fully. • Lift door pins from hinge arms and remove from cabinet. The door assembly is serviceable as an assembly or as individual parts.
- Page 15 Fuse / Noise Filter Board • Pull bottom of protective grille forward to release tabs securing it to frame. • Remove grille to access board. Copyright 2009...
- Page 16 Fuse / Noise Filter Board 20 Amp Fuse L1 & N In L1 & N Out Copyright 2009...
- Page 17 Cavity Light Replacement After removing grille, press in on tab & lift light cover from frame. Copyright 2009...
- Page 18 Cavity Light Replacement • Unscrew bulb from socket & remove from light recess to replace. • Bulb is a 40w, screw-in type. Copyright 2009...
- Page 19 Cavity Light Socket If lamp socket would need replacement, remove wires from terminals, press in on tab (arrow), twist socket slightly clockwise & pull from opening. Copyright 2009...
- Page 20 TCOs - Accessible from Front Bottom TCO Hood TCO Opens at 248°F Closes at 158°F Opens at 104°F The hood & bottom TCOs are accessible from the front after dropping the control panel. Bottom TCO is non-resettable. Copyright 2009...
-
Page 21: Interlock Assembly
Interlock Assembly Door Sensing Switch Monitor Switch Primary Interlock Switch • The switch housing is not adjustable. • It is fixed on the front frame with two screws. Copyright 2009... -
Page 22: Night Light
Night Light Night light bulb is accessible from the bottom of the cabinet by removing a single screw and dropping light cover. Copyright 2009... -
Page 23: Night Lights
Night Lights • After removing cover, unscrew bulb to replace. • Bulb is 40w, screw-in type. Copyright 2009... -
Page 24: Turntable Motor
Turntable Motor • Turntable operation can be turned off & on at control panel. • To access turntable motor, first drop the bottom panel by removing six screws. Copyright 2009... - Page 25 Turntable Motor Remove two wire harness from motor terminals. Copyright 2009...
- Page 26 Turntable Motor Remove single Phillips screw and twist motor slightly clockwise to release motor from tab on frame. NOTE: Motor is a 21vac motor. (See schematic) Copyright 2009...
- Page 27 Turntable Motor • Turntable coupler has a “D” shaped opening that slips over the turntable motor shaft. • There is also a locking tab on the side that keeps it from slipping off. • For ease of installation & removal, motor should be unsecured during process. Copyright 2009...
- Page 28 Stirrer Blade & Cover • Stirrer blade is air driven. • To access blade, first remove plastic pin by prying out. • Turn cover slightly clockwise to release tabs holding it to upper cavity. Copyright 2009...
- Page 29 Stirrer Blade & Cover • Blade rotates on a plastic pin on the underside of the cover. • Both blade and cover can be ordered separately. Copyright 2009...
- Page 30 Stirrer Blade Air Flow After passing by the magnetron, the air from the cooling fan flows upward through an opening in the upper frame, through a channel in the duct assembly and finally through holes in the backside of the oven cavity rotating the blade in a counter clockwise direction.
-
Page 31: Oven Removal
Oven Removal All components mentions from this point require removing oven from it’s installation on the wall. Copyright 2009... - Page 32 HV Capacitor & Diode • The High Voltage capacitor and diode are located on the right side rear of the cabinet. • They are separate components and can be replaced separately. Copyright 2009...
- Page 33 HV Capacitor & Diode • The diode can be disconnected by removing screw (arrow) & removing connector from capacitor terminal. • The capacitor can be released removing screw (arrow) and sliding out from under clamp. Copyright 2009...
- Page 34 Magnetron To replace magnetron, begin by removing two Phillips screws securing it to the metal frame. Copyright 2009...
- Page 35 Magnetron • Next, remove wires from the magnetron terminal and from the terminals of the magnetron TCO. • Finally, pull magnetron to the left to disengage tabs from slots in the metal frame. Copyright 2009...
-
Page 36: Magnetron Tco
Magnetron TCO Mag TCO Opens at 302°F Resets at 140°F The mag TCO is secured to the case of the magnetron with two small Phillips screws. Copyright 2009... -
Page 37: Wave Guide Cover
Wave Guide Cover • The wave guide cover is made of a heavy plastic material. • It’s held in place with three tabs on the front side & four compression pins (two on the rear side and one on the top & bottom). •... - Page 38 Wave Guide Cover • To remove, compress the four pins (arrows) with a pair of needle nose pliers. • Slide cover slightly towards the front to release tabs on front side. Copyright 2009...
- Page 39 Wave Guide Cover View of the back side of the wave guide cover. Copyright 2009...
-
Page 40: Duct Assembly
Duct Assembly • The plastic air duct assembly is mounted to the top of the chassis frame. • It provides for the passage of air from the cooling & vent fans. • The duct assembly needs to be removed to access the cavity TCO. •... - Page 41 Duct Assembly Next, remove the Phillips screws located to the right of the cavity lamp. Copyright 2009...
- Page 42 Duct Assembly • Remove final Phillips screw located on the duct’s right side, in front of the HV capacitor. • Lastly, lift duct up at the rear and pull towards the back to release the tabs securing it to the front frame. Copyright 2009...
-
Page 43: Cavity Tco
Cavity TCO Cavity TCO Opens at 212°F • The Cavity TCO is accessible after removing the duct assembly. • The Cavity TCO is non- resettable. • To remove, slide the TCO out from under the spring clips. Copyright 2009... - Page 44 HV Transformer To replace the high voltage transformer, begin by removing the primary wire connector (arrow) and the secondary wires from the mag & capacitor. Copyright 2009...
- Page 45 HV Transformer After dropping the cabinet bottom panel, remove the four large Phillips screws securing the transformer to the bottom frame. Copyright 2009...
-
Page 46: Magnetron Cooling Fan
Magnetron Cooling Fan • To access cooling fan motor & blade assembly: • First remove one screw securing front frame to support (circle). • Next remove three screws securing fan bracket to frame (circles). • Remove wire harness from fan motor. Copyright 2009... - Page 47 Magnetron Cooling Fan • Remove primary wires from HV transformer. • Slide fan motor / blade bracket from main fram. Copyright 2009...
- Page 48 Magnetron Cooling Fan Blade • Remove blade from shaft by pulling straight off. • Disengage motor from bracket by removing two Phillips screws. Copyright 2009...
-
Page 49: Vent Fan
Vent Fan Vent fan is accessible for redirection before installation by first removing a single screw on rear of cabinet. Copyright 2009... - Page 50 Vent Fan • Bend fan cover upward to access fan motor. • Remove second screw on rear cover to lift fan motor from cabinet. • See installation instruction for methods of directing exhaust air flow. Copyright 2009...
- Page 51 Vent Fan Plug Cover is removed here for better view, but vent fan electrical plug can be accessed with outer cover in place by lifting out fan motor and reaching in to disconnect or connect plug. Copyright 2009...
-
Page 52: Vent Fan Capacitor
Vent Fan Capacitor • Outer cover needs to be removed to replace vent fan capacitor. • It is held in place with a single Phillips screw. Copyright 2009... -
Page 53: Fault Codes
FAULT CODES FAULT DISPLAYED “KEYPAD SHORTED --- SERVICE MAY BE NEEDED” FAULT DETECTED Key pad shorted for > 60 seconds Any key pad shorted / closed for more than 60 seconds will generate this display along with a periodic 3 beep tone. All control pads are deactivated and unit is inoperative. - Page 54 Schematic Copyright 2009...
-
Page 55: Wiring Diagram
Wiring Diagram Copyright 2009... - Page 56 END OF PRESENTATION Copyright 2009...