Table of Contents
Advertisement
Quick Links
Advertisement
Table of Contents

Related Manuals for Bosch HGA120B20Z


Summary of Contents for Bosch HGA120B20Z
- Page 1 Free standing cooker HGA120B20Z User manual and installation instructions [en]...
-
Page 2: Table Of Contents
en Safety ATTENTION: Observe the applicable regula- Table of contents tions and only set up the appliance in well- ventilated rooms. Read through the instruc- tions before setting up and using the appli- USER MANUAL ance. Warning: The appliance is only used for cook- Safety .............. - Page 3 Safety en ▶ Connection, maintenance and setting of the been instructed on how to use the appliance gas governor must be carried out by an au- safely and have understood the resulting thorised installation specialist. dangers. Do not let children play with the appliance. WARNING ‒ Risk of suffocation! Children must not perform cleaning or user Using the gas cooking appliance leads to a...
-
Page 4: Safety
en Safety control and do not attempt to re-ignite the When the cooking compartment is hot, any al- burner for at least one minute. coholic vapours inside may catch fire. Opening the appliance door creates a ▶ Only use small quantities of drinks with a draught. - Page 5 Safety en ▶ Never let the power cord come into contact ▶ Keep children at a safe distance. with sharp points or edges. If there is water in the cooking compartment when it is hot, this may create hot steam. ▶ Never kink, crush or modify the power cord.
-
Page 6: Preventing Material Damage
en Preventing material damage ▶ Do not keep any flammable or combustible 1.5 Plinth drawer objects in the plinth drawer. WARNING ‒ Risk of fire! The surfaces of the plinth drawer may be- come very hot. ▶ Only store oven accessories in the drawer. 2 ... -
Page 7: Environmental Protection And Saving En- Ergy
Environmental protection and saving energy en No not use oven liners. Only use pots and pans with an even base. ▶ ▶ The burner may not ignite or the burner flame is not Do not heat up empty pots or pans. ▶... - Page 8 en Installation and connection Choose a burner roughly the same size as your pan. Use a glass lid. Centre the cookware on the hob. ¡ You can see into the pan through a glass lid without having to lift it. Tip: Cookware manufacturers often give the upper diameter of the saucepan.
-
Page 9: Installation And Connection
Installation and connection en ¡ All registered installers are issued with a card carry- ¡ For safety reasons, this appliance must only be con- ing their registration number. Ask to be shown the nected to an earthed connection. If the safety earth card before allowing the installation work to com- terminal does not comply with regulations, protec- mence and make a note of the installer registration... - Page 10 en Installation and connection ¡ In particular, the distance from the high-output Use an Allen key to raise or lower the adjustable burner or wok burner to the fronts of adjacent units feet until the cooker is level. or from the wall must be at least 50 mm. Setting the base height of the appliance Set the base height in accordance with the functions of your appliance.
-
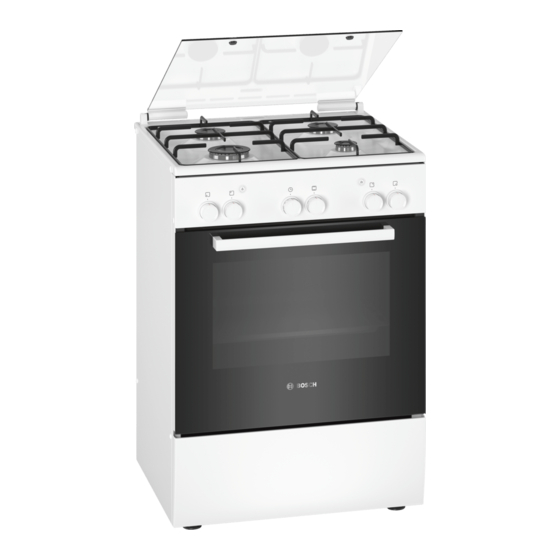
Page 11: Familiarising Yourself With Your Appliance
Familiarising yourself with your appliance en 5 Familiarising yourself with your appliance 5.1 Your appliance 5.2 Hob You can find an overview of the parts of your appliance You can view an overview of the hob here. here. Note: On certain models, specific details such as col- Note: On certain models, specific details such as col- our and shape may differ from those pictured. - Page 12 en Familiarising yourself with your appliance Control Explanation Control Explanation You can use the four hot- To switch on the elec- Hotplate control Ignition button plate switches to control tronic ignition system. the output provided by → "Ignition button", each individual hotplate. Page 12 The symbol above each Press the button to switch...
-
Page 13: Accessories
Accessories en Lighting 5.4 Cooking compartment The oven light lights up the cooking compartment. The functions in the cooking compartment make your To illuminate the cooking compartment, press the lamp appliance easier to use. button. Rails Steam outlet The rails in the cooking compartment enable you to The hot air from the cooking compartment escapes at place accessories at different heights. - Page 14 Slide the tray in with the sloping your appliance in our brochures and online: E.g. univer- edge facing the appliance door. www.bosch-home.com sal pan or Accessories vary from one appliance to another. When baking tray purchasing accessories, always quote the exact product number (E no.) of your appliance.
- Page 15 Cookware en 8 Cookware This information has been provided to help you save ¡ Position the cookware energy and avoid damaging your cookware. in the middle of the burner, otherwise it may tip over. 8.1 Using cookware ¡ Do not position large The selection and positioning of the cookware affects cookware on the burn- the safety and energy efficiency of your appliance.
-
Page 16: Operating The Hotplate
en Operating the hotplate 9 Operating the hotplate door or window in the room. Wait at least one You can find out everything you need to know about minute before igniting the burner again. operating your hotplate here. In the event of the burner flames being accidentally ▶... -
Page 17: Basic Operation
Basic operation en 9.5 Recommended cooking settings You can find an overview of different foods with appropriate heat settings here. Notes ¡ The cooking time will vary depending on the type, weight, thickness and quality of the food. ¡ Select the right cookware size for each hotplate. The diameter of the cookware base should be the same size as the hotplate. -
Page 18: Time-Setting Options
en Time-setting options The top cover must remain open while the appli- 10.2 Setting the oven gas grill ance is running. If the gas burner for the gas grill is lit, you can grill in Turn on the main gas supply to the appliance. Insert the oven. -
Page 19: Cleaning And Servicing
Cleaning and servicing en Suitable cleaning agents Only use cleaning agents that are suitable for the differ- Follow the instructions on cleaning the appliance. ent surfaces on your appliance. → "Cleaning the appliance", Page 20 Appliance Surface Suitable cleaning agents Information Stainless steel ¡... - Page 20 en Cleaning and servicing Area Suitable cleaning agents Information Rails ¡ Hot soapy water Soak any heavily soiled areas and use a brush or steel wool. Tip: Remove the shelf supports for cleaning. → "Rails", Page 21 Accessories ¡ Hot soapy water Soak any heavily soiled areas and use a brush or steel wool. ¡...
- Page 21 Rails en ¡ Do not use a glass ceramic cleaner. – Wring out the cloth well. The cloth must not be too wet. ¡ Do not remove the cooking zone switch. – Wash new sponge cloths thoroughly before use. Clean the cooking zone switch using hot soapy wa- Dry with a soft cloth.
- Page 22 en Appliance door Hook both rails into the side walls of the oven. If the rails are fitted correctly, the distance between the two upper shelf positions is greater. 14 Appliance door It is normally sufficient if you clean the outside of the When the locking levers are open in order to detach appliance door.
-
Page 23: Top Cover
Top cover en Close the oven door as far as the limit stop. Grip The notch on the hinge must engage on both sides. the left and right hand sides of the door with both hands. Close the door slightly more and remove it. Close both locking levers again. -
Page 24: Troubleshooting
en Troubleshooting The hinge with the letter R must be fitted on the right, 15.2 Installing the top cover and the hinge with the letter L must be fitted on the left. After cleaning, install the top cover following the ▶ same procedure in reverse order. Note: Only close the top cover once the hotplates have cooled down. -
Page 25: Transportation And Disposal
Transportation and disposal en Fault Cause and troubleshooting Burner goes out Openings on the burner are soiled. straight after being ig- Clean and dry the openings on the burner. ▶ nited. The burner flame is The burner parts are positioned incorrectly. not uniform. -
Page 26: Customer Service
en Customer Service Slide all accessories, such as baking trays, into the This appliance is labelled in accord- corresponding slots with thin cardboard at the ance with European Directive edges, in order to avoid damaging the appliance. 2012/19/EU concerning used elec- Place cardboard or similar between the front and trical and electronic appliances rear side to prevent knocks against the inside of the... -
Page 27: How It Works
How it works en the appliance door, the control panel or the front pan- Reference gases els of adjacent kitchen cabinets. The formation of con- Unsuitable gas mixtures may impair the cooking power densation is a normal physical phenomenon. level. In order to prevent damage, wipe away the condensa- Note: The appliance was manufactured in accordance tion. - Page 28 en How it works ¡ Depending on the size and type of the food to be 19.5 Roasting and grilling roasted, add up to 1/2 litre water to the universal The setting values are based on the assumption that pan. unstuffed, chilled, ready-to-roast poultry, meat or fish is You can make a sauce from the juices that are col- placed into a cold cooking compartment.
-
Page 29: Installation Instructions
Installation instructions en 19.7 Tips for keeping acrylamide levels to a Meal minimum when cooking General ¡ Keep cooking times as short as pos- informa- sible. Acrylamide is dangerous to your health and is pro- tion ¡ Cook food until it is golden brown, but duced in particular when you cook cereal and potato not too dark. - Page 30 en Installation instructions 20.4 Gas connection ATTENTION! Do not hold and move the appliance at the These instructions apply only if the appliance is in- gas pipe (collector). Damage to the gas pipe stalled in countries that are specified on the rating plate.
- Page 31 Installation instructions en Secure the connecting piece using a 24 mm span- If you are using a gas hose, observe the following: ner. Use a 24 mm spanner to place the threaded fit- ¡ Use a safety gas hose or a plastic gas hose with a ting of the gas pipe or safety gas hose on the con- diameter of 8 or 10 mm.
- Page 32 en Installation instructions After conversion Explanation ¡ Always test for leaks after converting the appliance Blind plugs (closure part) to a different gas type. You can find additional in- formation about this in the section entitled "Leak and function test" → Page 36. ¡...
- Page 33 Installation instructions en In order to gain access to the bypass nozzles, re- Remove the pan support grids or the pan support move the control panel. You can find additional in- racks and the burner parts. formation about this in the section entitled "Remov- ing the control panel"...
- Page 34 en Installation instructions Note: To ensure that no scratches are formed on Grip the panel with both hands and slowly pull it up- the matte glass plate, do not allow the underside of wards. Remove the panel from the fastening lugs. the hob to come into contact with objects. Then carefully pull the panel forwards to remove it.
- Page 35 Installation instructions en Check that the seals on the bypass nozzles are ¡ Disconnect the appliance from the mains. seated correctly and work properly. Only use by- Replacing the oven's lower gas burner nozzle pass nozzles with absolutely faultless seals. Open the appliance door. Undo the front screw on the appliance base plate.
- Page 36 en Installation instructions Undo the screw that holds the grill burner fastening Checking the cooker burner nozzles plate and the grill burner together, then carefully pull Check the leak tightness of each nozzle. the burner out towards the front. You should now be Open the gas connection shut-off.
- Page 37 Installation instructions en Checking the correct burner behaviour for the 20.7 Checking the correct burner behaviour lower oven gas burner Check the burning and soot formation of each burner Ignite the gas grill burner in the oven in accordance after the product has been converted to a different gas with the instructions in the operating instructions.
- Page 38 en Installation instructions G20/ G25.3 G30/G31 Gas pressure (kPa) 2.0/2.5 2.0 2.8– 3.0/3.7 Nozzle (mm) 0.97 0.97 0.91 0.94 0.94 0.65 0.58 0.62 Bypass nozzle (mm) 0.58 0.58 0.58 0.58 0.58 0.58 0.38 0.38 0.38 0.58 Max. input power (kW) 1.75 1.75 1.75 1.75...
- Page 39 Installation instructions en G20/G25 G25.3 G30 Min. input power (kW) Gas flow at 15 °C and 101.325 kPa m 0.2/0.233 0.233 0.233 0.228 Gas flow at 15 °C and 101.325 kPa g/h Use the bypass nozzle with the appropriate diameter that is included in the set.
- Page 40 Expert advice for your Bosch home appliances, help with problems or a repair from Bosch experts. Find out everything about the many ways Bosch can support you: www.bosch-home.com/service Contact data of all countries are listed in the attached service directory.