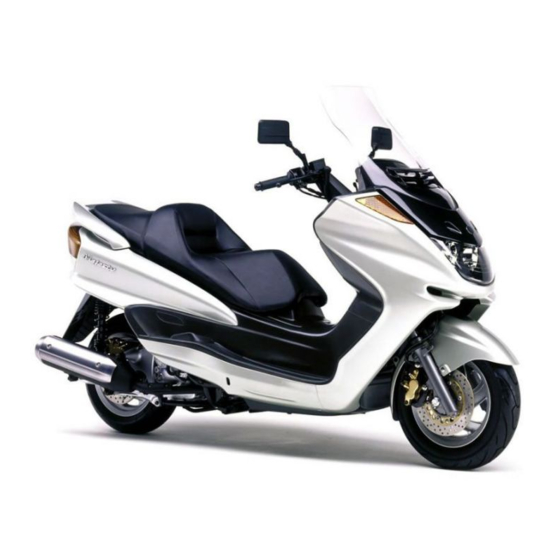
Yamaha Majesty YP250 Owner's Manual
Hide thumbs
Also See for Majesty YP250:
- Service manual (267 pages) ,
- Owner's manual (116 pages) ,
- Owner's manual (98 pages)
Table of Contents
Advertisement
Advertisement
Chapters
Table of Contents
Troubleshooting

Related Manuals for Yamaha Majesty YP250


Summary of Contents for Yamaha Majesty YP250
- Page 1 OWNER’S MANUAL YP250 5GM-28199-E1...
- Page 2 INTRODUCTION Welcome to the Yamaha world of motorcycling! As the owner of a YP250, you are benefiting from Yamaha’s vast experience and newest technology regarding the design and manufacture of high-quality products, which have earned Yamaha a reputa- tion for dependability.
- Page 3 8 This manual should be considered a permanent part of this scooter and should remain with it even if the scooter is subsequently sold. 8 Yamaha continually seeks advancements in product design and quality. Therefore, while this manual contains the most current product information available at the time of printing, there may be minor discrepancies between your scooter and this manual.
- Page 4 IMPORTANT MANUAL INFORMATION EW000002 PLEASE READ THIS MANUAL CAREFULLY AND COMPLETELY BEFORE OPERATING THIS SCOOTER.
- Page 5 EAU03337 YP250 OWNER’S MANUAL © 2000 by Yamaha Motor Co., Ltd. 1st Edition, August 2000 All rights reserved. Any reprinting or unauthorized use without the written permission of Yamaha Motor Co., Ltd. is expressly prohibited. Printed in Japan.
-
Page 6: Table Of Contents
EAU00009 TABLE OF CONTENTS 1 GIVE SAFETY THE RIGHT OF WAY 2 DESCRIPTION 3 INSTRUMENT AND CONTROL FUNCTIONS 4 PRE-OPERATION CHECKS 5 OPERATION AND IMPORTANT RIDING POINTS 6 PERIODIC MAINTENANCE AND MINOR REPAIR 7 SCOOTER CARE AND STORAGE 8 SPECIFICATIONS 9 CONSUMER INFORMATION INDEX... -
Page 8: Give Safety The Right Of Way
GIVE SAFETY THE RIGHT OF WAY GIVE SAFETY THE RIGHT OF WAY ..........1-1 Further safe-riding points..............1-2... - Page 9 EAU00021 GIVE SAFETY THE RIGHT OF WAY Scooter are fascinating vehicles, which can give you an unsurpassed feeling of power and freedom. However, they also impose certain limits, which you must accept; even the best scooter does not ignore the laws of physics. Regular care and maintenance are essential for preserving value and operating condition of your scooter.
- Page 10 Q GIVE SAFETY THE RIGHT OF WAY EAU03099 Further safe-riding points 8 Be sure to signal clearly when making turns. 8 Braking can be extremely difficult on a wet road. Avoid hard braking, because the scooter could slide. Apply the brakes slowly when stopping on a wet surface. 8 Slow down as you approach a corner or turn.
-
Page 12: Description
DESCRIPTION Left view .....................2-1 Right view ...................2-2 Controls and instruments..............2-3... - Page 13 EAU00026 DESCRIPTION Left view 1. Rear storage compartment (page 3-13) 5. V-belt case air filter element (page 6-21) 2. Grab bar (Page 5-2) 6. Centerstand (page 6-29) 3. Shock absorber spring preload 7. Sidestand (page 3-15, 6-29) adjusting ring (page 3-14) 8.
- Page 14 DESCRIPTION Right view 15, 14 9. Passenger seat 14. Battery (page 6-31) 10. Rider seat (page 3-11) 15. Fuse box (page 6-33) 11. Air flow louver (page 6-22) 16. Coolant reservoir cap (page 6-19) 12. Headlight (page 6-34) 17. Coolant level check window (page 6-19) 13.
- Page 15 DESCRIPTION Controls and instruments 1. Rear brake lever (page 3-8) 7. Fuel gauge (page 3-4) 2. Left handlebar switches (page 3-5) 8. Right handlebar switches (page 3-6) 3. Front storage compartment A (page 3-12) 9. Front brake lever (page 3-8) 4.
-
Page 16: Instrument And Control Functions
INSTRUMENT AND CONTROL FUNCTIONS Main switch/steering lock..............3-1 Indicator lights ..................3-2 Speedometer unit ................3-3 Self-diagnosis device .................3-3 Anti-theft alarm (optional) ..............3-4 Fuel gauge..................3-4 Coolant temperature gauge..............3-4 Clock....................3-5 Handlebar switches ................3-5 Front brake lever ................3-8 Rear brake lever .................3-8 Fuel tank cap ..................3-9 Fuel....................3-10 Catalytic converter................3-10 Rider seat ..................3-11... -
Page 17: Main Switch/Steering Lock
EAU00027 INSTRUMENT AND CONTROL FUNCTIONS EAU00040 EAU03733 LOCK (Parking) The steering is locked, and all electri- The steering is locked, and the tail- cal systems are off. The key can be light, license light and auxiliary light OPEN removed. are on, but all other electrical sys- PUSH tems are off. -
Page 18: Indicator Lights
If the indicator light does not The corresponding indicator light 1. Oil change indicator light “ ” come on, have a Yamaha dealer 2. High beam indicator light “&” flashes when the turn signal switch is check the electrical circuit. -
Page 19: Speedometer Unit
If the indicator light flashes or comes on, have a Yamaha dealer check the 1. Speedometer 2. Odometer/tripmeter motorcycle as soon as possible. 3. “TRIP” button... -
Page 20: Anti-Theft Alarm (Optional)
INSTRUMENT AND CONTROL FUNCTIONS EAU00109 Anti-theft alarm (optional) This scooter can be equipped with an optional anti-theft alarm by a Yamaha dealer. Contact a Yamaha dealer for more information. 1. Fuel gauge 1. Coolant temperature gauge 2. Red mark EAU00110... -
Page 21: Clock
INSTRUMENT AND CONTROL FUNCTIONS NOTE: To set the clock after the power source has been cut, first set the time to 1:00 AM, and then set the clock to the correct time. 1. Digital clock 1. Pass switch “&” 2. Hour setting button “h” 2. - Page 22 INSTRUMENT AND CONTROL FUNCTIONS EAU00127 Turn signal switch To signal a right-hand turn, push this switch to “6”. To signal a left-hand turn, push this switch to “4”. When released, the switch returns to the center position. To cancel the turn signal lights, push the switch in after it has returned to the center position.
- Page 23 INSTRUMENT AND CONTROL FUNCTIONS EAU00136 Headlight variations 3 : High beam light on 2 : Low beam light on 1 : Light off : Auxiliary light on Bulb to be used Left Right Destination Germany, Belgium, Switzerland, Spain Halogen France, Greece, Italy, Netherlands, 60/55W bulb &...
-
Page 24: Front Brake Lever
INSTRUMENT AND CONTROL FUNCTIONS 1. Engine stop switch 1. Front brake lever 1. Rear brake lever 2. Light switch EAU03378 EAU00163 3. Start switch “,” Front brake lever Rear brake lever EAU00138 The front brake lever is located at the The rear brake lever is located on the Engine stop switch right handlebar grip. -
Page 25: Fuel Tank Cap
INSTRUMENT AND CONTROL FUNCTIONS 1. Lid 1. Fuel tank cap 1. Match marks 2. Lever 2. Insert the key into the lock and To install the fuel tank cap EAU03090 Fuel tank cap turn it clockwise. The lock will be 1. -
Page 26: Fuel
INSTRUMENT AND CONTROL FUNCTIONS EAU00185 EAU03098 Catalytic converter This scooter is equipped with a cat- Immediately wipe off spilled fuel alytic converter in the muffler. with a clean, dry, soft cloth, since fuel may deteriorate painted sur- EW000128 faces or plastic parts. The exhaust system is hot after EAU03626 operation. -
Page 27: Rider Seat
INSTRUMENT AND CONTROL FUNCTIONS EC000114 The following precautions must be observed to prevent a fire hazard OPEN or other damages. PUSH 8 Use only unleaded gasoline. LOCK The use of leaded gasoline will PUSH cause unrepairable damage to the catalytic converter. a. -
Page 28: Adjusting The Rider Seat
INSTRUMENT AND CONTROL FUNCTIONS Compartment A 1. Rider seat 1. Bolt (×4) 1. Button 2. Collar (×4) 2. Lid EAU03096 a. Lock. 2. Remove the bolts and collars. Adjusting the rider seat EAU03331 3. Slide the rider seat forward or Storage compartments The rider seat can be adjusted as fol- backward to the desired position. - Page 29 INSTRUMENT AND CONTROL FUNCTIONS ECA00051 Compartment B Do not leave the rider seat open for an extended period of time as the storage compartment light may cause the battery to discharge. EWA00035 1. Lever 1. Rider seat Do not exceed the loading limits: 2.
-
Page 30: Adjusting The Shock Absorber Assemblies
INSTRUMENT AND CONTROL FUNCTIONS EAU03625 NOTE: Adjusting the shock 8 Align the appropriate notch in the absorber assemblies adjusting ring with the position Each shock absorber assembly is indicator on the shock absorber. equipped with spring preload 8 Use the spring preload adjusting adjusting ring. -
Page 31: Sidestand
Periodically check the operation of regularly as described below and the ignition circuit cut-off system have a Yamaha dealer repair it if it NOTE: according to the following procedure. does not function properly. The built-in sidestand switch is part of... - Page 32 Does the engine start? The sidestand switch may be defective. The scooter should not be ridden until checked by a Yamaha dealer. With the engine still off: 6. Move the sidestand up. 7. Keep the front or rear brake applied.
-
Page 34: Pre-Operation Checks
PRE-OPERATION CHECKS Pre-operation check list ..............4-1... - Page 35 • If necessary, add recommended coolant to specified level. 3-4, 6-18–6-20 • Check cooling system for leakage. • Check operation. • If soft or spongy, have Yamaha dealer bleed hydraulic system. • Check lever free play. Front brake • Adjust if necessary.
- Page 36 PRE-OPERATION CHECKS ITEM CHECKS PAGE • Check operation. • If soft or spongy, have Yamaha dealer bleed hydraulic system. Rear brake • Check fluid level in reservoir. 3-8, 6-25–6-28 • If necessary, add recommended brake fluid to specified level. • Check hydraulic system for leakage.
- Page 37 PRE-OPERATION CHECKS NOTE: Pre-operation checks should be made each time the scooter is used. Such an inspection can be accomplished in a very short time; and the added safety it assures is more than worth the time involved. EWA00033 If any item in the Pre-operation check list is not working properly, have it inspected and repaired before operat- ing the scooter.
-
Page 38: Operation And Important Riding Points
OPERATION AND IMPORTANT RIDING POINTS Starting the engine ................5-1 Starting off ..................5-2 Acceleration and deceleration ............5-3 Braking ....................5-3 Tips for reducing fuel consumption.............5-4 Engine break-in ..................5-4 Parking ....................5-5... -
Page 39: Starting The Engine
See page 5-4 for engine break-in their functions before riding. instructions prior to operating the Consult Yamaha dealer vehicle for the first time. regarding any control or func- tion that you do not thorough- In order for the ignition circuit cut-off ly understand. -
Page 40: Starting Off
OPERATION AND IMPORTANT RIDING POINTS 4. Check for oncoming traffic, and NOTE: then slowly turn the throttle grip If the engine does not start, release (on the right) in order to take off. the start switch, wait a few seconds, 5. -
Page 41: Acceleration And Deceleration
OPERATION AND IMPORTANT RIDING POINTS EW000057 8 Avoid braking hard or sudden- ly (especially when leaning over to one side), otherwise the scooter may skid or over- turn. 8 Railroad crossings, streetcar rails, iron plates on road con- struction sites, and manhole EAU00434 EAU00435 covers become extremely slip-... -
Page 42: Tips For Reducing Fuel Consumption
1,600 km and beyond ings). ing must be avoided. Proceed with normal riding. EC000049 If any engine trouble should occur during the engine break-in period, immediately have a Yamaha dealer check the vehicle. -
Page 43: Parking
OPERATION AND IMPORTANT RIDING POINTS EAU00461 Parking When parking, stop the engine, and then remove the key from the main switch. EW000058 8 Since the engine and exhaust system can become very hot, park in a place where pedestri- ans or children are not likely to touch them. - Page 44 PERIODIC MAINTENANCE AND MINOR REPAIR Owner’s tool kit ............6-1 Battery..............6-31 Periodic maintenance and lubrication chart ....6-3 Replacing the fuses ..........6-33 Removing and installing cowlings and panel ..6-6 Replacing a headlight bulb........6-34 Checking the spark plug ........6-12 Replacing a front turn signal light bulb....6-35 Engine oil ..............6-14 Replacing a rear turn signal light bulb....6-36 Final gear oil ............6-17...
-
Page 45: Owner's Tool Kit
However, DEPENDING replaced more frequently, other- WEATHER, TERRAIN, wise rapid engine wear may result. GEOGRAPHICAL LOCATION, AND Consult a Yamaha dealer for prop- INDIVIDUAL USE, THE MAINTE- er maintenance intervals. NANCE INTERVALS MAY NEED TO BE SHORTENED. - Page 46 PERIODIC MAINTENANCE AND MINOR REPAIR NOTE: If you do not have the tools or experi- ence required for a particular job, have a Yamaha dealer perform it for you. EW000063 Modifications not approved by 1. Mat Yamaha may cause loss of perfor- 2.
-
Page 47: Periodic Maintenance And Lubrication Chart
8 The annual checks must be performed every year, except if a kilometer-based maintenance is performed instead. 8 From 50,000 km, repeat the maintenance intervals starting from 10,000 km. 8 Items marked with an asterisk should be performed by a Yamaha dealer as they require special tools, data and technical skills. - Page 48 PERIODIC MAINTENANCE AND MINOR REPAIR ODOMETER READING (×1,000 km) ANNUAL ITEM CHECK OR MAINTENANCE JOB CHECK √ √ √ √ Wheels • Check runout and for damage. • Check tread depth and for damage. • Replace if necessary. √ √ √...
- Page 49 PERIODIC MAINTENANCE AND MINOR REPAIR ODOMETER READING (×1,000 km) ANNUAL ITEM CHECK OR MAINTENANCE JOB CHECK √ √ √ • Check vehicle for oil leakage. Final gear oil √ √ √ • Change. √ √ V-belt • Replace. Front and rear brake √...
-
Page 50: Removing And Installing Cowlings And Panel
PERIODIC MAINTENANCE AND MINOR REPAIR 1. Cowling A 1. Cowling B 1. Cowling C EAU03624 Removing and installing cowlings and panel The cowlings and panel shown above need to be removed to perform some of the maintenance jobs described in this chapter. - Page 51 PERIODIC MAINTENANCE AND MINOR REPAIR 1. Panel A 1. Mat A 1. Screw (×4) 2. Mat B 2. Cowling A EAU03615 2. Remove the screws. Cowling A To remove the cowling 1. Pull up the left floorboard mats as shown.
- Page 52 PERIODIC MAINTENANCE AND MINOR REPAIR 1. Tab (×10) 1. Mat A 2. Mat B 3. Pull the cowling down slightly, To install the cowling EAU03632 and then pull it outward as 1. Insert the tabs on the cowling Cowling B shown.
- Page 53 PERIODIC MAINTENANCE AND MINOR REPAIR 1. Screw (×4) 1. Tab (×10) 2. Cowling B 3. Pull the cowling down slightly, To install the cowling 2. Remove the screws. and then pull it outward as 1. Insert the tabs on the cowling shown.
- Page 54 PERIODIC MAINTENANCE AND MINOR REPAIR 1. Screw (×2) a. Push. EAU03617 2. Push the cowling in lightly, and Cowling C then pull it back as shown. To remove the cowling ECA00067 1. Remove the screws. Take care not to damage the tabs on the cowling when removing and or installing it.
- Page 55 PERIODIC MAINTENANCE AND MINOR REPAIR 1. Tab (×4) 1. Bolt (×2) 2. Slot (×4) 2. Panel A To install the cowling EAU03628 Panel A 1. Insert the tabs on the cowling To remove the panel into the slots as shown, and then Remove the bolts, and then pull the push the cowling in until it snaps panel out as shown.
-
Page 56: Checking The Spark Plug
PERIODIC MAINTENANCE AND MINOR REPAIR EAU03620 Checking the spark plug The spark plug is an important engine component, which is easy to check. Since heat and deposits will cause any spark plug to slowly erode, the spark plug should be removed and checked in accordance with the periodic maintenance and lubrication chart. - Page 57 Instead, shown, with the spark plug 1. Measure the spark plug gap with have a Yamaha dealer check the wrench included in the owner’s a wire thickness gauge and, if scooter. tool kit. necessary, adjust the gap to specification.
-
Page 58: Engine Oil
PERIODIC MAINTENANCE AND MINOR REPAIR EAU03119 To check the engine oil level Tightening torque: Engine oil 1. Place the scooter on the center- Spark plug: The engine oil level should be stand. 17.5 Nm (1.75 m0kg) checked before each ride. In addition, the oil must be changed at the inter- NOTE: NOTE:... - Page 59 PERIODIC MAINTENANCE AND MINOR REPAIR 4. If the engine oil is below the min- imum level mark, add sufficient oil of the recommended type to raise it to the correct level. 5. Insert the dipstick into the oil filler hole, and then tighten the oil filler cap.
- Page 60 PERIODIC MAINTENANCE AND MINOR REPAIR 6. Add the specified amount of the 7. Start the engine, and then let it recommended engine oil, and idle for several minutes while then install and tighten the oil checking it for oil leakage. If oil is filler cap.
-
Page 61: Final Gear Oil
Yamaha dealer check and repair the cator light must be reset after the oil scooter. In addition, the final gear oil change for the next periodic oil must be changed as follows at the... -
Page 62: Coolant
PERIODIC MAINTENANCE AND MINOR REPAIR EAU01587 Coolant The coolant reservoir is located under the battery cover. (See page 6-31 for battery cover removal proce- dures.) To check the coolant level 1. Place the scooter on a level sur- face and hold it in an upright 1. - Page 63 8 If water has been added to the Coolant reservoir capacity: coolant, have a Yamaha dealer 0.4 L check the antifreeze content of the coolant as soon as possi- 4. Install the battery cover.
-
Page 64: Air Filter And V-Belt Case Air Filter Elements
PERIODIC MAINTENANCE AND MINOR REPAIR EAU03627 NOTE: Air filter and V-belt case air The radiator fan is automatically filter elements switched on or off according to the The air filter and V-belt case air filter coolant temperature in the radiator. If elements should be cleaned at the the engine overheats, see page 6-40 intervals specified in the periodic... - Page 65 PERIODIC MAINTENANCE AND MINOR REPAIR NOTE: The sponge material should be wet but not dripping. Recommended oil: Engine oil 7. Insert the sponge material into the air filter case. 1. V-belt case air filter cover 8. Install the air filter case cover by 2.
-
Page 66: Air Flow Louver
PERIODIC MAINTENANCE AND MINOR REPAIR ECA00049 Be sure to close the louver when riding in the rain and when wash- ing the scooter. 1. V-belt case air filter cover 1. Air flow louver 2. V-belt case air filter element 2. Air inlet 3. -
Page 67: Tires
PERIODIC MAINTENANCE AND MINOR REPAIR EW000082 EW000077 8 The tire air pressure must be Because loading has an enormous checked and adjusted on cold impact on the handling, braking, tires (i.e., when the tempera- performance and safety character- ture of the tires equals the istics of your scooter, you should ambient temperature). - Page 68 The tire tread depth limits may differ from country to country. Always com- ply with the local regulations. EW000079 8 Have a Yamaha dealer replace excessively worn tires. 1. Side wall Besides being illegal, operat- a.
-
Page 69: Wheels
Size Type damage found, have 1. Locknut INOUE 130/70-12 62L MB67 2. Adjusting bolt Yamaha dealer replace MICHELIN 130/70-12 62L BOPPER c. Brake lever free play wheel. Do not attempt even the EAU00703 Adjusting the front and rear smallest repair to the wheel. A... -
Page 70: Checking The Front And Rear Brake Pads
Checking the front and rear that the wear indicator groove has 1. Loosen the locknut at the brake brake pads almost disappeared, have a Yamaha lever. The front and rear brake pads must dealer replace the brake pads as a 2. -
Page 71: Checking The Brake Fluid Level
Yamaha dealer brake pads and/or brake system check the cause. leakage. If the brake level is low, be Recommended brake fluid:... -
Page 72: Changing The Brake Fluid
EAU02962 Changing the brake fluid Checking and lubricating the cables Have a Yamaha dealer change the brake fluid at the intervals specified in The operation of all control cables the periodic maintenance and lubrica- and the condition of the cables tion chart. -
Page 73: Checking And Lubricating The Centerstand And Sidestand
Check the inner tubes for scratches, to-metal contact surfaces should be damage and excessive oil leakage. lubricated if necessary. EW000114 If the centerstand or sidestand does not move up and down smoothly, have a Yamaha dealer check or repair it. 6-29... -
Page 74: Checking The Steering
EC000098 If any damage is found or the front fork does not operate smoothly, have a Yamaha dealer check or repair it. 6-30... -
Page 75: Checking The Wheel Bearings
If there is play in the wheel hub or if the wheel does not turn smoothly, have a Yamaha dealer check the wheel bearings. 1. Right footboard mat 1. Battery 2. - Page 76 If you do not have hydrogen gas. Therefore, keep access to a sealed-type (MF) sparks, flames, cigarettes, battery charger, have etc., away from the battery and Yamaha dealer charge your provide sufficient ventilation battery. when charging it in an en- closed space. 6-32...
-
Page 77: Replacing The Fuses
PERIODIC MAINTENANCE AND MINOR REPAIR 2. Remove the blown fuse, and 4. If the fuse immediately blows again, have a Yamaha dealer then install a new fuse of the check the electrical system. specified amperage. Specified fuses: Main fuse: 30 A... -
Page 78: Replacing A Headlight Bulb
PERIODIC MAINTENANCE AND MINOR REPAIR EAU03630 Replacing a headlight bulb This scooter is equipped with quartz bulb headlights. If a headlight bulb burns out, replace it as follows. 1. Place the scooter on the center- stand. 2. Remove panel A. (See page 6-11 for panel removal and 1. -
Page 79: Replacing A Front Turn Signal Light Bulb
6. Install the bulb cover, and then connect the headlight coupler. 7. Install the panel. 8. Have a Yamaha dealer adjust the headlight beam if necessary. 6-35... -
Page 80: Replacing A Rear Turn Signal Light Bulb
PERIODIC MAINTENANCE AND MINOR REPAIR EAU03618 Replacing a rear turn signal light bulb 1. Place the scooter on the center- stand. 2. Remove cowling C. (See page 6-10 for cowling removal and installation procedures.) 1. Socket 1. Socket 3. Remove the socket (together 3. -
Page 81: Replacing A Tail/Brake Light Bulb
PERIODIC MAINTENANCE AND MINOR REPAIR EAU03619 EAU03621 Replacing a tail/brake light Replacing the license plate bulb light bulb 1. Place the scooter on the center- 1. Place the scooter on the center- stand. stand. 2. Remove cowling C. (See page 2. -
Page 82: Troubleshooting
Do not overtighten the screws, Use only genuine Yamaha replace- otherwise the lens may break. ment parts. Imitation parts may look like Yamaha parts, but they are often 7. Install the cowling. inferior, have a shorter service life and can lead to expensive repair bills. -
Page 83: Troubleshooting Charts
Remove the spark plug and check the electrodes. The engine does not start. Have a Yamaha dealer check the vehicle. Check the battery. 4. Battery The engine turns over The battery is good. - Page 84 Start the engine. If the engine overheats again, have a The coolant level Yamaha dealer check and repair the cooling system. is OK. NOTE: If coolant is not available, tap water can be temporarily used instead, provided that it is changed to the recommended coolant as soon as possible.
-
Page 86: Scooter Care And Storage
SCOOTER CARE AND STORAGE Care....................7-1 Storage ....................7-4... - Page 87 EAU03434 SCOOTER CARE AND STORAGE Before cleaning Cleaning Care 1. Cover the muffler outlet with a ECA00011 While the open design of a scooter plastic bag after the engine has reveals the attractiveness of the tech- 8 Avoid using strong acidic cooled down.
- Page 88 SCOOTER CARE AND STORAGE 8 Do not use any harsh chemical 8 For scooters equipped with a After riding in the rain, near the sea products on plastic parts. Be windshield: Do not use strong or on salt-sprayed roads sure to avoid using cloths or cleaners or hard sponges as Since sea salt or salt sprayed on the sponges which have been in...
- Page 89 NOTE: detergent. ing chrome- and nickel-plated, Consult a Yamaha dealer for advice 8 Before operating the scooter surfaces. on what products to use. 4. Use spray oil as a universal test its braking performance and cornering behavior.
- Page 90 SCOOTER CARE AND STORAGE Long-term a. Remove the spark plug cap and Storage Before storing your scooter for sever- spark plug. Short-term al months: b. Pour a teaspoonful of engine oil Always store your scooter in a cool, 1. Follow all the instructions in the into the spark plug bore.
- Page 91 SCOOTER CARE AND STORAGE 5. Lubricate all control cables and 8. Remove the battery and fully the pivoting points of all levers charge it. Store it in a cool, dry and pedals as well as of the place and charge it once a sidestand/centerstand.
-
Page 92: Specifications
SPECIFICATIONS Specifications ..................8-1 Conversion table.................8-5... - Page 93 EAU01038 SPECIFICATIONS Specifications Engine oil Model YP250 Type –20° –10° 0° 10° 20° 30° 40° 50°C Dimensions Overall length 2,140 mm SAE 10W/30 Overall width 780 mm SAE 10W/40 Overall height 1,350 mm SAE 15W/40 Seat height 730 mm SAE 20W/40 Wheelbase 1,535 mm SAE 20W/50...
- Page 94 SPECIFICATIONS Final gear case oil Chassis Type Engine oil SAE 10W-30 Frame type Steel tube underbone (API SE) Caster angle 28° Total amount 0.25 L Trail 103 mm Radiator capacity Tires (including all routes) 1.4 L Front Air filter Wet type element Type Tubeless Fuel...
- Page 95 SPECIFICATIONS Wheels Spring/shock absorbers Front Front Coil spring/oil damper Type Cast wheel Rear Coil spring/oil damper 12 × MT2.75 Size Wheel travel Rear Front 100 mm Type Cast wheel Rear 90 mm 12 × MT3.50 Size Electrical Brakes Ignition system Transistorized coil ignition (digital) Front...
- Page 96 SPECIFICATIONS 12 V, 5 W × 1 Auxiliary light 12 V, 5 W × 1 License plate light 12 V, 1.7 W × 3 Meter lighting 12 V, 1.7 W × 1 High beam indicator light 12 V, 3.4 W × 2 Turn indicator light 12 V, 1.7 W ×...
- Page 97 SPECIFICATIONS EAU01064 Conversion table CONVERSION TABLE All specification data in this manual are listed in SI and METRIC TO IMPERIAL METRIC UNITS. Metric unit Multiplier Imperial unit Use this table to convert METRIC unit data to m • kg 7.233 ft •...
-
Page 98: Consumer Information
CONSUMER INFORMATION Identification numbers ................9-1 Key identification number ..............9-1 Vehicle identification number..............9-1 Model label ..................9-2... - Page 99 Record the key identification number, vehicle identification number and model label information in the spaces provided below for assistance when ordering spare parts from a Yamaha dealer or for reference in case the vehicle is stolen. 1. KEY IDENTIFICATION 1. Key identification number 1.
- Page 100 (See page 3-13 for rear stor- age compartment opening and clos- procedures.) Record information on this label in the space provided. This information will be needed when ordering spare parts from a Yamaha dealer.
- Page 101 INDEX Key identification number ......9-1 Acceleration and deceleration ....5-3 Final gear oil..........6-17 Air filter and V-belt case air filter Front and rear brake lever free play, elements, cleaning ......6-20 adjusting ..........6-25 License plate light bulb, replacing ..6-37 Air flow louver........6-22 Front and rear brake pads, checking..6-26 Anti-theft alarm (optional) ......3-4 Front fork, checking.......6-29...
- Page 102 INDEX Storage compartments ......3-12 Tail/brake light bulb, replacing....6-37 Tires ............6-23 Tool kit.............6-1 Troubleshooting........6-38 Troubleshooting charts......6-39 Turn signal light bulb (front), replacing ..6-35 Turn signal light bulb (rear), replacing...6-36 Vehicle identification number ....9-1 Wheel bearings, checking .....6-31 Wheels ..........6-25...
- Page 106 YAMAHA MOTOR CO., LTD. PRINTED ON RECYCLED PAPER PRINTED IN JAPAN 2000·9–0.2×1(E)