Table of Contents
Advertisement
Quick Links
1 Copyright ............................................................................. 1
2 Getting Started ..................................................................... 3
Your Phone at a Glance ..................................................... 3
Keys and Functions ........................................................... 4
Inserting the USIM Card and the Battery ........................... 6
Inserting the MicroSD Card ............................................... 7
Charging the Battery ......................................................... 7
Status Icons ...................................................................... 8
3 Text Entry ........................................................................... 11
Entering Spanish ............................................................. 11
Entering English .............................................................. 11
Smart English Input Method .................................................. 11
Traditional English Input Method ........................................... 11
Entering a Digit ............................................................... 12
4 Contacts ............................................................................ 13
Adding a Contact ............................................................ 13
Searching for a Contact ................................................... 13
5 Voice Services ..................................................................... 14
Making a Call .................................................................. 14
Dialing via Keypad ................................................................ 14
Dialing via Contacts .............................................................. 14
Dialing via Call Log ............................................................... 14
Answering a Call ............................................................. 14
6 Direct Connect (DC) and DC Group ..................................... 16
Making a DC Call ............................................................ 16
Advertisement
Table of Contents

Related Manuals for Huawei U5200


Summary of Contents for Huawei U5200
-
Page 1: Table Of Contents
1 Copyright ................1 2 Getting Started ..............3 Your Phone at a Glance ............. 3 Keys and Functions ............4 Inserting the USIM Card and the Battery ......6 Inserting the MicroSD Card ..........7 Charging the Battery ............7 Status Icons .............. - Page 2 Dialing a DC Number ............16 Last call notification .............. 17 Making a DC call from Contacts ..........17 Making a DC call from the Call Log ........17 Alert ................17 Sending a Alert ..............18 DC Group ............... 18 Creating a DC Group ............
- Page 3 Starting the Music Player ............27 Adding a Playlist ..............28 Playing music ................ 28 Playing a Video ............... 28 Picture Viewer ..............29 FM Radio ................ 29 Switching on the FM Radio ........... 29 Switching off the FM Radio ........... 30 Recorder .................
-
Page 5: Copyright
Copyright Copyright © Huawei Technologies Co., Ltd. 2011. All rights reserved. No part of this document may be reproduced or transmitted in any form or by any means without prior written consent of Huawei Technologies Co., Ltd. The product described in this manual may include copyrighted software of Huawei Technologies Co., Ltd and possible licensors. - Page 6 Huawei Technologies Co., Ltd reserves the right to change or modify any information or specifications contained in this manual without prior notice or obligation. Import and Export Regulations Customers shall comply with all applicable export or import laws and regulations and will obtain all necessary governmental...
-
Page 7: Getting Started
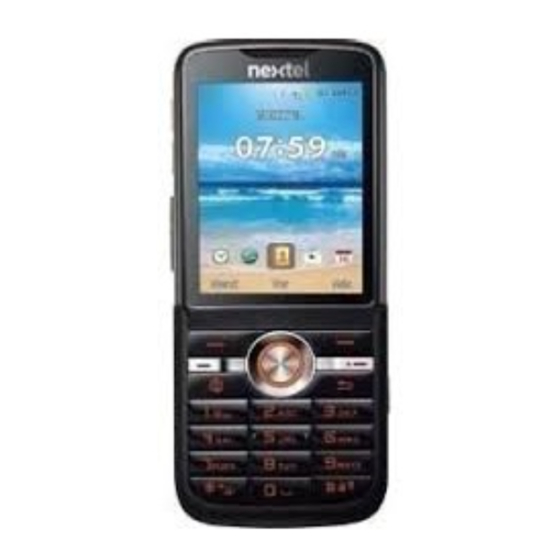
Getting Started Your Phone at a Glance For optimal voice or Direct Connect calls and FM radio performance, please use the headset that was included with your phone. Earpiece Screen Confirm key Right soft key End/Power key Clear/back key... -
Page 8: Keys And Functions
Camera button Microphone Number key Network Talk/Send key Left soft key Navigation keys Torch Headset jack Volume Control button DC button Charger Interface/Data Cable Connector Speaker Camera Keys and Functions Send key Make or answer a call. Access call logs in standby mode. ... - Page 9 Clear/back Delete a character in editing mode or delete a selected item in an application. Return to the upper-level menu. * key Switch between the general volume mode and the Vibration mode by pressing and holding the key. # key Switch between text input methods when editing text.
-
Page 10: Inserting The Usim Card And The Battery
Inserting the USIM Card and the Battery... -
Page 11: Inserting The Microsd Card
Inserting the MicroSD Card Charging the Battery Before charging the battery with the charger, ensure that the battery is installed in your phone. Do not use a damaged battery or charger. 1. Connect the charger to a power outlet. 2. Connect the charger to the charger connector of the phone. The phone begins charging. -
Page 12: Status Icons
Status Icons Signal strength Roaming 2G network 3G network available available Receiving and Receiving and sending data on a sending data on a 3G 2G network network Call in progress Missed call Call forward Video call Music player No memory for playing in the messages background... - Page 13 Ring and vibration Ringing mode mode activated activated MicroSD card Silence mode inserted activated Speaker on Speaker off GPS turned on Headset connected DC Group call in DC service not progress available DC call roaming DC call in progress Number type (PTT Number type (PTT 2) Missed DC call Incoming DC call...
- Page 14 Originator in a DC To add a member to Group call an ongoing call...
-
Page 15: Text Entry
Text Entry Entering Spanish You can enter Spanish words using Spanish text input methods. The traditional Spanish input method and the smart Spanish input method are similar to the traditional English input method and the smart English input method. For details, see "Entering English". -
Page 16: Entering A Digit
the desired letter once to enter the first letter on the key, twice to enter the second letter on the key, and so on. Press 1 key to enter a full stop or another commonly used punctuation. Press 0 key once to enter a space, twice to enter a carriage return, and three times to enter 0. -
Page 17: Contacts
Contacts Adding a Contact 1. Select Menu > Contacts > Create new, you can choose Create contact or Create DC Group. 2. On the Edit screen, enter the information about the contact. For each contact, at least one number needs to be entered. 3. -
Page 18: Voice Services
Voice Services Making a Call Dialing via Keypad 1. In standby mode, enter the phone number. To make an international call, press * key twice consecutively to enter the international long-distance code (+), and then enter the country code or region code, area code, and phone number in sequence. - Page 19 If the Any Key answer function is enabled, you can press any key except End key, Clear/back key and Right soft key to answer an incoming call. If the Headset auto-answer function is enabled, when the headset is connected to the phone, the incoming call is answered automatically.
-
Page 20: Direct Connect (Dc) And Dc Group
Direct Connect (DC) and DC Group With DC, you can instantly talk to another DC user or group of users with the push of a button. You can select Menu > Settings > Call > DC settings set the DC button and DC-related functions. Making a DC Call You can make a DC call using one of the following methods: Dialing a DC Number... -
Page 21: Last Call Notification
When no party is speaking during an active call, the phone displays Open and any party can push and hold the DC button to talk when the phone displays Speak, when you are speaking do not release the DC button until you finish speaking. -
Page 22: Sending A Alert
receives an Alert, the phone of the other party receives an Alert tone and displays your name or DC number on their screen. Sending a Alert 1. In standby mode, select Contacts or Call log > DC calls. Then select a contact or a DC number. 2. -
Page 23: Adding Members To A Dc Call
DC Group calls with iDEN users are not possible. 1. Select a group from Contacts or Call log, or select multiple contacts from the contact list to create a temporary DC Group. You can also enter the DC numbers to create a DC Group. 2. -
Page 24: Sending An Interrupt Request
Sending an Interrupt Request During a DC call or a DC Group call, when another party is speaking, you can do the following to make a speak request: Press the left soft key to select Options > Request to speak. Then the speaker's phone displays xxxx Request to speak. - Page 25 display "Push DC button to call xxxxxxxx." Then you can do the following: Press the right soft key to select Cancel. Then press the Send key to return to the voice call screen. Press the left soft key to select Alert. An alert will be sent to the other party.
-
Page 26: Other Operations
Push and hold the DC button to make a DC call to the group call initiator. Receiving an Invitation During a Voice Call When you receive a DC Group invitation during a voice call, the phone displays "Incoming invitation." At this moment, press the right soft key to select Ignore and continue with the voice call;... - Page 27 Add Member to ongoing call Select one of the following to allow a member to add a contact to a Direct Connect or DC Group Call you initiated. Allow call to continue. End call for everyone. Save unknown number Select whether you want your phone to prompt you to save Direct Connect callers to your Contact list if you do not have them previously stored.
-
Page 28: Messaging
Messaging SMS & MMS Writing and Sending a Text Message 1. Select Menu > Messages > Create message. 2. Enter one or more recipient's numbers directly, or press Confirm key to access the contact list and then select one or multiple recipients. -
Page 29: Creating And Sending An Email
1. Select Menu > Email, and then select OK to start creating an email account. 2. In the email server list, select the desired server. 3. On the Setup wizard screens, enter the information of your email account. 4. Select Done. The email account is created and the account name is displayed in the Email menu. - Page 30 contents by pressing Confirm key to open the email and press Confirm key to download the contents. To change the download mode, select an email account, and then select Account settings > Download settings.
-
Page 31: Media Applications
Media Applications Camera Taking a Photo 1. Select Menu > Camera or press the camera button to enter the camera interface. 2. In the viewfinder screen, select Options for the camera settings. 3. Focus the camera on the scene. Press Confirm key or Camera button to take a photo. -
Page 32: Adding A Playlist
Adding a Playlist 1. Select Menu > Multimedia > Music player. 2. Select Options > Media library > Playlist. 3. Select Options > Create to create a new playlist. Open the playlist and select Add to add songs to the playlist. You can also select Menu >... -
Page 33: Picture Viewer
3. Press Navigation keys to scroll to the video to be played. Then press Confirm key to play the video. After you select All videos, the phone automatically lists all videos stored on the phone. Picture Viewer 1. Select Menu > Pictures. 2. -
Page 34: Switching Off The Fm Radio
Press Confirm key to switch between the headset and the loudspeaker. Press Navigation keys to adjust the frequency or switch between the channels saved in the channel list. Press Volume key to adjust the volume. Select Minimize to minimize the radio screen, and listen to radio programs played in the background. -
Page 35: Browser
Browser Surfing the Internet 1. To open the Opera Mobile browser, select Menu > Browser, or in standby mode, press the left or right navigation key to select Browser. 2. Nextel's homepage will be displayed as the default webpage. 3. Press the navigation keys to move the pointer on the screen. When a link is highlighted, you can press the OK key to open the link. -
Page 36: Connectivity
USB cable. To install the PC Suite software, perform the following operations: 1. Connect your phone and PC with the USB cable. 2. Double-click My Computer. Find the disk named HUAWEI ASSITANT and double-click it. Wait for the dialog box to appear on your PC. -
Page 37: Usb-Based Internet Access
Vista, Windows XP and Windows 7 are supported. 1. Connect your phone and PC with the USB cable. 2. Double-click My Computer. Find the disk named HUAWEI ASSITANT and double-click it. Wait for the dialog box to appear on your PC. -
Page 38: Bluetooth
For details, contact your service provider. Bluetooth Bluetooth-based Data Transfer You can exchange data between your Bluetooth phone and other Bluetooth devices. If you want to exchange data between your phone and another device, that device must support Bluetooth and the Bluetooth function must be enabled. 1. - Page 39 the device list. If the other Bluetooth device requires verification before connection, your phone displays "Enter password" on the screen. Then create a password that is to be used together with the other device. After the password has been entered in both devices, the Bluetooth connection can be set up.
-
Page 40: Security
Security Enabling/Disabling the Phone Lock The phone lock protects your phone from unauthorized use. The phone lock function is not enabled when you purchase the phone. You can change the default phone lock code 000000 to any string of 1 to 8 digits. 1. -
Page 41: Unlocking The Keypad
In standby mode, press # key to lock the keypad. After you select Menu > Settings > Phone > Auto keypad lock > On, the keypad is automatically locked after the phone is idle for 3 seconds. Unlocking the Keypad In standby mode , Press the left soft key and then right soft key to unlock the keypad. -
Page 42: Warnings And Precautions
Warnings and Precautions This section contains important information pertaining to the operating instructions of your device. It also contains information about how to use the device safely. Read this information carefully before using your device. Electronic Device Power off your device if using the device is prohibited. Do not use the device when using the device causes danger or interference with electronic devices. - Page 43 not power on your device at refueling points such as service stations. Comply with restrictions on the use of radio equipment in fuel depots, storage, and distribution areas, and chemical plants. In addition, adhere to restrictions in areas where blasting operations are in progress.
- Page 44 aircraft and disrupt the wireless telephone network. It may also be considered illegal. Operating Environment Do not use or charge the device in dusty, damp, and dirty places or places with magnetic fields. Otherwise, it may result in a malfunction of the circuit. ...
- Page 45 dangerous, as it may present a choking hazard. Ensure that small children are kept away from the device and accessories. Accessories Use the accessories delivered only by the manufacturer. Using accessories of other manufacturers or vendors with this device model may invalidate any approval or warranty applicable to the device, result in the non-operation of the device, and cause danger.
- Page 46 If there is a case of battery deformation, color change, or abnormal heating while you charge or store the battery, remove the battery immediately and stop using it. Otherwise, it may lead to battery leakage, overheating, explosion, or fire. ...
- Page 47 Do not place sharp metal objects such as pins near the earpiece. The earpiece may attract these objects and hurt you when you are using the device. Before you clean or maintain the device, power off the device and disconnect it from the charger.
- Page 48 when using a device. The SAR value is determined at the highest certified power level in laboratory conditions, but the actual SAR level of the device when being operated can be well below the value. This is because the device is designed to use the minimum power required to reach the network.
- Page 49 (2) this device must accept any interference received, including interference that may cause undesired operation. Changes or modifications made to this device not expressly approved by Huawei Technologies Co., Ltd. may void the FCC authorization to operate this device.