
Related Manuals for LG ARX5000


Summary of Contents for LG ARX5000
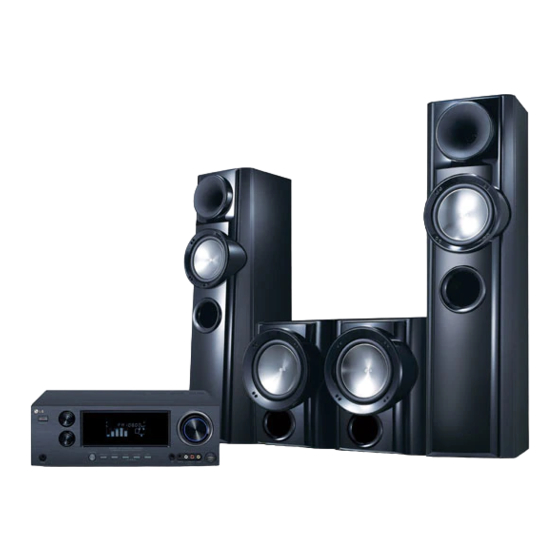
- Page 1 OWNER’S MANUAL DIGITAL A/V RECEIVER SYSTEM Please read this manual carefully before operating your set and retain it for future reference. MODEL ARX5000 (ARX5000, SR55DS-F/W) P/NO : MFL63267055...
-
Page 2: Safety Information
Safety Information Safety Information CAUTION: Do not block any ventilation openings. CAUTION Install in accordance with the manufacturer’s RISK OF ELECTRIC SHOCK instructions. DO NOT OPEN Slots and openings in the cabinet are provided for CAUTION: TO REDUCE THE RISK OF ELECTRIC SHOCK ventilation and to ensure reliable operation of the DO NOT REMOVE COVER (OR BACK) NO USER- product and to protect it from over heating. -
Page 3: Copyrights
AND 625p UNIT, PLEASE CONTACT OUR CUSTOMER SERVICE CENTER. You have to set the disc format option to [Mastered] in order to make the discs compatible with the LG players when formatting rewritable discs. When setting the option to Live File System, you cannot use it on LG players. -
Page 4: Table Of Contents
Contents Contents Installation Installing speakers Connecting speakers Connecting to Your TV Video/Audio (Left/Right) Safety Information connection HDMI connection Cautions and Warnings Resolution Setting Copyrights Connecting TV or components with HDMI jack Connecting components with analog video and audio jacks Preparation AV IN 1 connection Introduction AV IN 2 connection... - Page 5 Contents Operation Maintenance Turning On the unit Handling the Unit Selecting the input source Adjusting the speaker levels Enjoying various sound mode Troubleshooting Sound Effect Bass Blast Troubleshooting Setting the USER EQ Listening to FM/AM radio Automatic tuning Appendix Manual tuning Presetting radio stations Trademarks and Licenses Tuning to preset stations...
-
Page 6: Preparation
Preparation Preparation Accessories Introduction Please check and identify the supplied accessories. About the “ ” Symbol Display “ ” may appear on your TV display during operation and indicates that the function explained in this owner’s manual is not FM antenna (1) AM antenna (1) available on that specifi c media. -
Page 7: Required Cables
Preparation • HDMI cable Required cables The hookup diagrams on the subsequent pages assume the use of the following connection cables. You must purchase the connection cables • Portable cable separately if necessary. • Analog audio cable White (L) NOTE Red (R) •... -
Page 8: Remote Control
• • • • • • • • • a • • • • • • • • Remote control POWER (1): Switches the unit ON or OFF. TV control buttons: Controls the TV. (LG TV only) - 1 : Turns the TV on or off . - Page 9 Preparation • • • • • • • • • b • • • • • • • • • • • • • • • • • d • • • • • • • • > (SKIP): Goes to the next or previous SETUP: Displays or exits the [SETUP] menu.
-
Page 10: Front Panel
Preparation Front panel i USER EQ a STANDBY/ON (1/[) Sets the USER EQ mode (BASS, MIDDLE Switches the unit ON or OFF. and TREBLE). (Page 27) b INPUT SELECTOR j ENTER Selects the input source. Rotate this knob Acknowledges menu selection. until the input source you want appears in the display window. -
Page 11: Rear Panel
Preparation Rear panel fg h i a Speakers connectors f AV IN 1 (L-AUDIO-R, VIDEO) Connects the components with analog Connects the speaker cables. audio/video output jacks (DVD player, Blu- b OPTICAL IN 1/2 ray disc player, Satellite tuner, Set-top box, Connects other components with an etc). -
Page 12: Installation
Installation Installation A Front speaker (left)/ B Front speaker Installing speakers (right) Place the front speakers to the sides of the monitor or screen and as fl ush with the screen surface as possible. The unit allows you to use 2.2 channel system. The following illustration shows an example C / D Subwoofer of positioning the system. -
Page 13: Connecting Speakers
Installation 2. Connect the wires to the speakers. Connect Connecting speakers the other end of each wire to the correct speaker according to the color coding: Color Speaker Position Before connecting the cables, be sure to disconnect the AC power cord. Orange Subwoofer Any front... -
Page 14: Connecting To Your Tv
Installation Video/Audio (Left/Right) Connecting to Your TV connection Connect the VIDEO OUT jack on the unit to the video in jack on the TV using a video cable. You can watch the selected input image when Connect the left and right AUDIO OUT jacks of you connect the VIDEO OUT or HDMI OUT jack the unit to the audio left and right IN jacks on to a TV. -
Page 15: Hdmi Connection
Installation HDMI connection NOTE If you have a HDMI TV or monitor, you can • HDMI is the abbreviated name for High connect it to this unit using a HDMI cable. Defi nition Multimedia Interface. It is an interface Connect the HDMI OUT jack on the unit to which transmits video and audio signals in the HDMI IN jack on a HDMI compatible TV or digital format. -
Page 16: Resolution Setting
Installation Resolution Setting Connecting TV or The unit provides several output resolutions for components with HDMI OUT jack. You can change the resolution using [Setup] menu. HDMI jack 1. Press SETUP. The [Setup] menu appears. 1. Connect the HDMI OUT jack on the unit to the HDMI IN jack on a HDMI compatible TV or monitor. -
Page 17: Connecting Components With Analog Video And Audio Jacks
Installation AV IN 2 connection Connecting components 1. Connect the VIDEO IN jack on the unit to with analog video and the VIDEO OUT jack on your component audio jacks using a video cable. Connect the left and right AUDIO IN jacks of the unit to the audio left and right OUT jacks on your component using the audio cables. -
Page 18: Connecting Components With Digital Audio Jacks
Installation Coaxial digital audio Connecting connection components with 1. Connect the COAXIAL IN 1/2 jack on the Digital Audio jacks unit to your components with COAXIAL OUT jack using a coaxial digital audio cable. COAXIAL IN connection It is not necessary to connect all the cables. Connect the cables according to the jacks of your components. -
Page 19: Connecting The Portable Device
Installation Connecting the Connecting the portable device antennas Connect the supplied AM loop antenna and 1. Connect the PORT. IN jack on the unit to the FM wire antenna. LINE OUT jack on your Portable device (MP3 Before connecting the antenna, be sure to player, etc...) using a portable cable ( 3.5 disconnect the AC power cord. -
Page 20: Connecting The Headphones
Installation Connecting the headphones Connect a pair of stereo headphones ( 3.5 mm phone plug) to the unit’s PHONES jack for private listening. Headphones connection Unit Headphones NOTE • Always turn down the volume before connecting your headphones. • The speakers are turned off while the headphones plug is inserted in the PHONES jack. -
Page 21: Settings
Installation Settings [Language] Menu Menu Language Adjusting the Setup Settings Select a language for the [Setup] menu and on-screen display. You can change the settings of the unit in the [Setup] menu. 1. Press SETUP. [Display] Menu The [Setup] menu appears. TV Aspect Select which screen aspect to use based on the shape of your TV screen. -
Page 22: Audio] Menu
Installation [576i] [Speaker] Outputs 576 lines of interlaced video. Select a speaker that you want to adjust. [576p] NOTE Outputs 576 lines of progressive video. Certain speaker settings are prohibited by the Dolby Digital licensing agreement. [720p] Outputs 720 lines of progressive video. [Size] [1080i] Since the speaker settings are fi xed, you... -
Page 23: Others] Menu
Installation DRC (Dynamic Range Control) [Others] Menu When a title encoded in Dolby Digital or Dolby Digital Plus is playing back, you may wish to compress the dynamic range of the audio DivX(R) VOD output (the diff erence between the loudest ABOUT DIVX VIDEO: DivX®... -
Page 24: Turning On The Unit
Operation Operation Turning On the unit To select the Display Component connected to AV 1 AV IN 1 jack Before connecting the power cord, connect all Component connected to AV 2 your speakers and AV components. AV IN 2 jack 1. -
Page 25: Adjusting The Speaker Levels
Operation To select the required input source using Adjusting the speaker the remote control, use the INPUT buttons. levels To select the Button Component connected to AV IN 1/2 jack You can adjust the level of each speaker. These Portable device connected PORTABLE settings are applied to all sound fi elds. -
Page 26: Enjoying Various Sound Mode
Operation Enjoying various BASS BLAST During playback, reinforces the bass sound. sound mode LOUDNESS Improves the bass and treble sound. VIRTUAL You can enjoy more virtual You can enjoy various sound mode. For details, surround sound. refer to the Sound Eff ect, Bass Blast, and USER BYPASS You can enjoy the 2 channel EQ. -
Page 27: Bass Blast
Operation Bass Blast Listening to FM/AM You can set the BASS BLAST sound mode radio directly. Press BASS BLAST repeatedly. You can listen to FM and AM broadcasts Display Description through the built-in tuner. Before operation, BASS BLAST During playback, reinforces make sure you have connected the FM and AM the bass sound. -
Page 28: Presetting Radio Stations
Operation Presetting radio stations Tuning to preset stations You can preset up to 50 FM or AM stations. Before tuning to preset stations, make sure you Then you can easily tune in the stations you preset radio stations. (Page 28) often listen to. -
Page 29: Playing The Usb Device
Operation 3. Select [Music], [Movie] or [Photo] using I / Playing the USB i , and press ENTER ( ) to play the fi le. device To stop playback MUSIC MOVIE PHOTO Press x (STOP) during playback. This unit can play movie, music and photo fi les contained in the USB device. - Page 30 Operation To slow down the playing speed NOTE MOVIE While the playback is paused, press M • Devices which require additional program installation connected to a computer, are not repeatedly to play various speeds of slow supported. motion. • Do not extract the USB device while in operation.
-
Page 31: Listening To Music
Operation Listening to music NOTE You can play music fi les contained in a USB device. • The fi le requirements are described on page 32. • You can use various playback functions. Refer to 1. Select [Music] using I / i on the [USB] pages 29-30. -
Page 32: Playing A Movie Fi Le
Operation Playing repeatedly or randomly Music fi le requirement During playback, press REPEAT repeatedly Music fi le compatibility with this unit is limited to select a desired mode. as follows : • Sampling frequency : within 32 to 48 kHz Display Description (MP3), within 32 to 48 kHz (WMA) - Page 33 Operation Hearing different audio a Title – current title number/total number 1. During playback, press INFO/DISPLAY ( ) to of titles display the On-Screen display. b Time – elapsed playing time/total 2. Use U / u to select the [Audio] option. playback time c Audio –...
-
Page 34: Viewing A Photo
Operation Movie fi le requirement Viewing a photo Movie fi le compatibility with this unit is limited You can view photo fi les contained in a USB as follows : device. • Available resolution: within 720 x 576 1. Select [Photo] using I / i on the [USB] (W x H) pixels. -
Page 35: Dimmer
Operation To stop a slide show Photo fi le requirement Press x (STOP) during slide show. Photo fi le compatibility with this unit is limited as follows : • Max pixel in width : 2 760 x 2 048 pixel To pause a slide show Press X (PAUSE) during slide show. -
Page 36: Using The Sleep Timer
Operation Using the Sleep Timer Using microphone 1. Connect a microphone ( You can set the unit to turn off automatically at 6.3 mm) to MIC a specifi ed time. jack. Press SLEEP repeatedly. The indicator changes cyclically in the display Microphone connection window as follows. -
Page 37: Maintenance
Maintenance Maintenance Handling the Unit Cleaning the unit When shipping the unit To clean the player, use a soft, dry cloth. If Please save the original shipping carton and the surfaces are extremely dirty, use a soft packing materials. If you need to ship the unit, cloth lightly moistened with a mild detergent for maximum protection, re-pack the unit as it solution. -
Page 38: Troubleshooting
Troubleshooting Troubleshooting Troubleshooting PROBLEM CAUSE CORRECTION No power. • The power cord is • Plug the power cord into the wall disconnected. outlet securely. No sound. • The speaker wires are • Check the speaker connections. disconnected. • The MASTER VOLUME is •... - Page 39 Troubleshooting Preset stations cannot • An incorrect station • Memorize the correct station be received. frequency has been frequency. memorized. • The memorized stations are • Memorize the stations again. cleared. Poor FM reception. • No antenna is connected. • Connect the antenna. •...
-
Page 40: Appendix
Appendix Appendix Trademarks and Licenses HDMI, the HDMI logo and High-Defi nition Multimedia Manufactured under license from Dolby Laboratories. Interface are trademarks or registered trademarks of Dolby and the double-D symbol are trademarks of Dolby Laboratories. HDMI licensing LLC. Manufactured under licence under U.S. Patent #’s: DivX®, DivX Certifi ed®... -
Page 41: Specifi Cations
Appendix Specifi cations General Tuner • Power requirements: Refer to main label. • FM Tuning Range: 87.50 to 108.00 MHz or 87.5 to 108.0 MHz • Power consumption: Refer to main label. • AM Tuning Range: • Dimensions (W x H x D): 430 x 150 x 312 mm 522 to 1 620 kHz or 530 to 1 720 kHz •... - Page 42 Appendix...
- Page 43 Appendix...