Toshiba IK-WB16A User Manual
Toshiba network camera user's manual
Hide thumbs
Also See for IK-WB16A:
- Specifications (2 pages) ,
- Quick start manual and important safeguards (24 pages)
Table of Contents
Advertisement
Advertisement
Table of Contents

Related Manuals for Toshiba IK-WB16A


Summary of Contents for Toshiba IK-WB16A
-
Page 1: Network Camera
NETWORK CAMERA IK-WB16A / IK-WB16A-W Model: User's Manual IK-WB16A For information on our latest products and peripheral devices, refer to the following Website: http://www.toshibasecurity.com If the URL changes, refer to the Toshiba website (http://www.toshiba.com/). IK-WB16A-W... -
Page 2: Table Of Contents
Security ... 38 HTTPS (Hypertext Transfer Protocol over SSL) ... 39 SNMP (Simple Network Management Protocol) ... 44 Network ... 45 Wireless LAN (IK-WB16A-W only) ... 59 DDNS ... 62 Access List ... 63 Audio and Video ... 66 Motion Detection ... 75 Camera Tampering Detection ... - Page 3 Audio ... 109 External Microphone ... 109 Recommended system requirements ... 109 Lens Focus ... 109 WPS (Wi-Fi Protected Setup) : IK-WB16A-W only ... 109 Specifications ���������������������������������������������������������������������������������������������������������������������������������������������������������� 110 Appearance Diagram����������������������������������������������������������������������������������������������������������������������������������������������� 112 Technology License Notice �������������������������������������������������������������������������������������������������������������������������������������� 114 GNU General Public License����������������������������������������������������������������������������������������������������������������������������������� 115...
-
Page 4: Introduction
Introduction FCC (USA)-INFORMATION NOTE: This equipment has been tested and found to comply with the limits for a Class B digital device, pursuant to Part 15 of the FCC Rules. These limits are designed to provide reasonable protection against harmful interference in a residential installation. This equipment generates, uses and can radiate radio frequency energy and, if not installed and used in accordance with the instructions, may cause harmful interference to radio communications. - Page 5 Thank you for purchasing the IK-WB16A/IK-WB16A-W Network Camera. Before you start using the camera, read this User's Manual carefully to ensure correct usage. Once you have finished reading this User's Manual, keep it in a convenient place for future reference.
-
Page 6: Important Safeguards
Important Safeguards 1. Read Instructions Read all the safety and operating instructions before operating the product. 2. Retain Instructions Retain the safety instructions and user's manual for future reference. 3. Warnings Comply with all warnings on the product and in the user's manual. 4. - Page 7 13. Lightning For additional protection on this video product during a lightning storm, or when it is left unattended and unused for long periods of time, unplug it from the wall outlet and disconnect the power supply and cable system. This will prevent damage to the video product due to lightning and power-line surges.
- Page 8 20. When using a wireless LAN function (IK-WB16A-W): • Do not use near people with heart pacemakers. • Do not use near electronic medical equipment, or in hospitals or other medical institutions. • Do not use inside aircraft or in places where the wireless LAN function could interfere with electromagnetic signals.
-
Page 9: Important Safeguards (Cont.)
Important Safeguards (Cont.) CAUTION TO REDUCE THE RISK OF ELECTRIC SHOCK DO NOT REMOVE COVER. NO USER SERVICEABLE PARTS INSIDE. REFER SERVICING TO QUALIFIED SERVICE PERSONNEL. The lightning flash with arrowhead symbol, within an equilateral triangle, is intended to alert the user to the presence of uninsulated "dangerous voltage"... -
Page 10: Notes On Use And Installation
Special care is required to use the camera at high temperature and humidity. ● Caution when using the wireless LAN functions (IK-WB16A-W) The Wireless LAN in this unit uses the 2.4 GHz waveband. If there is a similar wireless LAN in the area, or a wireless device using the 2.4 GHz waveband, or a microwave oven, the... -
Page 11: Precautions For Use
Accordingly, [Toshiba/TAIS] disclaims any and all liability arising out of the use of the product in any critical applications. - Page 12 Because Wireless LAN products operate within the guidelines found in radio frequency safety standards and recommendations, TOSHIBA believes Wireless LAN is safe for use by consumers. These standards and recommendations reflect the consensus of the scientific community and result from deliberations of panels and committees of scientists who continually review and interpret the extensive research literature.
-
Page 13: Ac Adapter
AC Adapter Be sure to use only the supplied AC adapter. Using a different AC adapter may cause the camera to malfunction, heat up, or catch fire. Before using the AC adapter, carefully read and observe the Important Safeguards ( → page 5) and the notes below. ●... - Page 14 Specifications AC adapter (DSA-20P-10) Power source Rated output Ambient temperature guaranteed for performance Storage temperature Maximum external dimensions Cord length : 100-240V AC 50/60 Hz : 12V DC, 1.5 A : 32°F to 104°F (0°C to 40°C) : -4°F to 140°F (-20°C to 60°C) : 1.42 x 1.85 x 2.93 inches (36 x 47 x 74.5 mm) (width x height x depth) : 72 inches (1828 mm)
-
Page 15: Package Contents
Adobe Systems Incorporated website. For information on our latest products and peripheral devices, refer to the following Website: http://www.toshibasecurity.com If the URL changes, refer to the Toshiba website (http://www.toshiba.com/tai/products/ prod_biz.jsp). l CD-ROM IK-WB16A Content:... -
Page 16: Physical Description
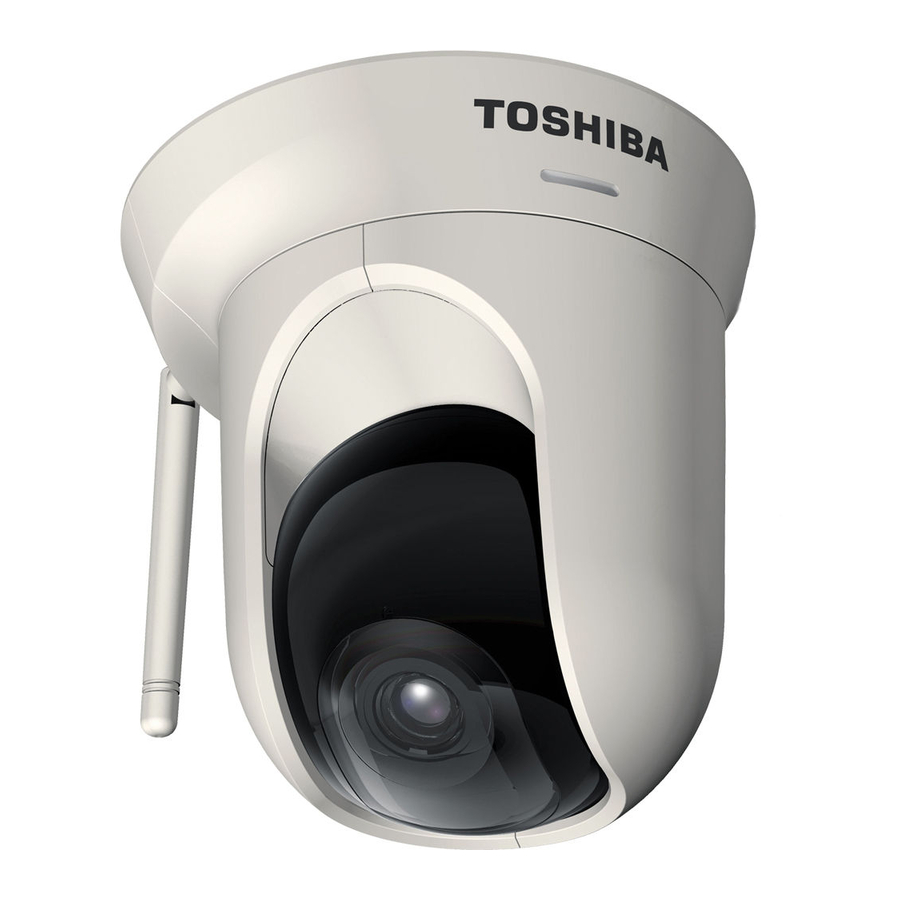
4 3 2 1 4 3 2 1 Built-in Microphone MicroSD/SDHC Card Slot Power Cord Socket Antenna (IK-WB16A-W only) W h e n y o u c o n n e c t or disconnect a wire, use the orange push- button. -
Page 17: Status Led
The diagrams below apply when "Digital Input" is used for an alarm input. Status LED The LED indicates the status of the Network Camera. Item Steady Red Red LED unlit Steady Red + Blinking Green every 1 sec. Steady Red + Green LED unlit Steady Red + Blinking Green every 2 sec. - Page 18 This button is used dual purposes. WPS/Reset Button WPS: (IK-WB16A-W only) Push the WPS button of your wireless access point. Press and release the WPS recessed button on the back of the camera using a paper clip or small object. The ESSID and encrypted key of the wireless access point will be sent to the camera and the wireless LAN settings are complete.
-
Page 19: Installation
Installation Hardware Installation Please verify that your product package contains all the accessories listed in the Package Contents listed on page 13. Depending on the user’s application, an Ethernet cable may be needed. The Ethernet cable should meet the specs of UTP Category 5. Hardware Installation is shown in the Quick Start Guide(QSG). - Page 20 2. In this case, if the Local Area Network (LAN) IP address of your Network Camera is 192.168.0.3, please forward the following ports for the Network Camera on the router. ■ HTTP port ■ RTSP port ■ RTP port for audio ■...
- Page 21 Set up the Network Camera through Power over Ethernet (PoE) (IK-WB16A only) When using a PoE-enabled switch The Network Camera is PoE-compliant, which allows it to be powered via a single Ethernet cable. If your switch/router supports PoE, refer to the following illustration to connect the Network Camera to a PoE-enabled switch/router.
- Page 22 1. SSID, abbreviated from Service Set Identifier, is the name assigned to the wireless network. The IK-WB16A-W's factory SSID setting is set to "default". 2. Select "Ad-Hoc" wireless mode if you want the IK-WB16A-W to communicate without using an AP or wireless router.
-
Page 23: Software Installation
3. The program will search for Network Cameras on the same LAN. 4. After searching, the main installer window will pop up. Click on the MAC and model name which matches the MAC of the camera. MODEL No. IK-WB16A-W MODEL No. IK-WB16A-W S/N:... -
Page 24: Ready To Use
Ready to Use 1. Access the Network Camera on the LAN. 2. Retrieve live video through a web browser. NOTE ● The screen image of the IK-WB16A-W may vary from the IK-WB16A. -
Page 25: Accessing The Network Camera
Accessing the Network Camera This chapter explains how to access the Network Camera through web browsers, RTSP players and 3GPP-compatible mobile devices. Using Web Browsers Use Installation Wizard to access the Network Cameras on the LAN. If your network environment is not a LAN, follow these steps to access the Network Camera: 1. - Page 26 ® ► If you see a dialog box indicating that your security settings prohibit running ActiveX Controls, please enable the ActiveX ® Controls for your browser. 1. Choose Tools > Internet Options > Security > Custom Level. ® 2. Look for Download signed ActiveX controls;...
-
Page 27: Using Rtsp Players
Using RTSP Players To view the MPEG-4 streaming media using RTSP players, you can use players that support RTSP streaming. 1. Launch the RTSP player. 2. Choose File > Open URL. A URL dialog box will pop up. 3. The address format is rtsp://<ip address>:<rtsp port>/<RTSP streaming access name for stream1 or stream2>... -
Page 28: Using 3Gpp-Compatible Mobile Devices
Using 3GPP-compatible Mobile Devices To view the streaming media through 3GPP-compatible mobile devices, make sure the Network Camera can be accessed over the Internet. For more information on how to set up the Network Camera over the Internet, please refer to Setup the Network Camera over the Internet on page To utilize this feature, please check the following settings on your Network Camera: 1. -
Page 29: Main Page
Main Page This chapter explains the layout of the main page. It is composed of the following sections: TOSHIBA Logo, Host Name, Camera Control Area, Configuration Area, Menu, and Live Video Window. TOSHIBA Logo Camera Control Area Configuration Area TOSHIBA Logo Click this logo to visit the TOSHIBA website. - Page 30 Pan: Click this button to start the auto pan. When the current position is Home or on the left side of Home, the camera starts panning from the current position to the left-most position, then to the right- most position, and finally backward to the original position. When the current position is on the right side of Home, the camera starts panning from the current position to the right-most position, then to the left- most position, and finally backward to the original position.
- Page 31 Video Title: The video title can be configured. For more information, please refer to Video Settings on page 66. MPEG-4 Protocol and Media Options: The transmission protocol and media options for MPEG-4 video streaming. For further configuration, please refer to Client Settings on page 33. Time: Displays the current time.
- Page 32 Full Screen: Click this button to switch to full screen mode. Press the “Esc” key to switch back to normal mode. ■ The following window is displayed when the video mode is set to MJPEG: Video Title Title and Time Video Title: The video title can be configured.
-
Page 33: Client Settings
Client Settings This chapter explains how to select the stream transmission mode and saving options on the local computer. When completed with the settings on this page, click Save on the page bottom to enable the settings. Clicking the Client Settings in Configuration Area of a Main Page, the following window is shown. -
Page 34: Mp4 Saving Options
MP4 Saving Options Users can record live video as they are watching it by clicking page. Here, you can specify the storage destination and file name. Folder: Specify a storage destination for the recorded video files. File name prefix: Enter the text that will be appended to the front of the video file name. Add date and time suffix to the file name: Select this option to append the date and time to the end of the file name. -
Page 35: Configuration
Click Configuration on the main page to enter the camera setting pages shown below. Note that only Administrators can access the configuration page. TOSHIBA offers an easy-to-use user interface that helps you set up your network camera with minimal effort. To simplify the setting procedure, two types of user interfaces are available: Advanced Mode for professional users and Basic Mode for entry-level users. -
Page 36: System
Advanced Mode Configuration List Click to switch to Basic Mode Firmware Version Each function on the configuration list will be explained in the following sections. Those functions that are displayed only in Advanced Mode are marked with Advanced Mode . If you want to set up advanced functions, please click [Advanced Mode] on the bottom of the configuration list to quickly switch over. - Page 37 System Time Keep current date and time: Select this option to preserve the current date and time of the Network Camera. The Network Camera’s internal real-time clock maintains the date and time even when the power of the system is turned off. Sync with computer time: Select this option to synchronize the date and time of the Network Camera with the local computer.
-
Page 38: Security
Security This section explains how to enable password protection and create multiple accounts. Root Password The administrator account name is “root”, which is permanent and can not be deleted. If you want to add more accounts in the Manage User column, please apply the password for the “root” account first. 1. -
Page 39: Https (Hypertext Transfer Protocol Over Ssl)
HTTPS (Hypertext Transfer Protocol over SSL) Advanced Mode This section explains how to enable authentication and encrypted communication over SSL (Secure Socket Layer). It helps protect streaming data transmission over the Internet on higher security level. Enable HTTPS Check this item to enable HTTPS communication, then select a connection option: "HTTP & HTTPS" or "HTTPS only". - Page 40 4. The Certificate Information will automatically be displayed in the third column as shown below. You can click Property to view detailed information about the certificate. 5. Click Home to return to the main page. Change the address from “http://” to “https://“ in the address bar and press Enter on your keyboard.
- Page 41 Create self-signed certificate manually 1. Select this option. 2. Click Create to open the Create Certificate page, then click Save to generate the certificate. 3. The Certificate Information will automatically be displayed in the third column as shown below. You can click Property to see detailed information about the certificate.
- Page 42 3. If you see the following Information bar, click OK and click on the Information bar at the top of the page to allow pop-ups. 4. The pop-up window shows an example of a certificate request.
- Page 43 5. Look for a trusted certificate authority that issues digital certificates. Enroll the Network Camera. Wait for the certificate authority to issue a SSL certificate; click Browse... to search for the issued certificate, then click Upload in the second column. NOTE ●...
-
Page 44: Snmp (Simple Network Management Protocol)
SNMP (Simple Network Management Protocol) This section explains how to use the SNMP on the network camera. The Simple Network Management Protocol is an application layer protocol that facilitates the exchange of management information between network devices. It helps network administrators to remotely manage network devices and find, solve network problems with ease. -
Page 45: Network
Use fixed IP address: Select this option to manually assign a static IP address to the Network Camera. 1. You can use the TOSHIBA Installation Wizard on the software CD to easily set up the Network Camera on LAN. Please refer to Software Installation on page 23 for details. - Page 46 Enable UPnP port forwarding: To access the Network Camera from the Internet, select this option to allow the Network Camera to open ports on the router automatically so that video streams can be sent out from a LAN. To utilize of this feature, make sure that your router supports UPnP PPPoE (Point-to-point over Ethernet) Select this option to configure your Network Camera to make it accessible from anywhere as long as there is an Internet connection.
- Page 47 ● Steps to enable the UPnP user interface on your computer: Note that you must log on to the computer as a system administrator to install the UPnP components. 1. Go to Start, click Control Panel, then click Add or Remove Programs. 2.
- Page 48 4. In the Networking Services dialog box, select Universal Plug and Play and click OK. 5. Click Next in the following window. 6. Click Finish. UPnP is enabled. ● How does UPnP work? UPnP networking technology provides automatic IP configuration and dynamic discovery of devices added to a network.
- Page 49 Enable IPv6 Select this option and click Save to enable IPv6 settings. Please note that this only works if your network environment and hardware equipment support IPv6. The ® browser should be Microsoft Internet Explorer 6.5 or above. When IPv6 is enabled, by default, the network camera will listen to router advertisements and be assigned with a link-local IPv6 address accordingly.
- Page 50 Please follow the steps below to link to an IPv6 address: 1. Open your web browser. 2. Enter the link-global or link-local IPv6 address in the address bar of your web browser. 3. The format should be: http://[2001:0c08:2500:0002:0202:d1ff:fe04:65f4]/ 4. Press Enter on the keyboard or click Refresh button to refresh the webpage. For example: NOTE ●...
- Page 51 IEEE 802.1x Advanced Mode This function is not able to work at the time of WLAN connection of IK-WB16A-W. Enable this function if your network environment uses IEEE 802.1x, which is a port-based network access control. The network devices, intermediary switch/access point/hub, and RADIUS server must support and enable 802.1x settings.
- Page 52 3. The switch also forwards the RADIUS Server’s certificate to the Network Camera. 4. Assuming all certificates are validated, the switch then changes the Network Camera’s state to authorized and is allowed access to the protected network via a pre-configured port. TOSHIBA IK-WB16A Certificate Authority (CA) Certificate...
- Page 53 QoS (Quality of Service) Advanced Mode Quality of Service refers to a resource reservation control mechanism, which guarantees a certain quality to different services on the network. Quality of service guarantees are important if the network capacity is insufficient, especially for real-time streaming multimedia applications. Quality can be defined as, for instance, a maintained level of bit rate, low latency, no packet dropping, etc.
- Page 54 QoS/DSCP (the DiffServ model) DSCP-ECN defines QoS at Layer 3 (Network Layer). The Differentiated Services (DiffServ) model is based on packet marking and router queuing disciplines. The marking is done by adding a field to the IP header, called the DSCP (Differentiated Services Codepoint). This is a 6-bit field that provides 64 different class IDs.
- Page 55 HTTP port / Secondary HTTP port: By default, the HTTP port is set to 80 and the secondary HTTP port is set to 8080. They can also be assigned to another port number between 1025 and 65535. If the ports are incorrectly assigned, the following warning messages will be displayed: To access the Network Camera on the LAN, both the HTTP port and secondary HTTP port can be used to access the Network Camera.
- Page 56 The FTP server allows the user to save recorded video clips. You can utilize TOSHIBA Installation Wizard to upgrade the firmware via FTP server. By default, the FTP port is set to 21. It also can be assigned to...
- Page 57 RTSP Streaming To utilize RTSP streaming authentication, make sure that you have set a password for the Network Camera first; please refer to Security on page 38 for details. Authentication: Depending on your network security requirements, the Network Camera provides three types of security settings for streaming via RTSP protocol: disable, basic, and digest.
- Page 58 If the RTP ports are incorrectly assigned, the following warning message will be displayed: Multicast settings for stream 1 ~ 5: Click the items to display the detailed configuration information. Select the Always multicast option to enable multicast for stream 1 ~ 5. Unicast video transmission delivers a stream through point-to-point transmission;...
-
Page 59: Wireless Lan (Ik-Wb16A-W Only)
Wireless LAN (IK-WB16A-W only) SSID (Service Set Identifier): This is the name that identifies a wireless network. Access Points and wireless clients attempting to connect to a specific WLAN (Wireless Local Area Network) must use the same SSID. The default setting is “default”. Note: The maximum length for an SSID is 32 single-byte characters and cannot consist of “, <, >, or blank spaces. - Page 60 WEP (Wired Equivalent Privacy): This allows communication only with other devices with identical WEP settings. ■ Authentication Mode: Choose one of the following modes. The default setting is “Open”. Open – Communicates the key across the network. Shared – Allows communication only with other devices with identical WEP settings. ■...
- Page 61 WPA-PSK: Use WPA (Wi-Fi Protected Access) pre-shared key WPA2-PSK: Use WPA2 pre-shared key. Wi-Fi Protected Access (WPA and WPA2) is a certification program to indicate compliance with the security protocol created to secure wireless computer networks. This protocol improved several serious weaknesses of the previous system, WEP.
-
Page 62: Ddns
DDNS. ChangeIP.com http://www.changeip.com/toshiba/ No-IP.com http://www.no-ip.com/ext/toshiba.php Host Name: If the User wants to use a DDNS service, enter the camera name that is registered at the DDNS server. -
Page 63: Access List
Access List Advanced Mode This section explains how to control access permission by verifying the client PC’s IP address. General Settings Maximum number of concurrent streaming connection(s) limited to: Simultaneous live viewing for 1~10 clients (including stream 1 and stream 2). The default value is 10. If you modify the value and click Save, all current connections will be disconnected and automatically attempt to re-link. - Page 64 ■ Refresh: Click this button to refresh all current connections. ■ Add to deny list: You can select entries from the Connection Status list and add them to the Deny List to deny access. Please note that those checked connections will only be disconnected temporarily and will automatically try to re-link again (IE Explore or Quick Time Player).
- Page 65 Network: This rule allows the user to assign a network address and corresponding subnet mask to the Allow/Deny List. For example: Range: This rule allows the user to assign a range of IP addresses to the Allow/Deny List. This rule is only applied to IPv4.
-
Page 66: Audio And Video
Audio and Video This section explains how to configure the audio and video settings of the Network Camera. It is composed of the following two columns: Video Settings and Audio Settings. Video Settings Video title: Enter a name that will be displayed on the title bar of the live video. Video Title 2010/01/15 17:08:56 Title and Time... - Page 67 Video orientation: Flip--vertically reflect the display of the live video; Mirror--horizontally reflect the display of the live video. Select both options if the Network Camera is installed upside-down (ex. on the ceiling) to correct the image orientation. Overlay title and time stamp on video: Select this option to place the video title and time on the video streams.
- Page 68 Advanced Mode Image Settings Click Image settings to open the Image Settings page. On this page, you can tune the White balance, Brightness, Saturation, Contrast, and Sharpness settings for the video. 2010/01/15 02:27:43 White balance: Adjust the value for the best color temperature. ■...
- Page 69 Enable Edge Enhancement Edge enhancement is an image processing filter that enhances the edge contrast of an image or video to improve its sharpness. Enter a value from 1 to 128 to set the degree of enhancement desired. Enable Noise Reduction Noise reduction is the process of removing noise from a signal.
- Page 70 Advanced Mode Sensor Settings Click Sensor Settings to open the Image Sensor Settings page. On this page, you can set the maximum exposure time, exposure level, and AGC (Auto Gain Control) settings. You can configure two sets of sensor settings: one for normal situations, the other for special situations, such as day/night/schedule mode.
- Page 71 Advanced Mode Cropping Setting Click Cropping Setting to open the Cropping Settings page. Please follow the steps below to set up cropping mode for mutiple streams: 1. Click Cropping Setting to open the window as shown below. Select a Captured area from the drop-down list. The floating frame, the same as the one in the Global View window on the home page, will resize accordingly.
- Page 72 Video quality settings for stream 1 ~ 4 Click the items to display the detailed video quality settings. This Network Camera offers two choices of video compression standards (MPEG-4 and JPEG) for real- time viewing. MPEG-4 mode is selected, the video is streamed via RTSP protocol. There are four parameters provided in MPEG-4 mode which allow you to adjust the video performance: ■...
- Page 73 ■ Intra frame period Determine how often to plant an I frame. The shorter the duration, the more likely you will get better video quality, but at the cost of higher network bandwidth consumption. Select the intra frame period from the following durations: 1/4 second, 1/2 second, 1 second, 2 seconds, 3 seconds, and 4 seconds. ■...
-
Page 74: Audio Settings
Audio Settings Mute: Select this option to disable audio transmission from the Network Camera to all clients. Note that if mute mode is turned on, no audio data will be transmitted even if audio transmission is enabled on the Client Settings page. In that case, the following message is displayed: Internal microphone input gain: Select the gain of the internal audio input according to ambient conditions. -
Page 75: Motion Detection
Motion Detection This section explains how to configure the Network Camera to enable motion detection. A total of three motion detection windows can be configured. 2010/01/15 11:20:25 Follow the steps below to enable motion detection: Follow the steps below to enable motion detection: 1. - Page 76 A green bar indicates that even though motions have been detected, the event has not been triggered because the image variations still fall under the defined threshold. NOTE ● How does motion detection work? There are two motion detection parameters: Sensitivity and Percentage. In the illustration above, frame A and frame B are two sequential images.
-
Page 77: Camera Tampering Detection
Camera Tampering Detection This section explains how to set up camera tamper detection. With tamper detection, the camera is capable of detecting incidents such as redirection, blocking or defocusing, or even spray paint. Please follow the steps below to set up the camera tamper detection function: 1. -
Page 78: Camera Control
Camera Control This section explains how to control the Network Camera’s Pan/Tilt/digitl Zoom operation via the control panel and how to preset positions. Preset Positions You can preset positions for the Network Camera to go to directly or patrol. A total of 20 preset positions can be configured. - Page 79 Home page in PTZ Mode ■ The Preset Positions will also be displayed on the home page. Select one from the drop-down list, and the Network Camera will move to the selected preset position.
-
Page 80: Patrol Settings
Patrol Settings You can select some preset positions for the Network Camera to patrol. Please follow the steps below to set up a patrol schedule: 1. Click a preset location on the list and click Select. 2. The selected preset location will be displayed on the Source list. 3. -
Page 81: Homepage Layout
Homepage Layout Advanced Mode This section explains how to set up your own customized homepage layout. Preview This column shows the settings of your hompage layout. You can manually select the background and font colors in Theme Options (the third column on this page). The settings will be displayed automatically in this Preview field. - Page 82 Theme Options Here you can change the color of your homepage layout. There are three types of preset patterns for you to choose from. The new layout will simultaneously appear in the Preview filed. Click Save to enable the settings. Preset Patterns Font Color Background Color of the...
- Page 83 ■ Follow the steps below to set up the customed homepage: 1. Click Custom on the left column. 2. Click the field where you want to change the color on the right column. Custom Pattern 3. The palette window will pop up as shown below. 4.
-
Page 84: Application
Application Advanced Mode This section explains how to configure the Network Camera to responds to particular situations (event). A typical application is that when a motion is detected, the Network Camera sends buffered images to an FTP server or e-mail address as notifications. In the illustration on the right, an event can be triggered by many sources, such as motion detection or external digital input devices. - Page 85 Event name: Enter a name for the event setting. Enable this event: Select this option to enable the event setting. Priority: Select the relative importance of this event (High, Normal, or Low). Events with a higher priority setting will be executed first. Detect next event after seconds: Enter the duration in seconds to pause motion detection after a motion is detected.
- Page 86 Trigger This is the cause or stimulus which defines when to trigger the Network Camera. The trigger source can be configured to use the Network Camera’s built-in motion detection mechanism or external digital input devices. There are several choices of trigger sources as shown below. Select the item to display the detailed configuration options.
- Page 87 ■ Camera tampering detection This option allows the Network Camera to trigger when the camera detects that is being tampered with. To enable this function, you need to configure the Tampering Detection option first. Please refer to page 77 for detailed information. Event Schedule Specify the period for the event.
- Page 88 To set an event with recorded video or snapshots, it is necessary to configure the server and media settings so that the Network Camera will know what action to take (such as which server to send the media files to) when a trigger is activated. ■...
- Page 89 When completed, click Save to enable the settings and click Close to exit Event Settings page. The new event settings / server settings / media settings will appear in the event drop-down list on the Application page. Here is an example of the Application page with an event setting: When the Event Status is ON, once an event is triggered by motion detection, the Network Camera will automatically send snapshots via e-mail.
-
Page 90: Server Settings
Server Settings Click Add Server on Event Settings page to open the Server Setting page. On this page, you can specify where the notification messages are sent when a trigger is activated. A total of 5 server settings can be configured. - Page 91 FTP: Select to send the media files to an FTP server when a trigger is activated. ■ Server address: Enter the domain name or IP address of the FTP server. ■ Server port By default, the FTP server port is set to 21. It can also be assigned to another port number between 1025 and 65535.
- Page 92 HTTP: Select to send the media files to an HTTP server when a trigger is activated. ■ URL: Enter the URL of the HTTP server. ■ User name: Enter the user name if necessary. ■ Password: Enter the password if necessary. To verify if the HTTP settings are correctly configured, click Test.
-
Page 93: Media Settings
Media Settings Click Add Media on the Event Settings page to open the Media Settings page. On this page, you can specify the type of media that will be sent when a trigger is activated. A total of 5 media settings can be configured. - Page 94 Video clip: Select to send video clips when a trigger is activated. ■ Source: The source of video clip, which will be identical to the time shift caching stream. For more information about time shift caching stream, please refer to page 66. ■...
- Page 95 When completed, click Save to enable the settings and click Close to exit this page. The new media settings will appear on the Event Settings page. You can continue to select a server and media type for the event. Please go back to page 91 for detailed information.
- Page 96 The following is an example of a file destination with video clips: Click to delete selected items Click 20100115 to open the directory: The format is: HH (24r) Click to open the file list for that hour Click to delete selected items The format is: File name prefix + Minute (mm) You can set up the file name prefix on Media Settings page.
-
Page 97: Recording
Recording Advanced Mode This section explains how to configure the recording settings for the Network Camera. Recording Settings Insert your SD card and click here to test NOTE ● Before setting up this page, please set up the Network Storage on the Server Settings page first. ●... - Page 98 If successful, you will receive a test.txt file on the network storage server. 3. Enter a server name. 4. Click Save to complete the settings and click Close to exit the page. Recording Settings Click Add to open the recording setting page. In this page, you can define the recording source, recording schedule and recording capacity.
- Page 99 Source: Select the recording source (stream 1 ~ 4). Recording Schedule: Specify the recording duration. ■ Select the days of the week. ■ Select the recording start and end times in 24-hr time format. Destination: You can select the SD card or network storage that was set up for the recorded video files. Capacity: You can choose either the entire free space available or limit the recording size.
-
Page 100: Local Storage
Local Storage Advanced Mode This section explains how to manage the local storage on the Network Camera. Here you can view SD card status, search for recorded files to playback, download, etc. no SD card SD Card Management SD card status: This column shows the status and reserved space of your SD card. Please remember to format the SD card when using for the first time. - Page 101 SD card control ■ Enable cyclic storage: Check this item if you want to enable cyclic recording. When the maximum capacity is reached, the oldest file will be overwritten by the latest one. ■ Enable automatic disk cleanup: Check this item and enter the number of days you wish to retain a file. For example, if you enter “7 days”, the recorded files will be stored on the SD card for 7 days.
- Page 102 Search Results The following is an example of search results. There are four columns: Trigger time, Media type, Trigger type, and Locked. Click to sort the search results in either direction. Numbers of entries displayed on one page View: Click on a search result which will highlight the selected item in purple as shown above. Click the View button and a media window will pop up to play back the selected file.
- Page 103 Download: Click on a search result to highlight the selected item in purple as shown above. Then click the Download button and a file download window will pop up for you to save the file. JPEGs to AVI: This functions only applies to “JPEG“ format files such as snapshots. You can select several snapshots from the list, then click this button.
-
Page 104: System Log
System Log Advanced Mode This section explains how to configure the Network Camera to send the system log to the remote server as backup. Remote Log You can configure the Network Camera to send the system log file to a remote server as a log message. When using this feature, the appropriate syslog server is required for receiving the system log message from the Network Camera. -
Page 105: Maintenance
Maintenance This chapter explains how to restore the Network Camera to factory default, upgrade firmware version, etc. Reboot This feature allows you to reboot the Network Camera, which takes about one minute to complete. When completed, the live video page will be displayed in your browser. The following message will be displayed during the reboot process. - Page 106 Export / Upload Files Advanced Mode This feature allows you to Export / Upload daylight saving time rules, custom language files, and setting backup files. Export daylight saving time configuration file: Click to set the start and end time of DST. Follow the steps below to export: 1.
- Page 107 Note: Do not power off the Network Camera during the upgrade! Follow the steps below to upgrade the firmware: 1. Download the latest firmware file from the TOSHIBA website. The file is in .pkg file format. 2. Click Browse… and specify the firmware file.
- Page 108 The following message is displayed when the upgrade has succeeded. The following message is displayed when you have selected an incorrect firmware file. Starting firmware upgrade... Do not power down the server during the upgrade. The server will restart automatically after the upgrade is completed.
-
Page 109: Troubleshooting
There may be a difference of focus if compared to the left, right, top and bottom of image. It is not failure. WPS (Wi-Fi Protected Setup) : IK-WB16A-W only When using WPS button, make sure the router settings first. WPS of IK-WB16A-W doesn't support WEP security mode. ®... -
Page 110: Specifications
Specifications IK-WB16A Power supply Consumption current Image pickup device Full resolution Scanning system Minimum object illuminance White balance Image size Image compression system Image quality setting Maximum frame rate at M-JPEG*1 30 fps at 800 x 600, 15 fps at 1600 x 1200... - Page 111 Specifications IK-WB16A-W Power supply Consumption current Image pickup device Full resolution Scanning system Minimum object illuminance White balance Image size Image compression system Image quality setting Maximum frame rate at M-JPEG*1 30 fps at 800 x 600, 15 fps at 1600 x 1200...
-
Page 112: Appearance Diagram
Appearance Diagram IK-WB16A 5.2 inchs (131mm) 5.6 inchs (140mm) inches (mm) - Page 113 Appearance Diagram IK-WB16A-W 5.2 inchs (131mm) 5.6 inchs (140mm) inches (mm)
-
Page 114: Technology License Notice
The software is protected by the Copyright Law, Universal Copyright Convention, and other intellectual property laws and agreements. The permission of Toshiba and the third party must therefore be obtained before the software can be reproduced. Contact Toshiba if you need it for more information at... -
Page 115: Gnu General Public License
End-user License Agreement on Free Software Components Used in the TOSHIBA Network Camera GNU GENERAL PUBLIC LICENSE Copyright (C) 1989, 1991 Free Software Foundation, Inc. 51 Franklin Street, Fifth Floor, Boston, MA 02110-1301 USA Everyone is permitted to copy and distribute verbatim copies of this license document, but changing it is not allowed. - Page 116 having been made by running the Program). Whether that is true depends on what the Program does. 1. You may copy and distribute verbatim copies of the Program's source code as you receive it, in any medium, provided that you conspicuously and appropriately publish on each copy an appropriate copyright notice and disclaimer of warranty;...
- Page 117 c) Accompany it with the information you received as to the offer to distribute corresponding source code. (This alternative is allowed only for noncommercial distribution and only if you received the program in object code or executable form with such an offer, in accord with Subsection b above.) The source code for a work means the preferred form of the work for making modifications to it.
- Page 118 a licensee cannot impose that choice. This section is intended to make thoroughly clear what is believed to be a consequence of the rest of this License. 8. If the distribution and/or use of the Program is restricted in certain countries either by patents or by copyrighted interfaces, the original copyright holder who places the Program under this License may add an explicit geographical distribution limitation excluding those countries, so that distribution is permitted only in or among countries not thus excluded.
- Page 119 END OF TERMS AND CONDITIONS How to Apply These Terms to Your New Programs If you develop a new program, and you want it to be of the greatest possible use to the public, the best way to achieve this is to make it free software which everyone can redistribute and change under these terms.
- Page 120 TOSHIBA AMERICA INFORMATION SYSTEMS, INC. Surveillance & IP Video Products 9740 Irvine Boulevard, Irvine, CA 92618-1697 Phone Number: (877) 855-1349...