Table of Contents
Advertisement
Quick Links
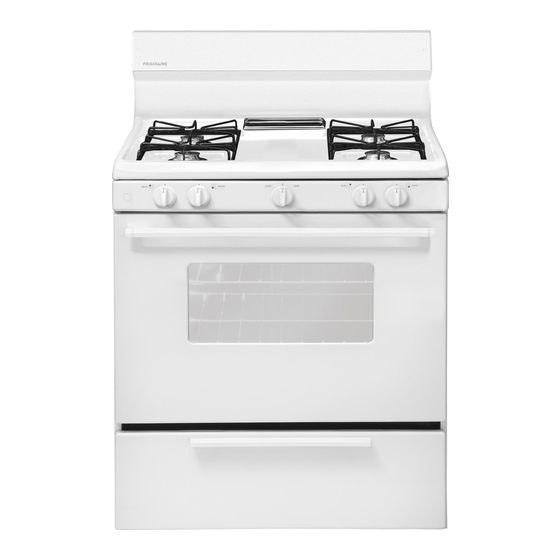
All about the
Use
of your
Important Safety Instructions ...........................3-6
Before Setting Oven Controls ..............................7
Before Setting Surface Controls ...........................8
Setting Surface Controls ....................................9
Setting Clock and Minute Timer ......................... 10
www.frigidaire.com USA 1-800-944-9044
&
Gas Range
TA B L E O F C O N T E N T S
www.frigidaire.ca Canada 1-800-265-8352
Care
Setting Oven Controls .................................. 11-12
Care & Cleaning .......................................... 13-16
Before You Call ........................................... 17-18
Major Appliance Warranty ................................. 20
Advertisement
Table of Contents

Related Manuals for Electrolux Frigidaire FFGF3005MQ


Summary of Contents for Electrolux Frigidaire FFGF3005MQ
-
Page 1: Table Of Contents
All about the & Care Gas Range of your TA B L E O F C O N T E N T S Important Safety Instructions ......3-6 Setting Oven Controls ........11-12 Before Setting Oven Controls ......7 Care & Cleaning .......... 13-16 Before Setting Surface Controls ......8 Before You Call ........... -
Page 2: Product Registration
Serial plate is located here Be sure to visit us online at under cooktop www.frigidaire.com for a complete line of accessories. or open broiler drawer (some models) or storage drawer (some models). All rights reserved. Printed in the USA ©2012 Electrolux Home Products, Inc. -
Page 3: Important Safety Instructions
IMPORTANT SAFETY INSTRUCTIONS Read all instructions before using this appliance. Do not attempt to install or operate your appliance un- WARNING til you have read the safety precautions in this manual. Safety items throughout this manual are labeled with a If the information in this manual is not followed WARNING or CAUTION statement based on the risk type. - Page 4 IMPORTANT SAFETY INSTRUCTIONS IMPORTANT WARNING For electric ignition models only: Do not attempt NEVER use this appliance as a space heater to to operate the range during a power failure. If heat or warm the room. Doing so may result in the power fails, always turn off the range.
- Page 5 IMPORTANT SAFETY INSTRUCTIONS IMPORTANT INSTRUCTIONS FOR USING IMPORTANT INSTRUCTIONS FOR USING YOUR COOKTOP YOUR OVEN • Use care when opening oven door , warmer WARNING drawer or lower oven door—Stand to the side of the range when opening the door of a hot oven. Let hot air Use Proper Flame Size—Adjust flame size so it does or steam escape before you remove or replace food in not extend beyond the edge of the utensil.
- Page 6 IMPORTANT SAFETY INSTRUCTIONS Important Safety Notice Conversion to Liquefied Petroleum Gas The California Safe Drinking Water and Toxic Enforcement WARNING Act requires the Governor of California to publish a list of substances known to the state to cause cancer, Personal injury or death from electrical shock may occur birth defects or other reproductive harm, and requires if the range is not installed by a qualified installer or businesses to warn customers of potential exposure to...
-
Page 7: Before Setting Oven Controls
BEFORE SETTING OVEN CONTROLS Oven vent location Removing, replacing & arranging racks The oven vent is located at center rear of cooktop To remove - pull the rack forward until it stops. Lift up below the control panel (See Fig. 1). When the oven is front of rack and slide out. -
Page 8: Before Setting Surface Controls
BEFORE SETTING SURFACE CONTROLS Using proper cookware Set proper burner flame size The color of the flame is the key to proper burner adjustment. For best cooking results, A good flame is clear, blue and hardly visible in a well-lighted cookware should have flat room. -
Page 9: Setting Surface Controls
SETTING SURFACE CONTROLS Setting surface controls Always select cookware that is suitable for the amount and type of food being prepared. Set a flame size appropriate to the pan. Adjust burner to a setting that does not allow flames to extend beyond the outer edge of the cooking utensil. -
Page 10: Setting Clock And Minute Timer
SETTING CLOCK AND MINUTE TIMER (some models) To Set Models with no Clock (some models) To Set the 4 Button Time of Day Clock If your model has no Clock or Minute Timer, clock settings (some models): are NOT required to operate your range. Please proceed to When the range is first plugged in, or when the power Setting Surface &... -
Page 11: Setting Oven Controls
SETTING OVEN CONTROLS Setting bake NOTE The oven can be programmed to bake at any temperature from 170°F to 550°F (77°C to 287°C). • The graphics shown for the oven control knob may not To set bake look identical to the knob on your range. The illustration 1. -
Page 12: Setting Broil
SETTING OVEN CONTROLS Setting broil 3 rear locating tilt up front of rack Use the broil feature to cook meats that require direct hole positions to remove and adjust exposure to flame heat for optimum browning. Use the broiler drawer and rack along with the broil pan and insert when broiling. -
Page 13: Care & Cleaning
CARE & CLEANING Cleaning recommendation table Surface type Recommendation • Control knobs For general cleaning , use hot, soapy water and a cloth. For more difficult soils and • Painted body parts built-up grease , apply a liquid detergent directly onto the soil. Leave on soil for •... -
Page 14: Cleaning The Cooktop And Surface Burners
CARE & CLEANING Cleaning the cooktop and surface burners CAUTION WARNING • DO NOT turn the burners on when the cooktop is • To avoid possible burns DO NOT attempt any of the raised for cleaning. Be sure that the top is completely cleaning instructions provided below before turning OFF lowered and securely in place before turning on the all of the surface burners and allow them to cool. - Page 15 CARE & CLEANING Cleaning the cooktop and surface burners (cont’d) To clean the surface burner heads rear burners For proper gas flow it may be necessary to clean the shipping screws burner ports. Before cleaning be sure the gas burners are turned off.
-
Page 16: Removing & Replacing Oven Door
CARE & CLEANING Removing and replacing the lift-off oven door CAUTION Oven door • To avoid possible injury when removing or replacing hinge the oven door, follow the instructions below care- locations fully and always hold the oven door with both hands positioned away from the door hinge area. -
Page 17: Before You Call
BEFORE YOU CALL Solutions to common problems • Problem Solution Poor baking results. • Many factors affect baking results. Make sure the proper oven rack position is used. Center food in the oven and space pans to allow air to circulate. Allow the oven to preheat to the set temperature before placing food in the oven. - Page 18 BEFORE YOU CALL • Solutions to common problems Problem Solution Oven smokes excessively during broiling. • Incorrect setting. Follow broil instructions in Setting Oven Controls. • Broiler drawer is open. Be sure broiler drawer is closed. • Meat too close to broil burner. Reposition the broiler drawer rack to provide proper clearance between the meat &...
- Page 19 NOTES...
-
Page 20: Major Appliance Warranty
This warranty only applies in the USA and Canada. In the USA, your appliance is warranted by Electrolux Major Appliances North America, a division of Electrolux Home Products, Inc. In Canada, your appliance is warranted by Electrolux Canada Corp.