Table of Contents
Advertisement
Advertisement
Table of Contents

Related Manuals for Pioneer DEH-X7800BHS


Summary of Contents for Pioneer DEH-X7800BHS
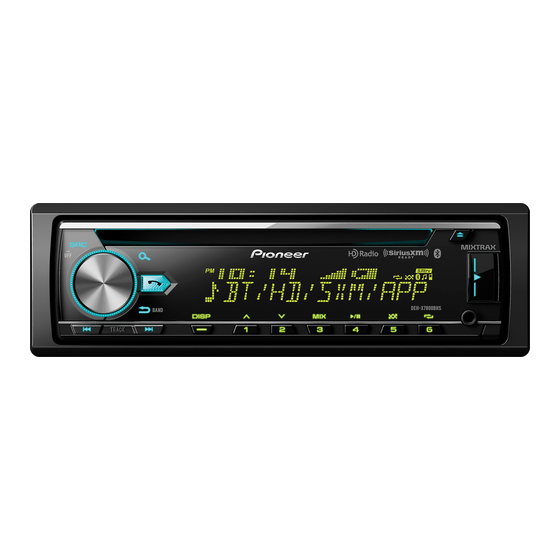
- Page 1 CD RDS RECEIVER DEH-X8800BHS DEH-X7800BHS DEH-X6800BS DIGITAL MEDIA RECEIVER Owner’s Manual MVH-X580BS Important (Serial number) The serial number is located on the bottom of this unit. For your own security and convenience, be sure to record this number on the enclosed warranty card.
-
Page 2: Table Of Contents
Before You Start Before You Start..................2 Thank you for purchasing this PIONEER product To ensure proper use, please read through this manual before using this product. It is especially important that you read and observe WARNINGs and CAUTIONs in this manual. Please keep the Getting Started.................. -
Page 3: Getting Started
This product is a class 1 laser product classified under the Safety of laser products, IEC 60825-1:2007. After-sales service for Pioneer products Please contact the dealer, distributor from where you purchased this unit or the authorized PIONEER Service Station for after-sales service or any other information. In case the necessary information is not... - Page 4 Operation MVH-X580BS Purpose Head Unit Remote Control M.C. (multi-control) dial Change the display Press DISP repeatedly. Press DISP repeatedly. SRC (source)/OFF Display window information Return to the previous Press BAND/ Press to select the display/list next/previous folder. Return to the normal display Press and hold BAND/ –...
- Page 5 Detach Attach How to replace the battery Insert the CR2025 (3 V) battery with the plus (+) and Important minus (–) poles orientated properly. • Avoid subjecting the front panel to excessive shock. • Keep the front panel out of direct sunlight and high temperatures. •...
- Page 6 INITIAL settings WARNING Do not use the unit in standard mode when a speaker system for network mode is connected to the unit. Do not use the unit in network mode when a speaker system for standard mode is connected to Press and hold SRC/OFF until the unit turns off.
-
Page 7: Hd Radio™ Technology/Radio
Digital, CD-quality sound. HD Radio Technology enables local radio stations to broadcast HD Radio™ Technology/Radio a clean digital signal. AM sounds like today’s FM and FM sounds like a CD. Receiving preset stations (HD Radio™ Technology is only available for DEH- X8800BHS/X7800BHS.) Press SRC/OFF to select [HD RADIO] or [RADIO]. -
Page 8: Cd/Usb/Ipod/Aux
CAUTION Press and hold the M.C. dial in step 2 above. Use an optional Pioneer USB cable (CD-U50E) to connect the USB device as any device connected Turn the M.C. dial to select [DELETE YES], then press to confirm. directly to the unit will protrude out from the unit, which could be dangerous. - Page 9 Purpose Operation Useful functions for iPod Select a folder/album*1 Press 1/ or 2/ Select a track/song (chapter) Press Link play mode Fast forward or reverse*2 Press and hold You can access songs based on the artist, album, or genre currently playing. Search for a file from a list 1 Press to display the list.
-
Page 10: Bluetooth
GUEST MODE when the unit has already been paired with three devices. [ON], [OFF] Select [Pioneer BT Unit] shown in the device display. Select [ON] to pair the unit and iPhone automatically when an A.PAIRING Make sure the same 6-digit number appears on this unit and the device, then iPhone is connected to the unit via USB. - Page 11 Turn the M.C. dial to select [RECENTS] or [PHONE BOOK], then press to confirm. Press and hold to activate the voice recognition mode. If you select [PHONE BOOK], proceed to step 4. Press the M.C. dial and then talk into the microphone to input voice commands. Turn the M.C.
-
Page 12: App Mode
Press BAND/ to start playback. NOTE PIONEER IS NOT LIABLE FOR ANY THIRD PARTY APPS OR CONTENT, INCLUDING WITHOUT LIMITATION THEIR ACCURACY OR COMPLETENESS. THE CONTENT AND FUNCTIONALITY OF SUCH APPS ARE THE Basic operations SOLE RESPONSIBILITY OF THE APP PROVIDER. -
Page 13: Pandora
NOTE Turn the M.C. dial to select [BLUETOOTH] for iPhone/Android device via When the connection setting is changed, a message that lets you know that the connection Bluetooth. setting had been changed will appear in the display. Press the M.C. dial and turn the M.C. dial to select [SRC OFF :YES], then press to confirm. -
Page 14: Spotify
Basic operations Spotify® You can make various adjustments in the FUNCTION settings (page 19). Spotify is a music streaming distribution service not affiliated with Pioneer. NOTE To enjoy Spotify as you drive, first download the Spotify app to your iPhone or The available operations may vary according to the type of contents (track/album/artist/playlist/radio) Android device. - Page 15 Press any key to clear the activation message. TuneStart™ Automatically start songs from the beginning when you tune to one of your preset NOTE music channels stored on the current band of presets. For details, refer to TUNE START on The activation process usually takes 10 minutes to 15 minutes but may take up to an hour in some page 20.
-
Page 16: Using Pioneer Arc App
NOTE Press DISP to change the display information between “Channel Name”, “Artist Name”, “Song Title”, You can operate the unit from Pioneer ARC APP installed on an iPhone/Android device. “Content Info” and “Channel Number”. In some cases, you can control aspects of the application, such as source selection, Scan options pause, etc., by using the unit. -
Page 17: Audio Adjustments
NOTE If Pioneer ARC APP has not been installed on your Android device yet, a message that prompts you to install the application will appear on your Android device. Select [OFF] in [P.APP AUTO ON] to You can adjust the cut-off frequency value and the slope value of each speaker. - Page 18 • When this unit is connected to a power amp with an LPF (low pass filter), turn off the LPF before Turn the M.C. dial to select an appropriate cut-off frequency for the speaker unit performing auto TA and EQ. Also set the cut-off frequency for the built-in LPF of an active subwoofer (filter) selected in step 4, then press to confirm.
-
Page 19: Settings
Settings You can adjust various settings in the main menu. Press the M.C. dial to display the main menu. Turn the M.C. dial to select one of the categories below, then press to confirm. • FUNCTION settings (page 19) • AUDIO settings (page 21) •... - Page 20 Menu Item Description Menu Item Description SAVE STOP Store the information about the song currently Stop playback. being played to your music list on Spotify. * If [HD SEEK] is set to [ON] and [BLEND] is set to [OFF], the tuner cannot receive broadcasts. In this UNSAVE case, [HD SEEK] or [BLEND] is changed automatically as follows: –...
-
Page 21: Audio Settings
Menu Item Description Menu Item Description SUBWOOFER PARENTAL CTRL [ON], [OFF] Set to [ON] when using a subwoofer speaker. [LOCKED CH], [CLEAR ALL], [EDIT Input the current passcode on the [PASSCODE] CODE] screen (the default passcode is 0000). SUBWOOFER*2 1 Turn the M.C. dial to select a number. [NOR], [REV] Select the subwoofer phase. -
Page 22: System Settings
Menu Item Description SYSTEM settings A-EQ & TA You can also access to these menus when the unit is turned off. [ON], [OFF] Set the auto-adjusted equalizer to suit the vehicle’s acoustics. To use this function, the Menu Item Description vehicle’s acoustics must be measured in advance CLOCK SET (page 18). -
Page 23: Illumination Settings
* The CUSTOM setting is only available for [KEY COLOR] and [DISP COLOR]. P.APP AUTO ON DIM SETTING [ON], [OFF] Select [ON] to automatically launch Pioneer ARC [SYNC ILLUMI], [SYNC CLOCK], Change the display brightness. APP when an Android device is connected to the [ON], [OFF] unit via AOA. -
Page 24: Mixtrax Settings
MIXTRAX settings Connections/Installation Menu Item Description Ground wire POWER AMP Connections SHORT PLAYBCK [1.0 MIN], [1.5 MIN], [2.0 MIN], Select the length of the playback time. In the following, "NW" represents network [2.5 MIN], [3.0 MIN], [OFF] mode and "STD" represents standard FLASH AREA mode. - Page 25 – Do not connect the yellow cable to the SiriusXM Connect Vehicle Tuner input Connect to the system control terminal battery by passing it through the hole Power cord input of the power amp or auto-antenna relay to the engine compartment. Microphone input control terminal (max.
- Page 26 recommended to use the clamps (sold Installation separately) to arrange the lead. NOTE Important Depending on the vehicle model, the • Check all connections and systems before microphone cable length may be too short final installation. when you mount the microphone on the •...
-
Page 27: Additional Information
ON again. If the message remains, – Select the repeat play range again. contact your dealer or an authorized Pioneer Service Station for assistance. A subfolder is not played back. → Subfolders cannot be played when NO XXXX (NO TITLE, for example) [FLD] (folder repeat) is selected. - Page 28 → iPod failure. Bluetooth device ERROR-23 PROTECT – Disconnect the cable from the iPod. → Unsupported CD format. → All the files on the connected USB Once the iPod’s main menu is ERROR-10 – Replace the disc. device are embedded with DRM. displayed, reconnect the iPod and →...
- Page 29 – Wait until Pandora allows you to skip SiriusXM Satellite Radio DISCONNECTED PRESS BAND KEY TO CHECK APP again. → Connection to the application failed. RETRY CHECK ANTENNA → Bluetooth connection lost. – Follow the instructions that appear on UPDATE APP →...
- Page 30 CAUTION – Select a band with two or more become jammed under the brake or • Pioneer cannot guarantee compatibility channels. accelerator pedal. with all USB mass storage devices, and • Use 12-cm discs.
- Page 31 CAUTION registered trademarks owned by Bluetooth SIG, less than two tiers.) Pioneer accepts no responsibility for data Inc. and any use of such marks by PIONEER Apple Lossless Not compatible Playable folders Up to 1 500 CORPORATION is under license. Other...
- Page 32 INTERRUPTION) HOWEVER CAUSED AND Specifications mode): ON ANY THEORY OF LIABILITY, WHETHER Frequency: 50 Hz/63 Hz/80 Hz/100 MIXTRAX MIXTRAX is a trademark of the PIONEER IN CONTRACT, STRICT LIABILITY, OR TORT Hz/125 Hz/160 Hz/200 Hz General CORPORATION. (INCLUDING NEGLIGENCE OR OTHERWISE) Slope: -6 dB/oct, -12 dB/oct, -18 dB/ Power source: 14.4 V DC (10.8 V to 15.1 V...
- Page 33 High pass filter (HIGH) (Network mode): AAC decoding format: MPEG-4 AAC (iTunes Bluetooth Frequency: 1.25 kHz/1.6 kHz/2 kHz/ encoded only) (Ver. 10.6 and earlier) Version: Bluetooth 3.0 certified 2.5 kHz/3.15 kHz/4 kHz/5 kHz/6.3 kHz/ WAV signal format: Linear PCM & MS Output power: +4 dBm Maximum (Power 8 kHz/10 kHz/12.5 kHz ADPCM (Non-compressed)