
Related Manuals for Panasonic AG-DVC60P


Summary of Contents for Panasonic AG-DVC60P
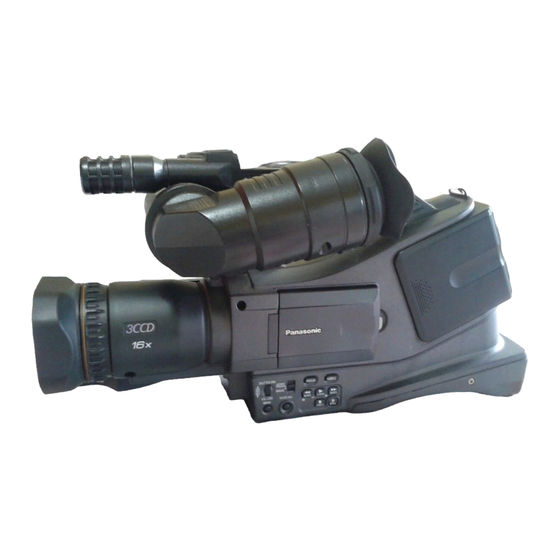
- Page 1 Mini NTSC Digital Video Camera-Recorder Model AG- Before operating this product, please read the instructions carefully and save this manual for future use. Printed in Japan F0804S0 -H VQT0N16...
- Page 2 IMPORTANT “Unauthorized recording of copyrighted television programs, video tapes and other materials may infringe the right of copyright owners and be contrary to copyright laws.” CAUTION: CAUTION THE AC RECEPTACLE (MAINS SOCKET OUT- RISK OF ELECTRIC SHOCK LET) SHALL BE INSTALLED NEAR THE DO NOT OPEN EQUIPMENT AND EASILY ACCESSIBLE.
- Page 3 Notice (U.S.A.only): Camera-Recorder • The rating plate is on the underside of the Camera- This product has a fluorescent lamp that con- Recorder tains a small amount of mercury. It also contains lead in some components. Dis- AC Adapter posal of these materials may be regulated in your community due to environmental consid- •...
- Page 4 Important Safeguards 13. Outdoor Antenna Grounding — If an outside 17. Objects and Liquids — Never push objects of any antenna or cable system is connected to the video kind into this video unit through openings as they unit, be sure the antenna or cable system is may touch dangerous voltage points or short out grounded so as to provide some protection against parts that could result in a fire or electric shock.
- Page 5 Remember to check the settings especially when you intend to use special effects or backlight compensation. Panasonic makes no guarantees for your recordings. Please understand that Panasonic makes no guarantees for your recordings in cases where images and/or sound were not recorded as you intended due to problems with the camera-recorder or cassette.
-
Page 6: Table Of Contents
Contents Adjusting the hand strap ....14 BEFORE USE Attaching the shoulder strap ....14 Operating precautions . - Page 7 Time data ....... . . 25 PREPARATION Adjusting the calendar ..... 25 Charging the internal battery .
-
Page 8: Operating Precautions
Operating precautions Do not allow any water to get into the camera- Do not drop the camera-recorder while carrying it. • Strong impact may damage the camera-recorder to recorder when using it in the rain or snow or at the beach. - Page 9 Battery characteristics Liquid crystal displays • If the same image or characters are left displayed on This camera-recorder uses a rechargeable lithium-ion battery that uses its internal chemical reaction to gener- the LCD monitor or viewfinder for an extended ate electrical energy. This reaction is easily influenced period, they may become burned onto the screen.
-
Page 10: Checking The System Operations
Checking the system operations After purchasing your camera-recorder, follow the instructions for checking the system operations to ensure that the unit is working properly before you attempt to shoot anything. Getting ready AC adapter AC cord Slide the OPEN/EJECT lever in the direction shown by the arrow to open the cassette cover. -
Page 11: Turning On The Power
Press the part marked “PUSH” and close the cas- Shooting sette holder. When the holder is closed properly, the cassette Set the AUTO/MANUAL selector switch to AUTO. holder is retracted automatically. mrpe SHUTTER/IRIS FOCUS USER 2 AUTO MANUAL VOL/JOG WHITE BAL SEARCH D.ZOOM SEARCH... -
Page 12: Checking What You Have Shot (Rec Check)
Checking the system operations (cont.) Checking what you have shot Removing the tape (rec check) Slide the OPEN/EJECT lever in the direction shown by the arrow to open the cassette cover. Open the LCD monitor while holding down the When the cover is fully opened, the cassette holder panel locking button. -
Page 13: Turning Off The Power
• Check that the camera-recorder’s power is on before sliding the OPEN/EJECT lever. • Close the cassette cover if you are not going to insert a cassette tape immediately after removing another. • Do not attempt to remove a tape while you are recording. -
Page 14: Adjusting The Hand Strap
Adjusting the hand strap Adjust the hand strap to fit your hand. Open the cover and adjust the strap length. Close the cover firmly. Attaching the shoulder strap We recommended that you attach the shoulder strap to help you avoid dropping the camera-recorder. inch (20 mm) inch or more... -
Page 15: Lens Hood
Lens hood Removing the lens hood Attaching the lens hood • Turn the lens hood counterclockwise to remove it. • Make sure that the larger flat part of the lens hood is pointing upward, then fit it into place. • Turn the lens hood clockwise to attach it. Larger flat area Cassette tapes g We recommend that you use the following mini DV... -
Page 16: Camera-Recorder
Description of parts For details, refer to the respective pages. Camera-recorder... - Page 17 Camera-recorder REC sub button (P54, 56) ZOOM SPEED select switch (P31) REC button (P54, 56) ZOOM SPEED RESET button (counter) OFF/M COUNTER RESET (P24, 27, 48) AUDIO IN select switch AUDIO IN FRONT (P42) AUDIO LEVEL COUNTER button (P48) LINE MODE CHK REAR CH1 CH2...
-
Page 18: Wireless Remote Control Unit
Description of parts (cont.) Wireless remote control unit 1. DATE/TIME button (P44) Note that the following buttons are for functions that 2. OSD (On Screen Display) button (P44) cannot be executed on the camera-recorder. 3. COUNTER button (P48) • TITLE •... -
Page 19: Remote Control Unit
Remote control unit Installing the battery Setting the remote control unit When two camera-recorders are used simultaneously, Pull out the battery holder while pressing the knob either [VCR1] or [VCR2] can be set for this camera- in the direction of arrow recorder and the wireless remote control unit so that the remote control unit will not be used to operate the wrong camera-recorder by mistake. -
Page 20: Battery
Battery Charging Before using the battery, fully charge it in the AC Recording time of accessory battery adapter. We recommend that you keep a spare battery with you whenever you use the battery to run the camera- recorder. Align the battery with the “ ”... -
Page 21: Mounting
Mounting Press the battery straight against the camera-recorder body and slide it down until it clicks into place. Removing • Turn the POWER lever to the OFF position, check that the POWER lamp (CAM/VCR) has gone off, and then remove the battery. •... -
Page 22: Viewfinder
Viewfinder This camera-recorder offers a choice of viewfinders: a viewfinder with a small LCD screen and one with a 2.5- Adjust the diopter adjustment lever so that the char- inch LCD monitor. acters on the viewfinder screen are seen most Use the viewfinder that best suits the application and clearly. - Page 23 Adjusting the screen display Use the menus (P62-64) to select “YES” as the Turn the multi dial to adjust the color level of the LCD/EVF SET item setting on the DISPLAY LCD monitor screen. SETUP screen. SHUTTER/IRIS afpmi^v==pbqrm |||| i`aLbsc==pbq jfoolo pbic==pellq VOL/JOG...
- Page 24 Viewfinder (cont.) • If the RESET button (counter) is pressed when it is possible to change the settings by selecting the LCD/EVF SET item, the values set for those items (LCD BRIGHTNESS and COLOR LEVEL, and EVF BRIGHTNESS) can be returned to the factory set- tings.
-
Page 25: Time Data
Time data Adjusting the calendar This shows you how to adjust the calendar to 5:20 PM Turn the multi dial to set DEC. on December 25, 2004. `il`h==pbq SHUTTER/IRIS Set the POWER lever to the ON position. vb^o OMMQ POWER POWER jlkqe VOL/JOG... -
Page 26: Charging The Internal Battery
Time data (cont.) Charging the internal battery Turn the multi dial to move to the UB PRESET item. ob`loafkd==pbqrm The calendar data (year/month/day/hours/ minutes) is SHUTTER/IRIS kept in the memory by the internal battery (three cfopq==ob`==q` obdbk months when fully charged). |||| q`==mobpbq When the “... -
Page 27: Setting The Time Code
Press the multi dial to move to the next digit. Press the MENU button twice to exit the menu mode. r_==mobpbq SHUTTER/IRIS MENU SELECT VAR. SEARCH ZOOM c==M===M===M===M===M===M===M STORE MENU VOL/JOG OFF/ON ITEM P.B.DIGITAL ZOOM MENU ITEM Setting the time code mrpe==jbkr==ql==obqrok Perform the settings related to the time code using the If the RESET button (counter) is pressed when the... -
Page 28: Specifying The Time Code
Time data (cont.) Specifying the time code You can record a value of your choice as the initial set- Press the multi dial to move q to “YES”. ting for the time code to be used at the start of record- ing. - Page 29 Press the multi dial to move to the next digit. The time code is entered when the multi dial is pressed. q`==mobpbq SHUTTER/IRIS N=M=Ü=M=M=ã=M=M=ë=M=M=Ñ= VOL/JOG ZOOM MENU ITEM mrpe==jbkr==ql==obqrok If the RESET button (counter) is pressed when the time code has been set, the time code is cleared to Press the MENU button two times to exit the menu zero.
-
Page 30: Regular Shooting
Regular shooting Preparation and inspections Shooting Before shooting, check that the camera-recorder is Set the AUTO/MANUAL selector switch to the operating properly. AUTO position. Check the equipment as warranted by the shooting conditions. g Battery (P20) Have a fully charged battery ready. We also recommend that you keep a spare battery on hand. -
Page 31: Shooting Techniques For Different Targets
Shooting techniques for different targets Low-angle shooting Zoom functions For shooting at a low angle, you can use the START/ This camera-recorder comes with a ×16 optical zoom. STOP button on the handle. Press the main unit's ZOOM buttons gently for slow The recording operation of this button can be set using zooming;... -
Page 32: Self-Portrait Shooting
Shooting techniques for different targets (cont.) Self-portrait shooting High-sensitivity shooting (SNS) This camera-recorder comes with a high-sensitivity When the LCD monitor is opened and turned 180 shooting function to enable shooting in very dark plac- degrees toward the lens to take shots of yourself, the images shot may appear differently from how you You can shoot scenes in three high-sensitivity shooting would normally. -
Page 33: Vibration Reduction Function
• You can only adjust the gain when in the IR or • It may not be possible to reduce the vibration at such SUPER IR modes. You can adjust both the gain and times when the vibration is severe or when a moving aperture with the multi dial in the COLOR NS mode. -
Page 34: Zebra Pattern
Shooting techniques for different targets (cont.) Zebra pattern When the ZEBRA button is pressed, parts that may be This camera-recorder normally shoots scenes using whitened out due to overexposure can be displayed in field recording (60 fields per second). stripes. When “FRAME”... -
Page 35: Changing The Image Size
Changing the image size Adding effects to images Use the menus (P62-64) to select the “WIPE” or “MIX” This camera-recorder allows you to change the size (aspect ratio) of the images recorded on tape. for the EFFECT item on the RECORDING SETUP Use the menus (P62-64) to select the desired setting screen. -
Page 36: Using The User Buttons
Shooting techniques for different targets (cont.) Using the USER buttons AE lock function You can allocate functions that you have selected using This function locks the shutter speed and iris for as the menu to the USER1, USER2 and USER3 buttons. long as you shoot when you press the USER button (P68) to which the AE lock function has been allocated. -
Page 37: Backup Recording
Backup recording Switching to manual mode You can automatically record backups of the camera This camera-recorder enables you to switch over to the images on an external unit (P49) connected to the DV manual mode, which enables you to perform the opera- connector. -
Page 38: Shutter Speed, Iris And Gain Adjustments
Shutter speed, iris and gain adjustments You can adjust the shutter speed, iris and gain to suit Adjusting the slow shutter speed the scenes being shot and the lighting conditions. You cannot switch to the slow shutter speed while you are shooting at a normal shutter speed. -
Page 39: Iris And Gain Adjustments
• With artificial lighting and especially fluorescent lights Iris and gain adjustments and mercury-vapor lamps, the luminance changes in synchronization with the power line frequency. In When you press the multi dial, the iris and gain val- areas where this frequency is 50 Hz, mutual interfer- ues are displayed on the screen. -
Page 40: White Balance Adjustments
White balance adjustments Press the WHITE BAL button to select the desired Auto white balance white balance setting mode. When you shoot with the AUTO/MANUAL selector switch at the AUTO position, the white balance is adjusted automatically while scenes being recorded. -
Page 41: Adjusting The White Balance Manually
The white balance is now adjusted automatically. Adjusting the white balance manually The screen then darkens for a moment before the In the set mode ( ), you can save the white balance, black balance is adjusted automatically. which has been adjusted manually, in the memory. When the adjustments have been completed, stops blinking and changes back to a lighted dis- Place a white pattern in a location with the same... -
Page 42: Audio Input Select And Level Adjustments
Audio input select and level adjustments Selecting audio input Audio level adjustments Use the AUDIO IN switch to switch input between the You can adjust the level of the audio input built-in microphone, an external microphone, an exter- from a microphone and the headphone nal microphone (XLR), and an external line (XLR). -
Page 43: Normal Playback
Normal playback Playing back a tape You can play back images as soon as you have shot Open the LCD monitor while holding down the them. panel locking button. The LCD monitor can be opened to a maximum Turn the POWER lever to the ON position. angle of 90°. -
Page 44: Adjusting The Volume
Normal playback (cont.) Adjusting the volume Connecting a TV to view images You can adjust the speaker volume when a tape is When tha camera-recorder is connected to a TV set being played back. using an AV cable or S-video cord (options), you can The adjustment will be reflected in the headphone vol- view the playback images on tha TV screen. -
Page 45: Variable-Speed Playback
Variable-speed playback Slow playback Frame-feed playback You can play back tapes recorded in the SP and LP Frame-feed playback can be initiated by turning the mode at about one-fifth and one-third of the normal multi dial during still-picture playback. Turn the multi tape speed, respectively. -
Page 46: Search Functions
Search functions Variable-speed search If, in the VCR mode, you press the USER button (P68) This function enables you to change the playback speed and search for specific scenes. to which you have allocated the BLANK SEARCH func- tion, the end of the last scene shot (a blank part of the Press the q button on the camera-recorder or the tape) is found, and a still picture of the frame that is about a second ahead of the end of the last scene is... -
Page 47: Index Search
Index search This function searches for the index signals recorded Press one of the INDEX buttons (i or u) on the on the tape so that the tape can be cued up to a partic- remote control unit. ular part. Index searches can only be performed using the P-IN-P A.DUB... -
Page 48: Counter
Counter Counter display Counter memory function You can display a counter that indicates how much time After shooting or playback, the tape can first be has elapsed during shooting or playback by pressing returned to near the position reset to zero using the the COUNTER button. -
Page 49: Connecting External Units
Connecting external units Headphones melkbp melkbp Digital video equipment... -
Page 50: Tv Set
Connecting external units (cont.) TV set S-VIDEO S-VIDEO VIDEO VIDEO AUDIO AUDIO IN/OUT IN/OUT IN/OUT IN/OUT IN/OUT IN/OUT Red: CH2 (R ch) audio Yellow: Video White: CH1 (L ch) audio White: CH1 (L ch) audio Red: CH2 (R ch) audio S-video cable (option) AV cable (option) -
Page 51: External Microphone
External microphone... -
Page 52: Audio Dubbing
Audio dubbing Background music or narration can be added to the Press the A.DUB button on the remote control unit images you have recorded on the tape. to establish the status ready for audio dubbing. Press the MODE button to set the camera-recorder ^Kar_ to the VCR mode. - Page 53 g Listening to sound that has been g Using the counter memory func- dubbed tion to edit dubbed sound You can switch between the sound that has been First reset the counter memory display at the dubbed and the sound heard during shooting using position where the audio dubbing is to end.
-
Page 54: Dubbing
Dubbing Analog input Using the dubbing function, you can dub (copy) the contents of S-VHS (or VHS) cassettes onto DV cas- settes or record TV programs. (P50) Press the MODE button to set the camera-recorder to the VCR mode. POWER Turn on the power of the external unit, and play back the tape. -
Page 55: Analog Output
Analog input g Analog/digital (AD) conversion You can use a video deck to dub the images you have shot using this camera-recorder onto an S-VHS (or You can use the camera-recorder as an analog-dig- VHS) cassette tape. (P50) ital (AD) converter by using the menus (P62-64) to select “ON”... -
Page 56: Digital Input/Output
Dubbing (cont.) Digital input/output You can perform dubbing with a high image quality by Press the g button to stop the recording in the means of digital signals by using the DV cable (option) recorder. to connect the camera-recorder to a digital video unit equipped with a DV connector (IEEE 1394 connector). -
Page 57: Screen Displays
Screen displays Displays in CAMERA and VCR modes 31 30 29 ===aNS=u=====wMM m^rpb q`=====NO=W=PQ=W=RS=K=MM NKORu Items with the mark next to their numbers in jlsfb==== the figure at left are also displayed in the VCR mode as camera data when “ON” has been selected as the CAMERA DATA item setting on r=N=W=mrpe====^c=H=wj NLNMM... - Page 58 Screen displays (cont.) Displays in CAMERA and VCR modes 6. Button functions 15. Calendar The functions allocated to the USER buttons (P68) The current date and time are displayed here. and high-sensitivity shooting mode (P32) are dis- When the color bar is displayed the ID information played here while the MODE CHK button is held set at the ID SET item on the RECORDING SETUP down.
- Page 59 Displays in CAMERA and VCR modes 20. Shutter speed 29. One-shot recording ∗ The shutter speed used for shooting is displayed An asterisk ( ) appears when the camera- here. (P38) recorder has been set up for frame feed recording. It blinks in the shooting pause mode.
-
Page 60: In Vcr Mode Only
Screen displays (cont.) In VCR mode only Warnings The following messages are displayed in the center of the screen when a problem with the camera-recorder, tape, etc. has occurred. ===p==========N UNPLAYABLE TAPE (OTHER FORMAT) q`=====NO=W=PQ=W RS=K=MM The tape cannot be played back because it is in the wrong format. -
Page 61: Using The Mode Chk Button
Using the MODE CHK button Setting the DISPLAY items The amount of information to be displayed can be set by using the menus (P62-64) to select the DISPLAY =wMM item setting on the DISPLAY SETUP screen. (P71) q`=====NO= PQ= RS=K=MM NKOR When “PARTIAL”... -
Page 62: Menu Operations
Menu operations Using menus, you can change the camera-recorder’s settings to suit the scenes to be shot or material to be recorded. • You cannot perform menu operations while you are shooting or recording. Setting the menu mode Press the MENU button. Turn the multi dial. -
Page 63: Selecting The Sub Items
Selecting the sub items For items whose numerical value setting is to be changed Turn the multi dial. Press the multi dial at the position of the item to be changed, then press the dial again and move q to SHUTTER/IRIS SELECT VAR. -
Page 64: Setting Other Sub Items
Menu operations (cont.) Setting other sub items • When “INITIAL” is selected as the USER FILE item To set another sub item, repeat steps setting on the OTHER FUNCTIONS screen, you can return the menu settings in the currently used user file to their factory settings. -
Page 65: Menu Configuration
Menu configuration CAMERA mode menu CAMERA MENU SCENE FILE SCENE FILE (P66) SETTING DETAIL LEVEL SYNCRO SCAN NAME EDIT CHROMA LEVEL CAMERA SETUP ASPECT CONV SAVE/INIT CHROMA PHASE (P66) COLOR BAR COLOR TEMP SETUP MASTER PED AE SHIFT SW MODE USER1 (P68) REC SPEED... -
Page 66: Scene File Screen
Menu configuration (cont.) SCENE FILE screen Item/ Item/ (Display Description of settings (Display Description of settings mode) mode) SCENE FILE Settings corresponding to four shooting con- SKIN TONE DTL: (CAM) ditions are saved as scene files in this cam- OFF, ON era-recorder. -
Page 67: Playback Functions Screen
PLAYBACK FUNCTIONS screen Item/ Item/ (Display Description of settings (Display Description of settings mode) mode) SEARCH Use this to set the operation to be performed AUDIO OUT Use this to set the audio signals to be output (VCR) when an INDEX button (i or u) on the (VCR) from the AV IN/OUT jack when the tape is remote control unit is pressed. -
Page 68: Sw Mode Screen
Menu configuration (cont.) SW MODE screen Item/ Item/ (Display Description of settings (Display Description of settings mode) mode) USER1 This enables one function to be allocated to EVF DTL: (CAM) (VCR) the USER1 button. Select this to emphasize the outlines of the images on the screen when the button g Camera menu mode is pressed so that the subject becomes... -
Page 69: Recording Setup Screen
SW MODE screen RECORDING SETUP screen Item/ Item/ (Display Description of settings (Display Description of settings mode) mode) FOCUS Use this to select the function to be allocated REC SPEED Use this to select the recording duration RING to the focus ring. (CAM) (VCR) mode. - Page 70 Menu configuration (cont.) RECORDING SETUP screen Item/ Item/ (Display Description of settings (Display Description of settings mode) mode) Use this to set the mode in which to advance UB MODE Use this to set what is to be recorded as the (CAM) (VCR) the time code.
-
Page 71: Av In/Out Setup Screen
AV IN/OUT SETUP screen DISPLAY SETUP screen Item/ Item/ (Display Description of settings (Display Description of settings mode) mode) A. DUB Use this to select the sound to be recorded ZEBRA Use this to set the brightness level at which INPUT when performing audio dubbing. -
Page 72: Other Functions Screen
Menu configuration (cont.) DISPLAY SETUP screen OTHER FUNCTIONS screen Item/ Item/ (Display Description of settings (Display Description of settings mode) mode) LCD/EVF Use this to adjust the display level of the REMOTE Use this to set the operations to be performed images appearing in the viewfinder or on the (CAM) (VCR) using the accessory remote control unit. - Page 73 OTHER FUNCTIONS screen Item/ Item/ (Display Description of settings (Display Description of settings mode) mode) BEEP Select ON to be warned by a beep that the USER FILE LOAD: SOUND shooting has started or ended or that a prob- (CAM) (VCR) The menu (except scene file) settings (CAM) lem has occurred.
-
Page 74: Before Calling For Service
Before calling for service Power supply • Have the battery and AC adapter been connected properly? There’s no power. P10, 21 Check the connections again. • To prevent the battery from running down needlessly and to safe- Power shuts off for no apparent reason. -
Page 75: Other Types Of Video Recording
Other types of video recording • Is the manual focus mode established? The subject is not brought P30, 37 into focus automatically. You can focus automatically only when the auto focus mode is established. • Are you shooting a scene where it’s hard to bring the subject into –––... -
Page 76: Playback (Sound)
Before calling for service (cont.) Playback (sound) • Have you turned down the camera-recorder’s volume control too I can’t hear any sound from the camera- far? recorder’s speaker. In the VCR mode, adjust the volume level using the multi dial. •... -
Page 77: Condensation
Condensation How to find out whether there is condensation Turn on the power two to three hours later and inside and what to do about it if it has formed check whether or not the condensation display If the condensation mark blinks after the camera- has gone off. -
Page 78: Cleaning The Video Heads
Cleaning the video heads • Do not rewind the cleaning tape at any interim point When the video heads are dirty, mosaic-like noise will appear here and there when tapes are played back while it is playing. When it reaches the end, rewind it and/or a bluish tone will permeate entire images. -
Page 79: Storage Precautions
Storage precautions Before storing the camera-recorder, remove both the Cassette tapes • Always rewind your tapes to the start before storing cassette and battery. Store all of these items in a place with a low humidity and relatively constant tempera- them. -
Page 80: Specifications
Specifications [GENERAL] Pickup devices Interline transfer 1/4-inch CCD image senser (×3) Number of pixels Supply voltage: DC 7.2 V/7.9 V Total number of pixels: 410,000, Power consumption: Number of effective pixels: 380,000 6.2 W (when the viewfinder is used) (pixel offset system) 7.4 W (when the LCD monitor is used) Lens 8.9 W (Maximum) - Page 81 [VIDEO] [AC ADAPTER] Sampling frequency Power Source: Y: 13.5 MHz, P : 3.375 MHz 110/120/220/240 V AC, 50/60 Hz Quantizing Power Consumption: 8 bits 18 W Video compression system DCT + variable-length code indicates safety information. Error correction Reed-Solomon product code Weight 0.35 Ib (0.16 kg) Dimensions (W×H×D)
- Page 82 PANASONIC BROADCAST & TELEVISION SYSTEMS COMPANY UNIT COMPANY OF MATSUSHITA ELECTRIC CORPORATION OF AMERICA Executive Office: One Panasonic Way 4E-7, Secaucus, NJ 07094 (201) 348-7000 EASTERN ZONE: One Panasonic Way 4E-7, Secaucus, NJ 07094 (201) 348-7621 Southeast Region: 1225 Northbrook Parkway, Ste 1-160, Suwanee, GA 30024 (770) 338-6835...