
Related Manuals for Philips HTB3581/93


Summary of Contents for Philips HTB3581/93
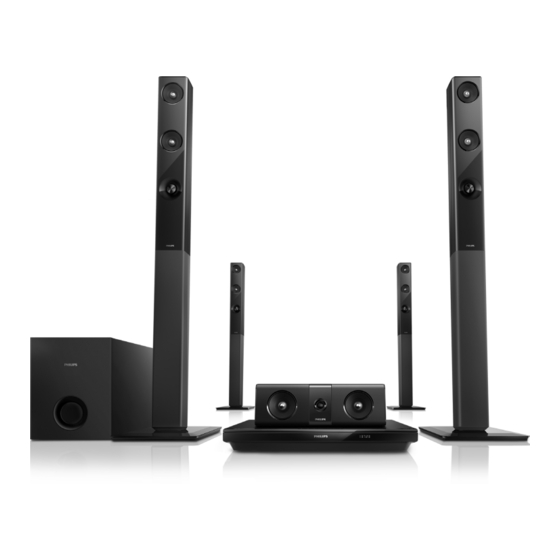
- Page 1 Always there to help you Register your product and get support at www.philips.com/support HTB3581/93 Question? Contact Philips User manual...
- Page 2 O: Indicates that this toxic or hazardous substance contained in all of the homogeneous materials for this part is below the limit requirement in SJ/T11363 – 2006. X: Indicates that this toxic or hazardous substance contained in at least one of the homogeneous materials used for this part is above the limit requirement in SJ/T11363 - 2006.
-
Page 3: Table Of Contents
Contents 1 Important 5 Change settings Safety Language settings Care for your product Picture and video settings Care of the environment Audio settings 3D health warning Parental control settings Display settings Energy saving settings 2 Your home theater Speaker settings Main unit Restore default settings Remote control... -
Page 4: Important
Contact For speakers with stands, use only • Philips Consumer Care to have the the supplied stands. Secure the stands product checked before use. to the speakers tightly. Place the Never place the product and •... -
Page 5: Care For Your Product
Risk of overheating! Never install this product in a confined • space. Always leave a space of at least four inches around the product for This is CLASS II apparatus with double ventilation. Ensure curtains or other insulation, and no protective earth objects never cover the ventilation provided. -
Page 6: Health Warning
Please visit www.recycle.philips.com for Congratulations on your purchase, and additional information on a recycling center welcome to Philips! To fully benefit in your area. from the support that Philips offers (e.g. notification of product software upgrade), register your product at 3D health warning www.philips.com/welcome. -
Page 7: Remote Control
SOURCE Remote control Select a source for the home theater. (Home) This section includes an overview of the remote control. Access the home menu. DISC MENU Switch to disc source. • Access or exit the disc menu or • pop-up menu when you play a disc. Navigation buttons Navigate menus. -
Page 8: Connectors
(Mute) Connectors Mute or restore volume. +/- (Volume) This section includes an overview of the Increase or decrease volume. connectors available on your home theater. Alphanumeric buttons Front connectors Enter values or letters (using SMS style entry). SUBTITLE Select subtitle language for video. AUDIO Select an audio language or channel. -
Page 9: Connect And Set Up
3 Connect and set Rear connectors This section helps you connect your home theater to a TV and other devices, and then set it up. For information about the basic AC MAINS~ connections of your home theater and Fixed AC power cable. accessories, see the quick start guide. -
Page 10: Connect To Tv
REAR LEFT (rear left) and REAR RIGHT (rear right) speakers: Place the rear surround speakers to FRONT FRONT the left and right side of your seating FRONT WOOFER LEFT RIGHT CENTER position, either in line with it or slightly behind it. SUBWOOFER (subwoofer): Place the subwoofer at least one meter to the left or right of the TV. -
Page 11: Connect Audio From Tv And Other Devices
The HDMI ARC connector on the On your TV, turn on HDMI-CEC • TV might be labeled differently. For operations. For details, see the TV user details, see the TV user manual. manual. HDMI-CEC is a feature that • On your TV, turn on HDMI-CEC enables CEC compliant devices operations. -
Page 12: Set Up Speakers
Option 1: Connect audio through a Option 3: Connect audio through digital optical cable analog audio cables Best quality audio Basic quality audio Using an analog cable, connect the AUDIO IN-AUX connectors on your home theater to the AUDIO OUT connectors on the TV or other device. -
Page 13: Set Up Easylink (Hdmi-Cec Control)
Set up EasyLink (HDMI-CEC control) With EasyLink, you can control your home theater, TV, and other connected HDMI- CEC compliant devices with a single This home theater supports Philips remote control. EasyLink, which uses the HDMI-CEC [One Touch Play] (One-touch play): •... -
Page 14: Connect And Set Up A Home
"Amplifier" (instead of TV speakers). networking principles. If necessary, For details, see the TV user manual, read documentation that accompanies the network components. Philips is setup the EasyLink audio control. • not responsible for lost, damaged, or Press (Home). -
Page 15: Use Your Home Theater
4 Use your home Using a network cable, connect the LAN connector on your home theater theater to the network router. Press (Home). Select [Setup], and then press OK. This section helps you use the home Select [Network] > [Network theater to play media from a wide range of installation] >... -
Page 16: Auto Play
Insert a disc into the home theater. Auto play If the disc does not play automatically, press DISC MENU to select disc Your home theater can automatically play a source, or select [Play disc] from the disc or a video file. home menu. - Page 17 Synchronize video and sound Note If the audio and video are not To avoid flickering, change the • synchronized, delay the audio to match the brightness of the display. video. Press . Bonus View on Blu-ray Press the Navigation buttons (left/ right) to select [Audio sync], and then On Blu-ray discs that support the Bonus press OK.
-
Page 18: Data Files
Connect your home theater to a To stop play, press . home network with Internet access To resume the video from where • (see 'Connect and set up a home you stopped, press (Play). network' on page 12). To play the video from the start, •... -
Page 19: Usb Storage Devices
Europe, India, LATAM, and Russia USB storage devices Character Set Language [Standard] English, Albanian, Danish, Enjoy pictures, audio, and video stored on a Dutch, Finnish, French, USB storage device such as an MP4 player Gaelic, German, Italian, or digital camera. Kurdish (Latin), Norwegian, What you need Portuguese, Spanish, Swedish... - Page 20 [2nd subtitle language]: Select the • Audio options second subtitle language for Blu-ray While playing audio, repeat an audio track, video. a disc, or a folder. [Titles]: Select a specific title. • [Chapters]: Select a specific • Press repeatedly to cycle through chapter.
-
Page 21: Radio
[Zoom]: Zoom into a video scene • Note or picture. Press the Navigation buttons (left/right) to select a AM and digital radio are not • supported. zoom factor. [Duration per slide]: Select the If no stereo signal is detected, you are •... -
Page 22: External Audio Device
Press the buttons on the external Button Action audio device to select and play audio Manual: files. 1) Press . 2) Press to select your preset. Voole 3) Press again to store the radio station. With this home theater connected to the Automatic: Press and Internet, you can stream movies and TV hold for three seconds to... - Page 23 Before you start Make sure that your PC firewall allows • Install a DLNA-compliant media server you to run Media Player programs (or • application on your device. Make sure the firewall’s exemption list has the that you download an application that media server software included).
- Page 24 Follow the onscreen instructions to Macintosh OS X Twonky Media (v4.4.2) add the other folders that contain your media files. Visit www.twonkymedia.com to purchase the software, or download a Microsoft Windows Media Player 12 free 30-day trial to your Macintosh. Start Windows Media Player on your Start Twonky Media on the Macintosh.
-
Page 25: Karaoke
Press the Navigation buttons (up/ If you cannot see the folders, • down) and OK to change the check that you have enabled media sharing on the selected device so following settings: that the content is available for [Microphone 1]: Turn the •... - Page 26 [Powerful]: Enjoy thrilling arcade Press to exit. • If you do not press a button sounds, ideal for action-packed • within a minute, the menu exits videos and loud parties. automatically. [Bright]: Spice up your dull movies • and music with added sound effects.
-
Page 27: Change Settings
5 Change settings Note If your preferred disc language is not • available, select [Others] from the list, The home theater settings are already and enter the 4-digit language code configured for optimal performance. found at the end of this user manual Unless you have a reason to change a (see 'Language code' on page 38). -
Page 28: Audio Settings
Press the Navigation buttons and OK Note to select and change: If you change a setting, make sure that [Change password]: Set or change • • the TV supports the new setting. your password for parental control access. If you do not have a password or have forgotten your password, enter 0000. -
Page 29: Speaker Settings
Press the Navigation buttons and OK Restore default settings to select and change: [Screen saver]: Switch the home • Press (Home). theater to screen saver mode after 10 minutes of inactivity. Select [Setup], and then press OK. [Auto standby]: Switch the home •... -
Page 30: Update Software
6 Update software Update software through Philips continually tries to improve its What you need products. To get the best features and A USB flash drive that is FAT or NTFS- • support, update your home theater with formatted, with at least 256MB of the latest software. -
Page 31: Update Software Through The Internet
Select [Advanced] > [Software Step 2: Update the software update] > [Network]. » If an upgrade media is detected, Caution you are prompted to start or Do not switch off the home theater or • cancel the update. remove the USB flash drive during the »... -
Page 32: Product Specifications
7 Product Audio formats specifications Your home theater supports the following audio files. Exten- Con- Audio codec Bit rate Note sion tainer .mp3 MP3 Up to 320 kbps Specifications and design are subject to • .wma ASF Up to 192 kbps change without notice. - Page 33 .mov files in MOV container Video formats Audio codec Video codec Bit rate If you have a high definition TV, your home AC-3, MPEG, MPEG 1, 40 Mbps theater allows you to play your video files MP3, AAC, MPEG 2 with: HE-AAC Resolution: 1920 x 1080 pixels at •...
- Page 34 .mpg and .mpeg files in PS container Sampling frequency: • MP3: 32 kHz, 44.1 kHz, 48 kHz • Audio codec Video codec Bit rate WMA: 44.1 kHz, 48 kHz • PCM, DTS MPEG 1, 40 Mbps Constant bit rate: • core, MPEG, MPEG 2 MP3: 32 kbps - 320 kbps •...
- Page 35 Speakers Laser Center speaker: Laser Type (Diode): InGaN/AIGaN • Output power: (BD), AIGaInP (DVD/CD) • 166 W RMS (10% THD) Wave length: 405 +7 nm/-7 nm (BD), • Speaker impedance: 3 ohm 655 +10 nm/-10 nm (DVD), • Speaker drivers: 790 +10 nm/-20 nm (CD) •...
-
Page 36: Troubleshooting
Make sure that the disc contains high- • request service. If you still have a problem, definition video. get support at www.philips.com/support. Make sure that the TV supports high- • definition video. Main unit Use an HDMI cable to connect to the •... - Page 37 Make sure that the home theater is with the video. • connected to a Philips brand EasyLink TV, and the EasyLink option is turned Play on (see 'Set up EasyLink (HDMI-CEC Cannot play a disc.
-
Page 38: Notice
2013 Verance Corporation. All rights mailing to this email address, please write reserved by Verance. Reverse engineering in English to “Open Source Team, Philips or disassembly is prohibited. Intellectual Property & Standards, P.O. Box 220, 5600 AE Eindhoven, The Netherlands”. -
Page 39: Rmvb End User Agreement
RMVB end user agreement Notes to End User: By using this product with RealNetworks software and services, the end user agrees to the following terms of REALNETWORKS, INC: End User may only use the software • for private, non-commercial use in accordance with the terms of RealNetworks EULA . -
Page 40: Language Code
10 Language code Inupiaq 7375 Pushto 8083 Abkhazian 6566 Afar 6565 Irish 7165 Russian 8285 Afrikaans 6570 Íslenska 7383 Quechua 8185 Amharic 6577 Italiano 7384 Raeto-Romance 8277 Arabic 6582 Ivrit 7269 Romanian 8279 Armenian 7289 Japanese 7465 Rundi 8278 Assamese 6583 Javanese 7486... -
Page 41: Index
11 Index clear BD-Live memory connect to TV connectors control buttons (disc) control buttons (USB) 2nd audio language 2nd subtitle language data files deep color 3D disc in 2D mode default settings 3D safety device name 3D video disc language disc menu display panel DivX 5.1 speakers... - Page 42 language code shuffle sleep timer slide animation software update main unit software version manual setup sound media formats speaker position media sharing speaker setup menu language speaker specifications musical slideshows subtitle language subtitle position surround sound synchronize picture and sound network night mode troubleshooting (picture) troubleshooting (play)
- Page 43 Rovi Corporation or its subsidiaries and are used under license. ABOUT DIVX VIDEO: DivX is a digital “Blu-ray 3D “ and “Blu-ray 3D “ logo video format created by DivX, LLC, a are trademarks of Blu-ray Disc Association. subsidiary of Rovi Corporation. This is an official DivX Certified device that plays DivX video.
- Page 44 Specifications are subject to change without notice © 2014 Koninklijke Philips N.V. All rights reserved. Trademarks are the property of Koninklijke Philips N.V. or their respective owners. HTB3581_93_UM_V1.0...