Table of Contents
Advertisement
Quick Links
Advertisement
Table of Contents

Related Manuals for LG AS60GDPV0


Summary of Contents for LG AS60GDPV0
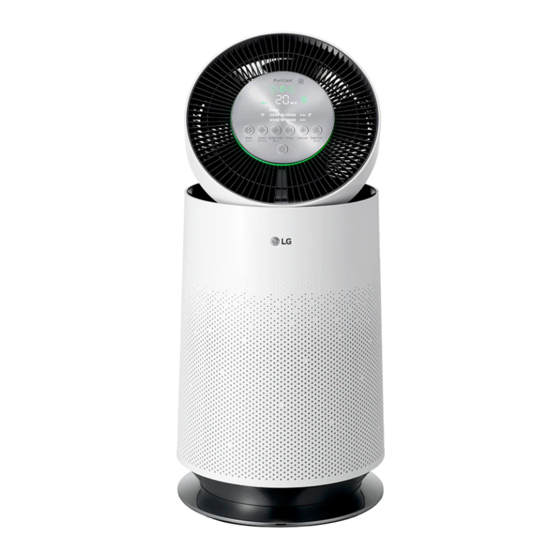
- Page 1 OwNER'S MANuAL AiR PuRifieR Read this owner’s manual thoroughly before operating the appliance and keep it handy for reference at all times. Model Name: AS60GD Series www.lg.com MFL69726830 Rev.05_021220 Copyright © 2017 - 2020 LG Electronics. All Rights Reserved.
-
Page 3: Table Of Contents
This manual is subject to revision by the manufacturer. Safety instructions ......04 Smart functions ......30 LG ThinQ Application ......30 unpacking ........10 Smart Diagnosis ........32 Parts............10 Maintenance ........33 Removing Packing Materials ....11 Remote Control Setup ......13... -
Page 4: Safety Instructions
Safety instructions READ THESE INSTRUCTIONS CAREFULLY This guide contains many important safety messages. Always read and obey all safety messages. This is the safety alert symbol. It alerts you to safety messages that inform you of hazards that can kill or hurt you or others, or cause damage to the product. All safety messages will be preceded by the safety alert symbol and the hazard signal word wARNING or CAuTION. - Page 5 • Do not install the product in an area exposed to direct sunlight or near heat-generating equipment. • Do not install the product in a place where combustible gas may leak or industrial oil or metallic particulates are present. POWeR •...
- Page 6 • If you detect any abnormal noise, odor or smoke, unplug the product immediately and contact an LG Electronics service center. • Only an authorized repair person from LG Electronics service center should disassemble, repair, or modify the product. • Do not use or store fire, combustibles (ether, benzene, alcohol, drugs, propane, butane, combustible spray, insecticide, air freshener, cosmetics etc.) or flammable materials (candles,...
- Page 7 • Be careful not to allow any part of your body to be pinched when you detach and re-attach parts of the product. • unplug the product when not in use for a long time. • Do not install and use broken parts. •...
- Page 8 Caution To reduce the risk of fire, electric shock, or personal injury when using the product, follow basic safety precautions, including the following: iNSTALLATiON • Do not tilt the product to pull or push it while transporting. • Do not install the product in transportation equipment (vehicle/ vessel etc.).
- Page 9 • Do not operate the product with wet hands. • Do not let the moisture from the humidifier directly touch the product. • Do not use the product while it is not in upright position. • Do not use the product near objects vulnerable to heat. •...
-
Page 10: Unpacking
unpacking Parts Air Purifier Owner’s Manual Remote Control / Owner’s Manual Battery (CR2025, 1 unit) • The appearance or components of the product may differ depending on the model. • The shape of the power plug differs depending on the country. -
Page 11: Removing Packing Materials
Removing Packing Remove the support located at the fi lter inlet. Materials unpack the product and remove any packing tape or protective vinyl before using the product. Support Pull out the product from the packaging and remove the fi xing tape attached on the product. - Page 12 Insert the fi xing parts at the bottom of the cover into the holes at the bottom of the product before you close the cover. Caution • Failure to remove the support may aff ect the performance of the product. Please be sure to remove it before use.
-
Page 13: Remote Control Setup
Remote Control Setup Warning • A button/coin-shaped battery is used in the with the backside of the remote remote control of the product. controller facing up, remove the • Do not swallow the battery. It may cause battery tray from the remote control. injury, including damage to the internal organs or death. -
Page 14: Installation
installation Transporting or Moving the installing the Product Product Caution Caution Install the product on a strong level surface. Installing the product on a weak Transport the product in a well-secured or tilted surface may cause noise and and upright position. Impacts may cause vibration or tipping, resulting in injury. -
Page 15: Operation
Operation Product Overview front View Air Outlet/Clean Booster Status Panel • It discharges purified air through use it to check the settings of the the filter. product and the air quality. • You can control the direction of the air so that it reaches every corner Control Panel of the room. - Page 16 Back View Smart Diagnosis Part Smell (Gas) Sensor In the event of a malfunction or failure, It detects a smell (gas). you can use the Smart Diagnosis filter option to check the product condition. (See Smart functions.) It removes allergic materials, yellow dust/ultra-fine dust, possible sources of sick house syndrome, smog and PM 1.0 (super ultra-fine dust)
- Page 17 filter System Total Harmful Gas Care filter Caution It removes harmful smells (gas) that • The Total Harmful Gas Care Filter and are generated in everyday life such Total Allergen Collection Care Filter are as bathroom smell, cigarette smoke assembled together. Do not try to detach (smell) and food smell.
- Page 18 Control Panel Start/Stop Button Booster Speed Button You can start or stop the operation. It allows you to adjust the wind strength of the clean booster. Mode Button • Press and hold it for 3 seconds or more to turn on or off the ionizer. use it to set the operation mode.
- Page 19 Displays operating mode function is activated. It turns on when the 'On/Off Displays speed and booster speed Reservation' is set in the LG ThinQ application. Speed: Displays the air purifier's It turns on when the control panel is wind strength.
- Page 20 Remote Control Caution • Do not press multiple buttons at the same time. It may cause the product to stop operating or malfunction. • Do not kick or step on the remote control. It may result in damage. • Do not use it where there is too much water or moisture.
-
Page 21: Getting Started
(ready) on the status panel. You can specify the sensor stabilization time in the 'Air Quality Sensor Operation Time' option in the LG ThinQ application. – 'Always On': The sensor stabilization turns on only once at the beginning. – 'Only During Operation': The sensor stabilization turns on every time you start/stop the operation. -
Page 22: Using Booster Mode
using Booster Mode using Normal Mode The clean booster cleans the air and quickly This is a basic operation mode for air sends it to a long distances to circulate the purification, enabling you to control the wind indoor air. strength as desired. -
Page 23: Adjusting The Purifier Fan Speed
Adjusting the Purifier Fan Adjusting the Clean Speed Booster fan Speed You can adjust the wind amount of the You can adjust the wind amount of the clean purifier. booster. Press the Speed button during the operation. while in Booster mode, press the Booster Speed button. -
Page 24: Rotating The Clean Booster
Rotating the Clean Booster The clean booster rotates left and right. while in Booster mode, press the Swing button. Caution Keep your hands out of the moving part of the clean booster. Note • The rotating angle of the clean booster is 35°. -
Page 25: Checking The Air Quality
Checking the Air Quality You can check the cleanliness of the indoor air by looking at the Light lamp and the status panel. understanding the Overall Air Quality The overall air quality is calculated based on the dust and smell (gas) concentrations and is categorized into 4 levels including green, yellow, orange or red depending on the contamination of the air. - Page 26 Checking Air Quality on the Sta- The above picture displays PM10/PM2.5/ PM1.0, meaning that the concentration of tus Panel super ultra-fine dust is higher than those of fine dust and ultra-fine dust. You may check the overall air quality, dust concentration, and smell concentration on while the color of the dust particle size the status panel.
- Page 27 PM2.5 density and is • The fine dust density could be affected based on LG Electronics standards. by cooking or using humidifiers, sprays or • The PM10 and PM2.5 densities displayed other products which generate steam or by the product could differ from the EPA fine particles.
-
Page 28: Using The Air Ionizer
using the Air ionizer Setting the Sleep Timer To generate ions to remove various bacteria You can set the product to stop automatically from the air. after running for the duration you set. Press the Booster Speed button for more Press the Sleep Timer button during the than 3 seconds while operating. -
Page 29: Locking The Control Panel Buttons
Locking the Control Panel Buttons You can lock the buttons on the Control Panel to prevent the product from operating due to unforeseen reasons, such as a child manipulating the buttons. Press the Sleep Timer button for at least 3 seconds during the operation. -
Page 30: Smart Functions
Internet service • Functions may vary by model. provider or refer to your wireless router manual. • LG ThinQ is not responsible for any network connection problems or any faults, Before using LG ThinQ malfunctions, or errors caused by network Application connection. - Page 31 (WPA2 is recommended) and register the product again. Installing the LG ThinQ Applica- tion Search for the LG ThinQ application from the Google Play Store or Apple App Store on a smartphone. Follow instructions to download and install the application.
-
Page 32: Smart Diagnosis
Fi equipped appliance, it can transmit troubleshooting data to a smartphone using the LG ThinQ application. • Launch the LG ThinQ application and After the data transfer is complete, select the Smart Diagnosis feature in the the diagnosis will be displayed in the menu. -
Page 33: Maintenance
• How to distinguish between the front the sensor regardless of the cleaning and back of the product: There is an LG frequency (2 months) of the PM 1.0 logo on the front, while 'PM 1.0 & GAS sensor. -
Page 34: Cleaning The Exterior
wipe the exterior with soft cloth. Caution • Do not disassemble the clean booster arbitrarily. • If the clean booster cover comes apart, secure it by aligning the 3 hooks with the slots before you use the product. Caution • Do not clean the product with an alkaline detergent. -
Page 35: Cleaning The Filter
Cleaning the filter Replacing the filter Separate the cover from the product. Remove the cover and replace the filter. • For more information on how to remove and mount the cover, • For more information on how to please see Removing Packing remove the cover and replace Materials. -
Page 36: Cleaning The Dust Sensor
Cleaning the Dust Sensor Close the sensor cover. PM 1.0 (super ultra-fi ne dust) sensor detects the fi ne dust as well as coarse dust. Therefore, you need to clean its lens regularly. Remove the rear cover from the product. •... - Page 37 Package the product to prevent the dust or foreign substance from entering the product. Store the packaged product at a shaded place. Caution Do not store the product at a humid place or at a place exposed to the direct sunlight. Otherwise the product may be deformed, malfunction or generate odor.
-
Page 38: Before Calling For Service
Before Calling for Service If a failure occurs in the product, check the following before contacting the Service Center. Symptom Cause Solution The product does not is the power plug • Plug it into the outlet properly. operate. unplugged from the outlet? Did dust accumulate in •... - Page 39 Symptom Cause Solution • If the amount of the smell is more than the capacity of the product, the display may not Doesn’t the color change change. even if it is moved to a The Light lamp • Clean the sensor area. clean room? continues to stay •...
- Page 40 Symptom Cause Solution • The Ministry of Environment guide shows the average The overall air quality is the guide from the value over a certain period of is different from that Ministry of environment time, but the overall air quality of the Ministry of different from the product displayed on the product is...
- Page 41 Are you looking at the are different between same dust particle? • The difference in the values the product and the could be caused by the LG ThinQ app. difference in update time between the LG ThinQ app and the product.
-
Page 42: Product Specifications
Product Specifications Height Depth width The external appearance and dimensions of the product are subject to change without prior notice. Model AS60GD Series Power AC 220–240 V 50 / 60 Hz when the clean booster is not running: 360 mm x 587 mm x 360 mm exterior dimensions (Width X Height X Depth) when the clean booster is running:...