Table of Contents
Advertisement
Quick Links
PQQX ZA-1 02.6.18 3:00 PM ページ 1
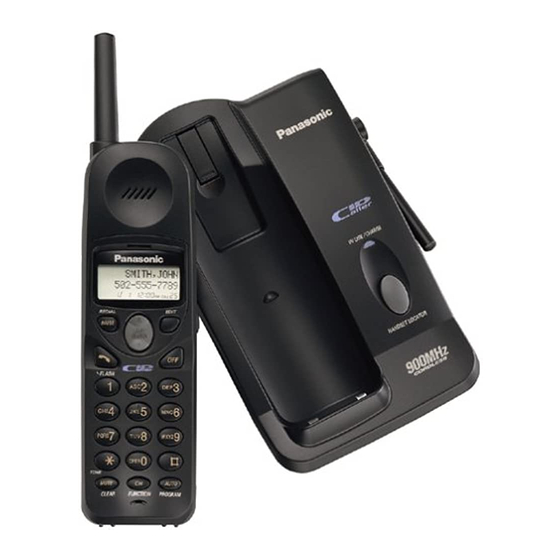
900MHz Cordless Phone
KX-TC1485LAB
Model No.
Pulse-or-tone dialing capability
Operating Instructions
Caller ID Compatible
PLEASE READ BEFORE USE AND SAVE.
Charge the battery for about 15 hours before initial use.
Panasonic World Wide Web address: http://www.panasonic.com
for customers in the USA or Puerto Rico
Advertisement
Table of Contents

Related Manuals for Panasonic KX-TC1485LAB


Summary of Contents for Panasonic KX-TC1485LAB
- Page 1 Model No. Pulse-or-tone dialing capability Operating Instructions Caller ID Compatible PLEASE READ BEFORE USE AND SAVE. Charge the battery for about 15 hours before initial use. Panasonic World Wide Web address: http://www.panasonic.com for customers in the USA or Puerto Rico...
- Page 2 Please read IMPORTANT SAFETY INSTRUCTIONS on page 34 before use. Read and understand all instructions. Thank you for purchasing your new Panasonic cordless telephone. Caller ID and Call Waiting Service, where available, are telephone company services. After subscribing to Caller ID, this phone will display a caller’s name and phone number.
- Page 3 PQQX ZA-1 02.6.18 2:43 PM ページ 3 For Best Performance Battery Charge A rechargeable Ni-Cd battery powers the handset. Charge the battery for about 15 hours before initial use (p. 8). Base Unit Location Calls are transmitted between the base unit and the handset using wireless radio waves. For maximum distance and noise-free operation, the recommended base unit location is: Away from electrical appliances In a HIGH and CENTRAL location...
-
Page 4: Table Of Contents
Contents Preparation Advanced Operation Location of Controls ....5 Phonebook ......20 Storing Names and Settings ........7 Numbers....... 20 Connections ......7 Entering Names and Installing the Battery....8 Symbols ....... 21 Battery Charge ......8 Finding Stored Items ....22 Ringer Volume ...... -
Page 5: Location Of Controls
PQQX ZA-2 02.6.18 2:43 PM ページ 5 Location of Controls “ Base unit Antenna (p. 3, 7) IN USE/CHARGE Indicator (p. 8, 25) Hook (p. 28) Charge Contacts (p. 9) (HANDSET\LOCATOR) Button (p. 25) For assistance, please call: 1-800-211-PANA(7262) - Page 6 PQQX ZA-2 02.6.18 2:43 PM ページ 6 “ Location of Controls Handset Antenna (PAUSE/REDIAL) Button (p. 11, 26) Display (p. 14) (‹) (›) Navigator Key ( RINGER Selector (p. 10, 12, 15, 20, 21) (p. 9) Headset Jack (p. 27) (–––/FLASH) Button (EDIT) Button (p. 10, 17, 20) (p.
-
Page 7: Settings
(RJ11C) AC Adaptor Telephone Line Cord ≥USE ONLY WITH Panasonic AC ADAPTOR PQWATC1461M (Order No. PQWATC1461M). ≥The AC adaptor must remain connected at all times. (It is normal for the adaptor to feel warm during use.) ≥To connect a standard telephone on the same line, see page 29. -
Page 8: Installing The Battery
PQQX ZA-2 02.6.18 2:43 PM ページ 8 “ Settings Installing the Battery Install the battery and close the handset cover, locking it into place. Black Lead Lead Battery Charge Place the handset on the base unit and charge for about 15 hours before initial use. ≥The IN USE/CHARGE indicator lights. IN USE/CHARGE Indicator Recharge Recharge the battery when:... -
Page 9: Ringer Volume
PQQX ZA-2 02.6.18 2:43 PM ページ 9 Battery information After your Panasonic battery is fully charged (p. 8): Operation Operating time While in use (TALK) Up to about 5 hours While not in use (Standby) Up to about 5 days ≥The battery operating time may be shortened depending on usage conditions, such as viewing the Caller ID Caller List or phonebook, and ambient temperature. -
Page 10: Programmable Functions
PQQX ZA-2 02.6.18 2:43 PM ページ 10 Programmable Functions You can program the following function items using the handset near the base unit. Make sure the unit is in the standby mode. ≥You can exit the programming mode at any time by pressing (OFF). ≥If you do not press any buttons for 60 seconds, the unit will return to the standby mode. -
Page 11: Making Calls
PQQX ZA-3 02.6.18 2:43 PM ページ 11 Making Calls “ To have a hands-free conversation, connect an optional headset to the handset (p. 27). (–––/FLASH) Press CONNECTING ≥After a few seconds, the display will show the receiver volume. Dial a telephone number. TALK ≥The dialed number is displayed. (OFF) To hang up, press or place the... -
Page 12: Answering Calls
PQQX ZA-3 02.6.18 2:43 PM ページ 12 “ Making calls To select the receiver volume (‹) (›) Ex. Receiver volume: Press while talking. level 4 ≥Each time you press (‹) or (›), the volume level TALK will change by 4 levels. To mute your conversation (MUTE/CLEAR) Press while talking. -
Page 13: Caller Id Service
PQQX ZA-3 02.6.18 2:43 PM ページ 13 Caller ID Service “ This unit is compatible with a Caller ID service offered by your telephone company. If you subscribe to a Caller ID service, the calling party’s information will be displayed after the first ring. The unit can record information of up to 40 callers, including the date and time received, in the Caller List. - Page 14 PQQX ZA-3 02.6.18 2:43 PM ページ 14 “ Caller ID Service ≥Caller information cannot be displayed in the following cases: ≥—If the caller dialed from an area which does not provide a Caller ID service, the display will show “OUT OF AREA”. ≥—If the caller has requested not to display his/her information, the display will show “PRIVATE CALLER”.
-
Page 15: Viewing The Caller List
PQQX ZA-3 02.6.18 2:43 PM ページ 15 “ Viewing the Caller List To check who has called, follow the steps below. Make sure the unit is in the standby mode. (›) (‹) Lift the handset off the base unit and press to enter the Caller List. ≥The display will show, for example, the following: SMITH,JACK (›) - Page 16 PQQX ZA-3 02.6.18 2:43 PM ページ 16 “ Caller ID Service Ex. When you search from the most recent call: (›) Lift the handset off the base unit and press ≥If there is no name information for a caller, ROBINSON,TINA the display will only show the phone number.
-
Page 17: Calling Back From The Caller List
PQQX ZA-3 02.6.18 2:43 PM ページ 17 “ Calling Back from the Caller List Lift the handset off the base unit and press (›) (‹) to enter the Caller List. (›) Scroll to the desired caller by using TURNER,CINDY (‹) (–––/FLASH) Press TALK ≥The displayed phone number is dialed automatically. -
Page 18: Storing Caller List Information In The Phonebook
PQQX ZA-3 02.6.18 2:43 PM ページ 18 “ Caller ID Service Storing Caller List Information in the Phonebook You can store numbers that are in the Caller List in the phonebook. Make sure the unit is in the standby mode. Lift the handset off the base unit and press (›) (‹) to enter the Caller List. -
Page 19: Erasing Caller List Information
PQQX ZA-3 02.6.18 2:43 PM ページ 19 Erasing Caller List Information After checking the Caller List, you can erase some or all of the entries. Make sure the unit is in the standby mode. To erase a specific caller from the Caller List Lift the handset off the base unit and (›) (‹) press... -
Page 20: Phonebook
PQQX ZA-4 02.6.18 2:43 PM ページ 20 Phonebook You can store up to 10 names and phone numbers in the phonebook. Using the phonebook, you can make a call by selecting a name on the handset display. Storing Names and Numbers Make sure the unit is in the standby mode. (AUTO/PROGRAM) Press SELECT STATION... -
Page 21: Entering Names And Symbols
PQQX ZA-4 02.6.18 2:43 PM ページ 21 “ Entering Names and Symbols (›) (‹) The handset dialing buttons ( can be used to enter letters and symbols. The letters are printed on the dialing buttons. Pressing each button selects a character as shown below. Number of times key is pressed Number of times key is pressed Keys Keys... -
Page 22: Finding Stored Items
PQQX ZA-4 02.6.18 2:43 PM ページ 22 “ Phonebook Finding Stored Items Make sure the unit is in the standby mode. (AUTO/PROGRAM) Press (‹) (›) Press ≥The first item or last item is displayed. Press (‹). Scroll to the desired item by (‹) (›) using Press (›). ≥You can find the items using the memory station numbers ((0) to (9)) directly in step 2. -
Page 23: Editing
PQQX ZA-4 02.6.18 2:43 PM ページ 23 “ Editing Make sure the unit is in the standby mode. (AUTO/PROGRAM) Press (‹) (›) Press ≥The first item or last item is displayed. Scroll to the phonebook item you want to JANE (‹) (›) change by using , and press (EDIT) JANE Edit the name using the dialing buttons,... -
Page 24: Erasing
PQQX ZA-4 02.6.18 2:43 PM ページ 24 “ Phonebook Erasing Make sure the unit is in the standby mode. To erase a specific caller from the Phonebook (AUTO/PROGRAM) Press (‹) (›) Press HELEN ≥The first item or last item is displayed. Scroll to the phonebook item you want to (‹) (›) erase by using... -
Page 25: Special Features
PQQX ZA-4 02.6.18 2:43 PM ページ 25 Special Features “ IN USE/CHARGE Indicator (PAUSE/REDIAL) (OFF) (–––/FLASH) (TONE) (HANDSET–LOCATOR) Automatic Security Code Setting Each time you place the handset on the base unit, the unit automatically selects one of more than 65,000 security codes. These codes help prevent the unauthorized use of your telephone line by another cordless telephone user. -
Page 26: How To Use The Pause Button (For Analog Pbx Line/Long Distance Service Users)
PQQX ZA-4 02.6.18 2:43 PM ページ 26 “ Special Features How to Use the PAUSE Button (For PBX Line/Long Distance Calls) (PAUSE/REDIAL) We recommend you press if a pause is required for dialing with a PBX or to make a long distance call. Ex. Line access number (9) (PBX) ≥... -
Page 27: Belt Clip
Optional Headset Plugging an optional headset into the handset allows a hands-free phone conversation. Please use only a Panasonic KX-TCA87 or KX-TCA90 headset. To order, call the accessories telephone number on page 2. Connecting an optional headset to the handset Open the headset jack cover, and connect an optional headset to the headset jack as shown below. -
Page 28: Wall Mounting
PQQX ZA-5 02.6.18 2:45 PM ページ 28 Wall Mounting This unit can be mounted on a wall phone plate. Remove the wall mounting adaptor. Push the lower side of the hook (1) and pull down the hook until it locks (2), so the tab holds the handset. Connect the AC adaptor. -
Page 29: Adding Another Phone
Adding Another Phone This unit will not function during a power failure. To connect a standard telephone on the same line, use the Panasonic T-adaptor KX-J66. To order, call the accessories telephone number on page 2. Standard Telephone... -
Page 30: Battery Replacement
Battery Replacement “RECHARGE” and “ ” are displayed after a few telephone calls even if the battery was fully charged, replace the battery with a new Panasonic P-P504 battery. To order, call the accessories telephone number on page 2. Press the notch on the handset cover firmly (1) and slide it as... -
Page 31: Troubleshooting
PQQX ZA-5 02.6.18 2:45 PM ページ 31 Troubleshooting “ Problem Cause and Remedy The unit does not work. ≥Check the settings (p. 7–9). ≥Charge the battery fully (p. 8). ≥Clean the charge contacts and charge again (p. 9). ≥Install the battery properly (p. 8, 30). ≥Place the handset on the base unit and unplug the AC adaptor to reset. - Page 32 PQQX ZA-5 02.6.18 2:45 PM ページ 32 “ Troubleshooting Problem Cause and Remedy You cannot store a name ≥You cannot store an item in the and phone number in the phonebook while the unit is in the talk phonebook. mode. ≥Do not pause for over 60 seconds while storing.
- Page 33 (p. 27). headset. If you cannot solve your ≥Call our customer call center at problem 1-800-211-PANA(7262). ≥Panasonic’s e-mail address for customer inquiries: consumerproducts@panasonic.com for customers in the USA or Puerto Rico ONLY For assistance, please call: 1-800-211-PANA(7262)
-
Page 34: Important Safety Instructions
PQQX ZA-5 02.6.18 2:45 PM ページ 34 Important Safety Instructions When using this unit, basic safety precautions should always be followed to reduce the risk of fire, electric shock, or personal injury. 11. Read and understand all instructions. 12. Follow all warnings and instructions marked on this unit. 13. - Page 35 PQQX ZA-5 02.6.18 2:45 PM ページ 35 CAUTION: To reduce the risk of fire or injury to persons, read and follow these instructions. 1. Use only the battery(ies) specified. 2. Do not dispose of the battery(ies) in a fire. They may explode. Check with local waste management codes for special disposal instructions. 3.
-
Page 36: Fcc And Other Information
PQQX ZA-5 02.6.18 2:45 PM ページ 36 FCC and Other Information This equipment complies with Part 68 of the FCC rules and the requirements adopted by the ACTA. On the bottom of this equipment is a label that contains, among other information, a product identifier in the format US:AAA-----. If requested, this number must be provided to the telephone company. - Page 37 ≥If there is any trouble—disconnect the unit from the telephone line and connect a known working phone. If the known working phone operates properly, have your unit repaired by one of the authorized Panasonic Factory Service Centers. If the known working phone does not operate properly, consult your telephone company.
-
Page 38: Index
PQQX ZA-5 02.6.18 2:45 PM ページ 38 Index Installation Accessories ........2 AC adaptor ......... 7 Answering calls......12 adding another phone....29 Automatic Security Code Battery ........8 Setting ........25 Telephone line cord ....7 Backlit LCD ......... 12 Language, display....... 10 Base Unit location......3 Location of controls .... -
Page 39: Warranty
Panasonic Consumer Electronics Company or Panasonic Sales Company (collectively referred to as “the warrantor”) will, for the length of the period indicated on the chart below, which starts with the date of original purchase (“warranty period”), at its option either (a) repair your product with new or refurbished parts,... - Page 40 Web Site. Accessory Purchases: 1-800-332-5368 (Customer Orders Only) Panasonic Services Company 20421 84th Avenue South, Kent, WA 98032 (6 am to 5 pm Monday - Friday; 6 am to 10:30 am Saturday; PST) (Visa, MasterCard, Discover Card, American Express, Check) Service in Puerto Rico Matsushita Electric of Puerto Rico, Inc.
- Page 41 ≥Send the unit to an authorized servicenter, prepaid and adequately insured. ≥Do not send your unit to the Panasonic Consumer Electronics Company listed on the back cover or to executive or regional sales offices. These locations do not repair consumer products.
- Page 42 1-800-211-PANA(7262) Panasonic Consumer Electronics Company, Division of Matsushita Electric Corporation of America One Panasonic Way, Secaucus, New Jersey 07094 Panasonic Sales Company, Division of Matsushita Electric of Puerto Rico, Inc. Ave. 65 de Infantería, Km. 9.5, San Gabriel Industrial Park...