Advertisement
Quick Links
All about the
Use
of your
Welcome & Congratulations ...................................2
Important Safety Instructions .................................3
Cooktop Features ..................................................5
Before Using the Cooktop ......................................6
www.frigidaire.com USA 1-800-944-9044
&
Cooktop
TA B L E O F C O N T E N T S
www.frigidaire.ca Canada 1-800-265-8352
Care
Setting Induction Surface Controls ..........................8
Care & Cleaning ..................................................12
Before You Call ..................................................14
Major Appliance Warranty ....................................16
Advertisement

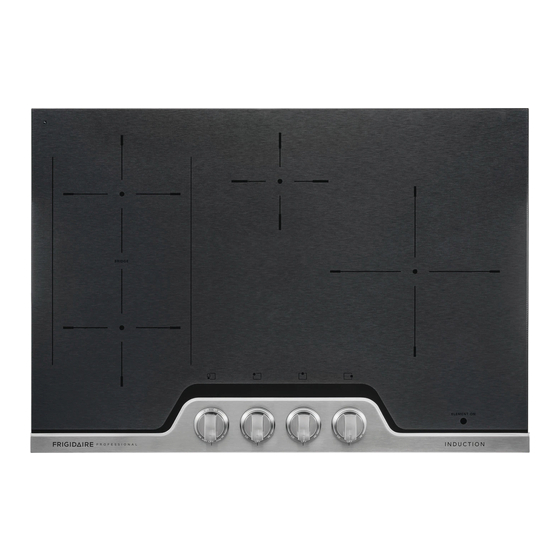
Summary of Contents for Frigidaire FPIC3077RF
-
Page 1: Table Of Contents
TA B L E O F C O N T E N T S Welcome & Congratulations ........2 Setting Induction Surface Controls ......8 Important Safety Instructions .........3 Care & Cleaning ..........12 Cooktop Features ..........5 Before You Call ..........14 Before Using the Cooktop ........6 Major Appliance Warranty ........16 www.frigidaire.com USA 1-800-944-9044 www.frigidaire.ca Canada 1-800-265-8352... -
Page 2: Welcome & Congratulations
Welcome & congratulations Congratulations on your purchase of a new appliance! At Product registration electrolux Home Products, we are very proud of our product and are completely committed to providing you register Your Product with the best service possible. Your satisfaction is our The Product number one priority. -
Page 3: Important Safety Instructions
imPortant saFetY instructions read all instructions before using this appliance. Warning Save these instructions for future reference. deFinitions Persons with a pacemaker or similar medical device should This is the safety alert symbol. It is used to alert exercise caution using or standing near an induction unit while it is in operation, as the electromagnetic field may you to potential personal injury hazards. - Page 4 imPortant saFetY instructions Warning • utensil Handles should Be turned inward and Not Extend Over Adjacent Surface Units. To reduce the risk of burns, ignition of flammable materials, and Never use your appliance for warming or heating spillage due to unintentional contact with the utensil. the room.
-
Page 5: Cooktop Features
cooKtoP Features read these instructions carefully before using the cooktop Left Rear Induction Element caution Left Front Induction Element Center Front Induction Element (36” model only) The Cooking Zones may appear to be cool while turned Center Rear (30” model only) or Right Rear Induc- ON and after they have been turned OFF. -
Page 6: Before Using The Cooktop
BeFore using tHe cooKtoP induction cooktop Features selecting surface cooking cookware The cookware used with the Induction Cooktop should have a cooler cooKtoP- A unique feature of the flat bottoms that make good contact with the entire surface Induction Cooktop is whether turned ON or OFF, the of the Cooking Zone. - Page 7 BeFore using tHe cooKtoP cookware recommendations Minimum Pan Size Requirements Be sure to follow the following recommendations for note using cookware as shown: Pan bottoms should not extend more than ½” (13mm) INCORRECT CORRECT beyond outer Cooking Zone (Induction). 3 7/8”...
-
Page 8: Setting Induction Surface Controls
setting induction surFace controls the electronic surface element control The Electronic Surface Element Control includes digital display windows. The control provides a numeric digital setting for the surface element positions on the cooktop. These settings work the same way as normal knob setting indicators work except the settings are displayed in digital windows (Figs. - Page 9 setting induction surFace controls operating the single induction surface elements The cooktop is equipped with 3 (or 4) single induction surface elements: the RIGHT FRONT, CENTER and REAR positions (Figure 1 and 2). to operate the induction surface elements 1. Place the correctly sized cookware of the proper material on the induction surface element.
- Page 10 setting induction surFace controls operating the Bridge induction surface radiant element The cooktop is equipped with a "BRIDGE" surface induction element located at the left front and rear (See Figures 1 & 2) positions. The Bridge can be used when cooking with rectangular (like a griddle) or oval shaped cookware.
- Page 11 setting induction surFace controls Power management Preheat recommendations In order to give you more flexibility, your induction When preheating a pan on the cooktop always watch cooktop is equipped with more cooking zones than the carefully. Whenever using the cooktop, always pay number of induction generators.
-
Page 12: Care & Cleaning
care & cleaning cleaning various Parts of Your cooktop Before cleaning any part of the cooktop, be sure all controls are turned OFF and the cooktop is COOL. REMOvE SPILLOvERS AND HEAvY SOILING AS SOON AS POSSIBLE. REGULAR CLEANINGS NOW WILL REDUCE THE DIFFICULTY AND ExTENT OF A MAjOR CLEANING LATER. - Page 13 care & cleaning cleaning recommendations for the Plastic or foods with a high sugar content: These types of soils need be removed immediately if ceramic glass cooktop spilled or melted onto the ceramic cooktop surface. Permanent damage (such as pitting of the cooktop caution surface) may occur if not removed immediately.
-
Page 14: Before You Call
BeFore You call (solutions to common Problems) imPortant Before you call for service, review this list. It may save you time and expense. The list includes common occurrences that are not the result of defective workmanship or materials in this appliance. occurrence PossiBle cause/solution entire cooktop does... - Page 15 BeFore You call (solutions to common Problems) occurrence PossiBle cause/solution cooking Zone led Induction Cooktop pan detection sensors do not see the correct cookware. Test with a continuously flashes. magnet to be sure cookware is made with Induction compatible material. Cookware has been removed from the Cooking Zone without turning the Cooking Zone OFF.
-
Page 16: Major Appliance Warranty
maJor aPPliance WarrantY Your appliance is covered by a one year limited warranty. For one year from your original date of purchase, Electrolux will pay all costs for repairing or replacing any parts of this appliance that prove to be defective in materials or workmanship when such appliance is installed, used and maintained in accordance with the provided instructions.


