
Related Manuals for Electrolux EBC65


Summary of Contents for Electrolux EBC65
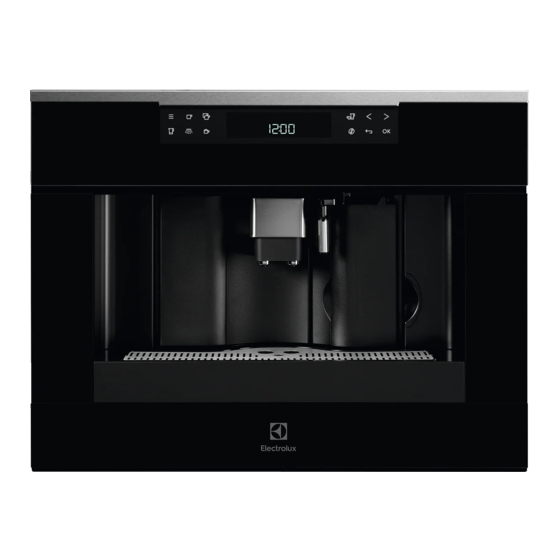
- Page 1 EBC65 KBC65 Automatic coffee maker User manual Get the most out of your appliance For quick access to manuals, how-to guides, support and more through our photo registration visit electrolux.com/register...
-
Page 2: Table Of Contents
TROUBLESHOOTING ....................23 FOR PERFECT RESULTS Thank you for choosing this Electrolux product. We have created it to give you impec- cable performance for many years, with innovative technologies that help make life simpler features you might not find on ordinary appliances. Please spend a few minutes reading to get the very best from it. -
Page 3: Safety Information
ENGLISH SAFETY INFORMATION Before the installation and use of the appliance, carefully read the supplied instructions. The manufacturer is not responsible if an incorrect installation and use causes injuries and damages. Always keep the instructions with the appliance for future reference. 1.1 Children and vulnerable people safety The appliance is not intended for use by persons (including children) with reduced physical, sensory or mental capabilities,... - Page 4 Cleaning and user maintenance shall not be made by children without supervision. Never immerse the appliance in water. CAUTION: To prevent damage to the appliance do not use alkaline cleaning agents when cleaning, use a soft cloth and a mild detergent This is an household appliance only.
-
Page 5: Safety Instructions
ENGLISH 2. SAFETY extracted. Make sure the appli- ance is inactive before extracting INSTRUCTIONS The only exception is adjusting DANGER! the coffee mill which must be done This is an electrical appliance, it is with the machine out (see the sec- therefore important to respect the tion “Adjusting the coffee mill”). -
Page 6: Product Description
If the power socket does not Do not use multiple sockets or match the plug on the appliance, extensions. have the socket replaced with a IMPORTANT! suitable type by a qualified profes- Safety cutout devices must be in- sional. To comply with safety... -
Page 7: Preliminary Checks
ENGLISH 4. PRELIMINARY CHECKS 4.1 Controls after transport qualified professional in compliance with legislation in force in the country After removing the packaging, make sure of installation (see Built-in installation). the product is complete and undamaged • The packing elements (plastic bags, and that all accessories are present.Do polystyrene foam, etc.) should be kept not use the appliance if it is visibly dam-... -
Page 8: Turning On And Heating Up
6. TURNING ON AND HEATING UP Each time the appliance is turned on, it When heating is complete, the message performs an automatic preheat and rinse changes to “RINSING”; cycle which cannot be interrupted. The appliance is at temperature when The appliance is ready for use only after the message “MEDIUM CUP NORMAL... -
Page 9: Changing The Quantity Of Coffee In The Cup
ENGLISH If it is removed, it will not be possible to IMPORTANT! make the coffee and the appliance will When extracting the drip tray, the display “GROUND TOO FINE ADJUST waste coffee container MUST MILL AND PRESS OK” and then “FILL always be emptied. -
Page 10: Adjusting The Coffee Mill
The • Press the icon (B6) twice to exit the progress bar shows the quantity of cof- menu. fee selected. The appliance is now reprogrammed with • Press the OK icon (B9) again to con- the new settings and is ready. -
Page 11: Delivering Hot Water
ENGLISH 11. DELIVERING HOT WATER • Always make sure the appliance is To interrupt, press the icon (B13) ready. or the icon (B6). The appliance • Make sure the hot water spout is in stops delivery once the set quantity is place (fig. -
Page 12: Changing The Quantity Of Milk And Coffee For Cappuccino
• Remove the hot water spout and at- • Press the CLEAN button on the lid tach the milk container to the nozzle (C3) and hold down for at least 5 (fig. 17). seconds (fig. 20) to start the cleaning •... -
Page 13: Making A Number Of Cups Of Coffee With The Jug Function
ENGLISH • Press the OK icon (B9) to confirm then quantity of coffee selected. • Press the OK icon (B9) to confirm or icons (B7 and (B8) (fig. 2) icon (B6) to cancel the opera- until “COFFEE FOR CAPPUCC.” is tion. -
Page 14: Changing Jug Function Parameters
16. CHANGING JUG FUNCTION PARAMETERS The jug programme is factory set with icons (B7) and (B8) until default values. “JUG LEVEL” is displayed. These can be modified to suit your per- • Press the OK icon (B9) to confirm. - Page 15 ENGLISH that the inside of the appliance is not contains. dirty. Before the indicator protrudes from the If necessary, remove coffee deposits cup tray, the drip tray must be emptied with the brush (C8) supplied and a and cleaned. sponge. To remove the tray: 1.
- Page 16 Note 3 in the section “Making cappuccino”. Support All components can be washed in a dish- washer, placing them in the top basket of the dishwasher. 1. Turn the lid of the milk container clockwise then remove it.
-
Page 17: Changing And Setting Menu Parameters
ENGLISH 18. CHANGING AND SETTING MENU PARAMETERS When the appliance is ready, you can • When you turn the appliance on, if you use the internal menu to modify the fol- want to make a small cup of coffee lowing parameters and functions: (less than 60 cc), preheat the cup by •... - Page 18 (B9) to confirm. • Press the icons (B7) and (B8) to • Use the icons (B7) and (B8) to select the required coffee temperature set the minutes, then press the OK from low, medium and high. icon (B9) to confirm.
- Page 19 (cod. • Replace the tank full of clean water. 9029798718 M3BICD200 - Web- “RINSING PLEASE CONFIRM” is Shop Electrolux: www.electrolux. displayed again. com/shop). Use of other descal- • Press the OK icon (B9) again. Hot ers invalidates the guarantee.
- Page 20 18.13 Resetting default values 18.16 Adjusting contrast (reset) To increase or reduce the contrast of the display, proceed as follows: If you change the original values, the • Press the icon (B2) to enter the default values can be reset as follows:...
-
Page 21: Turning The Appliance Off
ENGLISH 19. TURNING THE APPLIANCE OFF Each time the appliance is turned off, it If the appliance is not used for an performs an automatic rinse cycle which extended period, place the main cannot be interrupted. switch on the back of the appli- ance in the 0 position (A23). -
Page 22: Displayed Messages
21. DISPLAYED MESSAGES Displayed message Possible cause Remedy FILL TANK! The water tank is empty or Fill the tank with water and/ positioned incorrectly. or insert it correctly, push- ing it as far as it will go. GROUND TOO FINE AD-... -
Page 23: Troubleshooting
ENGLISH Displayed message Possible cause Remedy FILL BEAN CONTAINER The coffee beans have run Fill bean container out. INSERT BREWING UNIT The brewing unit has not Insert the brewing unit as been replaced after clean- described in the section ing. “Cleaning the brewing unit”. - Page 24 Problem Possible cause Remedy The coffee is delivered too The coffee is ground too Turn the grinding adjust- quickly. coarsely. ment knob one click anticlockwise towards “1” while the coffee mill is in operation. Avoid turning the grinding adjustment knob exces-...
- Page 25 ENGLISH...
- Page 26 www.electrolux.com...
- Page 27 ENGLISH...
- Page 28 electrolux.com/shop...