Table of Contents
Advertisement
Advertisement
Table of Contents

Related Manuals for Pioneer DivX DMH-G220BT


Summary of Contents for Pioneer DivX DMH-G220BT
- Page 1 DMH-G220BT DMH-G120 RDS AV RECEIVER Operation Manual...
-
Page 2: Table Of Contents
Contents ■ Other functions ....35 Thank you for buying this Pioneer ■ product. Appendix ......37 Please read through these instructions so you will know how to operate your model properly. After you have finished reading the instructions, keep this document in a safe place for future reference. -
Page 3: Precaution
• If liquid or foreign matter should get inside this product, park your vehicle in a safe place, turn the ignition switch off (ACC OFF) immediately and consult your dealer or the nearest authorised Pioneer - 3 -... - Page 4 • If you notice smoke, a strange noise or odour from this product, or any other abnormal signs on the LCD screen, turn off the power immediately and consult your dealer or the nearest authorised Pioneer Service Station. Using this product in this condition may result in permanent damage to the system.
- Page 5 • To prevent data loss and damage to the storage device, never remove it from this product while data is being transferred. • Pioneer cannot guarantee compatibility with all USB mass storage devices and assumes no responsibility for any loss of data on media players, iPhone, smartphone, or other devices while using this product.
- Page 6 • We offer the latest information about PIONEER CORPORATION on our website. • Pioneer regularly provides software updates to further improve it’s products. Please check the support section of the Pioneer website for all available software updates. About this product •...
-
Page 7: Parts And Controls
Meanings of symbols used in this manual This indicates model names that are supported by the described operations. G000BT This indicates to touch the appropriate soft key on the touch screen. This indicates to touch and hold the appropriate soft key on the touch screen. Parts and controls Main unit VOL (+/... -
Page 8: Basic Operation
Basic operation Resetting the microprocessor CAUTION • Pressing the RESET button resets settings and recorded contents to the factory settings. – Do not perform this operation when a device is connected to this product. – Some of the settings and recorded contents will not be reset. •... - Page 9 Common touch panel keys Switches between playback and pause. Skips files/tracks/chapters forwards or backwards. Performs fast reverse or fast forwards. Touch again to change the playback speed. Stops playback. Text When all characters are not displayed, the rests are automatically scrolled on information the display.
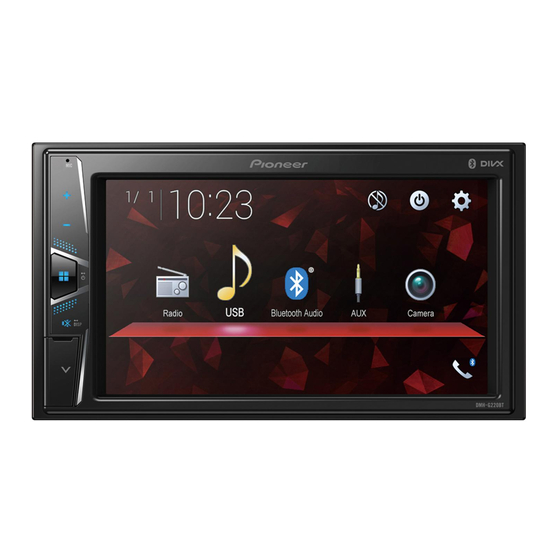
- Page 10 Operating the time bar You can change the playback point by dragging the key. NOTE The time bar function may vary depending on the activating source. Top menu screen 6/10 Radio BluetoothAudio Camera Source icons Setting the time and date (page 35) Settings (page 25) and Favourite menu (page 34) Hands-free phoning (page 13) (DMH-G220BT) AV source off...
-
Page 11: Bluetooth
Bluetooth G220BT Bluetooth connection Turn on the Bluetooth function on the device. Press Touch then The Bluetooth menu screen appears. Touch [Connection]. Touch The unit starts to search for available devices, then displays them in the device list. Touch the Bluetooth device name. After the device is successfully registered, a Bluetooth connection is established by the system. - Page 12 CAUTION Never turn this product off and disconnect the device while the Bluetooth setting operation is being processed. Menu Item Description [Connection] Connect, disconnect, or delete registered Bluetooth device manually. Touch to delete registered device. To connect a registered Bluetooth device manually, touch the name of the device.
- Page 13 • The hands-free phoning is also switched when the connected device via Bluetooth is switched. Hands-free phoning To use this function you need to connect your mobile phone to this product via Bluetooth in advance (page 11). CAUTION For your safety, avoid talking on the phone as much as possible while driving. Making a phone call Press , then touch...
- Page 14 Using the preset dial lists ▶Registering a phone number You can easily store up to six phone numbers per device as presets. Press , then touch Touch On the [Phone Book] screen, touch the desired name to display the contact’s phone number.
- Page 15 Menu Item Description [Invert Name] Select [Yes] to change the order of the first and last names in the phone book. Setting the private mode During a conversation, you can switch to private mode (talk directly on your mobile phone). Touch to turn private mode on or off.
- Page 16 ▶The received call and dialled number histories • You cannot make a call to the entry of an unknown user (no phone number) in the received call history. • If calls are made by operating your mobile phone, no history data will be recorded in this product.
-
Page 17: Av Source
Basic operation Description of Bluetooth audio playback screen Track number indicator Sets a repeat play range. Plays files in random order. Switches the devices. AV source Supported AV source You can play or use the following sources with this product. •... -
Page 18: Smartphone Connection For Av Source
Touch the source key. When you select [AV OFF], the AV source is turned off. Smartphone connection for AV source When using a smartphone with this product, the settings are automatically configured according to the device to be connected. NOTES •... -
Page 19: Radio
• USB storage device Connect a smartphone with this product via USB (Refer to the Quick Start Guide). Press Touch compatible desired source. Radio Starting procedure Press Touch [Radio]. The Radio screen appears. Basic operation Description of Radio screen Recalls the preset channel stored to a key from memory. Stores the current broadcast frequency to a key. - Page 20 Storing the strongest broadcast frequencies (BSM) The BSM (best stations memory) function automatically stores the six strongest broadcast frequencies under the preset channel keys [1] to [6]. NOTES • Storing broadcast frequencies with BSM may replace those you have already saved. •...
-
Page 21: Compressed Files
Menu Item Description [Alternative FREQ]* Allow the unit to retune to a different frequency [On] [Off] providing the same station. [Auto PI] Searches for the same PI (Programme [On] [Off] Identification) code broadcast station from all frequency bands automatically when the broadcasting station contains RDS data. - Page 22 CAUTION Use a USB cable (sold separately) to connect the USB device as any device connected directly to the unit will protrude out from the unit, which could be dangerous. Unplugging a USB storage device Pull out the USB storage device from the USB cable. NOTES •...
- Page 23 Selects a file from the list. Touch a file on the list to playback. Touching a folder on the list shows its contents. You can play a file on the list by touching it. When you touch the memory select icon while connecting an Android device, it switches between internal memory and external memory.
-
Page 24: Aux
Selects a file from the list. Touch a file on the list to playback. Touching a folder on the list shows its contents. You can play a file on the list by touching it. Still image source Description of Still image screen Touch anywhere on the screen, the touch panel keys appear. -
Page 25: Settings
NOTE A Mini-jack AV cable (sold separately) is required for connection. For details, refer to the Installation Manual. Starting procedure Press Touch then Confirm that [AUX Input] is turned on. Press Touch [AUX]. The AUX screen appears. Basic operation Description of AUX screen TIPS •... -
Page 26: System Settings
Audio settings (page 31) Video settings (page 33) Bluetooth settings (page 11) System settings The menu items vary according to the source. [AV Source Settings] Menu Item Description [Radio settings] (page 20) [Bluetooth Audio]* Setting Bluetooth audio source activation. [On] [Off] * DMH-G220BT [AUX Input] Menu Item... - Page 27 CAUTION Pioneer recommends the use of a camera which outputs mirror reversed images, otherwise the screen image may appear reversed. • Immediately verify whether the display changes to the rear view camera image when the gearstick is moved to REVERSE (R) from another position.
- Page 28 [Restore Settings] Menu Item Description [Restore Settings] Touch [Restore] to restore the settings to the default settings. CAUTION Do not turn off the engine while restoring the settings. NOTES • This setting is available only when you stop your vehicle in a safe place and apply the handbrake.
- Page 29 Menu Item Description [Touch panel calibration] Touch [Yes]. Touch four corners of the screen along the arrows. Press The adjustment results are saved. Press once again. Proceed to 16-point adjustment. Gently touch the centre of the [+] mark displayed on the screen.
- Page 30 Menu Item Description [Dimmer Duration] Adjust the time that the dimmer is turned on or off by dragging the cursors or touching You can use this function when [Dimmer Trigger] is set to [Time]. TIPS • Each touch of moves the cursor backwards or forwards in the 15 minute width.
-
Page 31: Theme Settings
* With some pictures, you cannot adjust [Hue] and [Colour]. NOTES • The adjustments of [Brightness], [Contrast], and [Dimmer] are stored separately when your vehicle's headlights are off (daytime) and on (nighttime). • [Brightness] and [Contrast] are switched automatically depending on the setting of [Dimmer Settings]. - Page 32 Menu Item Description [Fader/Balance] Touch to adjust the front/rear speaker balance. Set [Front] and [Rear] to [0] when using a dual speaker system. Touch to adjust the left/right speaker balance. You can also set the value by dragging the point on the displayed table. NOTE Only the fader can be adjusted when [Rear] is selected as the speaker mode.
-
Page 33: Video Settings
Menu Item Description [Loudness] Compensates for deficiencies in the low-frequency and [Off] [Low] [Mid] [High] high-frequency ranges at low volume. NOTE This function is not available while you make or receive a call using the hands-free function. (DMH-G220BT) Adjusting the LPF cutoff frequency value You can adjust the LPF cutoff frequency value for subwoofer. -
Page 34: Favourite Menu
[Video Signal Setting] Menu Item Description [AUX] Select the suitable video signal setting when you connect [Auto] [PAL] [NTSC] [PAL- this product to an AUX equipment. M] [PAL-N] [SECAM] [Camera] Select the suitable video signal setting when you connect [Auto] [PAL] [NTSC] [PAL- this product to a rear view camera. -
Page 35: Thank You For Buying This Pioneer Other Functions
Other functions Setting the time and date Touch the current time on the screen. Touch to set the correct time and date. You can operate the following items: Year, month, date, hour, minute. TIPS • You can change the time display format to [12hour] or [24hour]. •... - Page 36 • When a video is viewed in wide screen mode that does not match its original aspect ratio, it may appear different. • The video image will appear coarser when viewed in [Zoom] mode. NOTE Image files can be set to either [Normal] or [Trimming] in wide screen mode. Restoring this product to the default settings You can restore settings or recorded content to the default settings from [Restore Settings] in the [System] menu (page 28).
-
Page 37: Appendix
If the error persists, record the error message and contact your The screen is covered by a caution dealer or your nearest Pioneer service message and the video cannot be shown. centre. → The handbrake lead is not connected or the handbrake is not applied. - Page 38 • For details about USB storage device contact your dealer or an authorised compatibility with this product, refer to Pioneer Service Station. Specifications (page 42). • Protocol: bulk • You cannot connect a USB storage device to this product via a USB hub.
- Page 39 • There may be a slight delay when starting However, if there is only one DivX file and playback of audio files encoded with one subtitle file in a single folder, the files image data. are associated even if the file names are •...
- Page 40 • This product is not compatible with the Sampling frequency: 8, 11.025, 12, 16, following: MP3i (MP3 interactive), mp3 22.05, 24, 32, 44.1, 48, 64, 88.2, 96 kHz PRO, m3u playlist DivX compatibility • tag information can be displayed with •...
- Page 41 Bluetooth SIG, Notice regarding video Inc. and any use of such marks by PIONEER CORPORATION is under license. Other viewing trademarks and trade names are those of their respective owners.
- Page 42 In that case, please consult your cause moisture to form inside this dealer or the nearest authorised Pioneer product, resulting in possible damage. Service Station. • Small black dots or white dots (bright dots) may appear on the LCD screen.
- Page 43 Display MP3 decoding format: MPEG-1 & 2 & 2.5 Audio Layer 3 Screen size/aspect ratio: WMA decoding format: 6.2 inch wide/16:9 (effective display area: Ver. 7, 7.1, 8, 9, 9.1, 9.2 (2 ch audio) 137.52 mm × 77.232 mm) (Windows Media Player) Pixels: AAC decoding format: 1 152 000 (2 400 ×...
- Page 44 Usable sensitivity: 12 dBf (1.1 μV/75 Ω, mono, S/N: 30 dB) Signal-to-noise ratio: 72 dB (IEC-A network) MW tuner Frequency range: 531 kHz to 1 602 kHz (9 kHz) Usable sensitivity: 28 μV (S/N: 20 dB) Signal-to-noise ratio: 62 dB (IEC-A network) LW tuner Frequency range: 153 kHz to 281 kHz...
- Page 45 © 2019 PIONEER CORPORATION. All rights reserved. <OPM_DMHG220BTEW5_EG_A> EW...