Table of Contents

Related Manuals for LG DH6230


Summary of Contents for LG DH6230
- Page 1 OWNER’S MANUAL DVD Home Theater System Please read this manual carefully before operating your set and retain it for future reference. DH6230S (DH6230S, S63T1-C/ W, S63S1-S) DH6230S-F2_DCOLLLK_ENG_0924.indd 1 2013-03-27 3:22:09...
- Page 2 Getting Started Safety Information CAUTION CAUTION: This product employs a Laser System. RISK OF ELECTRIC SHOCK To ensure proper use of this product, please read DO NOT OPEN this owner’s manual carefully and retain it for future CAUTION: TO REDUCE THE RISK OF ELECTRIC reference. Shall the unit require maintenance, SHOCK DO NOT REMOVE COVER (OR BACK) NO contact an authorized service center. USER-SERVICEABLE PARTS INSIDE REFER SERVICING Use of controls, adjustments or the performance of TO QUALIFIED SERVICE PERSONNEL. procedures other than those specified herein may result in hazardous radiation exposure. This lightning flash with To prevent direct exposure to laser beam, do not arrowhead symbol within an try to open the enclosure. equilateral triangle is intended to CAUTION concerning the Power Cord alert the user to the presence of uninsulated dangerous voltage Most appliances recommend they be placed upon within the product’s enclosure that a dedicated circuit; may be of sufficient magnitude to That is, a single outlet circuit which powers only constitute a risk of electric shock that appliance and has no additional outlets or...
- Page 3 Getting Started Notes on Copyrights This device is equipped with a portable battery or accumulator. y This product incorporates copyright protection Safety way to remove the battery or the technology that is protected by U.S. patents battery from the equipment: Remove the and other intellectual property rights. Use of old battery or battery pack, follow the steps this copyright protection technology must be in reverse order than the assembly. To prevent authorized by Rovi, and is intended for home and contamination of the environment and bring on other limited viewing uses only unless otherwise possible threat to human and animal health, the authorized by Rovi. Reverse engineering or old battery or the battery put it in the appropriate disassembly is prohibited. container at designated collection points. Do y Under the U.S. Copyright laws and Copyright not dispose of batteries or battery together with laws of other countries, unauthorized recording, other waste. It is recommended that you use use, display, distribution, or revision of television local, free reimbursement systems batteries and programs, videotapes, BD-ROM discs, DVDs, CDs...
-
Page 4: Table Of Contents
Table of Contents Table of Contents System Setting Adjust the setup settings – OSD Initial language settings - Optional Getting Started – To display and exit the Setup menu – Language Safety Information – Display Unique Features – Audio – Portable In –... - Page 5 Table of Contents Troubleshooting Troubleshooting Appendix Maintenance – Handling the Unit – Notes on Discs Area Code List Language code List Trademarks and Licenses Specifications DH6230S-F2_DCOLLLK_ENG_0924.indd 5 2013-03-27 3:22:10...
-
Page 6: Getting Started
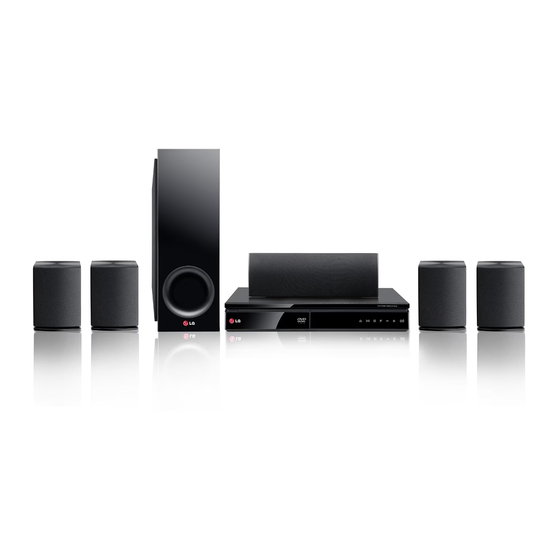
Getting Started Unique Features Accessories Please check and identify the supplied accessories. Portable In Listen to music from your portable device. (MP3, Notebook, etc) USB Direct Recording Remote control (1) Battery (1) Records music from CD to your USB device. Full HD up-scaling Views Full HD picture quality with simple setup. Home Theater Speaker ez Setup FM antenna (1) Optical cable (1) Listen to sounds from TV, DVD and Digital device with vivid 5.1 (2.1 or 2.0) ch mode. Speaker cables (5) HDMI Cable (1) DH6230S-F2_DCOLLLK_ENG_0924.indd 6 2013-03-27 3:22:11... -
Page 7: Introduction
Getting Started Introduction Symbols Used in this Manual DVD-Video, DVD±R/RW in Video mode or VR mode and finalized Playable Discs Audio CDs This unit plays DVD±R/RW and CD-R/RW that contains audio titles, DivX, MP3, WMA and/or Video files contained in the JPEG files. Some DVD±RW/DVD±R or CD-RW/ USB/Disc CD-R cannot be played on this unit due to the recording quality or physical condition of the disc, Audio files contained in the or the characteristics of the recording device and USB/Disc authoring software. Photo files DVD-VIDEO (8 cm / 12 cm disc) Discs such as movies that can be Note purchased or rented. Indicates special notes and operating features. DVD±R (8 cm / 12 cm disc) Video mode and finalized only. Indicates tip and hints for making the task easier. DVD-RW (8 cm / 12 cm disc) > Caution Video mode and finalized only. DVD+R: Video mode only Indicates cautions for preventing possible damages from abuse. Supports the double layer disc also. -
Page 8: Playable File Requirement
Playable DivX file : “.avi”, “.mpg”, “.mpeg”, “.divx” y File extensions : “.mp3”/ “.wma” y Playable Subtitle format : SubRip (*.srt/ *.txt), y CD-ROM file format : ISO9660/ JOLIET SAMI (*.smi), SubStation Alpha (*.ssa/ *.txt), y We recommend that you use Easy-CD Creator, MicroDVD (*.sub/ *.txt), SubViewer 2.0 (*.sub/ which creates an ISO9660 file system. *.txt), Vobsub (*.sub) y You have to set the disc format option to y Playable Codec format : [Mastered] in order to make the discs compatible “DIVX3.11”, “DIVX4”, “DIVX5”, “DIVX6”, with the LG players when formatting rewritable “MP4V3”, “3IVX”. discs. When setting the option to Live File y Playable Audio format : “AC3”, “PCM”, “MP3”, “WMA”. System, you cannot use it on LG players. y Sampling frequency : within 32 to 48 kHz (MP3), (Mastered/ Live File System : Disc format system within 32 to 48 kHz (WMA) for Windows Vist y Bit rate : within 32 to 320 kbps (MP3), 40 to 192 Photo file requirement kbps (WMA) y For Discs formatted in Live file system, you can Photo file compatibility with this unit is limited as not it on this unit. -
Page 9: Remote Control
CLEAR: Removes a number when TUNING +/-: Tunes in the desired setting the password. radio station. • • • • • • f • • • • • b ENTER: Acknowledges menu selection. TV Control buttons: Controls the Presetting the radio stations. TV. (LG TV only) x,RETURN: Moves backwards - You can control the sound in the menu or exits the setup level, input source, and power menu. switching of LG TVs as well. Hold POWER (TV) and press PR/ TITLE: If the current DVD title has CH (W/S) button repeatedly a menu, the title menu appears until the TV turns on or off. -
Page 10: Front Panel
Getting Started Front panel a Disc Tray i F (FUNCTION) Changes the input source or function. b Display window j -/+(Volume) Shows the current status of the unit. Adjusts speaker volume. c Microphone jacks 1/2 k 1/! (POWER) d PORT. IN Switches the unit ON or OFF. Connects to a portable player with audio outputs. e USB Port Connects a USB device. f R (OPEN/CLOSE) Opens or closes the disc tray. g T (PLAY/PAUSE) Starts playback. Pauses playback temporarily, press again to exit pause mode. h I (STOP) Stops playback. -
Page 11: Rear Panel
Getting Started Rear panel a Power cord f VIDEO OUT Connects to a TV with video inputs. b Speaker connectors g HDMI OUT Connects the speaker cables Connects to TV with HDMI inputs. c Cooling Fan (Interface for digital audio and video) d Antenna Connector h OPTICAL IN FM- Connects the FM wired antenna Connects to optical audio equipment. e AUX (L/R) INPUT Connects to an external source with 2 channel audio outputs. DH6230S-F2_DCOLLLK_ENG_0924.indd 11 2013-03-27 3:22:12... -
Page 12: Connecting
Connecting Spekaer installation B. Wall type (Mounting the speakers to a Wall) 1. Separate the stand from the speaker. 2. Attach the stand to the speaker as shown below. A. Stand type 3. You can adjust angle of speaker. You can adjust angle of speaker. 4. Fix the stand to the speaker by rotating the screw. 5. Drive 1 screw in the wall for the speaker and then hook the speaker over there. y Separates stand Separate the stand from the speaker as shown below. DH6230S-F2_DCOLLLK_ENG_0924.indd 12 2013-03-27 3:22:12... -
Page 13: Attaching The Speakers To The Unit
Connecting Attaching the speakers Color Speaker Position to the unit Grey Rear Rear right Blue Rear Rear left 1. Connect the wires to the unit. Green Center Center Match each wire’s colored band to the same Orange Sub woofer Any front position colored connection terminal on the rear of the unit. To connect the cable to the unit, press Front Front right each plastic finger pad to open the connection terminal. Insert the wire and release the finger White Front Front left pad. To connect the cable to the speakers, press each plastic finger pad to open the connection terminals on the base of each speaker. Insert the wire and release the finger pad. > Caution y Be careful to make sure children do not put their hands or any objects into the *speaker... -
Page 14: Positioning The System
Connecting Positioning the system F ront left speaker (L)/ Front right speaker (R): Place the front speakers to the sides of the monitor or screen and as flush with the screen The following illustration shows an example of surface as possible. positioning the system. Note that the illustrations C enter speaker: Place the center speaker above in these instructions differ from the actual unit for or below the monitor or screen. explanation purposes. S urround left speaker (L)/ Surround right For the best possible surround sound, all the speaker (R): speakers other than the subwoofer should be Place these speakers behind your listening placed at the same distance from the listening position, facing slightly inwards. position ( ). S ubwoofer: The position of the subwoofer is not so critical, because low bass sounds are not highly directional. But it is better to place the subwoofer near the front speakers. Turn it slightly toward the center of the room to reduce the wall reflections. Unit DH6230S-F2_DCOLLLK_ENG_0924.indd 14 2013-03-27 3:22:14... -
Page 15: Connections To Your Tv
Connecting Connections to Your HDMI Out Connection If you have a HDMI TV or monitor, you can connect it to this unit using a HDMI cable (Type A, High Speed HDMI™ Cable). Connect the HDMI OUT jack on the unit to the Make one of the following connections, depending HDMI IN jack on a HDMI compatible TV or monitor. on the capabilities of your existing equipment. Set the TV’s source to HDMI (refer to TV’s Owner’s Note manual). y Depending on your TV and other equipment you wish to connect, there are various ways you could connect the player. Use only one of the connections described in this manual. Unit y Please refer to the manuals of your TV, Stereo System or other devices as necessary to make the best connections. > Caution y Make sure the unit is connected directly to the TV. Tune the TV to the correct video input channel. y Do not connect your player via your VCR. The image could be distorted by the copy protection system. y You can fully enjoy digital audio and video signals together with this HDMI connection. - Page 16 Connecting Note y If a connected HDMI device does not accept the audio output of the unit, the HDMI Some functions of this unit are controlled by the device’s audio sound may be distorted or TV’s remote control when this unit and LG TV’s with may not output. SIMPLINK are connected through HDMI connection. y When you connect a HDMI or DVI Controllable functions by LG TV’s remote control; compatible device make sure of the Play, Pause, Scan, Skip, Stop, Power Off, etc. following: Refer to the TV owner’s manual for the details of - T ry switching off the HDMI/DVI device SIMPLINK function. and this unit. Next, switch on the HDMI/ LG TV’s with SIMPLINK function has the logo as DVI device and leave it for around 30 shown above. seconds, then switch on this unit. Note - T he connected device’s video input is set correctly for this unit. Depending on the disc type or playing status, some SIMPLINK operation may differ from your - T he connected device is compatible with purpose or not work. 720 x 480i (or 576i), 720 x 480p (or 576p), 1 280 x 720p, 1 920 x 1 080i or 1 920 x 1 080p video input.
-
Page 17: Video Connection
Connecting Video Connection Connect the VIDEO OUT jack on the unit to the video in jack on the TV using a video cable. You can hear the sound through the system’s speakers. Unit Yellow DH6230S-F2_DCOLLLK_ENG_0924.indd 17 2013-03-27 3:22:14... -
Page 18: Resolution Setting
Connecting Video Output Resolution Setting Resolution The unit provides several output resolutions for HDMI OUT. You can change the resolution using [Setup] menu. Displayed resolution in display window and 1. Press n HOME. outputted resolution may different according to 2. Use A/D to select the [Setup] and press b connection type. ENTER. The [Setup] menu appears. [HDMI OUT]: 1 080p, 1 080i, 720p and 480p (or 576p) and 480i (or 576i) [VIDEO OUT]: 480i (or 576i) 3. Use W/S to select [Display] option then press D to move to the second level. 4. Use W/S to select the [Resolution] option then press D to move to the third level. 5. Use W/S to select the desired resolution then press b ENTER to confirm your selection. Note If your TV does not accept the resolution you have set on the player, you can set resolution to 480p (or 576p) as follows: Press Z STOP for more than 5 seconds. DH6230S-F2_DCOLLLK_ENG_0924.indd 18 2013-03-27 3:22:15... -
Page 19: Optional Equipment Connection
Connecting Optional Equipment AUDIO (PORT. IN) In Connection Connection Connect an output of portable device (MP3 or PMP etc) to the AUDIO (PORT. IN) input connector. AUX In Connection Connect an Output of auxiliary device to the AUX (L/R) INPUT Connector. Unit MP3 player, etc... Listening to music from your portable player or external device To the audio output jacks of your component The unit can be used to play the music from many (TV, VCR, etc.) types of portable player or external devices. -
Page 20: Usb Connection
Connecting USB Connection Compatible USB Devices y MP3 Player : Flash type MP3 player. Connect the USB port of USB Memory (or MP3 player, etc.) to the USB port on the front of the unit. y USB Flash Drive : D evices that support USB2.0 or USB1.1. y The USB function of this unit does not support some USB devices. USB device requirement y Devices which require additional program installation connected to a computer, are not supported. y Do not extract the USB device while in operation. y For a large capacity USB, it may take longer than a few minute to be searched. Note y To prevent data loss, back up all data. Removing the USB Device from the unit 1. Choose a different function mode or press y If you use a USB extension cable or USB hub, the Z STOP twice in a row. USB device is not recognized. -
Page 21: Optical In Connection
Connecting OPTICAL In connection Home theater speaker ez setup Connect an optical output of Unit (or Digital Device etc) to the OPTICAL IN connector. Listen to sound from TV, DVD and Digital Device with 5.1(2.1 or 2)ch mode. Even in power off mode, if you press OPTICAL, then power is on and automatically changed to AUX OPT mode. 1. Connect the unit’s OPTICAL IN jack to jack on optical out of your TV (or Digital Device etc.). 2. Select the AUX OPT by using the OPTICAL. To select the AUX OPT directly. 3. Listen sound with 5.1(2.1 or 2)ch speaker. 4. To escape from AUX OPT by using the OPTICAL. Function is retuned to previous one. To the digital optical output jack of your component DH6230S-F2_DCOLLLK_ENG_0924.indd 21 2013-03-27 3:22:15... -
Page 22: Antenna Connection
Connecting Antenna Connection Connect the supplied FM antenna for listening to the radio. Connect the FM Wire antenna to the FM antenna connector. Note Be sure to fully extend the FM wire antenna. After connecting the FM wire antenna, keep it as horizontal as possible. DH6230S-F2_DCOLLLK_ENG_0924.indd 22 2013-03-27 3:22:16... -
Page 23: System Setting
System Setting Adjust the setup To display and exit the Setup menu settings 1. Press n HOME. Displays the [Home Menu]. By using the Setup menu, you can make various adjustments to items such as picture and sound. You can also set a language for the subtitles and the Setup menu, among other things. For details on each Setup menu item, see pages 23 to 27. 2. Select an [Setup] by using AD. OSD Initial language settings 3. Press b ENTER. - Optional Displays the [Setup]. 4. Press n HOME or x RETURN to exit in the During the first use of this unit, the initial language [Setup] Menu. setup menu appears on your TV screen. You must About help menu for Setup complete initial language selection before using the unit. English will be selected as the initial Menu... -
Page 24: Language
System Setting Language Display Mode The Display Mode setting works only when the TV Menu Language Aspect mode is set to 4:3. Select a language for the Setup menu and then on [Letterbox] screen display. Displays a wide picture with bands on the upper and lower portions of the screen. Disc Audio / Disc Subtitle / Disc [Panscan] Menu Automatically displays the wide picture on the Select the language you prefer for the audio track entire screen and cuts off the portions that do (disc audio), subtitles, and the disc menu. not fit. (If the disc/file is not compatible with Pan Scan, the picture is displayed at Letterbox [Original] ratio.) Refers to the original language in which the disc was recorded. Resolution [Other] Sets the output resolution of HDMI video signal. To select another language, press numeric Refer to “Resolution Setting” for details about the buttons and then b ENTER to enter the resolution (page 18). corresponding 4-digit number according to the language code list on the page 40. If you [Auto]... -
Page 25: Audio
System Setting Audio [Speaker] Select a speaker that you want to adjust. 5.1 Speaker Setup Note Certain speaker settings are prohibited by the Make the following settings for the built-in 5.1 Dolby Digital licensing agreement. channel surround decoder. 1. Select [5.1 Speaker Setup] on the [Audio] menu. 2. Press b ENTER. [Size] The [5.1 SPEAKER] appears. Since the speaker settings are fixed, you cannot change the settings. [Volume] Adjust the output level of each speaker. [Distance] Adjust the distance between each speaker and the listening position. [Speaker Test Start] 3. Use AD to select the desired speaker. Select [Speaker Test Start] by using the WS 4. Adjust options using WSAD buttons. and press b ENTER. Press b ENTER again to 5. Returns to the previous menu by pressing x stop. Adjust the volume to match the volume RETURN. of test signals memorized in the system. DH6230S-F2_DCOLLLK_ENG_0924.indd 25 2013-03-27 3:22:16... -
Page 26: Lock (Parental Control)
System Setting Lock (Parental Control) DRC (Dynamic Range Control) Make the sound clear when the volume is turned down (Dolby Digital only). Set to [On] for this effect. Initial Setting the Area Code: When you use this unit for the first time, you have Vocal to set the Area Code. Select [On] to mix karaoke channels into normal 1. Select the [Lock] menu and then press D. stereo. 2. Press D. This function is effective for multi-channel karaoke To access the [Lock] options, you must input the DVDs only. password you have created. Input a password and press b ENTER. Enter it again and press b HD AV Sync ENTER to verify. If you make a mistake before pressing b ENTER, press CLEAR. Sometimes Digital TV encounters a delay between 3. Select the first character using WS buttons. picture and sound. If this happens you can compensate by setting a delay on the sound so 4. Press b ENTER and select the second character that it effectively ‘waits’... -
Page 27: Others
System Setting Others Password You can enter or change password. Divx(R) VOD 1. Select [Password] on the [Lock] menu and then press D. ABOUT DIVX VIDEO: DivX® is a digital video 2. Press b ENTER. format created by DivX, LLC, a subsidiary of Rovi Corporation. This is an official DivX Certified® device 3. Input a password and press b ENTER. that plays DivX video. Visit divx.com for more To change the password, press b ENTER when information and software tools to convert your files the [Change] option is highlighted. Input a into DivX videos. password and press b ENTER. Enter it again ABOUT DIVX VIDEO-ON-DEMAND: This DivX and press b ENTER to verify. Certified® device must be registered in order to play 4. Press n HOME to exit the menu. purchased DivX Video-on-Demand (VOD) movies. Note To obtain your registration code, locate the DivX VOD section in your device setup menu. Go to vod. If you forget your password, you can clear it divx.com for more information on how to complete using the following steps: your registration. 1. Select the [Setup] menu on the [Home Menu]. [Register] 2. Input the 6-digit number “210499” and Displays the registration code of your player. -
Page 28: Operating
Operating Using the Home Menu Basic Operations 1. Press n HOME. 1. Insert the disc by using the B OPEN/CLOSE or Displays the [Home Menu]. Connect the USB device to the USB port. 2. Press n HOME. Displays the [Home Menu]. 3. Select an option by using AD. If you select the [Movie], [Photo] or [Music] option when you connect up to two devices, 2. Select an option by using AD. it appears as belows. Select a media then press 3. Press b ENTER then selected option menu. b ENTER. [Music] – Displays [MUSIC] menu. [Movie] – S tart video media’s playback or displays the [MOVIE] menu. 4. Press b ENTER then selected option menu. [Photo] – Displays [PHOTO] menu. Note [Setup] – Displays the [Setup] menu. y For the most Audio CD and DVD-ROM discs, Note playback starts automatically. You can not select the [Music], [Movie] or y The unit plays only music file contained in [Photo] option when the USB device is not... -
Page 29: Other Operations
Operating Other Operations Do this Stop Press Z STOP. Displaying Disc Information Press d PLAY, MONO/ Playback STEREO. on-screen Press M PAUSE/STEP. Pause You can display various information about the disc loaded on-screen. Press M PAUSE/STEP Frame-by- repeatedly to play title Frame- 1. Press m INFO/DISPLAY to show various Frame playback by-Frame. (DVD, DivX only) playback information. The displayed items differ depending on the During playback, press C/, disc type or playing status. V SKIP to go to the next 2. You can select an item by pressing WS,and chapter/ track/ file or to Skipping to the change or select the setting by pressing AD. -
Page 30: To Display The Dvd Menu
Operating To display the DVD Menu 3. Input the required start time in hours, minutes, and seconds from left to right. If you enter the wrong numbers, press CLEAR to remove the numbers you entered. Then input the correct When you play a DVD which contains several menu, numbers. you can select the menu you want using the Menu. For example, to find a scene at 1 hour, 10 1. Press DISC MENU. minutes, and 20 seconds, enter “11020” by using The disc’s menu appears. numerical buttons. 2. Select the menu by using WSAD. 4. Press b ENTER to confirm. Playback starts from 3. Press d PLAY, MONO/STEREO to confirm. the selected time. To display the DVD title Resume playback ryut When you play a DVD which contains several title, The unit records the point where you pressed the you can select the title you want using the Menu. Z STOP depending on the disc. -
Page 31: Marked Playback
Operating Marked Playback To delete a Marker 1. Use to select the track that you wish to erase from the marked file. The mark function enables you to store your 2. Press MARKER. favourite files from any disc or USB device in the unit memory. To delete all Markers 1. Select [Music] on the [Home Menu]. Use WSAD to select [Deselect All] then press b Returning to the upper folder. ENTER in program edit mode. (MP3/ WMA only) Note File information will be displayed The markers are also cleared when the disc or according to the ID3TAG information USB device is removed, the unit is switched to on the appropriate music file. (MP3 power off or the function is switched to others. only) Selecting all tracks/ files. Deselecting all tracks/files. Moving to the previous or next file list. 2. Select a desired music on the [List] by using the then press MARKER to appears the mark on the list. -
Page 32: Viewing A Photo File
Operating Viewing a PHOTO file About help menu in the full screen Menu Buttons Operation This unit can play discs with photo files. Displaying the Option Menu INFO/ 1. Select [Photo] on the [Home Menu] and press menu. DISPLAY b ENTER. Moving to another file. Prev./ Next Moving to the previous or next file list. Returning to the RETURN Close [Photo] menu. Options while viewing a photo You can use various options during viewing a photo in full screen. 1. While viewing a photo in full screen, press m INFO/DISPLAY to display the option menu. -
Page 33: Sleep Timer Setting
Operating Sleep Timer Setting System Select - Optional Press SLEEP one or more times to select delay time You must select the appropriate system mode for between 10 and 180 minutes, after the unit will your TV system. Press and hold M PAUSE/STEP turn off. for more than five seconds to be able to select a system in the [Home Menu]. To check the remaining time, press SLEEP. Note To cancel the sleep function, press SLEEP repeatedly until “SLEEP 10” appears, and then press If the USB device is connected or a disc is SLEEP once again while “SLEEP 10” is displayed. inserted, this function is not operated. Note You can check the remaining time before the Adjust the speaker level Unit turns off. settings Press SLEEP The remaining time appears in the display window. You can adjust the sound level of each speaker. 1. Press SPEAKER LEVEL repeatedly to select a desired speaker to set. Dimmer 2. Press VOL -/+ to adjust the sound level of the selected speaker while the level setting memu Press SLEEP once. The display window will be is displayed on the display window. -
Page 34: Radio Operations
Operating Radio Operations Deleting a saved station 1. Press PRESET - / + to Select a preset number you want to delete. Be sure that FM aerials are connected. (Refer to the page 22.) 2. Press CLEAR, the preset number will blink in the display window. Listening to the radio 3. Press CLEAR again, to delete the selectd preset number. 1. Press P RADIO&INPUT until FM appears in the display window. Improving poor FM reception The last received station is tuned in. 2. Press and hold TUNING (-/+) for about two Press d PLAY, MONO/STEREO on the remote seconds until the frequency indication starts to control. This will change the tuner from stereo to change, then release. Scanning stops when the... -
Page 35: Sound Adjustment
Operating Note Sound adjustment y In some of surround modes, some speakers, there’s no sound or low sound. It depends on the mode of surround and the source of Setting the surround mode audio, it is not defective. y You may need to reset the surround mode, This system has a number of pre-set surround after switching the input, sometimes even sound fields. You can select a desired sound mode after the sound track changed. by using SOUND EFFECT. y This function is not operated when the You can change the SOUND EFFECT using AD microphone is connected to the unit. arrow key while the sound effect information is displayed on. The displayed items for the equalizer maybe different depending on sound sources and effects. On Display Description The NAT PLUS is Natural Plus sound effect. You can enjoy NAT PLUS the natural sound effect same as a 5.1-channel. You can enjoy comfortable NATURAL and natural sound. -
Page 36: Advanced Operations
Operating Note Advanced Operations y You can check the recording percentage rate for the USB record on the screen during the recording. (Audio CD or MP3/ WMA CD Recording to USB only) y During recording MP3/WMA, there is no You can record music or sound souce to USB device sound. by connecting in to the port on the unit. y When you stop recording during playback, 1. Connect the USB device to the unit. the file that has been recorded at that time 2. Select a mode in which you want to record. will be stored. (Audio CD only) Play back a sound source first. y Do not remove the USB device or turn 3. Start the recording by pressing X REC. off the unit during USB recording. If not, 4. To stop recording, press Z STOP. an incomplete file may be made and not deleted on PC. [All tracks/ files recording] y Recording through microphones is not Record to USB in stop or play mode. -
Page 37: Troubleshooting
Troubleshooting Troubleshooting PROBLEM CORRECTION No power Plug the power cord into the wall outlet securely. Select the appropriate video input mode on the TV so the picture from the unit appears on the TV screen. No picture Connect the video cables securely to both the TV and unit. Select the correct input mode of the unit so you can hear the sound from the unit. There is little or no sound Connect the audio cables into the connection terminals correctly. Replace with a new audio cable. Clean the disc using a soft cloth with outward strokes. The DVD picture quality is poor Insert a disc. Insert a playable disc (check the disc type, colour system and regional code). A DVD/CD will not play Place the disc with the label or printed side facing upwards. Enter your password or change the rating level. Clean the disc using a soft cloth with outward strokes. Humming noise heard while a DVD or CD is playing Move unit and audio components further away from your TV. Check the antenna connection and adjust its position. Attach an external aerial if necessary. Radio stations can’t be tuned in properly Tune to the station manually. Preset some radio stations, see page 34 for details. The remote is not pointed directly at the unit. Point the remote directly at the unit. The remote is too far from the unit. Use the remote within 23 feet (7m) of the unit. The remote control doesn’t work There is an obstacle in the path between the remote control and well / at all the unit. -
Page 38: Appendix
Appendix Maintenance Notes on Discs Handling Discs Handling the Unit Do not touch the playback side of the disc. Hold the disc by the edges so that fingerprints do not get on the surface. Never stick paper or tape on the When shipping the unit disc. Please save the original shipping carton and packing materials. If you need to ship the unit, for Storing Discs maximum protection, re-pack the unit as it was After playing, store the disc in its case. Do not originally packed at the factory. expose the disc to direct sunlight or sources of heat Keeping the exterior surfaces clean and never leave it in a parked car exposed to direct y Do not use volatile liquids such as insecticide sunlight. spray near the unit. y Wiping with strong pressure may damage the Cleaning Discs surface. Fingerprints and dust on the disc can cause poor y Do not leave rubber or plastic products in picture quality and sound distortion. Before playing, contact with the unit for a long period of time. -
Page 39: Area Code List
Appendix Area Code List Choose an area code from this list. Area Code Area Code Area Code Area Code Afghanistan Fiji Monaco Singapore Argentina Finland Mongolia Slovak Republic Australia France Morocco Slovenia Austria Germany Nepal South Africa Belgium Great Britain Netherlands South Korea Bhutan Greece Antilles Spain Bolivia Greenland New Zealand Sri Lanka Brazil Hong Kong... -
Page 40: Language Code List
Appendix Language code List Use this list to input your desired language for the following initial settings: [Disc Audio], [Disc Subtitle] and [Disc Menu]. Language Code Language Code Language Code Language Code Afar 6565 French 7082 Lithuanian 7684 Sindhi 8368 Afrikaans 6570 Frisian 7089 Macedonian 7775 Singhalese 8373 Albanian 8381 Galician 7176 Malagasy 7771 Slovak 8375 Ameharic 6577 Georgian 7565 Malay... -
Page 41: Trademarks And Licenses
Appendix Trademarks and Licenses Manufactured under license from Dolby Laboratories. Dolby and the double-D symbol are trademarks of Dolby Laboratories. The terms HDMI and HDMI High-Definition Multimedia Interface, and the HDMI logo are trademarks or registered trademarks of HDMI Licensing LLC in the United States and other countries. “DVD Logo” is a trademark of DVD Format/Logo Licensing Corporation. DivX®, DivX Certified® and associated logos are trademarks of Rovi Corporation or its subsidiaries and are used under license. DH6230S-F2_DCOLLLK_ENG_0924.indd 41 2013-03-27 3:22:18... -
Page 42: Specifications
Appendix Specifications General Power requirements Refer to main label. Power consumption Refer to main label. Dimensions (W x H x D) 360 x 60.5 x 299 mm without foot Net Weight (Approx.) 2.66 kg Operating temperature 41 °F to 95 °F (5 °C to 35 °C) Operating humidity 5 % to 90 % Bus Power Supply (USB) DC 5 V 0 500 mA Inputs/ Outputs VIDEO OUT 1.0 V (p-p), 75 Ω, sync negative, RCA jack x 1 HDMI OUT (video/audio): 19 pin (Type A, HDMI™ Connector ) ANALOG AUDIO IN 2.0 Vrms (1 kHz, 0 dB), 600 Ω, RCA jack (L, R) x 1 DIGITAL IN (OPTICAL): 3 V (p-p), Optical jack x 1 PORT. IN 0.5Vrms (3.5 mm stereo jack) Amplifier Stereo mode 167 W + 167 W (3 Ω at 1kHz) Front 167 W + 167 W (3 Ω at 1 kHz) Center 167 W (3 Ω at 1 kHz) Surround mode Surround 167 W + 167 W (3 Ω at 1 kHz)) Subwoofer 167 W (3 Ω at 60 Hz) Tuner FM Tuning Range... - Page 43 Appendix Front Speaker Type 1 way 1 speaker Impedance Rated 3 Ω Input Power 167 W Max. Input Power 334 W Net Dimensions (W x H x D) 88 x 122 x 81 mm Net Weight 0.5 kg Rear Speaker Type 1 way 1 speaker Impedance Rated 3 Ω Input Power 167 W Max. Input Power 334 W Net Dimensions (W x H x D) 88 x 122 x 81 mm Net Weight 0.5 kg Centre Speaker Type 1 way 1 speaker Impedance Rated 3 Ω Input Power 167 W Max. Input Power 334 W Net Dimensions (W x H x D) 260 x 93 x 74 mm Net Weight 0.6 kg...
- Page 44 DH6230S-F2_DCOLLLK_ENG_0924.indd 44 2013-03-27 3:22:18...