Table of Contents
Advertisement
Quick Links
Register your product and get support at
www.philips.com/welcome
READ THESE INSTRUCTIONS CAREFULLY BEFORE USING THE MACHINE.
CHECK ON WWW.PHILIPS.COM/SUPPORT TO DOWNLOAD THE LATEST USER MANUAL
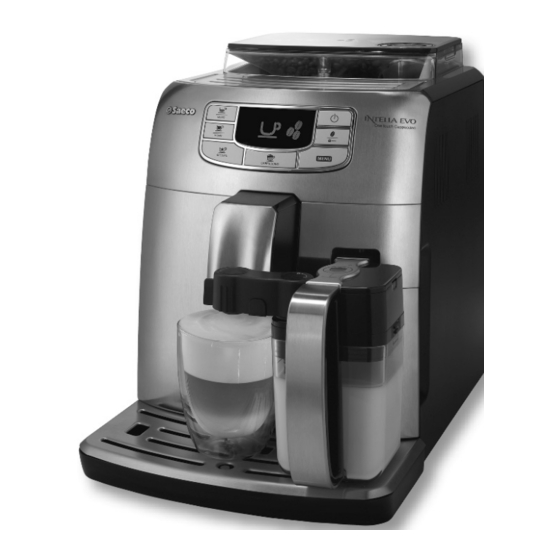
Type HD8753 - HD8884
INSTRUCTIONS
E S P R E S S O &
CAPPUCCINO
P E R F E T TO
by Philips Saeco
DTP number: B001
Advertisement
Table of Contents

Related Manuals for Philips Saeco INTELIA EVO HD8753


Summary of Contents for Philips Saeco INTELIA EVO HD8753
- Page 1 E S P R E S S O & Type HD8753 - HD8884 CAPPUCCINO P E R F E T TO by Philips Saeco DTP number: B001 INSTRUCTIONS READ THESE INSTRUCTIONS CAREFULLY BEFORE USING THE MACHINE. CHECK ON WWW.PHILIPS.COM/SUPPORT TO DOWNLOAD THE LATEST USER MANUAL...
- Page 2 Per le istruzioni complete scaricare il manuale utente dal WWW.PHILIPS.COM/SUPPORT Herzlich Willkommen in der Welt von Philips Saeco! Registrieren Sie sich auf der Internetseite WWW. PHILIPS.COM/WELCOME und erhalten Sie Hinweise und Aktualisierungen zur Wartung. In diesem Heft werden die Hinweise für den korrekten Betrieb des Geräts in Kurzform dargestellt.
- Page 3 This home barista is your gateway to a world of professionally prepared Italian coffee specialties. Treat your senses to perfect espresso and cappuccino by Philips Saeco – certifi ed by Italian Tasters – Centro Studi As- saggiatori, Italy’s #1 center for sensory analysis. Get more info on the certifi cation and learn about your new machine’s specifi...
-
Page 4: Table Of Contents
EN - CONTENT SAFETY INSTRUCTIONS ......................................6 FIRST INSTALLATION......................................10 MANUAL RINSE CYCLE......................................11 FIRST ESPRESSO ........................................12 MY ESPRESSO ........................................12 ADJUSTING THE CERAMIC COFFEE GRINDER ...............................12 FIRST CAPPUCCINO ......................................13 MY CAPPUCCINO ........................................14 FIRST HOT MILK .........................................15 MY HOT MILK ........................................16 HOT WATER........................................17 DESCALING ........................................18 BREW GROUP CLEANING ....................................21 CLEANING THE MILK CARAFE .....................................22 MENU FOR CUSTOMIZATION AND MAINTENANCE ...............................25... - Page 5 FR - TABLE DES MATIÈRES CONSIGNES DE SÉCURITÉ ....................................30 PREMIÈRE INSTALLATION ....................................32 CYCLE DE RINÇAGE MANUEL ....................................33 PREMIER CAFÉ EXPRESSO ....................................34 MON CAFÉ EXPRESSO ......................................34 RÉGLAGE DU MOULIN À CAFÉ EN CÉRAMIQUE ..............................34 PREMIER CAPPUCCINO ......................................35 MON CAPPUCCINO ......................................36 PREMIER LAIT CHAUD ......................................37 MON LAIT CHAUD .......................................38 EAU CHAUDE ........................................39 DÉTARTRAGE ........................................40...
-
Page 6: Safety Instructions
EN - SAFETY INSTRUCTIONS carried out by a service centre authorised by This machine is equipped with safety features. Philips to avoid a hazard. Nevertheless read and follow the safety in- • The machine should not be used by children structions carefully and only use the machine younger than 8 years old. - Page 7 • Do not leave water in the water tank when the machine is not used over a long period This Philips appliance complies with all the ap- of time. The water can be contaminated. Use plicable standards and regulations relating to fresh water every time you use the machine.
-
Page 8: Norme Di Sicurezza
La macchina è dotata di dispositivi di sicurezza. le riparazioni devono essere eseguite da un È tuttavia necessario leggere e seguire attenta- centro assistenza autorizzato da Philips per mente le indicazioni per la sicurezza descritte evitare qualsiasi pericolo. nelle presenti istruzioni d’uso in modo da evi- •... - Page 9 L’acqua potrebbe subire delle conta- minazioni. Ogni volta che si usa la macchina, Questo apparecchio Philips è conforme a tutti utilizzare acqua fresca. gli standard e le normative applicabili in mate- Smaltimento ria di esposizione ai campi elettromagnetici.
-
Page 10: First Installation
Instructions www.philips.com/support Istruzioni FIRST INSTALLATION PRIMA INSTALLAZIONE Insert the tray up to its limit Remove the water tank. Fill it with fresh drinking Fill the coff ee bean hopper. Insert the plug in the ma- stop. water. chine. Inserire la vasca fi no a bat- Estrarre il serbatoio acqua. -
Page 11: Manual Rinse Cycle
Instructions www.philips.com/support Istruzioni MANUAL RINSE CYCLE CICLO DI RISCIACQUO MANUALE Place a container under the When the dispensing is complete, empty the container. Press the button. The Press the button until dispensing spout. Repeat the operations from step 1 to step 4 twice, then con-... -
Page 12: First Espresso
Instructions www.philips.com/support Istruzioni FIRST ESPRESSO - PRIMO ESPRESSO Adjust the dispensing spout. Press the At the end of the process, re- button to ...press the button to move the cup. brew an espresso, or... brew a coff ee. Regolare l’ e rogatore. -
Page 13: First Cappuccino
Instructions www.philips.com/support Istruzioni Select ( ). Lighter taste, for Select ( ). Bolder taste, for Brew 2-3 products to taste the diff erence. If the coff ee is wa- dark roasted coff ee blends. light roasted coff ee blends. tery, adjust the coff ee grinder again. -
Page 14: My Cappuccino
Instructions www.philips.com/support Istruzioni The machine is in warm-up phase. Once the warm-up is If the quantities brewed are excessive compared to the cup complete, the machine brews the cappuccino according to used, press the button to stop the process. the factory preset quantities. -
Page 15: First Hot Milk
Instructions www.philips.com/support Istruzioni FIRST HOT MILK PRIMO LATTE CALDO MILK CLICK! Remove the water dispens- Remove the carafe lid. Fill with milk. Turn the dispensing spout Insert the milk carafe. ing spout. to "I". Rimuovere l’ e rogatore Rimuovere il coperchio della Riempire con il latte. -
Page 16: My Hot Milk
Instructions www.philips.com/support Istruzioni MY HOT MILK IL MIO LATTE CALDO CLICK! Make sure the carafe is fully Place the cup under the dis- The machine is in warm-up Press the button. Press and hold the but- inserted. pensing spout. phase. -
Page 17: Hot Water
Instructions www.philips.com/support Istruzioni HOT WATER ACQUA CALDA Insert the water dispenser. Lock it in place. Place the container in posi- Press the button. Press the button. tion. Inserire l’ e rogatore. Agganciare l’ e rogatore. Posizionare il contenitore. Premere il tasto... -
Page 18: Descaling
Instructions www.philips.com/support Istruzioni DESCALING - 30 min. DECALCIFICAZIONE - 30 min. When the “CALC CLEAN” symbol is displayed, you need to descale the machine. Not doing this will ultimately make your appliance stop working properly. In this case repair is not covered under your warranty. - Page 19 Instructions www.philips.com/support Istruzioni Pour the descaling solution. Fill the water tank with fresh Place a large container The descaling solution will Press the button to water up to the MAX level. (1.5 l) under both the milk be dispensed at regular in- start the descaling cycle.
- Page 20 Instructions www.philips.com/support Istruzioni Rinse the water tank and Place a container under both The machine automatically The machine activates the Press the button to quit fi ll it with fresh water up to the descaling cycle. the milk carafe dispenser primes the circuit.
-
Page 21: Brew Group Cleaning
Instructions www.philips.com/support Istruzioni BREW GROUP CLEANING PULIZIA GRUPPO CAFFÈ Remove the coff ee grounds drawer and open the service Remove the coff ee residues Carry out maintenance to the Check the alignment. door. drawer and then the brew brew group, as shown in the group. -
Page 22: Cleaning The Milk Carafe
Instructions www.philips.com/support Istruzioni CLEANING THE MILK CARAFE PULIZIA DELLA CARAFFA DEL LATTE It is important that you clean the milk carafe daily or after each use as it preserves hygiene and ensures perfect milk froth consistency. È importante pulire la... - Page 23 Instructions www.philips.com/support Istruzioni Place a container under the The following icon is dis- The machine starts dispens- Press the button. Press the button. milk dispensing spout. played during preheating ing water. time required by the ma- chine. Posizionare un contenitore...
- Page 24 Instructions www.philips.com/support Istruzioni Remove the fi tting (F) by Clean all the parts thoroughly with lukewarm water. pulling it outwards to de- Reassemble the parts following the reverse order. tach it from the remaining part (G). Sfi lare il raccordo (F) ti- Pulire a fondo tutti i componenti con acqua tiepida.
-
Page 25: Menu For Customization And Maintenance
Instructions www.philips.com/support Istruzioni Insert the milk carafe into the machine. Place a suitable con- At the end, empty the con- Press the button. Press the button to tainer (1.5 l) under the dispensing spout. tainer and repeat steps 10 start the carafe rinsing. -
Page 26: Warning Signals (Yellow Colour)
Instructions www.philips.com/support Istruzioni Adjusting water hardness. Perform this operation be- Descaling menu. Reset of parameters. fore the fi rst use. Use the strip provided with the ma- chine. For further information, please refer to the on- line downloadable user manual. -
Page 27: Warning Signals (Red Colour)
Replace it within 30 seconds to complete peat the procedure 2 or 3 times. brewing. If the machine does not start, contact the Philips SAECO ho- tline in your country (the contact details are indicated in the warranty booklet). -
Page 28: Sicherheitshinweise
• Das Gerät oder das Netzkabel dürfen keines- Das Gerät ist mit Sicherheitsvorrichtungen aus- falls modifi ziert werden. Alle Reparaturen gestattet. Dennoch sollten Sie die beschriebe- müssen durch ein von Philips autorisiertes nen Sicherheitshinweise in dieser Bedienungs- Kundendienstzentrum ausgeführt werden, anleitung aufmerksam lesen und umsetzen, um um jede Gefahr zu vermeiden. - Page 29 Geschäft, in dem Sie das Produkt gekauft verwendet wird. Das Wasser könnte verun- haben. reinigt werden. Bei jeder Verwendung des Geräts ist frisches Wasser zu benutzen. Dieses Philips-Gerät entspricht allen Standards Entsorgung und anwendbaren Vorschriften zum Einfl uss elektromagnetischer Felder. - Die Verpackungsmaterialien können recy-...
-
Page 30: Consignes De Sécurité
La machine est équipée de dispositifs de sécu- les réparations doivent être eff ectuées par rité. Il est toutefois nécessaire de lire et de suivre un centre d’assistance agréé par Philips pour attentivement les consignes de sécurité conte- éviter tout danger. - Page 31 L'eau pourrait être contami- produit. née. Utiliser de l'eau fraîche à chaque utili- sation de la machine. Cet appareil Philips est conforme à tous les standards et à toutes les réglementations appli- Élimination cables en matière d’ e xposition aux champs élec- - Les matériaux d'emballage peuvent être...
-
Page 32: Erste Inbetriebnahme
Hinweise www.philips.com/support Instructions ERSTE INBETRIEBNAHME PREMIÈRE INSTALLATION Die Schale bis zum Anschlag Den Wassertank herausneh- Mit frischem Trinkwasser Den Kaff eebehälter auff ül- Den Stecker in das Gerät ein- einsetzen. men. füllen. len. stecken. Insérer le bac jusqu'à la Retirer le réservoir à eau. -
Page 33: Manueller Spülzyklus
Hinweise www.philips.com/support Instructions MANUELLER SPÜLZYKLUS CYCLE DE RINÇAGE MANUEL Einen Behälter unter den Nach der Ausgabe den Behälter leeren. Die Taste drücken. Das Die Taste drücken, um Auslauf stellen. Die Vorgänge von Punkt 1 bis Punkt 4 insgesamt zwei Mal Gerät beginnt, Wasser aus-... -
Page 34: Erster Espresso
Hinweise www.philips.com/support Instructions ERSTER ESPRESSO - PREMIER CAFÉ EXPRESSO Die Düse einstellen. Nach Abschluss des Vor- Die Taste für die Ausgabe ... die Taste für die Aus- gangs die Tasse entnehmen. eines Espresso drücken oder ... gabe eines Kaff ees drücken. -
Page 35: Erster Cappuccino
Hinweise www.philips.com/support Instructions Anwahl vornehmen ( ). Anwahl vornehmen ( ). Stär- 2-3 Produkte ausgeben, um den Unterschied wahrzuneh- Leichteres Aroma, für Mi- keres Aroma, für Mischun- men. Ist der Kaff ee wässrig, das Mahlwerk erneut einstellen. schungen mit dunkler Rös- gen mit heller Röstung. -
Page 36: Mein Cappuccino
Hinweise www.philips.com/support Instructions Das Gerät befi ndet sich in der Aufheizphase. Nach Abschluss Sollte die verwendete Tasse für die ausgegebenen Mengen der Aufheizphase bereitet das Gerät den Cappuccino gemäß zu klein sein, wird die Taste gedrückt, um den Vorgang den werkseitig eingestellten Mengen zu. -
Page 37: Erste Heisse Milch
Hinweise www.philips.com/support Instructions ERSTE HEISSE MILCH PREMIER LAIT CHAUD MILK CLICK! Die Wasserdüse abnehmen. Den Deckel der Karaff e ab- Mit Milch füllen. Die Düse auf “I” drehen. Die Milchkaraff e einsetzen. nehmen. Enlever la buse de distribu- Retirer le couvercle de la Remplir avec du lait. -
Page 38: Meine Heisse Milch
Hinweise www.philips.com/support Instructions MEINE HEISSE MILCH MON LAIT CHAUD CLICK! Eine Tasse unter den Auslauf Sicherstellen, dass die Karaf- Die Taste drücken. Das Gerät befi ndet sich in der Die Taste für mehr als 3 stellen. fe gut sitzt. Aufheizphase. -
Page 39: Heisswasser
Hinweise www.philips.com/support Instructions HEISSWASSER EAU CHAUDE Die Düse einsetzen. Die Düse einhaken. Den Behälter positionieren. Die Taste drücken. Die Taste drücken. Insérer la buse de distribu- Accrocher la buse de distri- Positionner le récipient. Appuyer sur la touche . Appuyer sur la touche tion. -
Page 40: Entkalken
Hinweise www.philips.com/support Instructions ENTKALKEN - 30 Min. DÉTARTRAGE - 30 min. Wenn auf dem Display das Symbol “CALC CLEAN” erscheint, muss das Gerät entkalkt werden. Erfolgt das Entkalken nicht regelmäßig, so stellt das Gerät den Betrieb ein. Diese Bedingung wird nicht durch die Garantie gedeckt. - Page 41 Hinweise www.philips.com/support Instructions Den Entkalker einfüllen. Den Wassertank bis zum Einen großen Behälter (1,5 l) Das Entkalkungsmittel wird Die Taste drücken, um Füllstand MAX mit frischem unter die Düse der Milchka- in regelmäßigen Intervallen den Entkalkungszyklus zu Wasser füllen. raff e und den Kaff eeauslauf ausgegeben (Dauer: ca.
- Page 42 Hinweise www.philips.com/support Instructions Den Tank ausspülen und bis Einen Behälter unter die Das Gerät führt die automa- Das Gerät schaltet in die Auf- Die Taste drücken, um zum Füllstand MAX mit fri- Düse der Milchkaraff e und tische Entlüftung des Sys- heizphase und führt einen...
-
Page 43: Reinigung Brühgruppe
Hinweise www.philips.com/support Instructions REINIGUNG BRÜHGRUPPE NETTOYAGE GROUPE DE DISTRIBUTION Den Kaff eesatzbehälter entfernen und die Servicetür öff nen. Den Kaff eeauff angbehälter Die Wartung der Brühgrup- Die Ausrichtung vornehmen. und die Brühgruppe abneh- pe gemäß den Vorgaben in men. Bedienungsanleitung ausführen. -
Page 44: Reinigung Der Milchkaraffe
Hinweise www.philips.com/support Instructions REINIGUNG DER MILCHKARAFFE NETTOYAGE DE LA CARAFE À LAIT Die Milchkaraff e muss täglich und nach jeder Benutzung gereinigt werden, um die Hygie- ne und die Zubereitung eines Milchschaums mit perfekter Konsistenz zu gewährleisten. Il est important de net- toyer la carafe à... - Page 45 Hinweise www.philips.com/support Instructions Einen Behälter unter die Das Gerät benötigt eine Vor- Das Gerät beginnt, Wasser Die Taste drücken. Die Taste drücken. Milchdüse stellen. wärmzeit. In dieser Phase auszugeben. wird das seitliche Symbol angezeigt. Placer un récipient sous la . La machine nécessite une La machine commence à...
- Page 46 Hinweise www.philips.com/support Instructions Den Anschluss (F) nach au- Alle Teile sorgfältig mit lauwarmem Wasser reinigen. ßen abziehen, um ihn vom Die Teile in umgekehrter Reihenfolge wieder montieren. Reststück (G) abzunehmen. Retirer le raccord (F) en le Laver en profondeur tous les composants avec de l’ e au tirant vers l'extérieur pour...
-
Page 47: Personalisierungs- Und Wartungsmenü
Hinweise www.philips.com/support Instructions Die Milchkaraff e in das Gerät einsetzen. Einen großen Behäl- Dann den Behälter leeren Die Taste drücken. Die Taste drücken, um ter (1,5 l) unter die Düse stellen. und die Vorgänge von 10 bis die Spülung der Karaff e zu 11 bis zur Leerung des Tanks starten. -
Page 48: Hinweissignale (Gelb)
Hinweise www.philips.com/support Instructions Einstellung Wasserhärte. Ausführung vor der ersten Benutzung. Dabei den Menü Entkalkung. Reset Parameter. mit dem Gerät gelieferten Papierstreifen benutzen. Für ausführlichere In- formationen ist auf die Bedienungsanleitung Bezug zu nehmen, die online heruntergeladen werden kann. Réglage de la dureté de l’ e au. À eff ectuer avant la première utilisation. -
Page 49: Alarmsignale (Rot)
2 ou 3 fois. pour terminer la distribution. Si la machine ne démarre pas, contacter le centre d’assis- tance Philips SAECO de votre pays (les numéros de télé- phone sont indiqués dans la notice de la garantie). -
Page 50: Normas De Seguridad
No obstante, es necesario leer y se- rán ser efectuadas por un centro de asisten- guir atentamente las normas de seguridad que cia técnica autorizado por Philips. aquí se describen para evitar daños accidentales • La máquina no está destinada a ser utilizada a personas o cosas debidos al uso incorrecto de por niños de edad inferior a 8 años. - Page 51 El agua podría sufrir contaminaciones. Uti- donde adquirió el producto. lizar agua fresca cada vez que se utilice la máquina. Este aparato Philips cumple con todos los están- dares y las normativas aplicables en materia de Eliminación exposición a los campos electromagnéticos.
-
Page 52: Indicações Para A Segurança
A máquina está dotada de dispositivos de segu- devem ser realizadas por um centro de as- rança. Contudo, é necessário ler e seguir aten- sistência autorizado pela Philips, para evitar tamente as normas de segurança descritas nas qualquer perigo. presentes instruções de utilização, de modo a •... - Page 53 • Não deixe água no reservatório se a máqui- na não for utilizada por um longo período. A Este aparelho Philips está em conformidade água poderá sofrer contaminações. Sempre com todos os padrões e as normas aplicáveis em que utilizar a máquina, use água fresca.
-
Page 54: Primera Instalación
Instrucciones www.philips.com/support Instruções PRIMERA INSTALACIÓN PRIMEIRA INSTALAÇÃO Introducir la bandeja hasta Extraer el depósito de agua. Llenar con agua fresca po- Llenar el contenedor de café. Introducir la clavija en la el tope. table. máquina. Introduza a bandeja até que Extraia o reservatório de... -
Page 55: Ciclo De Enjuague Manual
Instrucciones www.philips.com/support Instruções CICLO DE ENJUAGUE MANUAL CICLO DE ENXAGUAMENTO MANUAL Colocar un recipiente bajo la Una vez fi nalizado el suministro, vaciar el recipiente. Pulsar el botón . La má- Pulsar el botón hasta salida de café. Repetir dos veces las operaciones del punto 1 al 4; a conti- quina comenzará... -
Page 56: Primer Café Exprés
Instrucciones www.philips.com/support Instruções PRIMER CAFÉ EXPRÉS - PRIMEIRO EXPRESSO Ajustar la salida de café. Una vez terminado el proce- Pulsar el botón para ... pulsar el botón para so, retirar la taza. suministrar un café exprés o... suministrar un café. -
Page 57: Primer Capuchino
Instrucciones www.philips.com/support Instruções Seleccionar ( ). Sabor más Seleccionar ( ). Sabor más Suministrar 2-3 productos para probar la diferencia. Si el ligero, para mezclas con to- fuerte, para mezclas con to- café está acuoso, ajustar de nuevo el molinillo de café. -
Page 58: Mi Capuchino
Instrucciones www.philips.com/support Instruções La máquina está en fase de calentamiento. Una vez calien- En caso de que las cantidades suministradas sean excesivas te, la máquina procede a suministrar el capuchino según las para la taza utilizada, pulsar el botón para detener el cantidades preconfi guradas de fábrica. -
Page 59: Primera Leche Caliente
Instrucciones www.philips.com/support Instruções PRIMERA LECHE CALIENTE PRIMEIRO LEITE QUENTE MILK CLICK! Extraer la salida de agua. Quitar la tapa de la jarra. Llenarla de leche. Posicionar la boquilla en “I”. Introducir la jarra de leche. Retire o distribuidor da Remova a tampa da jarra. -
Page 60: Mi Leche Caliente
Instrucciones www.philips.com/support Instruções MI LECHE CALIENTE O MEU LEITE QUENTE CLICK! Colocar una taza bajo la bo- Asegurarse de que la jarra Pulsar el botón Mantener pulsado el botón La máquina está en fase de quilla. esté correctamente intro- durante más de 3 se- calentamiento. -
Page 61: Agua Caliente
Instrucciones www.philips.com/support Instruções AGUA CALIENTE ÁGUA QUENTE Introducir la salida de agua. Acoplar la salida de agua. Colocar el recipiente. Pulsar el botón Pulsar el botón Introduza o grupo de distri- Engate o grupo de distri- Coloque o recipiente. Pressione a tecla Pressione a tecla buição. -
Page 62: Descalcificación
Instrucciones www.philips.com/support Instruções DESCALCIFICACIÓN - 30 min DESCALCIFICAÇÃO - 30 min. El icono “CALC CLEAN” visualizado en la pantalla indica que la máquina debe ser descalcifi cada. Si no se realiza la descalcifi cación puntualmente, la máquina dejará de funcionar. Condición no cubierta por la garantía. - Page 63 Instrucciones www.philips.com/support Instruções Verter el producto descalci- Rellenar el depósito con Colocar un recipiente grande La solución descalcifi cante Pulsar el botón para fi cante. agua fresca hasta el nivel (1,5 l) bajo la boquilla de la será suministrada a interva- dar inicio al ciclo de descal- MAX.
- Page 64 Instrucciones www.philips.com/support Instruções Enjuagar el depósito, llenar- Colocar un recipiente bajo la La máquina llevará a cabo La máquina entra en fase Pulsar el botón para lo con agua fresca hasta el boquilla de la jarra de leche la carga automática del cir-...
-
Page 65: Limpieza Del Grupo De Café
Instrucciones www.philips.com/support Instruções LIMPIEZA DEL GRUPO DE CAFÉ LIMPEZA DO GRUPO CAFÉ Sacar el cajón de recogida de posos y abrir la puerta de ser- Sacar el cajón de recogida de Realizar el mantenimiento Comprobar la alineación. vicio. café y el grupo de café. -
Page 66: Limpieza De La Jarra De Leche
Instrucciones www.philips.com/support Instruções LIMPIEZA DE LA JARRA DE LECHE LIMPEZA DA JARRA DE LEITE Es importante limpiar la jarra de leche diariamen- te y tras cada uso con el fi n de mantener la higie- ne y garantizar la pre- paración de una crema... - Page 67 Instrucciones www.philips.com/support Instruções Colocar un recipiente bajo la La máquina necesita un La máquina comienza a su- Pulsar el botón Pulsar el botón boquilla de la jarra de leche. tiempo de precalentamiento; ministrar agua. durante esta fase se visualiza el símbolo de arriba.
- Page 68 Instrucciones www.philips.com/support Instruções Extraer el racor (F) tirando Limpiar a fondo todos los componentes con agua tibia. de él hacia el exterior para Volver a montar los componentes siguiendo el mismo proce- separarlo de la pieza restan- dimiento a la inversa.
-
Page 69: Menú De Personalización Y Mantenimiento
Instrucciones www.philips.com/support Instruções Introducir la jarra de leche en la máquina. Colocar un reci- Una vez fi nalizado, vaciar el Pulsar el botón Pulsar el botón para piente grande (1,5 l) bajo la boquilla de la jarra. recipiente y repetir las ope-... -
Page 70: Señales De Aviso (Amarillo)
Instrucciones www.philips.com/support Instruções Ajuste de la dureza del agua. Efectuar antes de usar por Menú Descalcifi cación. Restablecimiento de los pa- primera vez. Utilizar la tira de test suministrada con la rámetros. máquina. Para más información, consultar el manual del usuario descargable en línea. -
Page 71: Señales De Alarma (Rojo)
30 segundos para completar el suministro. Si la máquina no se pone en marcha, contactar con la línea de atención al cliente de Philips SAECO del país (los teléfonos de contacto se indican en el libro de garantía). Encha o reservatório de Foi extraída a gaveta de borras durante uma distribuição... -
Page 72: Maintenance Products
Visita il negozio online Philips numero prodotto: CA6700 numero prodotto: HD5061 per verifi care la disponibilità e le opportunità di acquisto nel tuo Paese. Entkalker Fett Besuchen Sie den Online-Shop Produktnummer: CA6700 Produktnummer: HD5061 Philips für die Verfügbarkeit und die Kaufmöglichkeiten in Ihrem Land. -
Page 73: Produits Pour L'entretien
Pays. Solución descalcifi cante Grasa Visite la tienda en línea de Philips número de producto: CA6700 número de producto: HD5061 para comprobar la disponibilidad y las ofertas de compra en su país. - Page 74 Il produttore si riserva il diritto d`apportare qualsiasi modifica senza preavviso. The manufacturer reserves the right to change the features of the product without prior notice. Der Hersteller behält sich das Recht vor, Änderungen am Produkt ohne Vorankündigung vorzunehmen. Le producteur se réserve le droit d‘apporter des modifi cations au produit sans aucun préavis. El fabricante se reserva el derecho a realizar modifi...