
Related Manuals for Haier HDV40A1


Summary of Contents for Haier HDV40A1
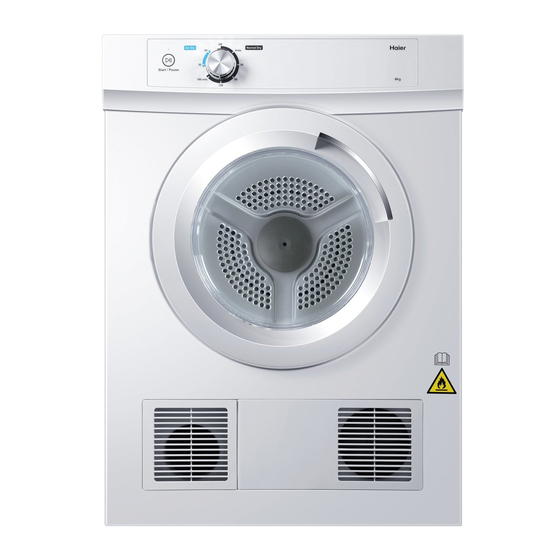
- Page 1 INSTALLATION INSTRUCTIONS USER GUIDE Vented clothes dryer Model: HDV60A1 and HDV40A1...
-
Page 3: Table Of Contents
CONTENTS SAFETY AND WARNINGS INSTALLATION INSTRUCTIONS CONTROL PANEL USING YOUR DRYER CLEANING YOUR DRYER TROUBLESHOOTING IMPORTANT! SAVE THESE INSTRUCTIONS Please read these instructions carefully before using your tumble dryer. The instructions contain important information which will help you get the best out of the device and ensure safe and proper installation, use and maintenance. -
Page 4: Safety And Warnings
SAFETY AND WARNINGS Meaning of symbols on the dryer Warning: Risk of fire/Flammable materials Read the instructions ! WARNING! Fire Hazard ■ Only dry fabrics that have been washed with water. ■ Do not use heat to dry articles containing foam rubber or similarly textured rubber–like materials, dry on ‘Airing’. - Page 5 ■ At regular intervals have the interior of the dryer cleaned of any accumulated lint. This must be done by a Haier trained and supported service technician. This must be done when the dryer installation is changed from free standing or inverted, or vice versa.
- Page 6 These materials can, when heated, produce fire by spontaneous combustion. ■ The maximum mass of dry textiles depends on your model, The HDV60A1 model is rated at 6kg. The HDV40A1 model is rated at 4kg. Do not overload your dryer.
-
Page 7: Installation Instructions
INSTALLATION INSTRUCTIONS Please read and follow the ‘Safety and warnings’ and ‘Installation instructions’ sections carefully before using your dryer. Unpacking 1 Remove all the packaging. 2 Tilt the dryer backwards and ‘walk’ it off the base one foot at a time. 3 Remove all packaging and accessories from inside the drum and ensure you remove protective covers from the door and console. - Page 8 INSTALLATION INSTRUCTIONS Venting Correct installation is very important for all dryers to ensure maximum efficiency and safety. IMPORTANT! Never run the dryer unless the airflow system is free from obstruction. There must be adequate ventilation to avoid the back flow of gases into the room from appliances burning fuels, including open fires, when operating the dryer.
- Page 9 INSTALLATION INSTRUCTIONS Free standing The dryer stands on the floor and can easily be moved into position. 1 Move the dryer into the desired position. Do not lift the dryer by the top panel. 2 Have a minimum clearance on all sides of at least 20mm.
- Page 10 INSTALLATION INSTRUCTIONS Mounting dryer on wall 1 Determine the position of the dryer on the wall and mark the bracket position. A minimum of 50mm is needed between the top of the dryer and the ceiling for ease of installation. If mounting above a washing machine, allow sufficient room to open the lid of the washer.
- Page 11 INSTALLATION INSTRUCTIONS Stacking installation Your dryer has been designed to be able to be stacked on the top of a Haier front load washing machine, ensure the washing machine is the same width as your dryer. Stacking bracket includes: Tools and parts required: ■...
- Page 12 INSTALLATION INSTRUCTIONS Before a rear venting option is installed the dryer must be changed from the front venting factory setup. Remove the outlet grille from the front left-hand side and replace with the outlet cover from the rear left-hand side. These covers should be gently pried at the sides to prevent damage.
- Page 13 ■ Do not touch or operate the dryer with wet hands or with bare feet. ■ A damaged power cord must be replaced by a Haier trained and supported service technician. The appliance must not be operated until it is repaired, as there is risk of electric shock.
-
Page 14: Control Panel
1 hour or until door is opened. MAX. LOAD SIZE (KG) DRYING CYCLE DESCRIPTION HDV60A1 HDV40A1 Normal Dry - Auto Heat cycle for rapid drying of everyday Sensor Dry * clothing, eg cotton fabrics, t-shirts, sheets, trousers. -
Page 15: Using Your Dryer
USING YOUR DRYER IMPORTANT! ■ Check the lint filter is clean before every load. Ensure it is replaced correctly before using your dryer. ■ Sort and load items into the dryer drum, ensuring no items are in the way of the door. ■... - Page 16 USING YOUR DRYER Selecting program Select you desired drying cycle by turning the control dial. Start the dryer Press ‘Start / Pause’ button to start your dryer. Complete the cycle When the cycle finishes, your dryer will stop rotating and the indicator light will flash, you can open the door and remove the laundry.
-
Page 17: Cleaning Your Dryer
Lint filter IMPORTANT! If the lint filter becomes damaged, contact your Haier Repairer to arrange for a replacement filter. Do not operate your dryer with a damaged lint filter or without the filter in place, as this will cause damage to your dryer. -
Page 18: Troubleshooting
Troubleshooting The following is a list of problems you may encounter when using this appliance and some suggestions that may help to correct the problem. If you still have problems, please contact your Haier Repairer. PROBLEM POSSIBLE CAUSES WHAT TO DO Dryer stops Power failure. - Page 20 0180500689A 2016. 07...