Table of Contents
Advertisement
Quick Links
Advertisement
Table of Contents

Related Manuals for Philips 439


Summary of Contents for Philips 439
- Page 1 Model: 437 Model: 439 DVD VIDEO PLAYER User Manual Manuel D’utilisation Manual de Instrucciones Manual do Utilizador Gebruikershandleiding 01-43_mdv439_21_eng3.indd 1 01-43_mdv439_21_eng3.indd 1 2007-06-11 10:55:00 AM 2007-06-11 10:55:00 AM...
- Page 2 01-43_mdv439_21_eng3.indd 2 01-43_mdv439_21_eng3.indd 2 2007-06-11 10:55:04 AM 2007-06-11 10:55:04 AM...
- Page 3 Index English ------------------------------------------6 Svenska --------------------------------------- 44 Dansk/Norsk --------------------------------- 82 Suomi ----------------------------------------120 This product incorporates copyright protection technology that is protected by method claims of certain U.S. patents and other intellectual property rights owned by Macrovision Corporation and other rights owners. Use of this copyright protection technology must be authorized by Macrovision Corporation, and is intended for home and other limited viewing uses only unless otherwise authorized...
- Page 4 General Information Environmental Information Laser Safety All unnecessary packaging has been This unit employs a laser. Due to possible omitted. The packaging has been made eye injury, only a qualifi ed service person easy to separate into two materials; should remove the cover or attempt to cardboard (box), polystyrene foam service this device.
- Page 5 Retain this information for future Wave length 650 nm (DVD) 790 nm (CD) reference. Output Power 10.0 mW (DVD) 5.0 mW (VCD/CD) Model No. 439 Beam divergence 60 degrees Serial No. ___________________ 01-43_mdv439_21_eng3.indd 5 01-43_mdv439_21_eng3.indd 5 2007-06-11 10:55:05 AM 2007-06-11 10:55:05 AM...
-
Page 6: Table Of Contents
Contents Care and Safety Information Setup ................................8 Cleaning discs .............................8 General Information Accessories supplied ..........................9 Region codes ...............................9 Connections Connecting to television ..................10-12 Using SCART sockets ........................... 10 Using Composite Video sockets (CVBS) ..................10 Using Component Video sockets (YPbPr) ..................11 Using an accessory RF modulator ..................... - Page 7 Contents Viewing the disc playback information ............... 25 Title/Chapter/Track selection ......................25 Time Search ............................. 25 Angle ................................25 Special DVD Features ....................26 Playing a Title ............................26 Changing the Audio Language ......................26 Subtitles..............................26 Special VCD and SVCD Feature .................. 26 Playback Control (PBC)........................
-
Page 8: Care And Safety Information
Care and Safety Information DANGER! Cleaning discs High voltage! Do not open the device. You run the risk of getting an electric shock. Some problems occur because the disc inside the player is dirty (frozen picture, The machine does not contain any sound disruptions, picture distortions). -
Page 9: General Information
General Information Accessories supplied Region codes This DVD player is designed to support the Region Management System. Check the regional code number on the disc package. If the number does not match the player’s region number (see table below), the player may be unable to playback the disc. -
Page 10: Connections
Connections Connecting to television COMPONENT VIDEO IN S-VIDEO V (Pr/Cr) AUDIO S-VIDEO U (Pb/Cb) AUDIO TV IN VIDEO IN COMPONENT VIDEO IN S-VIDEO V (Pr/Cr) AUDIO VIDEO IN U (Pb/Cb) VIDEO IN S-VIDEO AUDIO TV IN VIDEO IN DIGITAL DIGITAL VIDEO OUT VIDEO OUT AUDIO OUT... -
Page 11: Using Component Video Sockets (Ypbpr)
Connections (continued) COMPONENT VIDEO IN S-VIDEO V (Pr/Cr) AUDIO U (Pb/Cb) VIDEO IN COMPONENT VIDEO IN S-VIDEO V (Pr/Cr) AUDIO U (Pb/Cb) VIDEO IN DIGITAL VIDEO OUT AUDIO OUT COAXIAL COMPONENT VIDEO OUT IMPORTANT! – The progressive scan video quality is only possible when using YPbPr and a progressive scan television is required. -
Page 12: Using An Accessory Rf Modulator
Connections (continued) ANT IN RF coaxial cable to TV Back of RF Modulator (example only) ANT IN TO TV AUDIO IN VIDEO CH3 CH4 ANT IN DIGITAL VIDEO OUT AUDIO OUT COAXIAL COMPONENT VIDEO OUT IMPORTANT! To hear sound of this DVD player –... -
Page 13: Connecting The Power Cord
Connections (continued) Connecting the power cord COMPONENT VIDEO IN S-VIDEO V (Pr/Cr) AUDIO ~ AC MAINS U (Pb/Cb) VIDEO IN DIGITAL VIDEO OU AUDIO OUT COAXIAL COMPON After everything is connected properly, plug in the AC power cord to the power outlet. Never make or change any connections with the power switched on. -
Page 14: Optional Connections
Optional connections Connecting to a stereo Connecting to a digital AV system receiver STEREO AV Receiver AUDIO AUDIO DIGITAL DIGITAL DIGITAL DIGITAL VIDEO OUT VIDEO OUT AUDIO OUT COAXIAL AUDIO OUT COAXIAL COMPONENT VIDEO OUT COMPONENT VIDEO OUT Receiver has a PCM, Dolby Digital Stereo system has right/left Audio or MPEG decoder In sockets... -
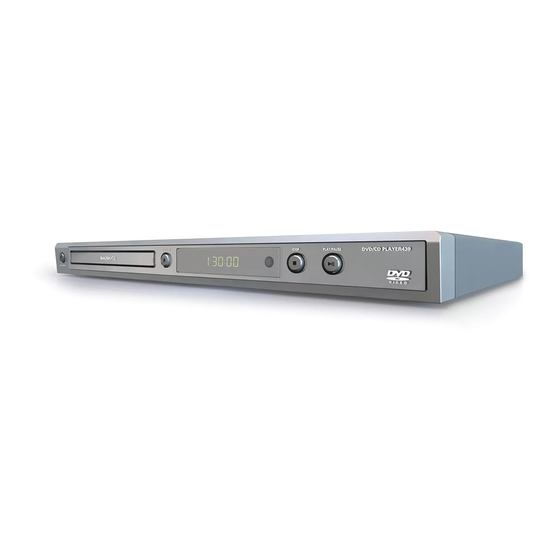
Page 15: Product Overview
Product Overview Front and Rear Panels STANDBY-ON – Turns on the player or switches to standby mode u PLAY/PAUSE Disc Tray – Starts or interrupts playback. ç OPEN/CLOSE STOP – Opens or closes the disc tray. – Stops playback Display panel IR Sensor –... -
Page 16: Remote Control
Product Overview (continued) Remote Control DISPLAY OPEN/CLOSE – Displays information on TV – Opens or closes the disc tray screen during playback 0-9 numeric key pad – Selects numbered items in a – To switch the DVD player menu to standby mode or ON RETURN/TITLE SEARCH –... -
Page 17: Getting Started
Getting Started Step 1 : Inserting Batteries Step 2 : Finding your viewing channel Press STANDBY-ON 2 on the DVD player to turn it on. Turn on the TV and set it to the correct video-in channel. You should see the blue DVD background screen. -
Page 18: Step 3: Setting Up Progressive Scan Feature
Getting Started (continued) Select { P-Scan }, then press OK to Step 3 : Setting up confi rm. The menu will appear on the TV. Progressive Scan feature Activating Progressive Scan (for Progressive Scan TV only) 1.Ensure your TV system supports Progressive Mode The progressive scan displays twice the 2.If there is a distorted picture on... -
Page 19: Step 4: Selecting The Matching Colour System
Getting Started (continued) Select a setting and press OK. Step 4 : Selecting the Follow the instructions show on the TV to confi rm the selection (if any). matching colour system Changing NTSC to PAL The colour system of the DVD player, 1.Ensure your TV system supports PAL Standard disc and TV should match in order for... -
Page 20: Step 5: Setting The Language
Getting Started (continued) Audio, Subtitle and DVD menu Step 5 : Setting the language languages You can choose your preferred language The language options are different or sound track from audio, subtitles and depending on your country or region. It DVD menu languages. -
Page 21: Playback From Disc
Playback from Disc IMPORTANT! – If the INVALID KEY appears on Super Video CD the TV screen when a button is pressed, it means the function is not MP3-Disc available on the current disc or at the current time. – DVD discs and players are designed ®... -
Page 22: Playback Features
Playback Features Starting disc playback Basic playback controls Unless otherwise stated, all operations Turn on the TV to the correct program described are based on Remote Control number for the DVD player (e.g. ‘EXT’, use. ‘0’, ‘AV’). Press STANDBY-ON 2 to turn on Pausing playback the DVD player. -
Page 23: Operations For Video Playback
Playback Features (continued) Playback restarts from the fi rst title Operations for video (DVD) or the beginning of the title/ track (VCD/CDDA/SVCD). playback To remove the message from the TV screen, press DISPLAY. Using the Disc Menu Depending on the disc, a menu may Slow Motion appear on the TV screen once you load You can slow forward or slow reverse a... -
Page 24: Selecting Various Repeat Functions
Playback Features (continued) Repeating a section within a Selecting various repeat chapter/track functions You can repeat the playback of a specifi c segment within a title/chapter track. To do this, you must mark the start and end Repeat play mode of the segment you want. -
Page 25: Viewing The Disc Playback Information
Playback Features (continued) Title/Chapter/Track selection Viewing the disc playback Press SEARCH. information Press to select {Title} / {Chapter} You can view the disc information (such or {Track}. as current title/chapter/track number on Use the alphanumeric keypad 0-9 the disc) without interrupting the disc input a valid number. -
Page 26: Special Dvd Features
Playback Features (continued) Special DVD Features Special VCD and SVCD Feature Playing a Title Playback Control (PBC) Press DISC MENU. The disc title menu appears on the TV For VCD with Playback Control screen. (PBC) feature (version 2.0 only) keys or alphanumeric Press DISC MENU to toggle between to select a play option. -
Page 27: Playing A Divx Disc
Playback Features (continued) ® Playing a DivX disc Playing MP3/WMA/JPEG/ Kodak/Fuji Picture CD ® This DVD player supports the DivX movie playback that you download from IMPORTANT! your computer onto a CD-R/RW or You have to turn on your TV and set to DVD±R/RW (see page 38 for more the correct Video In channel. -
Page 28: Playback Selection
Playback Features (continued) Playback selection Zoom picture (JPEG) During playback, you can; During playback, press ZOOM Press PREV . / NEXT > to repeatedly to display the picture with select the previous/next track/fi le in the different scales. current folder. to view the zoomed Press on the remote to... -
Page 29: Dvd Menu Options
DVD Menu Options OSD Language This DVD Player setup is carried out via This menu contains various language the TV, enabling you to customize the options for the language displayed on the DVD player to suit your particular screen. For details, see page 20. requirement. -
Page 30: Using The Video Setup Menu
DVD Menu Options (continued) Setting the Aspect Ratio Using the Video setup menu The picture shape can be adjusted to fi t your TV and the format must be available Press SETUP on the remote control. on the playback disc. Otherwise, the TV The system setup menu appears. -
Page 31: View Mode
DVD Menu Options (continued) TV System View Mode Use view mode to scale an image that fi ts This menu contains the options for selecting the colour system that matches to the TV screens’ width and height. the connected TV. For details, see page In ‘Video’, press to select { View Mode }, then press... -
Page 32: Smart Picture
DVD Menu Options (continued) Press to highlight one of the Smart Picture following options. This DVD player provides four predefi ned sets of picture color settings. BRIGHTNESS Increase the value to brighten the picture In ‘Video’, press to select { Smart or vice versa. -
Page 33: Using The Audio Setup Menu
DVD Menu Options (continued) Digital Output Using the Audio setup menu Select this if you connect to a multichannel decoder/receiver. Press SETUP on the remote control. In ‘Audio’, press to select { Digital The system setup menu appears. Output }, then press { All } Language Language... -
Page 34: Night Mode
DVD Menu Options (continued) Down Sampling Night Mode This mode optimises playback of sound at You can enable and disable the digital signal for better sound output quality. low volume. High volume outputs will be softened and low volume outputs are In ‘Audio’, press to select { Down brought upward to an audible level. -
Page 35: Using The Rating Setup Menu
DVD Menu Options (continued) Rating level settings Using the Rating setup menu Depending on the DVD, you may be asked to change the parental level while playing the disc. The rating levels are Press SETUP on the remote control. from 1 to 8 and are country dependent. The system setup menu appears. -
Page 36: Changing The Password
DVD Menu Options (continued) { 7. NC – 17 } Changing the Password No Children under age 17; not You need to enter your four-digit recommended viewing for children under password to play a prohibited disc or if age 17. prompted for a password. -
Page 37: Using The Misc (Miscellaneous) Setup Menu
DVD Menu Options (continued) Restoring to the original settings Using the Misc Setting the { Default } function will reset (Miscellaneous) setup menu all options and your personal settings to the factory defaults, except your password for rating level. Press SETUP on the remote control. In ‘Misc’, press to select { Use The system setup menu appears. -
Page 38: Divx ® Registration Code
DVD Menu Options (continued) ® DivX Registration Code ® DivX registration code allows you to rent and purchase movies using the ® DivX service from the internet. For more information, visit website; http://vod.divx.com ® In ‘Misc’, press to select { DivX Registration }, then press OK. -
Page 39: Software Upgrade
Others Software upgrade Periodically Philips will issue software upgrade to enhance your user experience. IMPORTANT! – Power supply must not be interrupted during upgrade! To check the current software version of this DVD player; Press OPEN/CLOSE ç on the DVD player to open the disc tray. -
Page 40: Troubleshooting
Troubleshooting WARNING Under no circumstances should you try to repair the system yourself, as this will invalidate the warranty. Do not open the system as there is a risk of electric shock. If a fault occurs, fi rst check the points listed below before taking the system for repair. If you are unable to remedy a problem by following these hints, consult your dealer for help. - Page 41 Troubleshooting (continued) Problem Solution – Press STOP button twice before selecting the setup/system Not able to select some items in the menu. setup/system menu. – Depending on the disc availability, some menu items cannot be selected. – Insert a readable disc with the playback side facing down. The DVD player does not start –...
-
Page 42: Specifi Cations
Specifi cations TV STANDARD (PAL/50Hz) (NTSC/60Hz) AUDIO PERFORMANCE Number of lines DA Converter 24 bit, 192 kHz Playback Multistandard (PAL/NTSC) fs 96 kHz 4Hz- 44kHz fs 48 kHz 4Hz- 22kHz VIDEO PERFORMANCE SVCD fs 48 kHz 4Hz- 22kHz Video DAC 12 bit, 108 MHz fs 44.1kHz 4Hz- 20kHz... -
Page 43: Glossary
Glossary Analog: Sound that has not been turned into MP3: A fi le format with a sound data compression numbers. Analog sound varies, while digital sound has system. ‘MP3’ is the abbreviation of Motion Picture specifi c numerical values. These jacks send audio Experts Group 1 (or MPEG-1) Audio Layer 3.