Table of Contents
Advertisement
Quick Links
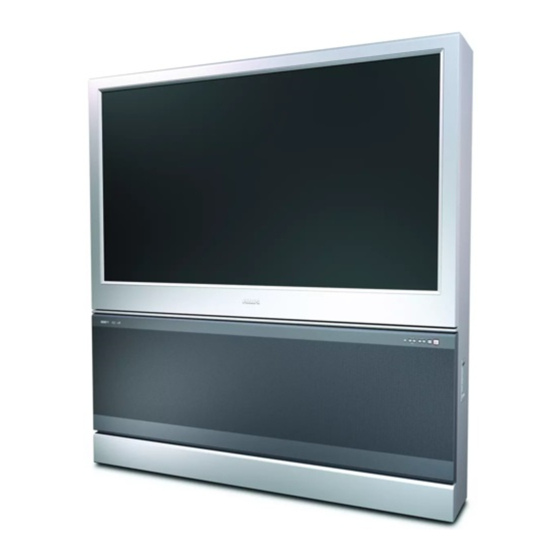
55PW9383
60PW9383
Product Highlights
• High-definition display—1080i/480p
• Philips HD Optics
• Auto IntelliSense
• HD DVI and Component Inputs
• Active Control
™
• Eye Fidelity—selectable progressive or
interlaced scan
• APAC
(Automatic Phosphor Aging
™
Compensation)
Features
• Multipoint digital convergence
• Protective screen filter
• Virtual Dolby
®
• 3-D Y/C comb filter
• Double-window, two-tuner
picture-in-picture
• Slim, upscale styling
• Home-cinema universal remote
with backlighting
Focus
™
Surround—30-watt RMS
3135 035 21401
Rear-projection
Rear-projection
HDTV Monitor
HDTV Monitor
Advertisement
Table of Contents

Related Manuals for Philips 60PW938399


Summary of Contents for Philips 60PW938399
- Page 1 Rear-projection Rear-projection HDTV Monitor HDTV Monitor 55PW9383 60PW9383 Product Highlights • High-definition display—1080i/480p • Philips HD Optics • Auto IntelliSense Focus ™ • HD DVI and Component Inputs • Active Control ™ • Eye Fidelity—selectable progressive or interlaced scan • APAC (Automatic Phosphor Aging ™...
-
Page 2: Welcome/Registration Of Your Tv
And we’ll do everything in our power to keep you happy with your purchase for many years to come. As a member of the PHILIPS “family,” you’re entitled to protection by one of the most comprehensive warranties and outstanding service networks in the industry. - Page 3 IMPORTANT SAFETY INSTRUCTIONS Read before operating equipment Read these instructions. Alliance: www.eiae.org Keep these instructions. 16. Damage Requiring Service - The appliance should be serviced by qualified service personnel when: Heed all warnings. A. The power supply cord or the plug has been damaged; Follow all instructions.
-
Page 4: Table Of Contents
ONTENTS Selecting the Stereo/Mono Sound Mode ....38 NTRODUCTION Selecting the SAP (Second Audio Program) Feature ..39 Welcome/Registration of Your TV ....2 Using the Bass Boost Control . -
Page 5: Features
This filter has been specifically for- to limit or expand the number of channels that are available to you mulated by Philips for HD displays to give the best possible pic- when you press the CH +/– buttons on your remote control. -
Page 6: Connecting Accessory Devices To Your Tv
Connecting Accessory Devices to Your TV ANEL VERVIEW TANDARD NPUTS AND UTPUTS ou can connect a wide range of video and audio devices to your TV, in various ways. Rear of TV This page and the next one provide an overview ANTENNA IN 75Ω... -
Page 7: Panel Overview: High-Definition Inputs
Because DVI is such new technology, the NOTE: The Picture-in-Picture (PIP) electronics industry is still working toward a feature is not available for use with AV5. decision on one standard. Philips testing has determined that compatibility issues exist with ELPFUL INTS respect to a limited number of high-definition •... -
Page 8: Connecting A Vcr
VIDEO that sell electronics. Or you can call our CH3 CH4 Customer Care Center at 1-800-531-0039. * (Example: Philips VCR model VR674CAT) Connect a cable TV or antenna signal to the ANT IN jack on the rear of the VCR. -
Page 9: Connecting A Vcr And Cable Box
Customer Care Center at 1-800-531-0039. VIDEO CH3 CH4 Connect a cable TV signal to a two- way signal splitter. * (Example: Philips VCR model Rear of Cable Box VR674CAT) Connect one of the two-way signal splitter outputs to the INPUT on the OUTPUT cable box. -
Page 10: Connecting And Using An Audio Hi-Fi System With Your Tv
Connecting Accessory Devices to Your TV ONNECTING AND SING AN UDIO YSTEM WITH ou can use your TV’s AUDIO OUTPUT jacks to connect to an external audio hi-fi system. Rear of TV ANTENNA IN 75Ω AMP SWITCH Follow the simple steps below. To make these connections, you will need two cables for audio connections (standard RCA). -
Page 11: Making Optional Surround-Sound Connections
Connecting Accessory Devices to Your TV AKING PTIONAL URROUND SOUND ONNECTIONS our TV has extra jacks that allow you to con- nect to an external audio amplifier system and ANTENNA IN 75Ω AMP SWITCH a powered subwoofer. This connection option will Rear of TV provide a surround-sound experience similar to a HD INPUT-AV 5... -
Page 12: Connecting A Standard Dvd Player
OPT OUT SUB WF OUT AUDIO OUT VIDEO OUT VIDEO OUT S-VIDEO OUT *(Example: Philips DVD model DVD712) Connect the YPbPr (component) ELPFUL INTS VIDEO OUT jacks from the DVD player • To simplify making connections, the con- to the INPUT-AV 1 YPbPr (component nectors on audio and video cables are often video) jacks on the rear of the TV. -
Page 13: Connecting An S-Video Device
Customer Care Center at 1-800-531-0039. VIDEO OPTICAL COAXIAL S-VIDEO CH3 CH4 *(Example: Philips DVD/VCR Combi model DV910VHS) Connect the S-VIDEO OUT jack on the rear of the accessory device with S-VIDEO output to the INPUT-AV 2 ELPFUL INTS S-VIDEO jack on the rear of the TV. -
Page 14: Connecting A Dvd Player With Progressive-Scan Capability
Connecting Accessory Devices to Your TV DVD P ONNECTING A LAYER WITH ROGRESSIVE SCAN APABILITY he following instructions explain how to connect a DVD player with progressive-scan Rear of TV ANTENNA IN 75Ω AMP SWITCH capability to the HD INPUT-AV 4 jacks on your TV. -
Page 15: Connecting An Hd Receiver To The Hd Input-Av 4 Jacks
NOTE: The cables are not supplied with your TV. Rear of HD Receiver Coaxial Cable Lead-in You should be able to buy them at most stores (Example: Philips DSHD800) from Cable Outlet, Cable Converter Box, that sell electronics. Or you can call our or VHF/UHF Antenna Customer Care Center at 1-800-531-0039. -
Page 16: Connecting A Camcorder
Connecting Accessory Devices to Your TV ONNECTING A AMCORDER he side panel jacks provide a convenient way for you to connect a camcorder to your TV. The side panel jacks are recognized by your TV Side Jack Panel as AV3. Typical Camcorder S-VIDEO... -
Page 17: Connecting And Using Headphones With Your Tv
Connecting Accessory Devices to Your TV ONNECTING AND SING EADPHONES WITH he TV’s side panel has a headphone jack for Side Jack Panel personal listening. Insert the headphone plug into the head- phone jack ; in the TV’s side panel. Turn down the TV’s volume or press the Mute button c c on the remote con-... -
Page 18: Using The Remote Control
Using the Remote Control POWER TV R ROGRAMMING THE EMOTE TO ORK WITH CCESSORY EVICES ACTIVE SWAP PIP CH CONTROL FREEZE SOUND PICTURE our TV remote is capable of working not Satellite Receiver only your TV but also other infrared remote (IR) controlled devices such as VCRs, cable TV converter boxes, satellite receivers, DVD players, and laser-disc players. -
Page 19: Using The Code-Entry Method To Program Your
Using the Remote Control POWER TV R SING THE ENTRY ETHOD TO ROGRAM EMOTE ACTIVE SWAP PIP CH CONTROL FREEZE SOUND PICTURE ow that you have looked up the four- Satellite Receiver digit remote-control Direct-entry Code for your brand of accessory device, you are ready to follow the simple steps shown below to program your TV remote. -
Page 20: Using The Search Method To Program Your Tv Remote
Using the Remote Control POWER TV R SING THE EARCH ETHOD TO ROGRAM EMOTE ACTIVE SWAP PIP CH CONTROL FREEZE SOUND PICTURE our TV remote can be set to work various Satellite Receiver accessory devices (VCRs, cable convert- ers, and satellite receivers, for example) by what is called the Search Method. -
Page 21: Direct-Entry Codes For A/V Accessory Devices
Using the Remote Control POWER A/V A IRECT ENTRY ODES FOR CCESSORY EVICES ACTIVE SWAP PIP CH CONTROL FREEZE SOUND PICTURE ....0068 ....0073 ODE NUMBER ENSEN UARTZ... - Page 22 Using the Remote Control POWER A/V A IRECT ENTRY ODES FOR CCESSORY EVICES ACTIVE SWAP PIP CH CONTROL FREEZE SOUND PICTURE ASER DISC LAYER ODE NUMBER ....0853, 0850 RCA .
-
Page 23: Using The Tv Remote With Accessory Devices
Chart below provides you with com- mon accessory-device functions associat- POWER POWER PAUSE ed with the buttons on your Philips TV remote control. (See pages 18–20 for information on REWIND FAST FORWARD programming your TV remote to operate accessory devices.) -
Page 24: Using The Av And Source Select Buttons
Using the Remote Control POWER SING THE OURCE ELECT UTTONS ACTIVE SWAP PIP CH CONTROL FREEZE SOUND PICTURE he AV button on the remote control and SOURCE SELECT button on the TV allow you to access the TV’s signal-source inputs. With each press of the AV button you can access a different signal-source input. -
Page 25: Using Autosound
Using the Remote Control POWER ™ SING OUND ACTIVE SWAP PIP CH CONTROL FREEZE SOUND PICTURE ou can use the AutoSound™ options to automatically tailor the TV’s sound for the type of program you are watching. The factory has set the VOICE, MUSIC, and PERSONAL THEATRE options. -
Page 26: Using Autopicture
Using the Remote Control POWER ™ SING ICTURE ACTIVE SWAP PIP CH CONTROL FREEZE SOUND PICTURE ou can use an AutoPicture™ option to automatically tailor the TV’s picture for certain types of input signals. The factory PERSONAL has set the MOVIES, SPORTS, WEAK SIG- MOVIES BRIGHTNESS NAL, and MULTIMEDIA options. -
Page 27: Using Autosurf
Using the Remote Control POWER ™ SING ACTIVE SWAP PIP CH CONTROL FREEZE SOUND PICTURE fter you set up a list of your favorite sig- nal sources in the SURF list, you can SURF press the SURF button to see the list and ADD? SURF quickly tune to a favorite signal source. -
Page 28: Using Program List And Alternate Channel (A/Ch)
Using the Remote Control POWER SING ROGRAM IST AND LTERNATE HANNEL ACTIVE SWAP PIP CH CONTROL FREEZE SOUND PICTURE ROGRAM POWER PROGRAM LIST - - - - - - - - - - Press the Program List button on - - - - - the remote control to display a list of AV 1 - - - - - ACTIVE... -
Page 29: Using The Sleep Timer Control
Using the Remote Control POWER SING THE LEEP IMER ONTROL ACTIVE SWAP PIP CH CONTROL FREEZE SOUND PICTURE ave you ever fallen asleep in front of the TV? You can program your TV to turn off while you sleep. The Sleep Timer feature allows you to set your TV to turn off within a certain amount of time: 15, 30, 45, 60, 90, 120, 180, or 240 minutes. -
Page 30: Using The On-Screen Submenus: Picture
Using the On-screen Submenus: Picture DJUSTING THE ICTURE ONTROLS o adjust your TV picture controls, select a channel and follow these steps. See descrip- tions of the picture-adjustment options below. PICTURE PICTURE BRIGHTNESS SOUND COLOR BRIGHTNESS FEATURES PICTURE COLOR Press the MENU/SELECT button on INSTALL SHARPNESS PICTURE... -
Page 31: Setting The Eye Fidelity Control
Using the On-screen Submenus: Picture ETTING THE IDELITY ONTROL ye Fidelity gives you a choice between two different scanning techniques—pro- gressive or interlaced. PICTURE PICTURE BRIGHTNESS Progressive scan doubles the number of pic- COLOR SOUND BRIGHTNESS ture lines, eliminating line flicker and pro- FEATURES PICTURE COLOR... -
Page 32: Setting The Dynamic Contrast Control
Using the On-screen Submenus: Picture ETTING THE YNAMIC ONTRAST ONTROL he Dynamic Contrast control allows you to sharpen the picture quality by making dark portions of the picture darker and light PICTURE PICTURE BRIGHTNESS portions of the picture more noticeable. SOUND COLOR BRIGHTNESS... -
Page 33: Adjusting The Manual Converge Controls: Converge Red/Blue
Using the On-screen Submenus: Picture DJUSTING THE ANUAL ONVERGE ONTROLS ONVERGE s explained in the Quick Use and Setup Guide, your projection TV has three color PICTURE projection tubes: one for red, one for green, and MANUAL CONVERGE one for blue. When mixed in proper proportion, CONVERGE RED the beams of light coming from the tubes can CONVERGE BLUE... -
Page 34: Adjusting The Manual Converge Controls: Multipoint Red/Blue
Using the On-screen Submenus: Picture DJUSTING THE ANUAL ONVERGE ONTROLS ULTIPOINT he Multipoint Red/Blue Convergence controls allow you to adjust picture convergence at PICTURE MANUAL CONVERGE specific points on the TV screen. PICTURE CONVERGE RED MANUAL CONVERGE CONVERGE BLUE CONVERGE RED MULTIPOINT RED CONVERGE BLUE MULTIPOINT BLUE... -
Page 35: Sound
Using the On-screen Submenus: Sound DJUSTING THE REBLE ALANCE ONTROLS esides the normal volume level control, your TV also has individual sound- adjustment controls. You can use TREBLE SOUND PICTURE TREBLE (high frequency), BASS (low frequency), and SOUND BASS TREBLE Speaker BALANCE to further adjust the FEATURES BALANCE... -
Page 36: Using The Avl (Audio Volume Leveler) Control
Using the On-screen Submenus: Sound AVL (A SING THE UDIO OLUME EVELER ONTROL ou may have noticed the peaks and val- leys of sound that occur between pro- gram changes or at commercial breaks. The SOUND TREBLE PICTURE volume levels often vary considerably. By SOUND BASS TREBLE... -
Page 37: Selecting The Surround-Sound Modes
Using the On-screen Submenus: Sound ELECTING THE URROUND SOUND ODES ased on the signal being received, you can Surround-sound Modes select various surround-sound modes: In stereo: select STEREO, INCR. MONO, SPATIAL, STEREO, INCR. SUR- SURROUND, or DOLBY VIRTUAL. ROUND, or DOLBY* VIRTUAL (Virtual INCR. -
Page 38: Selecting The Stereo/Mono Sound Mode
Using the On-screen Submenus: Sound ELECTING THE TEREO OUND ou can enjoy stereo programs on your TV. It has both an amplifier and twin speakers through which stereo sound can be SOUND TREBLE PICTURE heard. Follow these steps to select the SOUND BASS TREBLE... -
Page 39: Selecting The Sap (Second Audio Program) Feature
Using the On-screen Submenus: Sound SAP (S ELECTING THE ECOND UDIO ROGRAM EATURE AP, or Second Audio Program, is an addi- MENU/ STATUS/ tional part of the stereo broadcast system. SELECT EXIT Sent as a third audio channel, an SAP can be heard apart from the current TV program sound. -
Page 40: Using The Bass Boost Control
Using the On-screen Submenus: Sound SING THE OOST ONTROL he BASS BOOST control allows you to increase the low-frequency range of the TV’s sound. This creates a deeper, fuller SOUND PICTURE TREBLE sound. Follow these steps to turn BASS BASS SOUND BOOST ON. -
Page 41: Setting The Clock
Using the On-screen Submenus: Features ETTING THE LOCK our TV comes with an on-screen clock. You will need to set the clock before you can use the Timer feature. During normal operation, the FEATURES TIMER PICTURE time appears on the screen when you press the SOUND AutoLock STATUS/EXIT button. -
Page 42: Displaying The Time
Using the On-screen Submenus: Features ISPLAYING THE fter you have set the TV’s clock, you can use your TV to keep up with the time on screen. You can also set the timer to switch FEATURES PICTURE TIMER to another channel, and, if you want, turn SOUND AutoLock TIMER... -
Page 43: Setting The Timer's Start Time And Stop Time
Using the On-screen Submenus: Features ’ ETTING THE IMER TART IME AND ou can set the Timer to switch to a selected channel at a specific time while you are watching another channel, or when the TV is in FEATURES TIMER PICTURE standby mode. -
Page 44: Selecting The Timer's Channel
Using the On-screen Submenus: Features ’ ELECTING THE IMER HANNEL ollow these steps to select the channel to which the Timer will switch the TV. FEATURES PICTURE TIMER SOUND AutoLock TIME TIMER Press the MENU/SELECT button FEATURES AutoLock START TIME on the remote control to show the on- INSTALL CLOSED CAP... -
Page 45: Setting The Timer's Activate Control
Using the On-screen Submenus: Features ’ ETTING THE IMER CTIVATE ONTROL fter you have set the TIME, START TIME, STOP TIME, and CHANNEL, you must activate the Timer for it to operate. FEATURES PICTURE TIMER Your options are to set the Timer to work SOUND AutoLock TIMER... -
Page 46: Understanding Autolock
Using the On-screen Submenus: Features ™ NDERSTANDING he AutoLock™ feature can help par- ents control what their children watch AutoLock AutoLock on TV. AutoLock™ does this by using the MOVIE RATING TV RATING content advisories sent by broadcasters TV-Y or other program providers. After you TV-Y7 program AutoLock™, it can respond to PG-13... -
Page 47: Autolock
Using the On-screen Submenus: Features ™ A ETTING UP THE CCESS our AutoLock™ access code allows you to enter the AutoLock™ submenus to set up or turn off blocking. Your access FEATURES FEATURES PICTURE TIMER code is also the “key” that unlocks pro- SOUND AutoLock TIMER... -
Page 48: Using Autolock™ To Block Channels
™ SING LOCK HANNELS fter you have set up your personal access code (see page 47), you are ready to select the channels or program FEATURES FEATURES PICTURE TIMER sources you want to block. SOUND AutoLock TIMER TIME TIMER ACCESS CODE FEATURES AutoLock START TIME... -
Page 49: Using Autolock™ To Block By Movie Rating
Using the On-screen Submenus: Features ™ SING LOCK BY OVIE ATING fter you have set your personal access code (see page 47), you can block programs by specific movie ratings. FEATURES FEATURES PICTURE TIMER SOUND AUTOLOCK TIME TIMER TIMER ACCESS CODE FEATURES AutoLock START TIME... -
Page 50: Using Autolock™ To Block By Tv Rating
Using the On-screen Submenus: Features ™ TV R SING LOCK BY ATING ou also can block programs by specific TV ratings. Follow these simple steps. FEATURES FEATURES PICTURE TIMER SOUND AutoLock TIMER TIME TIMER ACCESS CODE FEATURES Press the MENU/SELECT START TIME AutoLock AutoLock... -
Page 51: Turning The Autolock™ Blocking Control
Using the On-screen Submenus: Features ™ B URNING THE LOCKING ONTROL ON OR OFF he BLOCKING control can be thought of as the “master switch” for FEATURES FEATURES AutoLock™. Use it to turn ON or OFF all PICTURE TIMER SOUND AutoLock of the settings (based on ratings). -
Page 52: Using Autolock™ To Block Unrated Broadcasts
Using the On-screen Submenus: Features ™ SING LOCK NRATED ROADCASTS n addition to blocking rated programs or channels, you may also choose to block all programming that is unrated. FEATURES FEATURES PICTURE TIMER Unrated programming consists of shows SOUND AutoLock TIMER TIME TIMER... -
Page 53: Using Autolock™ To Block Broadcasts That
Using the On-screen Submenus: Features ™ SING LOCK ROADCASTS ATING ome programs contain no content advi- sories from the Motion Picture Association of America or the television FEATURES FEATURES PICTURE TIMER broadcasters (see page 46). To block pro- SOUND AutoLock TIMER TIME TIMER... -
Page 54: Reviewing Your Currrent Autolock™ Settings
Using the On-screen Submenus: Features ™ S EVIEWING URRENT ETTINGS utoLock™ provides a screen that shows the settings you have selected. Here’s MOVIE RATING TV RATING how to access the screen. NC17 Press the STATUS/EXIT button on the remote control twice. Your BLOCK UNRATED AutoLock™... -
Page 55: Using The Closed Captioning Control
Using the On-screen Submenus: Features SING THE LOSED APTIONING ONTROL losed Captioning (CC) allows you to read the voice content of television programs on the TV screen. Designed to help the hear- FEATURES PICTURE TIMER ing impaired, this feature uses on-screen text SOUND AutoLock boxes to show dialogue and conversations... -
Page 56: Using The Picture-Format Control
Using the On-screen Submenus: Features SING THE ICTURE FORMAT ONTROL our TV’s wide screen (16:9 aspect ratio) Pictures appear more lifelike, ELPFUL INTS dramatic, and theatrical on your delivers a home-cinema experience not pos- TV's wide screen. • The term aspect ratio refers to the rela- sible with a conventional (4:3 aspect ratio) set. - Page 57 Using the On-screen Submenus: Features SING THE ICTURE FORMAT ONTROL Selecting a picture Format Using the TV Buttons Should your remote control become lost or other- TIMER PICTURE SOUND AutoLock wise unavailable for use, follow the steps below FEATURES FEATURES to use the buttons on the front of the TV to access CLOSED CAP INSTALL...
-
Page 58: Using Active Control
Using the On-screen Submenus: Features ™ SING CTIVE ONTROL ctive Control™ Measures and corrects POWER all incoming signals to provide the best ACTIVE CONTROL ON picture-quality settings. When you choose to turn Active Control™ SHARPNESS NOISE REDUCTION on, picture sharpness and noise reduction are controlled automatically. -
Page 59: Appendix A: Compatibility Information
The HD INPUT-AV 4 RGB ing (TMDS). inputs on your Philips TV will not be compatible with all digital equipment that offers RGB outputs. If the digital equip- ment you want to connect offers both... -
Page 60: Appendix B: Model Specifications
Appendix B ODEL PECIFICATIONS Product Type S-VIDEO INPUT (INPUT-AV 1, INPUT-AV2, side panel) Y-INPUT: 1 Vp-p (includes sync), 75 ohms Rear-projection HDTV Monitor C-INPUT: 300 mVp-p, 75 ohms Television System INPUT-AV 2 NTSC standard VIDEO (composite): 1 Vp-p, 75 ohms AUDIO: 500 mVrms, 30 kohm Channel Coverage HD INPUT-AV 4... -
Page 61: Appendix C: Setting Color Space For Hd Input-Av 4
Appendix C HD INPUT -AV 4 ETTING OLOR PACE FOR olor space refers to how colors are defined and appear on your TV. Your TV’s default color-space setting for HD INPUT-AV 4 is YPbPr. RGB is also an PICTURE LANGUAGE option. -
Page 62: General Information
General Information: Care and Cleaning ARE AND LEANING WARNING Concerning Stationary Images on LACEMENT OF THE the TV Screen: • To avoid cabinet warping, cabinet color changes, and Do not leave picture border bars or stationary increased chance of set failure, do not place the TV where temperatures can become excessively hot;... -
Page 63: Troubleshooting
General Information:Troubleshooting ROUBLESHOOTING Check This List of Symptoms and Possible Solutions Before Requesting Service You may be able to solve the problem yourself. Charges for TV installation and adjustment of customer controls are not cov- ered under your warranty. If you need to call a customer service representative, please know the model number and serial number of your product before you call. - Page 64 General Information:Troubleshooting ROUBLESHOOTING Difficulties and Possible Solutions (*Q refers to the Quick Use and Setup Guide that came with your TV.) The picture has no color or colors are not correct • Check to ensure that you have made connections correctly. See pages *Q-1, *Q-2, 6–9, and 12–16. •...
-
Page 65: Glossary Of Television Terms
General Information: Glossary of Television Terms LOSSARY OF ELEVISION ERMS Active Control™ • Proactive video-control system for NTSC NTSC • National Television Standards Committee format (see definition below) sources. Active Control™ continuously devised in the 1940s for TV broadcast analog video signals measures and corrects the incoming signals to provide the best (525 lines: 30 Hz). -
Page 66: Index
General Information: Index NDEX Hi-fi system, 10 Definition, 65 Satellite receiver (standard), 6, 12, 13 Feature description, 5 Active Control™, 58, 65 S-Video device, 13 Remote-control buttons, *Q-3, *Q-8 Alternate Channel (A/CH), 28, 65 VCR, 8 Tint control, *Q-8 APAC™, 5 VCR and cable box, 9 Tuning channels, *Q-5 Audio Out Control, 10... -
Page 67: Limited Warranty
RENEWED 90 DAY LIMITED WARRANTY...