
Related Manuals for LG BP320


Summary of Contents for LG BP320
- Page 1 OWNER’S MANUAL Network Blu-ray Disc™ / DVD Player Please read this manual carefully before operating your set and retain it for future reference. BP320 www.lg.com P/NO : SAC35374702...
- Page 2 Getting Started Safety information CAUTION RISK OF ELECTRIC SHOCK DO NOT OPEN CAUTION: TO REDUCE THE RISK OF ELECTRIC SHOCK DO NOT REMOVE COVER (OR BACK) NO USER-SERVICEABLE PARTS INSIDE REFER SERVICING TO QUALIFIED SERVICE PERSONNEL. This lightning flash with arrowhead symbol within an equilateral triangle is intended to alert the user to the presence of uninsulated dangerous...
- Page 3 CAUTION: Regulations of the FCC and FAA prohibit airborne operation of radio-frequency wireless devices because their signals could interfere with critical aircraft instruments. Responsible Party : LG Electronics USA, Inc.1000 Sylvan Avenue Englewood Cliffs, NJ 07632 TEL. : +1-800-243-0000...
-
Page 4: Important Safety
Getting Started Notes on Copyrights y Because AACS (Advanced Access Content System) is approved as content protection system for Blu-ray Disc format, similar to use of CSS (Content Scramble System) for DVD format, certain restrictions are imposed on playback, analog signal output, etc., of AACS protected content. -
Page 5: Getting Started 5
Getting Started 14. Refer all servicing to qualified service personnel. Servicing is required when the apparatus has been damaged in any way, such as power- supply cord or plug is damaged, liquid has been spilled or objects have fallen into the apparatus, the apparatus has been exposed to rain or moisture, does not operate normally, or has been dropped. -
Page 6: Table Of Contents
Table of Contents Getting Started Safety information Introduction – Playable discs and symbols used in this manual – About the “7” symbol display – Compatibility notes – File requirement – AVCHD (Advanced Video Codec High Definition) – About DLNA – Certain system requirements –... - Page 7 Using the LG Apps – Signing in – Managing my Apps – Searching online content Troubleshooting Troubleshooting – General – Network – Picture – Customer Support – Open source software notice Appendix Controlling a TV with the Supplied Remote Control –...
-
Page 8: Getting Started
Getting Started Introduction Playable discs and symbols used in this manual Media/Term Logo Blu-ray DVD-ROM DVD-R DVD-RW DVD+R DVD+RW (8 cm, 12 cm) DVD-RW (VR) (8 cm, 12 cm) Audio CD (8 cm, 12 cm) CD-R/RW (8 cm, 12 cm) Note –... -
Page 9: About The "7" Symbol Display
LG players when formatting rewritable discs. When setting the option to Live System, you cannot use it on LG player. (Mastered/Live File System : Disc format system for windows Vista) Getting Started About the “7” symbol display “7”... -
Page 10: File Requirement
Getting Started File requirement Video files File File Location Extension “.avi”, “.mpg”, “.mpeg”, “.mkv”, Disc, “.mp4”, “.asf”, “.wmv”, “.m4v” (DRM free), “.vob”, “.3gp” “.avi”, “.mpg”, “.mpeg”, “.mkv”, “.mp4”, “.asf”, DLNA “.wmv”, “.m4v” (DRM free) Audio files File File Location Extension “mp3”, “.wma”, “.wav”, “.m4a”... -
Page 11: Avchd (Advanced Video Codec High Definition)
Note y The file name is limited to 180 characters. y Maximum files/Folder: Less than 2000 (total number of files and folders) y Depending on the size and number of the files, it may take several minutes to read the content on the media. -
Page 12: About Dlna
Getting Started About DLNA This Player is a DLNA Certified digital media player that can display and play movie, photo and music content from your DLNA-compatible digital media server (PC and Consumer Electronics). The Digital Living Network Alliance (DLNA) is a cross-industry organization of consumer electronics, computing industry and mobile device companies. -
Page 13: Remote Control
SUBTITLE (]): Selects a subtitle language. TITLE/POP-UP: Displays the DVD title menu or BD-ROM’s pop-up menu, if available. Colored (R, G, Y, B) buttons: Use to navigate BD-ROM menus. They are also used for [MOVIE], [PHOTO], [MUSIC], [Premium] and [LG Apps] menu. -
Page 14: Front Panel
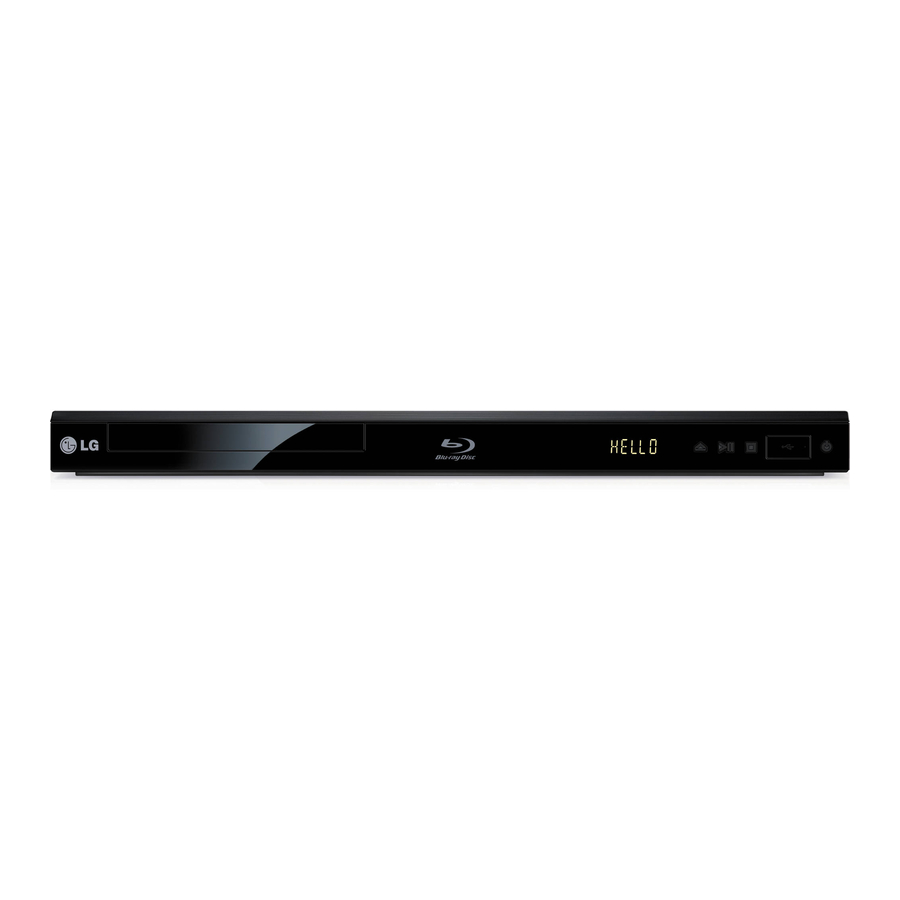
Getting Started Front panel a Disc Tray b Display Window c Remote Sensor d B (OPEN / CLOSE) e N (PLAY / PAUSE) Rear panel a AC power cord b LAN port c HDMI OUT d VIDEO OUT f Z (STOP) g USB Port h 1 (POWER) e DIGITAL AUDIO OUT (COAXIAL) -
Page 15: Connecting
Connecting to your TV Make one of the following connections, depending on the capabilities of your existing equipment. y HDMI connection (page 15) y Video connection (page 16) Note y Depending on your TV and other equipment you wish to connect, there are various ways you could connect the player. -
Page 16: What Is Simplink
4.5 m(15 ft.)). What is SIMPLINK? Some functions of this unit are controlled by the TV’s remote control when this unit and LG TV’s with SIMPLINK are connected through HDMI connection. Controllable functions by LG TV’s remote control;... -
Page 17: Resolution Setting
Resolution setting The player provides several output resolutions for HDMI OUT jack. You can change the resolution using [Setup] menu. 1. Press HOME (n). 2. Use a/d to select the [Setup] and press ENTER (b). The [Setup] menu appears. 3. Use w/s to select [DISPLAY] option then press d to move to the second level. -
Page 18: Connecting To An Amplifier
Connecting Connecting to an amplifier Make one of the following connections, depending on the capabilities of your existing equipment. y HDMI Audio connection (page 18) y Digital Audio connection (page 19) y 2CH Analog Audio connection (page 19) Since many factors affect the type of audio output, see “Audio Output Specifications”... -
Page 19: Channel Audio Output
Connecting to an amplifier via Digital Audio Output Connect the player’s DIGITAL AUDIO OUT jack to the corresponding in jack (COAXIAL) on your amplifier using an optional digital audio cable. Rear of the unit Coaxial cable Receiver/Amplifier You will need to activate the player’s digital output. (See “[AUDIO] Menu”... -
Page 20: Connecting To Your Home Network
Connecting Connecting to your home network This player can be connected to a local area network (LAN) via the LAN port on the rear panel or the internal wireless module. By connecting the unit to a broadband home network, you have access to services such as software updates, BD-Live interactivity and online content services. -
Page 21: Advanced Setting
1. Select [Connection Setting] option in the [Setup] menu then press ENTER (b). 2. Read the preparations for the network settings and then press ENTER (b) while [Start] is highlighted. Network will automatically be connected to the unit. Advanced Setting If you want to set the network settings manually, use w/s to select [Advanced Setting] on the [Network Setting] menu and press ENTER (b). -
Page 22: Wireless Network Connection
Connecting Wireless network connection Another connection option is to use an Access Point or a wireless router. The network configuration and connection method may vary depending on the equipment in use and the network environment. Wireless Communication Access Point or Wireless Router Broadband service... - Page 23 Note y WEP security mode generally have 4 keys available on an access point setting. If your access point or wireless router use WEP security, enter the security code of the key “No.1” to connect on your home network. y An Access Point is a device that allows you to connect to your home network wirelessly.
- Page 24 Connecting Notes on Network Connection: y Many network connection problems during set up can often be fixed by re-setting the router or modem. After connecting the player to the home network, quickly power off and/ or disconnect the power cable of the home network router or cable modem.
-
Page 25: Usb Device Connection
USB device connection This player can play video, audio and photo files contained in the USB device. Playback content in the USB device 1. Insert a USB device to the USB port until it fits into place. When you connect the USB device on the HOME menu, the player plays an audio file contained in the USB storage device automatically. -
Page 26: System Setting
System Setting Settings Initial setup When you turn on the unit for the first time, the initial setup wizard appears on the screen. Set the display language and network settings on the initial setup wizard. 1. Press 1 (POWER). The initial setup wizard appears on the screen. 2. -
Page 27: Adjust The Setup Settings
Adjust the setup settings You can change the settings of the player in the [Setup] menu. 1. Press HOME (n). 2. Use a/d to select the [Setup] and press ENTER (b). The [Setup] menu appears. 3. Use w/s to select the first setup option, and press d to move to the second level. - Page 28 System Setting Resolution Sets the output resolution of the HDMI video signal. Refer to page 17 for details about the resolution setting. [Auto] If the HDMI OUT jack is connected to TVs providing display information (EDID), automatically selects the resolution best suited to the connected TV.
-
Page 29: [Language] Menu
[LANGUAGE] menu Display Menu Select a language for the [Setup] menu and on- screen display. Disc Menu/Disc Audio/ Disc Subtitle Select the language you prefer for the audio track (disc audio), subtitles, and the disc menu. [Original] Refers to the original language in which the disc was recorded. -
Page 30: Digital Audio Output
System Setting Sampling Freq. (Digital Audio Output) [192 kHz] Select this if your A/V Receiver or Amplifier is capable of handling 192 kHz signals. [96 kHz] Select this if your A/V Receiver or Amplifier is not capable of handling 192 kHz signals. When this choice is made, this unit automatically converts any 192 kHz signals to 96 kHz so your system can decode them. -
Page 31: [Lock] Menu
[LOCK] menu The [LOCK] settings affect only Blu-ray Disc and DVD playback. To access the any features in [LOCK] settings, you must enter the 4-digit security code you have created. If you have not entered a password yet, you are prompted to do so. -
Page 32: [Network] Menu
Vudu account. Premium/LG Apps [Country Setting] Select your area for displaying proper services and content on the [Premium] and [LG Apps] feature. Device Name You can make a network name using virtual keyboard. This player will be recognised by the name you are entering on your home network. -
Page 33: [Others] Menu
[OTHERS] menu Auto Power Off The screen saver appears when you leave the player in Stop mode for about five minutes. If you set this option to [On], the unit automatically turns off within 20 minutes since the Screen Saver is displayed. -
Page 34: Operating
[Music] - Plays audio content. [Premium] - Displays the Premium Home screen. e [LG Apps] - Displays the [LG Apps] screen. f [Setup] - Adjusts the system settings. [Search] - Searches an online content by inputting a keyword on the search menu. -
Page 35: Enjoying Bd-Live
Enjoying BD-Live™ BD-ROM supporting BD-Live that has a network extension function allows you to enjoy more functions such as downloading new movie trailers by connecting this unit to the internet. 1. Check the network connection and settings (page 20). 2. Insert a USB storage device to the USB port on the front panel. -
Page 36: Wi-Fi Direct™ Connection
Operating Wi-Fi Direct™ connection Connecting to a Wi-Fi Direct™ certified device This player can play movie, music and photo files located in a Wi-Fi Direct™ certified device. The Wi-Fi Direct™ technology make the player to be directely connected to a Wi-Fi Direct™ certified device without connecting to a network device such as an access point. - Page 37 Connecting to a Wi-Fi equipped devices This player can connect to a general Wi-Fi device using Wi-Fi Direct™ function. 1. Set the [Wi-Fi Direct] option on the [Setup] menu to [On] (page 32). 2. Press HOME (n). 3. Select [Movie], [Photo] or [Music] using a/d, and press ENTER (b).
-
Page 38: Basic Operations For Video And Audio
Operating Basic operations for video and audio content To stop playback Press Z (STOP) while playback. To pause playback Press M (PAUSE) while playback. Press z (PLAY) to resume playback. To play frame-by-frame (Video) Press M (PAUSE) while movie playback. Press M (PAUSE) repeatedly to play Frame-by-Frame playback. -
Page 39: Resume Playback
Resume playback eroyt The unit records the point where you pressed the Z (STOP) depending on the disc. If “MZ (Resume Stop)” appears on the screen briefly, press z (PLAY) to resume playback (from the scene point). If you press Z (STOP) twice or unload the disc, “Z(Complete Stop)”... -
Page 40: Repeating A Specific Portion
Operating Repeating a specific portion erot This player can repeat a portion you have selected. 1. While playback, press REPEAT (h) to select [A-] at the beginning of the portion you wish to repeat. 2. Press ENTER (b) at the end of the portion. Your selected portion will be repeated continually. -
Page 41: Selecting A Subtitle File
Selecting a subtitle file If the subtitle file name is different from the video file name, you need to select the subtitle file on the [Movie] menu before playing the movie. 1. Use w/s/a/d to select the subtitle file you wish to play in the [Movie] menu. -
Page 42: Listening To Music While Slide Show
Operating Listening to music while slide show You can display photo files while listening to audio files. 1. While viewing a photo in full screen, press INFO/ MENU (m) to display the option menu. 2. Use w/s to select [Music Select] option, and press ENTER (b) to display the [Music Select] menu. -
Page 43: Playing From Selected Time
2. Select an option using w/s. 3. Use a/d to adjust the selected option value. 4. Press BACK(1) to exit the On-Screen display. Note y If no button is pressed for a few seconds, the on-screen display disappears. y A title number cannot be selected on some discs. -
Page 44: Hearing A Different Audio
Operating Hearing a different audio eroy 1. During playback, press INFO/MENU (m) to display the On-Screen display. 2. Use w/s to select the [Audio] option. 3. Use a/d to select desired audio language, audio track or audio channel. Note y Some discs allow you to change audio selections only via the disc menu. -
Page 45: Changing The Picture Mode
Changing the Picture Mode eroy You can change the [Picture mode] option while playback. 1. During playback, press INFO/MENU (m) to display the On-Screen display. 2. Use w/s to select the [Picture Mode] option. 3. Use a/d to select desired option. 4. -
Page 46: Using The Premium
This equipment should not be used for such purposes. LG expressly disclaims any responsibility for illegal distribution or use of unauthorized content in commercial purpose. -
Page 47: Using The Lg Apps
To install a paid application, you need to be a paid member. Visit www.lgappstv.com for more information. Signing in To use the [LG Apps] feature, you need to sign in with your account. 1. On the [LG Apps] or [My Apps] screen, press red (R) colored button. -
Page 48: Searching Online Content
Operating Searching online content If you are having difficulties finding specific content from online services, you can use the all-in-one search function by entering keywords in the [Search] menu. 1. Press HOME (n). 2. Select the [Search] on the launcher bar using w/s/a/d, and press ENTER (b). -
Page 49: Troubleshooting
Troubleshooting General Symptom The Power does not turned on. The unit does not start playback. The angle cannot be changed. Cannot play video, photo or audio files. The remote control does not work properly. The unit is plugged in, but the power will not turn on or off. -
Page 50: Network
Troubleshooting Network Symptom BD-Live feature does not work. Streaming video services (such as YouTube™, etc.) are often stopped or “buffer” during playback. Media servers are not displayed on the device list. Cannot connect the player to the access point or wireless LAN router. -
Page 51: Picture
You can update the Player using the latest software to enhance the products operation and/or add new features. To obtain the latest software for this player (if updates have been made), please visit http://www.lg.com/global/support or contact LG Electronics customer care center. Open source software notice To obtain the corresponding source code under GPL, LGPL and other open source licenses, please visit http://opensource.lge.com. -
Page 52: Appendix
Appendix Controlling a TV with the Supplied Remote Control You can control your TV using the buttons below. By pressing You can 1 (TV POWER) Turn the TV on or off. Scan up or down through PR/CH +/– memorized channels. VOL +/–... -
Page 53: Network Software Update
Network software update Network update notification From time to time, performance improvements and/or additional features or services may be made available to units that are connected to a broadband home network. If there is new software available and the unit is connected to a broadband home network, the player will inform you about the update as follows. - Page 54 The Software Update function may not work properly depending on your internet environment. In this case, you can obtain the latest software from the authorized LG Electronics Service Center then update your player. Refer to “Customer Support” on page 51.
-
Page 55: About Nero Mediahome 4 Essentials
Internet services and Apple iTunes. y The supplied Nero MediaHome 4 Essentials software can be downloaded at http://www. lg.com/global/support. Find the download link on the web page of this product. y This manual explains operations with the English version of Nero MediaHome 4 Essentials as examples. -
Page 56: Sharing Files And Folders
Appendix 9. If you want to take part in the anonymous collection of data, select the check box and click the [Next] button. 10. Click the [Exit] button to complete the installation. MAC OS X 1. Start up your computer, and insert the supplied CD-ROM disc into your computer’s CD-ROM drive. -
Page 57: Area Code List
Area code list Choose an area code from this list. Area Code Area Afghanistan Fiji Argentina Finland Australia France Austria Germany Belgium Great Britain Bhutan Greece Bolivia Greenland Hong Kong Brazil Cambodia Hungary Canada India Chile Indonesia China Israel Colombia Italy Congo Jamaica... -
Page 58: Language Code List
Appendix Language code list Use this list to input your desired language for the following initial settings: [Disc Audio], [Disc Subtitle] and [Disc Menu]. Language Code Afar 6565 Afrikaans 6570 Albanian 8381 Amharic 6577 Arabic 6582 Armenian 7289 Assamese 6583 Aymara 6588 Azerbaijani... -
Page 59: Trademarks And Licenses
Trademarks and licenses Blu-ray Disc™, Blu-ray™, BD-Live™, BONUSVIEW™ and the logos are trademarks of the Blu-ray Disc Association. “DVD Logo” is a trademark of DVD Format/Logo Licensing Corporation. Java is a trademark of Oracle and/or its affiliates. HDMI, the HDMI logo and High-Definition Multimedia Interface are trademarks or registered trademarks of HDMI Licensing LLC in the United States and other countries. - Page 60 Appendix Cinavia Notice This product uses Cinavia technology to limit the use of unauthorized copies of some commercially- produced film and videos and their soundtracks. When a prohibited use of an unauthorized copy is detected, a message will be displayed and playback or copying will be interrupted.
-
Page 61: Audio Output Specifications
Audio output specifications Jack/Setting Analog Source 2CH Output Dolby Digital PCM 2ch Dolby Digital Plus PCM 2ch Dolby TrueHD PCM 2ch PCM 2ch DTS-HD PCM 2ch Linear PCM 2ch PCM 2ch Linear PCM 5.1ch PCM 2ch Linear PCM 7.1ch PCM 2ch Jack/Setting Source PCM Stereo... - Page 62 Appendix y The audio is outputted as PCM 48 kHz/16 bit for MP3/WMA file and PCM 44.1kHz/16 bit for Audio CD while playback. y You must select a digital audio output and a maximum sampling frequency that your Amplifier (or AV receiver) accepts using [Digital Output] and [Sampling Freq.] options on the [Setup] menu (see page 29).
-
Page 63: Specifications
Specifications General Power requirements Power consumption Dimensions (W x H x D) Net Weight (Approx.) Operating temperature Operating humidity Outputs VIDEO OUT HDMI OUT (video/audio) 2CH AUDIO OUT DIGITAL AUDIO OUT (COAXIAL) System Laser wavelength Signal system Frequency response Signal-to-noise ratio Harmonic distortion Dynamic range LAN port... -
Page 64: Maintenance
Appendix Maintenance Handling the unit When shipping the unit Please save the original shipping carton and packing materials. If you need to ship the unit, for maximum protection, re-pack the unit as it was originally packed at the factory. Cleaning the unit To clean the player, use a soft, dry cloth. -
Page 65: Important Information Relating To Network Dervices
Appendix Important information relating to network dervices All information, data, documents, communications, downloads, files, text, images, photographs, graphics, videos, webcasts, publications, tools, resources, software, code, programs, applets, widgets, applications, products and other content (“Content”) and all services and offerings (“Services”) provided or made available by or through any third party (each a “Service Provider”) is the sole responsibility of the Service Provider from whom it...