
Related Manuals for LG F1020N-PN.ATI


Summary of Contents for LG F1020N-PN.ATI
- Page 1 OWNER’S MANUAL DIGITAL PHOTO FRAME Please read this manual carefully before operating your set and retain it for future reference. DIGITAL PHOTO FRAME MODELS F1020N www.lg.com...
-
Page 2: Table Of Contents
Table of Contents Important Safety Precaution Preparation Composition of product and Installation Accessories / Connection Names of parts Remote Control Button Names and Functions Remote Controller Sensor / Replacing the Remote Control Battery Installation and connection of product Installing Type /Connecting Power Cord Connecting USB / Connecting Memory card Before beginning Menu and... - Page 3 Digital Photo Frame Important Safety Precaution This unit has been engineered and manufactured to ensure your personal safety, however improper use may result in potential electrical shock or fire hazards. In order to allow the proper operation of all safeguards incorporated in this display, observe the following basic rules for its installation, use, and service.
- Page 4 Do not press the LCD screen with your finger for a long time as this may cause some afterimages. Some dot defects may appear as Red, Green or Blue spots on the screen. However, this will have no impact or effect on the display performance.
-
Page 5: Composition Of Product
Digital Photo Frame Composition of product Accessories Check the accessories. ■ Digital Photo Frame Digital Photo Frame Owner's Manual (CD) / Cards Remote Digital Photo Frame USB Cable to PC Power Adapter Note The Digital Photo Frame and its accessories may look different from those shown here. ■... -
Page 6: Names Of Parts
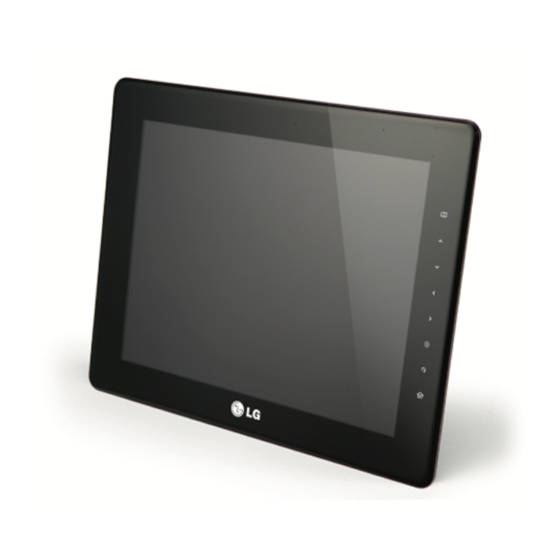
The remote controller sensor is on the center left of the frame. sensor When you use a remote controller, point it toward the remote controller sensor. LG Logo If connecting to the power, LG logo's light is on. Touch Key Button MENU Button It pops up menu... - Page 7 Digital Photo Frame Composition of product Side / Back Speaker When playing video clip or music, you can listen to the sound. Power button You can turn the power on and off. USB terminal for You can bring the file by connecting to external saving device and USB memory. connecting to storage device Power saving button...
- Page 8 Digital Photo Frame Composition of product Bottom You can open the file by inserting SD/MS/xD/MMC card. SD/MS/xD/MMC Slot When there is no left capacity in the internal memory, it is possible to be used for an extension of memory. Headphone / earphone When playing video clip or music, you can listen to the sound by connecting terminal head/earphone.
-
Page 9: Remote Control Button Names And Functions
Digital Photo Frame Composition of product Remote Control Button Names and Functions Turn ON/OFF Go to Show Slide Go to HomeMenu It pops up menu Go to Up Go to Down Go to Left Go to Right OK(The Play/Pause button is used to play Slide Show, Music, and Video files.) Go to previous screen Select the file... - Page 10 Digital Photo Frame Composition of product Remote Controller Sensor The remote controller sensor is on the center left of the frame. When you use a remote controller, point it toward the remote controller sensor. Replacing the Remote Control Battery Push the tab of the battery holder on the Pull the battery holder out.
-
Page 11: Installation And Connection Of Product
Digital Photo Frame Installation and connection of product Installing Type Turn the stand to install the product in a horizontal or vertical position. Connecting Power Cord After connecting power adapter to DC 9V IN terminal at the product side, please connect power code. -
Page 12: Connecting Usb / Connecting Memory Card
Digital Photo Frame Installation and connection of product Connecting USB / Connecting Memory card <Side> USB Memory Storage device USB Cable Connecting Headphone / earphone <Bottom> SD//MS/xD/MMC 1. Please connect to product's USB terminal. Storage device connection 2. Please connect to USB terminal of external storage device. 3. - Page 13 Digital Photo Frame Installation and connection of product Memory card 1. Please pay attention to the direction of the memory card. slot (SD/MS/xD/ 2. Please push into the slot. MMC) 3. If external memory card is read, a window pops up as below. Please select an operation you want.
-
Page 14: Before Beginning
Digital Photo Frame Before beginning Setting When turning on the power at first, the setup window that you can set up Language, Date and Time, and ■ Power on Message pops up. After finishing setup, it doesn't appear again, and if initializing, it reappears. If you need a detailed explanation for each menu or to change setup, please refer to Setup ( P24). -
Page 15: Homemenu
Digital Photo Frame HomeMenu Screen Composition and Buttons Please select desired menu. ■ Key-Help You can display the photo. ( P14) Slide Show You can select and manage the photo. ( P20) Photo You can play the music. ( P16) Music You can select and manage the music. - Page 16 Digital Photo Frame Slide Show You can play photo files in Slide Show. ■ To use a Slide Show, press the button on the remote control or select the Slide Show on the ■ HomeMenu. If selecting a Slide Show at home menu, it basically plays photo. If you want to play music or video, ■...
-
Page 17: Slide Show
Digital Photo Frame Slide Show You can set up clock and calendar. Clock/Calendar • Photo + : Insert photo - : Delete photo • Clock/Calendar 1~4 : Select Theme - : Delete clock/calendar It copies the photo being currently played. It is only possible to copy external device's Copy photo into internal memory. -
Page 18: Music
Digital Photo Frame Music Playing music If you want to play the music, please selects Music at Home Menu. Please select the file you want by button. If pressing button, it plays the music you selected. -
Page 19: Playing Screen Composition And Buttons
Digital Photo Frame Music Playing screen composition and buttons Operating key Play mode setup Playing previous song Playing next song Pause/play Volume adjustment Key-Help File information indication It indicates file name, musician, and album title. It indicates the total number of the file to be played and order of the file being Playing order currently played. -
Page 20: Video
Digital Photo Frame Video Playing video If you want to play the video, please select Video at Home Menu. Please select the file you want by button. If pressing button, it plays the video you selected. Note The video screen is only supported for the horizontal. -
Page 21: Playing Screen Composition And Buttons
Digital Photo Frame Video Playing screen composition and buttons Operating key Open/close play bar Rewind Fast rewind Pause / play Volume adjustment Key-Help It indicates name of the file being currently played. File information indication It indicates playing state of the file being currently played. Play bar... - Page 22 Digital Photo Frame File management Screen Composition and Buttons You can separately manage each file at Photo, Music, and Video. Below is an explanation by giving you an example of the Photo, and operation method of Music Video is also identical. Managing and editing folder is possible on PC.
-
Page 23: File Management
Digital Photo Frame File management File management menu If pressing button at Photo, Music, and Video, it moves to each menu. The usable menu could be different according to the format of the file. Key-Help Selected file Indicates the number and capacity of selected file. indication Function Please select the function you want. -
Page 24: File Copy/Delete
Digital Photo Frame File management File copy / delete File selection Selecting Copy/Delete menu The file selected in Photo, Music, or Video Pressing the button in Photo, Music, appears automatically. Select the Select from of the list Video displays the menu. Select the Copy menu if you want to select another file. -
Page 25: Selecting All File/Unselecting All File
Digital Photo Frame File management Selecting all file / Unselecting all file Select all files/Unselect all files within the device If pressing button at Photo, Music, Video menu appears. Please select Select all or Unselect all. Select all files/Unselect all files within folder If pressing button at the location of corre- sponding folder, it performs select all. -
Page 26: Setup
Digital Photo Frame Setup Setup allows you to configure the basic Properties of the device. Select Setup on the Home Menu. Set up the screen's brightness. It is possible to adjust from 1 to 5. Brightness Set the display direction of the product. Orientation (* This product reads the photo information and the orientation value and rotates the photo accordingly.) - Page 27 Digital Photo Frame Setup If music file is detected at photo slide show, it sets up that both are automatically Music Auto play ■ played together. You can set up the time that power is turned on or off. Power Saving ■...
-
Page 28: Power On Message Function
Digital Photo Frame Setup Power On Message Function Power On Message is the function to show setup function when other turns on the power by setting up mes- sage, photo, music, and video. Selecting 'On' Selecting message Select On on the Power On Message menu. Please select the message you will send. -
Page 29: Troubleshooting
Digital Photo Frame Troubleshooting Problems Solutions The screen does not work. • Check if the product is connected to the power adapter properly. • Check if the power adapter is connected to the power outlet properly. • Press the Power button to turn the product on. The photo is not displayed on •... - Page 30 Digital Photo Frame Troubleshooting Solutions Problems The screen ration is not nor- • Please adjust the aspect ratio of the screen. You can adjust it in the mal. Setup -> Photo Aspect Ratio or Setup -> Video Aspect Ratio. The screen color is dim or •...
-
Page 31: Specifications
Digital Photo Frame Specifications * Information in this document is subject to change without notice. F1020N Model Size 26.4 cm (10.4 inch) Dimension 271.5 mm x 213.5 mm x 74.92 mm (Width x Height x Depth) Weight 784 g (excl.packing) Resolution 800 x 600 Power Input... -
Page 32: Service Information
For software update, please refer to www.lg.com ■ Product Registration Visit www.lg.com and register the Serial No. on the product package or the back of the ■ product. The Serial No. is a combination of 12 digits with English letters and numbers. ■... - Page 33 Make sure to read the Important Precautions before using the product. Keep the Owner’s Manual (CD) in an accessible place for future reference. The model and serial number of the SET is located on the back and one side of the SET. Record it below should you ever need service.